out of range

Are you struggling with the black screen showing “Input Signal Out of Range”? Setting a perfect graphic and visual setting can really be freaking sometimes. If you try anything, it will turn out to prompt errors. However, encountering signals out of range is one of the most common and significant errors in the list. Fortunately, the error can be resolved by tweaking some of the settings of your system. From changing the resolution of your screen to fixing the graphic card’s resolution, one can simply attain an error-free and smooth run of the PC. Thus, if you want to resolve the error input signal out of range Windows 10, this article is best for you. Read further to get your system back on the trail.

What Does “Out of Range Error” Means?

What Does “Out of Range Error” Means?

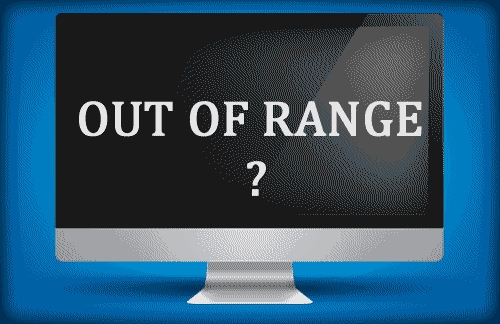
The error input signal out of range stands for the inefficiency of your monitor and the graphic card. Well, when your graphic card and the monitor are not appropriately stabilized to each other in order to send or receive the essential signals to function the everyday tasks.  In this condition, you will likely get the error saying, “input signal out of range.” In order to resolve this issue, you are required to maintain a refresh rate that will suit both the screen and your graphics card. But why is your system suddenly getting this now? Check the below section to know the causes.

Causes of “Input Signal Out of Range Windows 10”

When it comes to knowing the causes, one must be getting confused as there is indeed a variety of causes to it. However, understanding them will help you to resolve the issues with much more efficiency. Let’s check all the possible and responsible causes for the input signal being out of range.

  • Old Monitor: Old monitor is unable to make a stable connection with your upgraded graphic card. This unmatching will lead you to crashes and unwanted stutters. In this case, you must maintain a stabilized refresh rate between your monitor and your graphics card.
  • Faulty Resolution: If the resolution set by default is not compatible with the overall settings of your system. Then, you are most likely to get the error and crashes. 
  • Outdated Graphic Drivers: When you don’t upgrade your graphic drivers for an extended period of time, in this case, you are more prone to get the error as outdated graphic drivers lose the capability of sending signals to your system.
  • Corrupted Drivers: If you have corrupted drivers and files in your system, then your system can suffer a lot while functioning with day-to-day tasks. Hence, you must check the corruption in your device and try to remove it from any third-party apps. 
  • Loose Cabling: A loose cabling can cause the error as the graphics card won’t be able to work to its full potential if the cables connecting it to the system are not strong enough. Thus, you must check the cable connections for the betterment of the system. 

Ways To Troubleshoot “Out of Range Error”

Suppose you have got the reasons for why the error happened and what it actually means. Then it is time to dive into the resolving methods. Here, we are enlisting the top 3 methods for resolving “Out of Range Error” efficiently. Before you actually get into the following troubleshooters, you must check all the wirings and cabling of your device for better results. Might the issues be with your loose and inefficient cabling? Hence, you must tighten all the wirings.

1. Set the Refresh Rate to 60 Hz

A higher refresh rate of your system will lead your system to crash between the ongoing programs. The most common reason for this error crash is the unbalanced refresh rate of your card and the monitor. Thus, you must try to maintain a balance between the monitor resolution and the graphic card resolution. By minimizing the resolution, you can make the overall performance better and smooth. Let’s see how you can perform this.

Set the Refresh Rate to 60 Hz

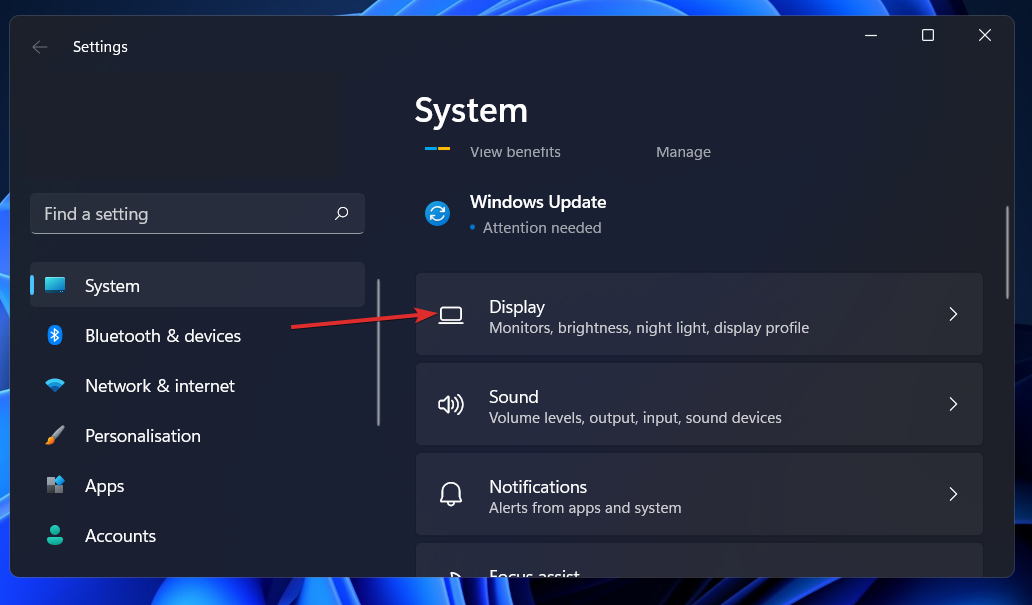
  • In the system search menu, type system settings and open it.
  • From the right sidebar, click display.
  • Again from the right pane, select the advanced settings option for display settings.
  • Here, you can see the display adapter properties option coming to your screen; Click it.
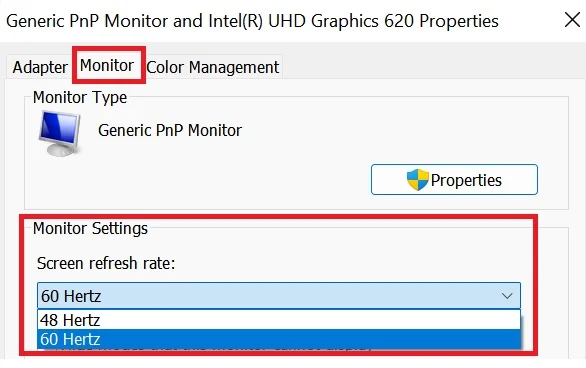
  • Now, get into the monitor tab. And here, you can select the screen refresh rate from the drop-down menu. 
  • Press Okay to execute the changes.

Here, you must note that if your screen is showing a different refresh rate, then you must set the depicting screen refresh rate for better performance of your screen. However, our recommendation is 60 hertz as it is the standard refresh rate for most of the monitors. 

This method is only applicable to Windows 10 and 11. Thus, for Windows 7, you can follow the below-written steps.

  • Go to the control panel of your system.
  • Locate the “Appearance and personalization” option and click it.
  • Here, you can see the display setting option, open it, and get into the refresh rate.
  • Like the above steps, select an advanced setting and enter the monitor tab.
  • Now, you can locate the option for screen refresh rate.

2. Fix the Graphics Driver Resolution Settings

Fix the Graphics Driver Resolution Settings

If the above methods don’t work out well for you, then you must try fixing the resolution of your graphics drivers. This way, you can gradually trigger the problem and resolve the error within a few clicks. However, before you do so, you must check at what rate of resolution your monitor will work efficiently. If you don’t know about it, then you must go to the official website of your monitor’s brand and check the maximum resolution of the specific product you have and manage it as per the limit.

Let’s check how you can manage the graphics card resolution.

  • Open the settings app of your PC and click the display for further settings.
  • If you have multiple monitors, then select the monitor from where the issue is coming.
  • Navigate to the display resolution option.
  • From the drop-down menu, coming on the right side of the option. Select the limit as your brand has suggested.

When you are done with the above settings and still facing the issue of screen flickering & crashes, then you must lower the limit more. You must restart your computer for better execution of the changes you made.

3. Upgrade or Uninstall The Newly Installed Graphic Driver

Fix the Graphics Driver Resolution Settings

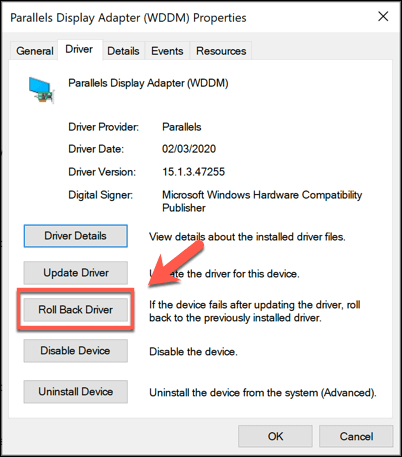
If you have recently installed new graphics drivers to your device, then you must uninstall them, as they must have come up with some bugs and malware on your device. This is why you are getting the error. Simply by uninstalling it, you can achieve the right functionality of your system. In addition to it, you must install a newer version of the driver after uninstalling the previous drivers. However, this time you must enable your firewall setting to have better results. Let’s see how you can upgrade your driver.

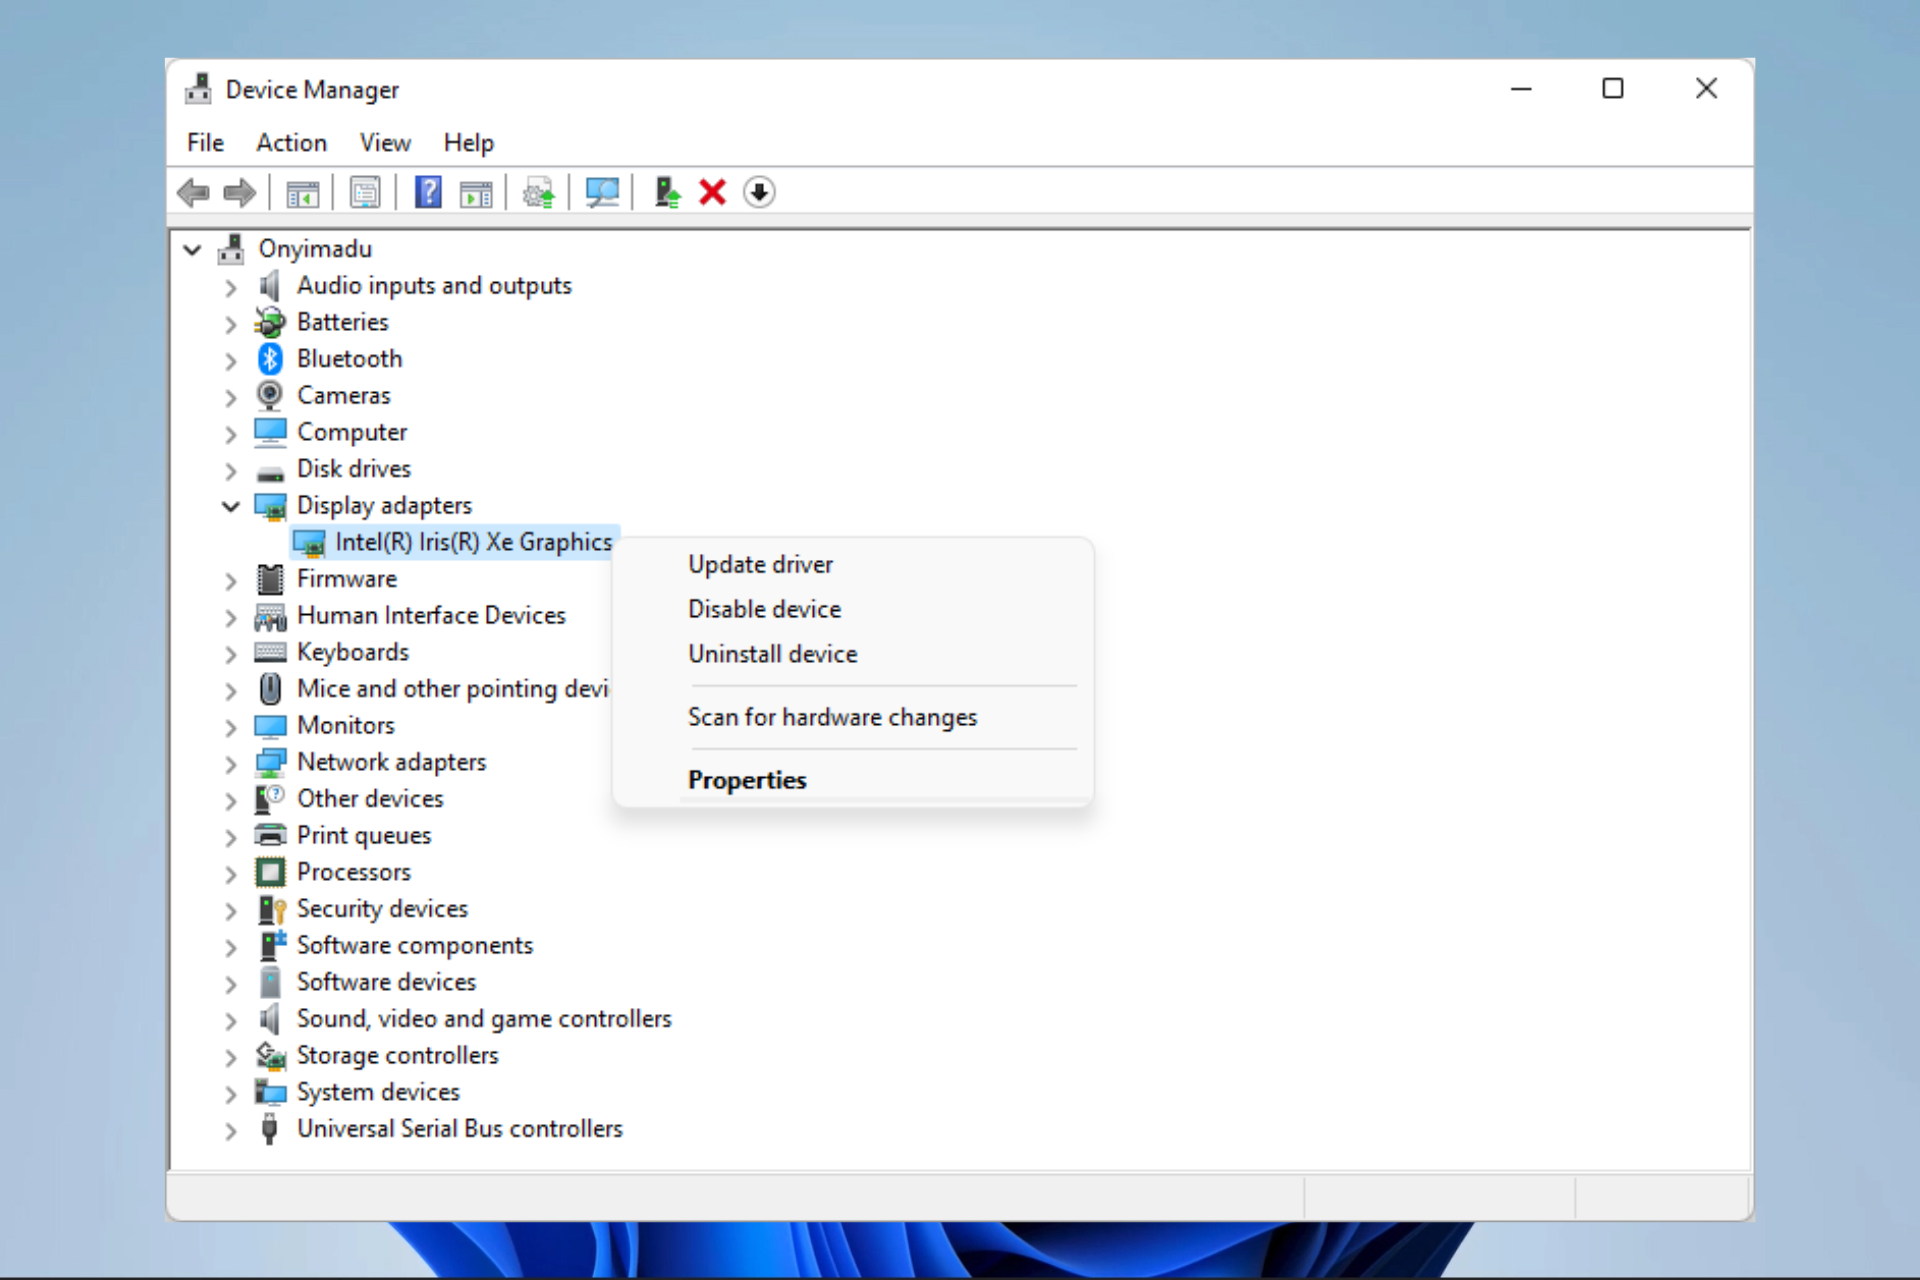
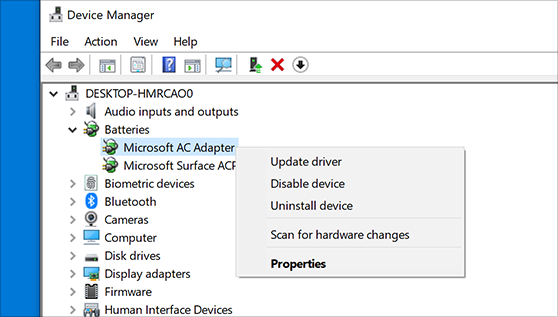
  • Open the device manager in your system. You can simply type device manager in the search windows of your device.
  • Here, you can see all the devices connected to your system and click display adapters.
  • From the drop-down menu, right-mouse the driver, and here you will get the option to update it.
  • Click update and wait for a few moments. 

After performing the above steps, you will feel some level of enhancement in the performance of your PC.

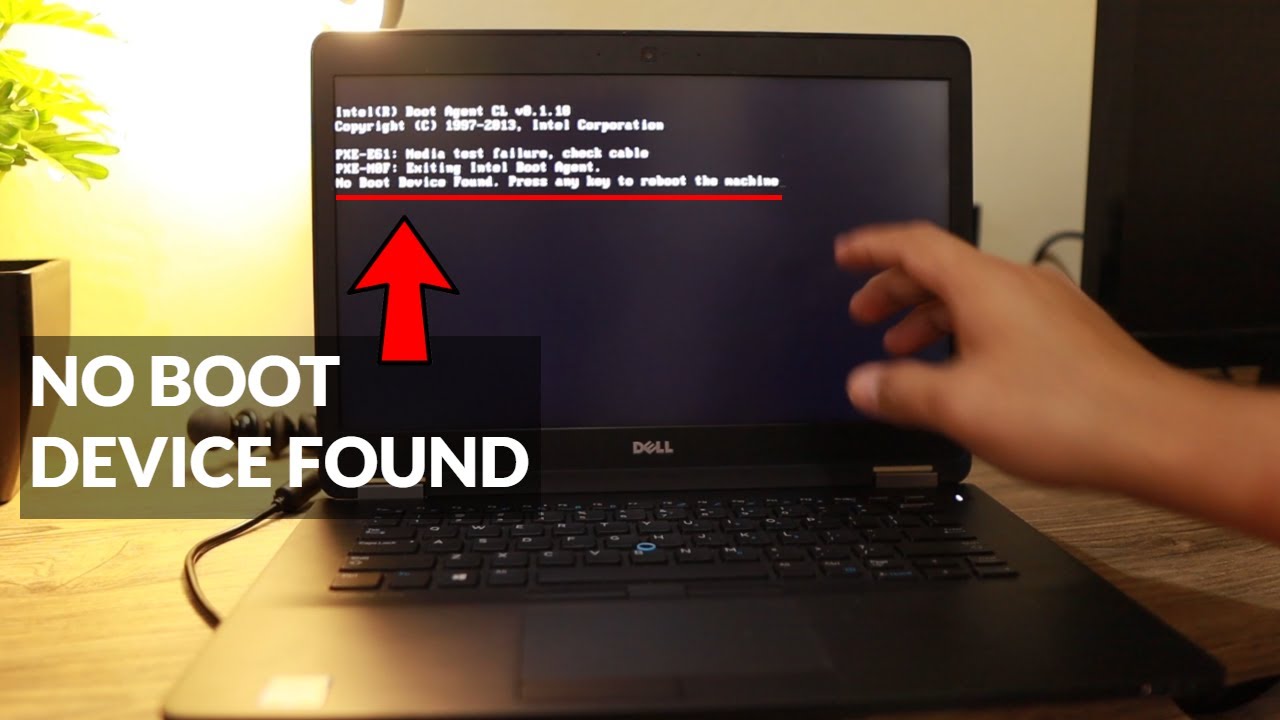
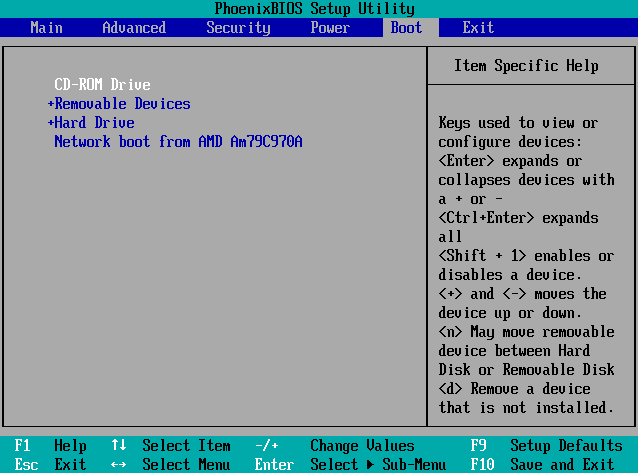
Read More: RESOLVE THE ERROR “THE SYSTEM CANNOT FIND ANY BOOTABLE DEVICES” WITH 5 QUICK METHODS

Frequently Asked Questions

Q1. Why does my monitor say Input signal Out of Range?

If your monitor is saying that the input signal is out of range, then it must be a problem with the connection between your graphics card and the monitor. The refresh rate and the screen resolution must match and be compatible with each other for better performance of your PC. 

Q2. How do I change the resolution of an input signal out of range?

You can simply change the resolution of your graphic card so that it will be compatible with the monitor’s refresh rate, and your system will ultimately start working well. Follow the steps below.

  • Open the settings and click display.
  • Navigate to advanced settings 
  • Manage the screen resolution here under the monitor tab.

Q3. How do I change my settings to 60Hz?

60 Hz is the standard limit of refresh rate for a normal PC. Thus, you must maintain this limit by tweaking some changes in your settings, you can attain the 60hz refresh rate. Here’s how to do so.

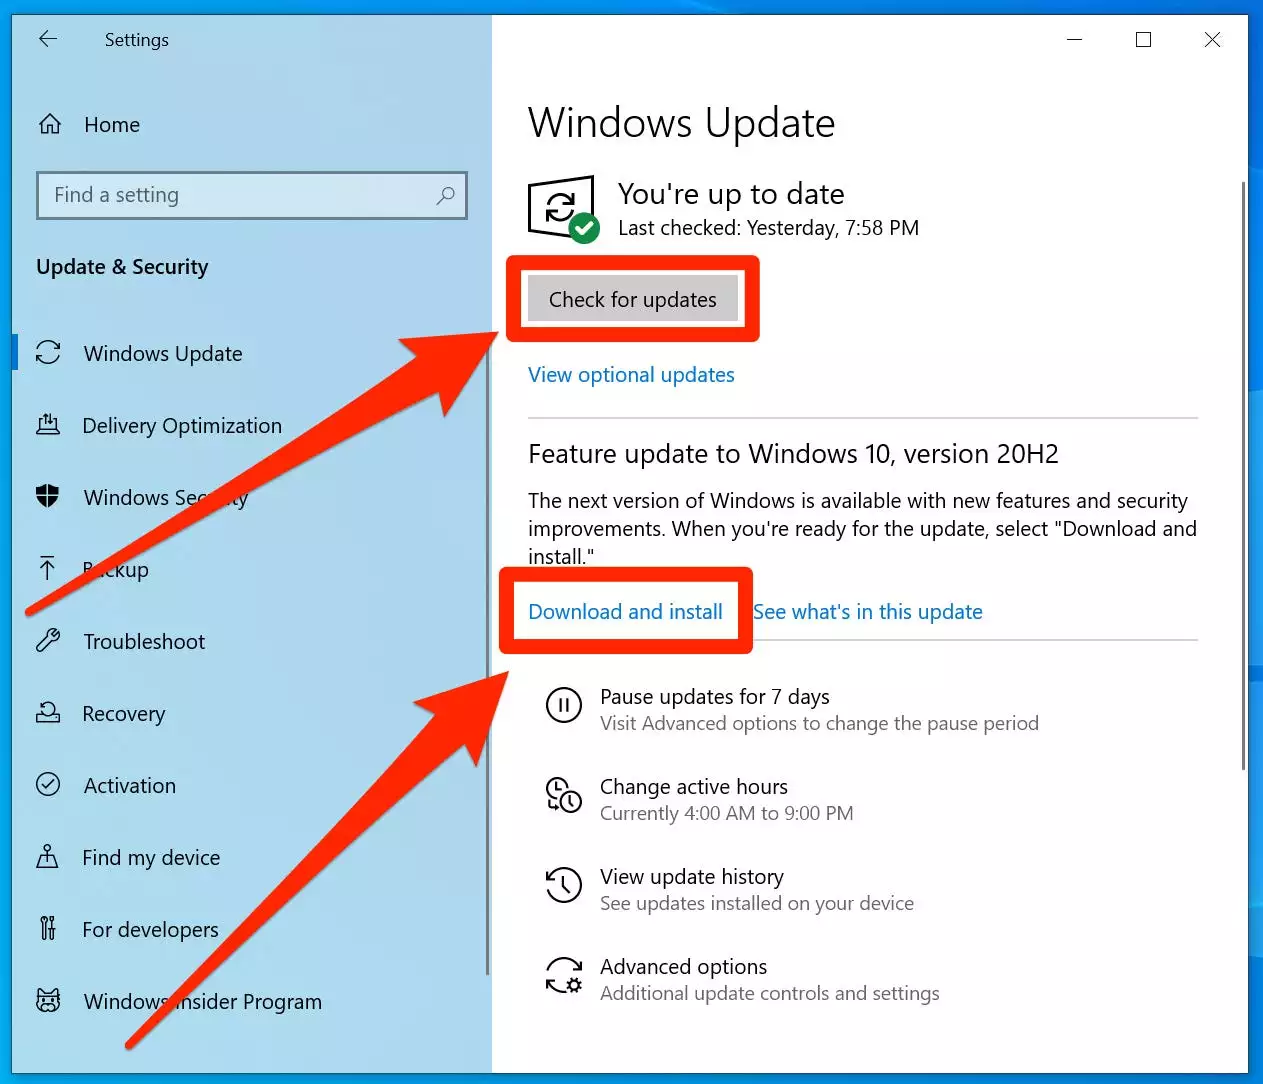
  • Open the settings of your PC and click the display settings.
  • Access the advanced settings, you can locate display adapter properties.
  • Open the monitor tab and click refresh rate.
  • Change it and fix it at 60 Hz.

Conclusion

In a nutshell, we have provided you with a guide that indeed has the capabilities to resolve the issue of “Input Signal Out of Range Windows 10”. You can try any of the above tweaks to retain the smoothness and excellent performance of your PC within a few clicks. However, if you are still facing any queries and have suggestions, you can contact us anytime.

no bootable devices found

At some point, we have all encountered a computer error that leaves us scratching our heads. The “The system cannot find any bootable devices” message is one of the most common errors that individuals encounter when attempting to start their laptop or desktop which can be incredibly frustrating. Fortunately, there is no need to panic as it’s often quite easy to resolve this issue quickly and get back online in no time. In this blog, we will provide you with a step-by-step guide on how to fix the “no bootable devices found” error by following five simple steps with easy instructions. Read on for more information and say goodbye to your tech woes!

What does “No Bootable Devices Found on Windows 10” mean?

no bootable devices found

If you are getting an error message “no bootable devices found” depicting that your system is unable to find a bootable device, then you must resolve it in time, as it can get worse if not fixed on time. But what does it mean? So, it simply implies that your device is having trouble while opening in order to get signals from the booting devices. Well, booting devices are the hardware required to start your computer. If you have just upgraded the hard drive or CD-ROM drive recently, you are more likely to face the error as your system would be unable to work with these drives and can’t find the essential files which help in starting up your PC. 

What Causes  “The System Cannot Find Any Bootable Devices”? 

Various things can be responsible for your system showing the ‘no boot device found’ error.  However, a better understanding of the cause will help you to resolve the error better. Hence, let’s see what the possible reasons for the error are.

  • The installed bootable device is not findable.
  • The boot order is not correct.
  • Having multiple hard drives
  • A disconnected bootable 
  • BIOS or CMOS settings may be incorrect.
  • Damage or corruption in your booting device

Now, you are fully aware of the cause. You can simply diagnose the cause and start with the fixing troubleshooters present in the further section. 

Troubleshooters To Fix  “No Bootable Devices Found” 

There are a total of 5 possible solutions that we have brought for you. This can fix the pesky error of “no bootable device windows 10” by setting back the boot drive and by repairing the bootloader. Let’s check the easy steps for doing all the fixes.

1. Setting The Hard Drive as The Boot Device

One of the significant causes of the error “no bootable devices found” is the hard drive issues. So you must look into fixing the hard drive issues if you have multiple hard drives injected into your computer. Then you must set a single hard drive for your PC to load. This way, you can make your PC’s overall performance smoother or can eliminate the error. Let’s check the steps that can help you to set the hard drive as the main booting device.

  • You need to restart your computer first. 
  • And while it is restarting, press the key “ESC” to get into BIOS settings.“ESC” to get into BIOS settings.
  • Here, you can see five tabs. Select the “boot” tab.
  • You can see a boot order list where you need to put the hard drive.
  • Press F10 to save the change. And let your computer start.

After doing the above steps, you must try opening your system and see if the error has been eliminated or not. If you are still facing the error, then you must try another method to fix it.

2. Fix The Corrupted Master Boot Record 

Maybe you have a corrupted master boot record. Thus, you will need to fix it within a few steps. It can simply cause an error and lead you to worse problems in the future if not fixed on time. Let’s get into the steps for fixing a corrupted MBR.

  • First, you will need to inject windows installation media into your computer.
  • Follow the on-screen wizards, asking for the language preference and the region.
  • Here you can see the option “repair your computer” click it. Click the install now option.
  • Click troubleshoot and open the command prompt in advanced settings.
  • Now, you can see the command prompt has shown up. Type out the following command in it. Make sure you press enter after every command.
bootrec /fixmbr
bootrec /fixboot
bootrec /scanos
bootrec /rebuildbcd

Here, you must note that if your computer is asking for a new installation, then you must press Y on it. If you are done with the above steps, you must be able to eliminate the error saying “windows 10 no bootable device”.

3. Use System File Checker

You can use the system file checker tool to know what file is exactly corrupted and causing errors. Before doing the test, you just check your hard drive is perfectly connected to your device. Then only you can do the test properly. Since your PC is not working thus, you will need to use the window installation media so that you can run your PC. Let’s check the steps to know what you can do to resolve the error “boot device not found”.
Use System File Checker

  • Insert your Window installation media into your device and start your computer.
  • Press ESC to open the BIOS setting, enter the boot tab, and put the hard drive first in the order list.
  • After changing the BIOS setting, you must save the changes and let your computer start again.
  • Press Shift + F10 to open a command prompt on your PC.
  •  Type DiskPart in the prompt & then type list volume.
  • Here you can see the whole list of the drivers connected to your PC. Know your dive letter from here.
  • Type exit DiskPart and enter the next command written below.
sfc /scannow /offbootdir=C:\ /offwindir=D:\Windows
  • You must replace the concern letter as per your PC. 
  • Now, SFC will start to repair the corrupted files themselves. You must close the tab when the process is done. 

After doing the above steps, you must check your system by opening it without windows installation media. See if the error “no boot device found” has been eliminated.

4. Check the Cabling of Your Device

If the above methods don’t perform a perfect fix for your problem of “no bootable devices found”, then there must be another problem that you need to investigate. The other possible and common cause for the problem is improper cabling and the presence of dust and debris in your CPU. Thus, you must perform a clean check of your system and also try to fix the cabling error, if any.

If you have loose cabling, then it may cause a hassle in transferring the signals to your PC; thus, you must reconnect it correctly. If this does not give a good result, you must replace the cable with the newer one.

While doing so, you must check if there is any dirt and debris in your CPU. You can open the front frame of your CPU and clean the dust with a soft brush and soft force. After doing so, restart your system and check if it has started working correctly. 

5. Maintaining a Windows 10 Installation

Maintenance has always been too essential for the smooth running of your device, from updated drivers to upgrade hard drives. You must maintain your system up to date. This way, you can manage unwanted opening errors and other things on your PC. 

Windows 10 Installation

In addition, if you have a corrupted or broken drive, then you must replace the drive. It will take some investment but can give you better results. However, you can go for resetting the window option too. Resetting Windows can cost your data. Thus, you must have a backup of your data first & then go for the reset option. 

Frequently Asked Questions

Q1. What does the boot device not found mean?

This is an error that comes when you open your PC and your PC is facing some hassles with the hard disk. The common reason for this error is when your hard drive doesn’t support the boot system of your device. 

Q2. How to fix the boot device not found?

There are various ways through which you can perform a fix for “no boot device found” error. You can try the above methods to rectify the errors. However, you can reset your windows, and also you can perform a cabling check for better results.

Q3. How do I activate my boot device?

Finding the bot device is quite easy. You can just restart your computer, & while the screen is blank, press key F10 on our keyboard to enter the BIOS setting, and here you can see the boot settings option. Follow the on=screen wizards and find your boot device.

Conclusion 

If you were too facing the “no bootable devices found” error while opening the device, then you must have panicked at first & then became frustrated in resolving it. However, we have brought you five ways to resolve the error in easy steps. You can choose any of the methods above and try next if one is not working for you. If you have any queries or suggestions in your head, then you can come back to us anytime.

faulty hardware corrupted page

Have you just experienced a crash on your smooth-running device? And the crash shows “faulty hardware corrupted page error” If so, then say goodbye to the error with our troubleshooting guide. However, this might have been a bit annoying for you. However, the time has arrived to resolve it. In this blog, We are coming up with the top 10 troubleshooters to rectify faulty_hardware_corrupted_page, from cleaning your computer to troubleshoot the error with tools like DISM and  Memory Diagnostic Tool. We have got it all covered. So, without wasting much time, let’s get started with the guide. Keep reading to enjoy the smooth running of your PC again.

What is Faulty Hardware Corrupted Page Blue Screen?

What is faulty_hardware_corrupted_page Blue Screen?

A faulty hardware corrupted page is a blue screen error that can interrupt your running program and also unstabilize the overall performance of the PC. This error will make the screen stuck or can cause a random crash. It comes up with a bug check value of 0x0000012B. You must try to rectify it timely. Otherwise, it can deliver further damage to your PC. Let’s have a better rationale for it by understanding its real causes.

Causes of Faulty Hardware Corrupted Page

There are various causes for faulty hardware corrupted page windows 10. Understanding the causes will give you a better rationale for resolving the issue. Let’s check them all in the below pointer. 

  • Problems in device drivers.
  • Corrupted files in your device.
  • Malicious attacks of viruses on your device.
  • Corrupted Registry.
  • Problematic hard drive. 

10 Ways To Troubleshoot The Issue “Faulty Hardware Corrupted Page”

After knowing all the essential pieces of information about Windows 10 faulty hardware corrupted pages, one must get into the troubleshooters. Thus, we are ready with the top 10 surefire ways that will be going to assist you in every way possible and eliminate the issue in no time. So without further ado, let’s get started with the solutions.

1. Disable Fast Startup

This issue has majorly been encountered in windows 10 because of its fast startup feature. Its core component sometimes corrupts the files of your device and leads the device to an error. Thus, disabling this fast startup can fix the issue of faulty_hardware_corrupted_page. Let’s see how one can do so.

  • Open the power user menu by pressing the Windows logo key and X together.
  • Now, choose additional power settings.
  • Click the ”Choose what power button does” option.Disable Fast Startup
  • Tap on the change settings option coming up on your screen.
  • Untick the box coming for the fast startup option.
  • Don’t forget to save the changes you made.

After getting done with the above settings, you must power off your computer entirely and turn it again after a few minutes. Now, check if the error has been resolved or not. 

2. Upgrade Drivers

Outdated drivers can be the cause of these random issues on your device. Thus, you must keep updating your device driver to have a seamless experience of using your device. Not only these drivers, but you must also keep updating all your network drivers and the Windows itself. Let’s check how you can update your device drivers in easy steps.

  • Open the settings of your device by pressing the Windows logo key, and I.
  • Now select the option coming ”updates and security”
  • Click check for updates.
  • Here, you get a blue-colored option of “checking additional updates”; click it.
  • Check the boxes of every other driver that requires an update.

3. Roll-Back Drivers

If you recently have a new driver injected into your system, it may be the issue with the new drivers. Thus, you are required to roll it back. You can simply get a satisfactory result by following the steps below.

  • The first step is to open the device manager on your PC.
  • Expand the list of devices from the drop-down menu.
  • Right-click on the device that you want to roll back.
  • Select Properties.
  • Now, a prompt will come up.
    Roll-Back Drivers
  • Select the Roll back drivers option. 
  • Don’t forget to save the changes. 

4. Eliminate External Peripherals

If you have multiple connected devices to your computer, then you may find this error bumping again and again on your screen. Thus, you are required to eliminate all these peripherals, such as scanners, printers, and other less necessary devices. After removing them, Check if the issue has been eliminated or not.  If following this has brought you results, then it is good. If not, then just hop onto the other method in the queue.

5. Run DISM Tool

Faulty files can disrupt the good performance of your computer and can cause trouble in overall performance. This way, the error faulty hardware corrupted page blue screen will be triggered. Hence, you must use the tool DISM stands for “Deployment Image Servicing and Management” you can simply follow the below steps to resolve the error.

  • Right-click on the power button, and you will get the menu opened.
  • Select the Windows PowerShell option coming in the list.
  • System file checkers can help you to repair system files. 
  • To do so, you can use below written three commands: 
DISM /Online /Cleanup-Image /CheckHealth
DISM /Online /Cleanup-Image /ScanHealth
DISM /Online /Cleanup-Image /RestoreHealth

6. Check Disk Utility

Might the issue you’re facing be with the disk? Thus, you can perform disk utility to ensure that it is corrupted and make hassles for your windows to run smoothly. To resolve the error, you may inculcate the following steps.

  • Press the Windows button on your laptop and type PowerShell under the search bar.
  • Right mouse click on it and choose the option ‘Run as admin’
  • Here, you can use it to its full potential. 
  • Now, type chkdsk C: /R, and one must not forget to replace the letter C with the drive letter of your windows partition.
  • Press Enter.
  • A prompt will come up asking permission.
  • Type ‘Y’ and click Enter.

You must restart your computer for better implication results. After doing so, you can see the changes that have been brought after doing the Disk utility check.

7. Windows Memory Diagnostic Tool


Windows Memory Diagnostic Tool

The Windows memory diagnostic tool helps a lot in resolving windows errors. Thus, you must try this method out to eliminate Windows 10 faulty hardware corrupted pages. Let’s see how one can do so.

  • Press the Windows log key and write Memory diagnostic. Launch it.
  • Click Restart. This way, your computer will restart by itself. 
  • Now, the diagnostic tool will load as the computer starts. Wait for a while.
  • Here, you can see a test running on your computer waiting for it, too, until it finishes itself.
  • Go to the power user list and choose the event viewer.
  • Select Windows and click System Logs.

Here, if you can see any errors, then you must try to resolve them by changing your RAM. If you see no error, then hurrah, it has been resolved. 

8. Clean the Computer

Frequent cleaning of your computer is essential. You can not only save your investment through it, but you are saving your internal data as well. Over time, unwanted dust and debris in the computer’s internal parts lead to some errors. Also, it can affect the overall smooth running of your computer. Thus, you must clean the screen and dust in the keyboard keys every few days. Hence, you must try performing this cleaning first and then check if the issue has been reduced or not. 

9. Resetting Windows 10

Resetting your windows can improve the overall performance of the PC and enhance the smoothness pace as well. If you perform a reset on your Windows, then your computer will get a fresh start with a completely new reinstallation. However, a reset can not only resolve windows 10 faulty hardware corrupted pages, but also it can improve the performance, battery life, security, and browsing experience as well. So let’s check how one can do so.

  •  Open the settings of your PC.
  • Choose the option for the update.
  • Click the recovery tab and select the option coming ‘get started.’
  • Here, a prompt will come up to keep the files or remove them.
  • You must choose to keep my file if you don’t have a proper backup. 
  • Click Enter to get started with the Resetting procedure.

10. Upgrade BIOS

Upgrade BIOS for windows 10 faulty hardware corrupted page

Outdated hardware is the most common reason for the error: Faulty hardware corrupted the page windows 10. Hence, you must always keep an eye on upgrading your software. However, Outdated BIOS always results in various hardware-related issues and errors. However, it can be untouched for many years, but if it remains like that, then it may cause some issues. Thus, it would be better to update it.

Frequently Asked Questions

Q1. What causes faulty hardware to be corrupt?

A malware attack can cause your hardware to go corrupt. Thus, you must do a malware check on your system. And one should always keep their firewall settings unable to protect their PC. 

Q2. How do I check for faulty hardware on Windows 11?

To check faulty hardware on your device, one must do troubleshooting on your PC. You can simply do this troubleshooting with the following steps.

  • Open system settings.
  • Click the system option coming on the next screen.
  • Click troubleshoot.
  • Now, target devices one by one.
  • You will get your query resolved.

Q3. How do I know if my Windows hardware is failing?

You can simply check it by performing a test on your PC. For this test, you just need to follow the below-written steps.

  • Press the window logo key and R together to trigger run windows.
  • Type mdsched.exe and enter to run the test.
  • Now, your system will take a few minutes to get back to you.

Your system will restart itself. After a few minutes, try using your system again and check whether your system has started performing well or not. 

Conclusion

In a nutshell, we have provided you with the top 10 methods for fixing the faulty hardware corrupted page error. Along with these resolving tricks, we have provided you with a detailed comprehension of it, which consists of its meaning, causes, and resolvers. However, you can try any resolving techniques mentioned above. If you have any queries or suggestions, then you can get back to us anytime.

Windows Shift S not working

Do you use Windows for all your computing needs? There’s no doubt that the operating system offers plenty of handy features and shortcuts, but unfortunately, it can come with some frustration. If you find yourself facing an issue when attempting to print screen using the Windows + Shift + S shortcut, rest assured that there are a few possible solutions. In this blog, we will detail six methods to fix Windows Shift S not working issues & help get your screenshots back on track and make life easier in the process. Whether you need to take a screenshot immediately or just want peace of mind for future reference, we’ve got everything covered right here.

Windows Shift S not working

Why Windows + Shift + S Not Working?

It is very important to know the root cause of Window Shift S not working before we actually get into troubleshooting ways. However, there can be various reasons responsible for this mishap in your device. Let’s check them out in the below pointers.

  • Double buttoning: The reason is very simple: when the load of the two functions is on the one key, then maybe the key won’t work efficiently. Similarly, when these three won’t get the perfect order to work.
  • Malicious activity within the app: Maybe your app is having some issues with viruses or other kinds of stuff. In this case, you just need to reinstall the app and get on with it. Check if the issue has been resolved or not.
  • Interference of another malware-containing app: If some apps in our system have malware or virus in it then it may cause disruption. Thus, you will need to boost up your computer by cleanup apps.

6 Resolving Troubleshooters for Windows Shift S Not Working Issue

After knowing all the possible causes, we can resolve the matter with a few clicks with a better understanding of troubleshooters. We have given the top 6 resolving methods that you can use to eradicate the issue of windows key shift s not working. Let’s get dive into the troubleshooters.

1. PrntScrn Button 

PrntScrn Button 

This is the most common and well-known method to try for taking a screenshot. If you are in urgent need of taking the screenshot, then you can press the “prtSc”  key to capture the screen and save the screenshot to your clipboard. After that, you can use any editing app like MS Paint and other editing apps from your device to edit the screenshot. But a number of systems lack this key. However, if you have this key on your keyboard, then you must try capturing your screen with this.

2. Allowing Snip & Sketch’s Notifications 

When you press the windows key shift s but no result comes up, then it can be the issue with your notification settings. If the notification for taking the screenshot is off, then you are most likely to face the issue of  ‘windows key shift s not working’. In this case, you just need to disable this setting from your PC. Here we are enlisting some steps to rectify the settings.

  • Press the Window log key and I together to trigger the setting app of your PC.
  • Select the system option coming very first on your screen.
  • Now, click on “Notification & actions” coming at the left bar.
  • Locate the ‘snip-n-sketch’ option and enable it.
  • Try taking a screenshot by pressing ‘windows + shift + s’. You must see a notification.

In case it is already enabled, then the cause of the problem is something else. Thus, you must jump to the next method. If it is not enabled prior, then you must see the screenshot notification when you try to take the screenshot.  

3. Turning Clipboard History ON

Window clipboard history is another feature that can help you to take screenshots even if your win shift s not working. If the history of your clipboard is off, then you must try to enable it. After enabling it, you can simply save whatever screenshot you may want to save by just pressing ctrl+v at the location. However, let’s check how one can turn on the clipboard history. Another important thing is that these steps have the potential to work on every version of Windows.

  • Open your settings window by pressing the Windows logo key and I together.
  • Select the system setting and come to the next screen.
  • Now, you can see an option for a clipboard in the left sidebar.
  • Click and enable the history option coming there.
    Turning Clipboard History ON

After doing the above steps, you must check to take a screenshot by pressing all three keys. Windows+Shift+S. If you are able to take the screenshot, then you must follow the below-written steps to save it.

  • Take a screenshot.
  • Launch MS paint and try to make a blank image.
  • Now you can paste your clipboard image here by pasting through ctrl+v here.
  • If you want to edit it, go ahead to do so.
  • And save the result simply by pressing ctrl+s.

Hence, you can save the screenshot at wherever location you may want it to be. One thing that you must keep in mind is to save the file at an easily accessible location such as the desktop or wherever you want it to be.

4. Reset Snip & Sketch App

Resetting the device has been a troubleshooter for every other little technical glitch that happens in your device. You must try resetting this tool to get the issue of “win shift s not working” resolved. Thus, let’s check what steps you will need to follow to get it working again.

  • Open the settings tab in your system.
  • Select apps option
  • Locate the “snip and sketch” app. Right-click on it.
  • Select advanced options.
  • Scroll down and choose the reset option.
  • Now, a prompt will come up, and select reset to continue the process.

This way, you have reset the app “snip and sketch”; thus, it may have started working well. To test, you must check by pressing all the concerned keys and see if it started working or not.

5. Reinstall Snip & Sketch 

Reinstalling Snip and sketch apps on your PC can resolve your problem in an easier way. This way, if any error or malware is disrupting the action, then you must reinstall the app so that you can have better results in a few seconds. If confused, how to do so? Then don’t worry because we have written the below steps for you to have a satisfactory result. 

Reinstall Snip & Sketch 

  • Open the settings of your system. You can open it by pressing the Windows logo key and “I” together.
  • Choose the “apps” option in the settings.
  • Locate the app Snip and sketch on the coming app list. 
  • Right-click and select uninstall.
  • A prompt will come up; select uninstall in it.
  • Now, open the Microsoft Store and search for the app snip and sketch.
  • Install it again from here.

After doing the above steps, you must launch it and do the needful things as per the coming on-screen wizards. Once again, test your system and the newly installed app. Press the Windows logo key + shift+S to take the screenshot. See if it has started working or not.

6. Perform a Clean Boot

Performing a clean boot on your computer can help you to make your keys work again & may tune up computer with maximum efficiency. Thus, you can download any trustworthy third-party app for it. Sometimes, a few malicious apps from your device try to interfere with the snip and sketch app and may create hassles for you to take the screenshot. Hence, you are advised to perform a clean boot on your device. This way, you can simply figure out what app is creating a mess on your PC.   

Frequently Asked Question 

Q1. Why is Windows Shift S not working?

There can be various reasons responsible for why the keys Windows Shift S not working on your PC. One of the most likely causes for it is the malicious app or some virus in the snip and sketch app. Another likely cause is the damaged or corrupted files of your system.

Q2. How do I enable Windows Shift S screenshot?

There are various tricks that you can use to enable Windows Shift S screenshots. You can try the above fixes for it. Simply get into the snipping tools’ advanced option and click on the repair option. Now, wait a few moments and see if the keys have started working again or not.

Q3. Why won’t my Windows let me a screenshot?

In a few devices, you can see the PrtSc key as the function’s key. It can do both tasks together, which is why it leads you to the problem of Windows Shift S not working for the screenshot. However,  you can simply resolve this by pressing it twice.

Conclusion

In a nutshell, we have provided you with the top 6 ways through which you can take a screen print in your pc if the keys on your pc Windows Shift S not working. Thus, you can try any one of the above tricks from the above article. Hope this guide has helped you in every way possible. If you have any suggestions or queries in your head, then you can come back to us anytime. 

windows 10 install

Windows 10 has been out for a while now, and many people are wondering if they should upgrade. Microsoft made it very easy to install, but there are still some things you need to know. In this post, we’ll walk you through every step of windows 10 install. so that you can do it yourself without any problems. So, whether you’re upgrading from an older version of Windows or doing a fresh install, we’ve got you covered! Let’s delve in!

how to install windows 10

Windows 10 Install by Creating Installation Disc or Drive

To begin How to install a Window 10 we have to start by creating an installation drive. 

Blank USB Flash Drive

how to install windows 10 from usb

To answer how to install windows 10 from USB, we will need a blank USB flash drive. A blank DVD would do just as well. The USB flash drive must be a minimum size of 8GB. 

The USB drive or the blank DVD will act as the bootable device having the Windows 10 installation drive. 

Product Key

The product key is a must. Direct purchases from Microsoft via the user’s Microsoft account will result in the product key being linked directly. The install product key is linked to the user’s account in the former case. 

In case of buying from a third-party retailer, the user will have to use a 25-key code. These are the product key codes. 

If you’re without the product key there are still ways how to install a Window. This can similarly happen if you’re performing an installation on a new hard drive.  

To start with the Windows 10 install process via the windows 10 update assistant, link the Windows 10 digital license to the Microsoft account. To perform the task, Click Settings, then go to Update and Security and Activation. 

Update and Security and Activation.

There might be a scenario you find in this particular step of Windows 10 installation. Windows is already activated with a digital license. Click on Add an Account option then. Once done, link the Microsoft Account.

There might be another scenario of a Windows 10 upgrade. In many cases, there is no need for the product key to perform the upgrade of Windows 10 installation. 

Download Process

Go to the official Microsoft site to do a Windows 10 install. Click on the Download tool now option. You will find this right in the middle of the page in a blue-shaped box. Once done, double-click on the installation file on your computer. Select, thereafter YES and allow the installer to run. 

Then click on Accept License when the box appears. 

Installation Media

Select Create Installation Media from the Windows 10 startup folder and click on OK. Doing so you have made sure a Windows 10 install disc or drive has been created.  

In the case of Windows 10, install the upgrade right-click on the Upgrade this PC now option. You will need to then follow the appearing instructions. 

Now you know not only how to install Windows but you have completed the install Windows 10 process. 

Update Details

Then comes the process of updating the details following your system. In the case of Windows 10 install it in the system you’re using. The default options are fine. 

While Windows 10 is installed on a different system and you need to update the details. This must be compatible with the computer including architecture. 

Type of Installation 

We have come almost to the end of how to install a Window. Now choose the type of installation to install Windows 10 in your system. ISO file if you’re using a DVD. Do next. 

how to install a window Installation Media

Flash Drive & ISO File 

Create Windows 10 installation media. This is to be done according to the device you have chosen for the Windows 10 installation. 

The flash drive option is simple. Simply select the option then click next. The windows 10 installation files will install themselves. When done, select Finish. 

While for an ISO file, wait for the download to finish. This Windows 10 download via this process is time-consuming. When finished, select the Open DVD burner option and select the DVD burner. Then select Burn. 

Windows 10 Install Boot

  1. Enter the device you have completed the installation media in.
  2. Now is the time to boot the system into the BIOS. 

There might be a situation to install Windows 10 with the system not being prepared to boot. Such scenarios mean Windows 10 installation media not working. We need to then reboot the system. 

After that, press the keyboard key compatible with the system you’re using to enter Setup or BIOS. 

Keys for the popular brands include, 

  • Dell: F2 or f12
  • HP: ESC or F10 
  • MSI: DEL 
  • Lenovo: F1, F2 or Fn + F2 
  • Acer and Asus: F2 or Del 
  • Sony: F1, F2 F3
  1. Then go to the boot tab or the Boot Options. Whatever is showing in your system, select the device to boot from. Choose the Removable device for the USB flash drive option and CD ROM Drive for the ISO option.  
  2. Keep on pressing the + key and wait for the boot option to become first. If the + key is not working push the CD-ROM Drive or Removable device as the top menu. Click on F5 instead. 
  3. Save and exit the settings then. F10 is often the most common shortcut key. To Save and Exit and restart the system.

Windows 10 Installation    

  1. Select Next when prompted. 
  2. Thereafter Select Install Now.
  3. You have to now Enter the Windows 10 key and right-click on it, If You’re without the key, click on the Skip option. This will be present at the bottom right corner. 
  4. Finally, follow the popup instruction appearing on the screen. While doing Windows 10 install upgrade. The system will let you choose between a custom install and performing an upgrade on the current operating system. 

Selecting an upgrade will restore your data and files. 

Windows 10 Full Installation is Now Complete

So, that brings me to the conclusion of my article. Hopefully, the detailed steps in order have been easy to follow. Window 10 installation is an easy few steps way of completing the whole installation task. Once done, your system will run smoother. 

Frequently Asked Questions:

Q.1) How to install a Windows 10 on Laptop? 

To perform laptop Windows 10 easy install you will be required a 5GB free space of any USB flash drive. Format the drive and set the partition as active. The USB drive will Format. So make sure there aren’t any important files in it. Then Copy Windows Setup into the USB flash drive. Complete the installation process. 

Q.2) What is Windows installation media?

Windows installation can be performed using a media installation device of a USB flash drive or a blank DVD drive. 

Q.3) How to install Windows 10 on a new pc?

To perform the Windows 10 install on a new PC, open the system. Then press the key to open the BOOT system. When done click on the option to boot the system from the installation media device. Once the setup starts follow the on-screen instructions.

the disk does not have enough space to replace bad clusters

This is happening with most of the windows users whenever they try to run CHKDSK on their drive. It start showing an error pop-up which is something like this “the disk does not have enough space to replace bad clusters”. The majority of these users stated that they attempted to continue this process several times. So that this issue can be solved itself but the result remained the same. The issue affects all versions of Windows. Including Windows 7, 8, 10,  so it is not unique to any one version. 

There is absolutely no reason to panic in the event that you receive this error message. Even though the hard drive might be malfunctioned or damaged, you shouldn’t give up and consider it a loss.

Here, we’ll guide you on how to troubleshoot the “chkdsk insufficient disk space” error message. So you can access CHKDSK on the Hard Disk Drive. 

The Disk Does Not Have Enough Space To Replace Bad Clusters: What Does It Mean? 

When a disk does not have enough space to replace bad clusters, it is an indication of poor overall disk health. The bad clusters refer to corrupted parts of the hard drive that can cause files to become unusable and even lead to complete data loss. If a message appears telling you there is not enough space available to replace these clusters, it means the defective sectors are so numerous they cannot all be dealt with at once. It is possible that other problems may be present in the drive as well. In this case, your best option would be to back up important data and replace the drive with a new one as soon as possible. Otherwise, you risk suffering from more serious malfunctions or complete system failure in the near future.

chkdsk insufficient disk space

All Possible Causes of CHKDSK Insufficient Disk Space

CHKDSK can alert a user to insufficient disk space, and there are several possible causes of this issue. One is that you have stored too much data on your drives. Another possibility is that rarely-used temporary files have accumulated over time. Which have taken up precious space. On the other hand, it could be caused by an outdated version of an application and its related files taking up disk resources. Conversely an infection from a virus or even formatting errors in your system. If you’re unfortunate enough to be experiencing this issue, it’s important to identify and address the root cause quickly.

Best Solution to Fix The Disk Does Not Have Enough Space to Replace Bad Clusters Error 

As above, we have given the reason for the error ” the disk does not have enough space to replace bad clusters” so now we are going to introduce you to five great solutions according to them. After attempting each solution, do check whether this error has been removed or not.

Solution 1: Do Not Stop the CHKDSK Process 

We advise against turning off the CHKDSK if you receive the “the disk does not have enough space to replace bad clusters” error because doing so will halt the process and make the issue greater. 

  • Run the command once more and possibly wait. That will take a lot of time, but the process can fix the drive if it is launched correctly. 
  • Go to the search bar of Windows, and type cmd. 
  • Choose Run as Administrator. 
  • Then, at the UAC prompt, select Yes to proceed. 
  • In the Command Window, type there chkdsk /f /r and press Enter
  • Tap on the Y button on your keyboard. 
  • After that, restart your system to start the disk check.

Solution 2:- Use Victoria HDD Utility to Regenerate Bad Clusters

If you’re lucky, you might get that despite the fact that CHKDSK was not capable of troubleshooting some bad sectors on your hard drive, the remaining drive components are still working and reliable. 

You can make a partition layout using a single, dependable method of isolation so that any partition will no longer contain the bad sectors.

Numerous paid software services are available that will make this possible for you. However, we will use a free proxy that will perform the same task (with some additional configuration) 

Victoria is a cost free third-party application that will recognize and troubleshoot bad sectors from your external or internal hard drive (SSD or traditional). 

Use Victoria HDD Utility to Regenerate Bad Clusters

Installing and utilizing Victoria to restore and utilize bad clusters is as follows:
  1. Download the archive that contains Victoria’s most recent version. It can be downloaded from a variety of download indexes, but we recommend downloading a version earlier than 4.2. Some download links are as follows:
  • MajorGeeks
  • SoftFamous
  • Softpedia
  1. Use a program like 7-Zip or WinZip to withdraw the stuff of the archive into a folder that is convenient after it has been downloaded.
  2. To ensure that Victoria.exe has administrator rights, right-click it and select Run as Admin
  3. Go to the Standard→ and get the drive (panel on the right) to choose the hard drive that is giving you the error message “the disk does not have enough space to replace bad clusters”. 
  4. Instead, tap on the Get SMART tab to learn more about the issues of your drive. 

When you are doing this, you need to pay attention to two things. 

After the investigation is finished, check the number of Reallocated sectors. If it is greater than ten, it is evident that the bad sectors are the actual problem. 

Additionally, if the status of your drive is GOOD (close to the Get Smart tab), you should be able to fix this problem and continue running the HDD.

Note:-

Do not forget the USB drives are incompatible with the SMART function.

  1. Move towards the Test button and select Scan to begin examining your drive for issues. The utility is set up to scan the complete drive consequently; however, if you come to know the exact location of bad sectors, you can easily configure the Start LBA & END LBA attributes. 
Note:-

You can likewise run the Quick scan program, but we don’t recommend it because it might miss some bad sectors. 

  1. When the scan is in progress, scroll down & tap on “Write Speed,” and select the Remap switch from the drop-down menu. This way will guarantee that the program will substitute good drive sectors from the reserved area of the drive for the bad sectors.
  2. Close Victoria after the scan, and then run a second CHKDSK scan & see if the problem has been fixed. If the problem persists, open the Victoria Gain and perform a second scan using the method shown in step 7, this time selecting Refresh. Any software-level broken sectors will be fixed by this.

Solution 3: Scanning and Repairing Bad Drive Sectors 

Soft and hard bad drive sectors can be identified and repaired with the assistance of different tools by using scan and accessing a surface check. 

Victoria HDD Utility is an application for free, but its operation is hard to understand and we can not say they are user-friendly. HDD Regenerator is our recommendation as a result. 

Scanning and Repairing Bad Drive Sectors 

HDD Regenerator, an excellent paid service, is made to scan your hard drive and find bad sectors. CHKDSK Insufficient Disk Space error is then fixed by the program by regenerating your physically harmed HDD.

Solution 4: Decongest Your Hard Disk

Sometimes, making some additional space on the hard drive can likewise assist with settling.

Way 1. Remove Unneeded Applications and Programs

Disk space can be freed up, and adequate unutilized sectors can be provided by uninstalling programs and apps that aren’t needed to run CHKDSK and fix bad sector errors.

To uninstall irrelevant applications and programs from your system, follow these simple steps:

  1. Open the Control panel, tap on the Program and select Uninstall a Program from the given options. 
  2. Right-click the program or application you want to get. Choose the Uninstall tab and confirm it.
  3. To finish the process of uninstallation, follow all the displayed prompts. 
Way 2. Clean up Your Windows Desktop 

If you’re getting a “Disk Does Not Have Enough Space To Replace Bad Clusters” error on your Windows desktop computer, it likely means that the space needed to fix errors and stop malfunctions is inadequate. This can be a result of too many files being stored on the desktop, or overly large files outputting more data than can fit in the available storage space. The good news is that this issue is fairly easy to rectify – all you need to do is perform some basic clean-up tasks on your Windows Desktop by organizing your files into folders and deleting unnecessary data as needed. Doing so should eliminate any insufficient disk space issues and get your system running smoothly without prompting errors again.

Solution 5: Increase the Size of Your Hard Drive’s Data Volume 

By expanding the disk’s volume into the unoccupied space beside it, you can enlarge the amount of space on your hard disk with Windows.

However, the empty space must immediately follow the volume you wish to extend, without any other volume in the middle, in order to accomplish this. On the other hand, Windows 8.1 and 11 support this procedure.

Increase the Size of Your Hard Drive’s Data Volume 

To increase your HDD’s data volume, follow these steps:

  • Use the search bar in the Taskar, type Computer Management and click on it. 
  • In the left-hand pane, select Disk Management. 
  • Select Extend Volume button by right-clicking on the disk that you wish to expand. 
  • Tap on the Next→Read all the given instructions and follow them to complete the process. 

Conclusion

The “The disk does not have enough space to replace bad clusters” error message appears when there is a shortage of storage on the hard drive. This can be fixed in a matter of seconds by using any one of the methods mentioned above. Implementing even just one of these solutions should give you extra storage space. You need to continue working on your PC without worry.

Frequently Asked Questions  

Q.1- How do you fix if there is not enough space on the disk?

Ans- Here are some ways to free up space on the disk: 

  1. Documents, videos, music, and other personal files can consume so much space on your system. Determine which unnecessary files occupy the most space and remove them. 
  2. you will not need to repeatedly transfer your files to another drive. because new files can be saved to a different drive to help avoid issues with low space in the future. You can save some of your new files to a different drive with more free space rather than saving all of them to the default drive.

Q.2- Do bad clusters mean failing hard drive?

Ans- A cluster of physically destroyed storage on the HDD is called a “physical bad sector.” A storage cluster on the hard drive that shows to be malfunctioning is known as a logically bad sector. Most of the time, bad sectors will cause a lot of problems, like losing data or having to scan and fix a drive that is stuck.

Q.3- How do I free up disk space without deleting apps?

Ans- We are going to share with you two good ways. With the help of this you will be able to free up disk space:

1. Compress Your All Content 

Many people are unaware that Windows includes a compression tool that can simply compress data on drives formatted with NTFS. To free up space, you can compress individual folders or even the entire drive. The best part is that the compressed data can still be used as usual with no error or any kind of configuration.

2. Transfer User Account Libraries 

By default, your user account libraries are kept on the C drive. My Documents, Pictures, Videos, Contacts, Desktop, and other folders are stored by the C drive. Certainly, these folders typically cover a lot of stuff that you might be willing to transfer to a different drive.

dll files missing

DLL files are an important part of the Windows operating system. They help programs run properly and can be shared by multiple programs. However, sometimes DLL files can become corrupted or go missing. This can lead to errors when trying to run certain programs. Luckily, there are some easy ways to fix DLL files missing errors on Windows. In this blog, we’ll give you step-by-step instructions on how to do just that. Keep reading to learn more.

What is a DLL File?

What is a DLL File?

DLL files are actually dynamic link library files. They’re small files that contain code that can be used by multiple programs on your computer. This code can include functions, data, and even resources like images or icons. And since DLL files can be shared by multiple programs, they help keep your computer’s memory usage down. So, when a program on your computer is unable to start because a DLL file is missing, it’s usually because the DLL file has been deleted or misplaced somehow. 

How Do DLL Files Work?

Dynamic link library files contain code that is used by more than one program at a time. This code is loaded into memory when the program that uses it is run. The advantage of using a DLL file is that it can be used by multiple programs simultaneously, which reduces memory usage on your computer. Additionally, if a DLL file needs to be updated, you only need to update the file once and all programs that use it will have access to the updates. 

DLL files are different from regular executable files because they are not directly executed by Windows. Instead, they are called by other executable files. When an executable file calls a DLL file, an entry point is executed. This entry point is a function within the DLL file that tells Windows what needs to be done when the called program is run. After the entry point function has been executed, the control is returned to the original program so that it can continue running. 

What Causes Missing DLL File Errors? 

dll files missing

There are a few different things that can cause DLL files missing errors. 

  • One of the most common is an outdated or corrupted driver. Drivers are pieces of software that help your computer talk to the hardware connected to it. 
  • If you have an outdated or corrupt driver, it can cause problems with how your computer communicates with the hardware, which can in turn cause errors.
  • Another common cause of missing DLL file errors is a virus or other malware infection. Malware can sometimes delete or corrupt important system files, which can lead to errors. 
  • Finally, another possible cause of missing DLL file errors is a change made to your Windows Registry. The Windows Registry is a database that stores information about your computer’s configuration. Sometimes, changes made to the Registry can cause problems that lead to errors like missing DLL files.   

Fixing Missing DLL Files Errors on Windows with Simple Methods

 For the easy Missing DLL files fix, you must go through the methods below.

Solution 1: Restart the Computer 

Restart the Computer 

One of the most effective ways to fix DLL files missing errors is simply to restart the computer. This simple solution can often resolve the issue quickly and easily, as it refreshes all processes on your computer and reloads any necessary files. To do so, click the Start button in the bottom left corner of your screen, then select Shut Down/Restart from the menu that appears. 

Solution 2: Update the Drivers 

Update the Drivers

Another common cause of missing DLL file errors is outdated drivers. When device drivers become out-of-date, they can cause conflicts that lead to errors like these. It’s important to make sure all of your drivers are up-to-date in order to avoid problems like this one. You can update them manually by visiting each manufacturer’s website or use an automatic driver update tool for faster results. 

Solution 3: Check for Malware 

In some cases, malware infections may also be responsible for missing DLL file errors & even the Blue Screen of Death Windows errors. To ensure that you don’t have any malicious programs running on your system, make sure you run a full system scan with reliable anti-malware software. This will detect any viruses or other threats present on your computer and allow you to take steps to remove them safely and securely.

Solution 4: Restore the DLL File from the Recycle Bin

Fixing a missing DLL file error on your Windows computer is relatively easy and can be done in a few different ways. The most common way to fix this error is to restore the deleted DLL file from the Recycle Bin.

  • Open the Recycle Bin.
  • Find the DLL file that is causing the error. The file will have a name that starts with “lib” and will end with “.dll”. 

Restore the DLL File from the Recycle Bin

  • Right-click on the DLL file and select “Restore”. This will restore the DLL file to its original location and should fix the error. 
  • If restoring the DLL file does not fix the error, you can try downloading a new copy of the file from a trusted website and placing it in the correct location on your computer. 

Solution 5: Recover the DLL File with a File Recovery Program

If you have accidentally deleted the DLL file, then you can restore it using a free file recovery program like Recuva. This program can help you recover deleted files from your hard drive, memory card, USB drive, etc. You just need to follow these given steps:

  • Download and install Recuva on your computer.
  • Launch the program and select the type of file that you want to recover. In this case, select “DLL.”
  • Select the location where you want to scan for the deleted DLL file. In most cases, it will be your hard drive. But if you have deleted the file from any other removable storage device, then select that location accordingly. 
  • Click on “Scan” and wait for the scanning process to complete. 
  • Once the scan is complete, select the DLL file that you want to recover and click on “Restore.” 

Solution 6: System Restore

System Restore

Another method that can help you fix DLL files missing errors is by using System Restore. System Restore is a built-in tool in Windows that allows you to roll back your system to a previous working state in case something goes wrong. Follow the below steps to use System Restore: 

  • Type “restore” in the search bar and click on “Create a restore point.” 
  • On the System Properties window, click on “System Restore.” 
  • Click “Next” and select a restore point that predates the time when you started seeing missing DLL files Windows 10 errors on your computer. 
  • Click “Next” again and follow the prompts to complete the process. 

Once the process is complete, restart your computer and check if the issue is fixed or not. If not, then try other methods given below. 

Solution 7: Use System File Checker

One of the best ways to fix missing or corrupt DLL errors is to use the System File Checker tool. This tool comes pre-installed on all versions of Windows and can be used to scan your system for missing or corrupt files. To use System File Checker, follow the steps given here.

  • Open the Start menu and type “cmd” into the search box. 
  • Right mouse click on cmd and tap on “Run as administrator.” 

Type "sfc /scannow" into cmd & press Enter. 

  • Type “sfc /scannow” into cmd & press Enter. 
  • System File Checker will now scan your system for missing or corrupt files and attempt to fix them. 
  • Once the scan is complete, reboot your computer and try launching the application again. The issue should now be resolved! 

Solution 8: Perform a Clean Installation of Windows

If you’re seeing DLL errors on your Windows 10 computer, it’s likely that there are corrupt or missing files somewhere on your system. In most cases, you can fix these errors by performing a clean installation of Windows 10. This will delete all the files and settings on your computer and replace them with fresh copies from Microsoft. 

Before you start, make sure to back up all your important files as a clean installation will delete everything on your hard drive. Once you’ve backed up your files, follow the steps below to perform a clean installation of Windows 10. 

How to Perform a Clean Installation of Windows 10?
  • Insert the Windows 10 installation media into your computer and restart it. 
  • From the tab “Choose an option”, tap on “Troubleshoot”. 
  • From the “Advanced options” screen, select “Reset this PC”. 
  • On the next screen, choose “Remove everything”. 
  • On the “Reset process” screen, select “Keep my files”. This will preserve your personal files but delete any apps or programs you’ve installed on your computer. 
  • Follow the prompts to complete the reset process. Once it’s finished, your computer will restart and you’ll be able to set it up as a new device. 
  • Restore your backed-up files and reinstall any apps or programs you need. 
  • That’s it! You’ve now performed a clean installation of Windows 10 and fixed any DLL errors in the process. 

Solution 9: Update Windows

Update Windows

If you’re running an older version of Windows, it’s important to update to the latest version in order to receive important security updates and fixes. Outdated versions of Windows are much more susceptible to viruses and malware. In addition, many application developers only support the latest versions of Windows, so updating is necessary in order to use the latest software. 

To update Windows, read below: 
  • Open the Start menu and select Settings. 
  • Click on Update & Security. 
  • On the left side of the window, select Windows Update. 
  • On the right side of the window, click Check for Updates. If any updates are available, they will begin installing automatically. 
  • Once all updates have been installed, restart your computer. 

Solution 10: Reinstall the Programs Using the DLL file

One way to try and fix DLL files missing errors is to reinstall the program that is causing the error. This will restore any files that have been deleted, renamed, or moved. It is also possible that the program was not installed correctly and this will correct that issue as well. To do this,: 

  • Open the Control Panel and select “Add or Remove Programs.” 
  • Find the program that uses the DLL file in question and click “Remove.” 
  • Once the program has been uninstalled, restart your computer and reinstall it. 
  • Try running the program again to see if it works now. 

Solution 11: Doing Repair Installation of Windows

Doing Repair Installation of Windows

If you’re receiving DLL files missing errors and you’re running Windows, there’s a good chance that the issue can be resolved by performing a Repair Installation of Windows. This process will replace any missing or corrupt files with fresh copies from your Windows installation disc. 

To perform a repair installation of Windows 10, you’ll need to have a bootable version of the Windows 10 installation media. You can create this by downloading the Windows 10 ISO file from Microsoft’s website and then burning it to a DVD or USB drive. Once you have your bootable media, follow these below steps: 

  • Boot from the DVD or USB drive 
  • From Install Windows, hit on “Repair your computer” 
  • From the Choose an options tab, tap on “Troubleshoot” 
  • On the “Advanced options” screen, select “Command Prompt” 
  • In the CMD window, type up the following command &hit Enter:
DISM /Online /Cleanup-Image /RestoreHealth 
  • Once the scan is complete, reboot your computer 
  • Try installing the program again 
  • If you’re still having issues, try running SFC /SCANNOW from Command Prompt. 

DISM /Online /Cleanup-Image /RestoreHealth 

  • Reboot your computer once again and try installing the program 
  • If you’re still having issues, you can try performing a clean install of Windows 10. Remember to back up your files first.

Solution 12: Contact Microsoft Support

dll files missing contact microsoft

If none of these solutions work for DLL files missing errors, then you must contact Microsoft Support for further assistance. Microsoft’s support website provides a variety of options for getting in touch with their team, including live chat, phone support, and even an online forum where you can post your question and get help from other users. 

Microsoft support is available 24/7, so you can get help whenever you need it. No matter what you face, Microsoft Support will be able to help you fix your missing DLL files and Windows 10 error so that you can get back to using your computer without any issues.

Why are DLL Files Important? 

DLL files play an important role in your system because they improve efficiency by allowing programs to share resources without duplicating files. Additionally, DLL files provide a way for developers to modularize code so that each module can be updated independently without affecting the entire program. This modular design makes it easier to develop and test programs because changes can be made to one module without affecting the other modules.

Moreover, DLL files make it possible for developers to create language-independent programs. This is because each language has its own set of DLL files that can be called from any language-specific program. 

Conclusion

So there you have it, a few easy ways to fix DLL files missing errors on Windows. Hopefully one of these methods worked for you and your computer is now running smoothly again. If not, keep in mind that there are plenty of other resources online where you can find help with this issue. And don’t forget, if all else fails, you can always take your computer to a professional to get it fixed. 

Frequently Asked Questions

Q1. How to fix missing DLL files in Windows?

There are a few ways to fix DLL files missing in Windows. One is to use the System File Checker tool which comes with Windows. This will scan your system for missing or corrupt files and replace them as necessary. Another option is to download the missing DLL file from a trusted website and place it in the correct location on your computer. 

Finally, you can use a dedicated DLL fixer tool to automatically find and replace missing or corrupt files. Whichever method you choose, be sure to back up your important files first in case something goes wrong.

Q2. Why do DLL files go missing?

DLL files go missing when they are deleted or moved from their original location. This can happen if the user accidentally deletes the file, or if a virus removes the file. Moving DLL files can also cause problems, as the operating system may be unable to find the file when it is needed. 

As a result, it is important to keep dll files in their original location and to make sure that they are not moved or deleted. If a dll file is missing, it can often be replaced by downloading it from the Internet or by using a software program that restores missing files.

Q3. Which program runs the DLL files?

DLL files are run by the Windows operating system. When a DLL file is called by an application, the operating system loads the file into memory and then runs the code within the file. This allows applications to share code, which can save both space and resources.

Q4. Can we open the DLL files with Notepad?

Yes, you can open DLL files with Notepad. However, doing so will not allow you to view the file’s contents in a readable format. DLL files are compiled binary files that are used by programs to perform specific tasks. Unlike text files, which can be opened and read by any text editor, DLL files can only be used by programs that are specifically designed to work with them.

Tuning Up Computer

No one likes their devices to run slow due to any reason. As the world runs fast, your devices need to run faster. There are a lot of reasons that might make your devices run slowly. If you can keep an eye on those reasons then you can maintain your device up to date. Here in this article, you will get to know about the ways that might help you to tuning up computer and make your PC run like a horse. 

As every device needs maintenance to keep its performance up the same way there are some things and some measures that are yet needed for the tuning up of your computer. Here we are bringing you those ways which would help you in your computer tune-up. Before getting straight to the measures let’s understand the concept of PC tune-up and why one needs a Computer Tune up.

What is Tuning up the Computer?

tuning up computer

Are you too hearing the phrase a lot about tuning up the computer but you don’t have any idea about what that is? For getting that concept clear to you, here is a brief introduction to what really does PC tune up means. Tuning up a computer refers to the process of the betterment of the performance of the computer. Two basic ways are used to perform this process. Either do it manually or use the software. Further in the article, we are going to learn about all those options in both of these options of tuning up the computer.

Why do you need to Tune up your Computer?

Now you might think of using Computer Tune up for tuning up the computer. But there are a lot of benefits that this process of computer tune-up brings you. Here are a few benefits and reasons that would make you want a computer tune-up right now:

  • Faster performance
  • Clears your junk
  • Prolongs the life of your device
  • Keeps your device clean of unwanted files
  • Fewer chances of experiencing errors
  • The device does not lag
  • Allows smooth running of your device

Methods to Tune up your Computer

As tuning up the computer brings you so many advantages for your device, you might think about the ways that you can use it. Here are two broad types of methods that can be used for computer tune-up and all the ways under them:

Manual Method

This has all those methods which you perform manually on your device and tries to boost the performance of your device. It has the following ways that you can access very easily on your device to tune up its performance.

  • Update Your Windows

Update Your Windows

Getting an update for your Windows might sound like a very common method but it is very much effective in making your computer’s performance a lot better. Having up-to-date Windows is something that plays a big role in maintaining the good performance of your device. Just look out for any available updates for your Windows then get your Windows updated and see a boost in the performance of your device.

  • Get Rid of Unwanted Files and Applications

Get Rid of Unwanted Files and Applications

Over the course of time, it usually happens that you accumulate a lot of files and applications that you now rarely use and they are just hoarding space in your device. The equipped space often causes your device to run slow and solving this issue would definitely help tune up the computer. For doing this, you can check out the list of applications and uninstall all those which are of no use. After that, you can just clean up all the residual files and have a lot of space in your device which would eventually result in tuning up the computer.

  • Have an Antivirus Scan

Have an Antivirus Scan

Having a harmful virus on your device is also one reason that might be the root cause of your device running slow. So, in order to have your computer tuned up, you can use your antivirus to run a full scan on your device. This would get rid of any harmful troublesome virus to get away from your device. once you clear all the viruses with an antivirus your device gets back to its usual good performance. Next time if you would ever think of what measure to take for tuning up the computer. Then, you can just go for a quick antivirus scan and get your problemed solved.

  • Reset your Computer

Reset your Computer

This option often gets a fresh start for your device eventually helping in the better performance of the computer. Just getting your computer reset once would help you to have its performance get better. If you are looking for methods that are capable of free PC tune then just use this method for tuning a computer.

Software

This method is the alternative to the manual methods. If you are not satisfied with the results given by the manual methods then you can go for the different software that is available for the tuning of the computer. Let’s have a look at some of that software one by one:

  • IOLO System Mechanic

One of the top-rated software that is recommended a lot for computer tune-up is this software. It is very user-friendly and performs its task very conveniently. It automatically detects and repairs the issues in your device through different measures like removing wanted files and putting a stop to startup programs controlling the performance of your RAM and CPU.

  • iObit SystemCare

This software allows you to solve your errors with just a single click. Works automatically to clear junk files, free disk space, and improve the boot time. Performing all these actions allows your computer to tune up. It has a premium and a free version. Both are of good use but they defer in terms of services. In the free version, you are just able to have a small clean-up scan but with the paid version you can get additional facilities.

  • Norton Utilities Premium

One of the most unique tools for the tuning of computers is the Norton Utilities Premium. This comes with the features like optimizing your computer with a single click through its dashboard. Uses measures such as shutting down startup programs, cleaning your hard drive, and detecting and solving common errors. 

  • Slimware SLIMCLEANER

This is a paid software made with the aim of providing the customer with the best features to boost their device’s performance. It allows a quick scan to detect all your errors and resolve them just with a single click. This will allow the device to optimize the start time and has ultimate features such as crowdsourced instant alert features. Being a paid app it does full justice to the price that the user pays.

Read more: DETAILED REVIEW ON ANTI HACK SOFTWARE | LIST OF TOP 6 SOFTWARES

Conclusion

No more using a slow device as we have got all the methods both manual and through software for tuning up the computer. If you want to boost the performance of your device and optimize its working then you will find all the methods for your computer tune-up. You can first try out the manual methods and if those don’t satisfy you then you can also check out the software made especially for tuning up computers. Hope this article would be helpful for you.

FAQs

Q1. Do I Need to tune up my computer?

If your computer is running slow and it needs to improve its performance then you can surely go for the option of tuning up the computer. It will solve all the issues in your device and allow it to run smoothly.

Q2. How can I tune-up my computer?

You can tune up your computer through the following steps:

  • Get rid of the useless files and unused application
  • Use antivirus 
  • Defragment your hard drive
  • Use IOLO, iObit System Mechanic & iObit SystemCare

Q3. How much is a PC Tune up?

The AVG PC TuneUp cost around $40 to $50.

anti hack software

Are you worried about the security of your device? Looking for a way that can help you to protect your device from a hacker attack then this is the right place for you. As these hackers and their attacks are something that might be causing a lot of damage to your device and to your personal information too. It’s high time that you get your hands on anti hack software and give your device 100{50afa256e6562afb2cd7837d8db3fd71ce947f26b53ffff72a77bb9141ae121a} protection from these harmful attacks.

There are several software that would claim to be good anti hacker software prevailing in the market. This will create a lot of confusion for you while you are making your choice. Just give the article a read and you would be able to find everything you need to know about anti-hack and anti hack software.

What is an Anti Hack?

anti hacker software

An anti hack is a protecting agent for your system. Its aim is to protect your device from the attack of hackers. As there are a number of threats from hacking, it becomes very important for a person to have something to save the device from such harmful attacks. Not just protects you from the attacks of hackers, but it also allows you to keep your network, password, and other personal information that needs privacy protection.

 They are something of great use and prove to be very helpful for maintaining a secure and safe environment for the device. In order to perform all these things there is certain software that caters to all the security demands for your device.

Software for Anti Hack

As the demand for anti hacker software increases day by day, the amount of options available for you of anti hacking software also becomes an endless list. From that elongated list, we have compared and reviewed all the different types of software available for your use. Here are some of the best anti hacking software:

  • Malwarebytes Anti-Malware

Malwarebytes Anti-Malware

One of the leading software in the anti hack software is Malwarebytes. It comprises all those qualities that a person might need to secure his device from hackers out there. It has qualities such as removing all types of harmful things like viruses, adware, shortcut virus, PUPs, etc. all the facilities it provides and the effectiveness for its purpose makes it a nice choice for you if you are looking out for an anti hacker software.

  • HitmanPro 

HitmanPro 

This next anti hacking software is that software which detects the malicious files in the registry and successfully gets them removed. Along with that it also gets the handover virus, rootkits, spyware, adware, etc. It provides all of its effective and user-friendly features without any additional charges. Just a simple app that would provide you with all the services required for your device to stay away from harmful activities like the attack of viruses and hackers.

  • Zemana antimalware 

Zemana antimalware 

Zemana AntiMalware is an anti hack software that holds up the vision of creating a safe environment for your computer. It is portable software that might be easy to carry on a USB drive. Just by running it by connecting your USB drive to the system will allow you to access this anti hacker software.

  • Bitdefender

Bitdefender Anti Hack Software

This software is a product of a manufacturing firm that provides the best antivirus. This point itself would make it really clear that this is one of the most effective software. It has multiple features like a protection service for your webcam, a vulnerability scanner along with a firewall. With all these features it becomes very effective in its work. Also, It provides the user with a complete sense of protection for their device.

  • Firewall Software

One of the leading solutions in the field of anti hack software is Firewall Software. This type of software is mainly concerned with the well-being of your device. Especially when you are dealing with internet-related things. It restricts your device to not come in contact with a harmful IP Address. It creates a barrier so that your device does not come in contact with miscellaneous and dangerous hackers.

  • SUPERAnti spyware

SUPERAnti spyware Anti Hack Software

One of the powerful tools in anti hacking. It removes these items once detected like the virus, spyware, trojan, rootkits, etc. just with a scan will detect all the issues with your device and delete them all. This will allow you to be protected from the attacks of the hacker and create a secure environment for your device and you too.

Read more: FACTORY RESET WINDOWS 10 (EASY WAYS YOU MUST KNOW)

The Final Say

There’s no one who can be spared from the attacks of hackers. We are all exposed to their best hacking software without a barrier in this techno-savvy world. The matter of security is one of those priorities which is the top when it comes to devices. As nowadays all the work is almost based on these devices. So, it becomes very important to preserve and keep these devices safe. 

To introduce you to the anti hack software that is built for the purpose to provide such protection, the above-mentioned article is curated. We made it easier for you to get your hands on the best software, and we have here brought you some good selected options to choose from. By getting to know about the qualities of these software you can choose the one for yourself. Through this, You can make your device protected from all the threats of hacking.

FAQs

Q1. What is the best anti-hack software?

Here are some of the best considered anti hack software:

  • Bitdefender Antivirus Plus
  • Norton 360
  • Webroot Secure Anywhere
  • Trend Micro Antivirus
  • Malwarebytes 

Q2. What is anti-hack?

An anti-hack is something that aims to protect the device from the harmful attacks of hackers. It is just a shield that preserves your device from dangerous and miscellaneous attackers of hackers.

how to factory reset windows 10

Wondering about how to factory reset Windows 10 in your system? Well, chances are your system has been harmed by some malware damage or there has been a virus attack. Plenty of time during Windows automatic update, malware damage takes place, hampering our system. In such cases, it becomes essential to know how to factory reset Windows 10. 

It generally means once you complete the task. The system will restore to the original operating system state. All the information and data will be deleted. If your system has become slow. It is a good idea then to back up the data and perform a factory reset. 

Today, we will be writing all about how to factory reset Windows 10 and how to use the command prompt for factory reset. 

how to factory reset windows 10

What is Factory Data Reset in Windows 10?

In Windows 10, the Factory Data Reset option reverted your PC back to its original state as when it first came out of the factory. This includes uninstalling all apps, deleting all files and settings, and reinstalling a fresh copy of Windows. It’s essentially like you are starting with a brand-new PC. The Factory Data Reset option is useful if you are having problems with your PC that cannot be fixed by any other means. It is important to note that you will lose all your data if you choose to do a Factory Data Reset, so make sure to back up your files before proceeding.

Command Prompt for Factory Reset

To start with, let’s begin with the operation of the command prompt for factory reset. Using the command prompt for is a quick-fire answer for this question. Once done after resetting, the system will refresh back to the original mode. Here are the steps. 

Command Prompt for Factory Reset

  1. Go to the search box and type cmd and then click on Command Prompt. 
  2. Once you have entered the Command Prompt type rstui.exe and press Enter
  3. Click on Next, select an available restore point and then click Next again. Click on Finish and thereafter click on Yes. 

The process of the command prompt has now begun. Important to note, a restore point needs to be done before the onset of the command prompt for a factory reset. 

There is another way to factory reset Windows 10 using Command Prompt. 

Simply enter systemreset – factoryreset in Command Prompt once done press Enter. There might be a situation of Windows 10 not loading the usual way. 

How to factory reset Windows 10 becomes a bit different than the process required. Boot first, in WinRE, and then perform Command Prompt for Windows 10. 

Besides Command Prompt for Windows 10, there are several ways to perform a factory reset Windows 10. I will be introducing you to these steps on how to factory reset Windows 10 other than Command Prompt. 

Different Methods of Factory Reset Windows 10

Reset This PC

Resetting your PC has become an excellent upgrade feature of Windows 10. This process is used by many using Windows 10. Particularly owing to the fact, when the user selects, Keep my files. There is absolutely no data loss. 

Here is how to factory reset Windows 10, while keeping your data. 

  1. Go to Update and Security. You will find this in the Settings Tab. 

Update and Security. You will find this in the Settings Tab.  Click on Recovery, and select Get Start

  1. Click on Recovery, and select Get Started. You will find the option under Reset This PC. 
  2. Select among the options, reset in your system. 
  3. Follow the next options that will be appearing. Eventually, click on Reset. 

Note: You can use this method to factory reset Windows 7 & all other versions present.

Windows 10 ISO Image File

Windows 10 ISO Image File

Other than Reset This PC, if you want to keep the information present in the system safe and secure. There is the method of Windows 10 ISO Image File. Much like Reset This PC, Windows 10 ISO Image File, keeps all the data intact. 

  1. To begin with, unless Windows 10 ISO Image File is already loaded in your system. You need to download the application. Thereafter follow these steps. 
  2. Check on the location of Windows 10 ISO Image File and then double-click. 
  3. Double-click again in the setup option, and then right-click on Yes. 
  4. Select the Download and install updates, this needs to be performed when the system has an internet connection. Then, right-click Next. 
  5. There will be a need to wait time for the updates to be checked upon. Once done and the license terms popup window has appeared right-click on Accept

Again, a short waiting time for the system to check on the updates. When done, Ready to install will appear. If wished so, you can select Change what to keep to change what to keep. Once completed, select Next and Install. 

Perform Backup

Another answer to this is probably the fact, once done the system will revert to the very first-day mode. Factory reset is often considered the last option in a troubleshooter’s toolbox. 

Yes, we have written about various methods to save your data. We would still highly recommend a backup before factory resetting Windows 10.  This is usually performed when an old system is meant to be sold. So, you can probably infer the need to back up before the process. 

There are plenty of cloud storage devices, like Google Drive or DropBox, or pCloud that would do the job fine. Often for free too. There is other backup software available. MiniTool ShadowMaker is an excellent choice in that regard. Acronis or Backblaze are other similar options. 

Now You Know How to Factory Reset Windows 10

This brings us to the conclusion of our article. We have tried to provide you with a detailed step-by-step process on how to factory reset Windows 10. Hopefully, we were able to help you in your search for factory reset of Windows 10. 

Frequently Asked Questions

Q.1) Will there be a loss of data if I perform a factory reset of Windows 10? 

Not necessarily, options such as Reset This PC thus provide the options of keeping data restored after the process has been done. We would still suggest performing an additional backup before the process starts.

Q.2) How to backup data before factory reset? 

There are various options to back up and restore data. Google Drive, Acronis, DropBox, and Acronis True Image are all reliable, fast, and efficient options for backup data and files of large chunks. 

Q.3) How to factory reset if Windows is not loading properly? 

In case of Windows not loading properly, select Boot in WinRE and then perform a factory reset.

0x800f0922

When you install a fresh update on your device, Windows 11/10 Update Error 0x800f0922 is a problem with updates that arises. However, when you upgrade to KB5012170 of your operating system, this vulnerability has recently been identified. When installing the cumulative update KB3213986 for Windows 10 on your device, this warning certainly appeared.

Never panic if you encounter this error code. This error may be rectified in a short period of time. Simply go through this article to the end and implement all the attempted methods we have suggested.

 0x800f0922 Windows 10?

What are the Possible Causes 0x800f0922 Windows 10?

This install error – 0x800f0922 could indicate a variety of different possible reasons. The list that follows includes contributing factors of error code 0x800f0922 –

  • System files with errors.
  • Spyware and viruses.
  • Spare partition space on the system is limited.
  • Interfering with firewalls.
  • Microsoft Windows Update server connection was unsatisfactory.
  • The.NET framework’s update-related installation failed.

Techniques To Fix 0x800f0922 Windows 10 Cumulative Update

You do not really require being a professional to use the techniques to fix this error since they are relatively simple. We have followed the simplest methods to complete every function. The techniques mentioned here should indeed be understood and used carefully.

Technique 1: Make Use of Windows Update Troubleshooter

To repair the “windows update 0x800f0922” error, you can investigate Windows update issues. There are several automated repair techniques offered by the Windows update troubleshooter tool. When it first starts, it will proactively look for issues and take action to resolve them. Follow the steps below –

0x800f0922

  • Firstly, when using Windows 10, open the Settings app by clicking the Start symbol and choosing it.
  • Secondly, scroll down to the bottom of the screen underneath the System tab and click Troubleshoot.
  • Then, numerous hardware and PC-related troubleshooters may be found by selecting Other troubleshooters.
  • Now, click Run after tapping on Windows Update.

Hence,  “0x800f0922 windows 10” will be immediately discovered and corrected by this troubleshooter.

Technique 2: Inspect the Network Connectioninspect the Network Connection

It is sluggish and unreliable to connect to the Microsoft Windows Update service due to a poor network connection and VPN. Any of these could end in an update 0x800f0922 error code. Restarting your network at this point and momentarily disabling VPN are our recommendations –

  • First, disconnect your router and stand in line for a few moments.
  • Now, connect the router’s power cord once again. Remain patient as the network computer boots up completely.
  • Next, by visiting any website, you may check your internet connection. Try switching from Wi-Fi to a cable connection if the surfing performance is poor.
  • If you are using a VPN, disable it. After that, restart your Windows 10 upgrade.

Restart your device and reactivate VPN software if the upgrade was completed. Continue to try again if the upgrade problem can’t be attributed to the network or VPN.

Technique 3: Deactivate Firewall

Microsoft introduced Windows Defender Firewall to protect from unauthorized access and possible damage. However, occasionally this built-in program may restrict certain connections and operations. So, temporarily turning down the firewall could be able to fix the 0x800f0922 ^ other such problems like 0X8024001E problem. You should perform the following steps mentioned below –

Deactivate Firewall

  • First, open Settings and choose Privacy & security.
  • Secondly, Windows Security may be opened by clicking Windows Security.
  • Then, turn off the toggle for Microsoft Defender Firewall by selecting the active network under Firewall & network protection.

Technique 4: Eliminate All of Your Temporary Files

The Update process may also be hampered by the existence of unnecessary temporary or cache files, which will result in the error 0x800f0922. This problem can be fixed by deleting these temporary files. The full instructions for removing temporary files from your computer are provided here –

  • First, choose Run from the context menu when you right-click the Windows icon.
  • Secondly, type “{50afa256e6562afb2cd7837d8db3fd71ce947f26b53ffff72a77bb9141ae121a}temp{50afa256e6562afb2cd7837d8db3fd71ce947f26b53ffff72a77bb9141ae121a}” in the vacant box and then click OK.

Eliminate All of Your Temporary Files

  • When you do this, the folder containing a list of temporary files would open.
  • Restart your computer and delete anything that is currently inside.

However, the most recent cumulative update may now be applied to the currently installed Operating System.

Technique 5: Change the Registry

Changing a few key items in the registry may fix your computer’s update problem if you continue to receive the error number 0x800f0922. An error here might damage the operating system as a whole rendering this operation extremely difficult. Therefore, engage with the following steps with some additional carefulness –

  • First, press Win + S to launch Windows Search.
  • Secondly, entering regedit into the text box after typing it in

regedit

  • Now, to allow admission, click Yes when the UAC asks you to.
  • Then, navigate to the following locations after the registry editor opens –
“HKEY_LOCAL_MACHINE\SOFTWARE\Microsoft\Windows\CurrentVersion\WINEVT\Publishers”.
  • Export may be found on the shortcut menu when you right-click the Publishers folder.
  • Enter the necessary file name after selecting the location to which you wish to export this key value.
  • To finalize the changes made thus far, click Save.

However, restart your computer and then proceed to install the remaining cumulative updates once again.

Technique 6: Repair the Installation File

Error 0x800f0922 code might also appear when updating Windows 10 if there are data corruption files accessible. If that’s so, utilizing the SFC command to remove the suspicious program would be very advantageous to prevent any serious problems. Hence, the steps to undertake are mentioned below –

, type sfc /scannow

  • First, enter Command Prompt in the search field by heading to the Search page.
  • Secondly, select Run as administrator from the context menu when you right-click the result.
  • Now, click Yes to indicate your permission if indeed the User Account Control window appears.
  • Then, on the elevated console, type sfc /scannow and press the Enter key.

Conclusion 

Well, we have listed all the most effective techniques to solve “install error – 0x800f0922”. We hope this article will help you for sure if you are experiencing a similar issue with your system. If you have any queries, kindly reach us in the comment section we have provided below. Also, if you know of any other solutions to fix the particular issue, kindly share them with us.

Frequently Asked Questions 

Q1: How do I fix error code 0x800F0922?

To fix error code 0x800F0922, you need to –

  • Make use of Windows Update Troubleshooter.
  • Eliminate all of your temporary files.
  • Deactivate Firewall.
  • Inspect the network connection.

Q2: What does error code 0x800F0922 mean?

Windows 10 update error code 0x800F0922 signifies that the device was unable to download the most recent OS update. If you didn’t communicate to the Windows Update service or there isn’t sufficient space on the System Reserved disc to install the new update, that is the eventual outcome.

Q3: Why does Windows 10 not update?

Your system files may have recently been erased or damaged, which will also indicate why Windows Update isn’t functioning with outdated drivers. For managing components like integrated graphics, network interface cards, and certain other devices that are just not inherently compatible with Windows 10, drivers must be installed.

Q4: How to fix .net framework 3.5 installation error 0x800f0922?

To fix .net framework 3.5 installation error 0x800f0922 code, you need to follow the steps mentioned below –

  • Go to the Windows Control Panel.
  • Then choose Programs and Features.
  • Press the Turn Windows Features On or Off button.
  • The.NET Framework 3.5 checkbox should be selected then select Ok.
  • Reboot the computer when the installation is finished.
  • Kofax Express 3.2 installation could proceed.

Q5: Do you require NET Framework for Windows 10?

Yes, it is necessary. Numerous Windows applications need to have the NET Framework to operate.

Windows Could not Complete the Installation

Are you also in the midst of getting your Windows installed? And your Windows could not complete the installation. Then you might also be going through a very common windows error. This error is something that leads to Windows could not complete the installation. Not only it deprives you of having up-to-date Windows but it would also cause a lot of hindrance in the general performance. Solving this issue of not being able to install the update for windows has been a matter of concern for many people.

windows could not complete the installation

To help out all of the troubled people with the issue of Windows installation failure, here we have gathered all the reasons and measures that would help anyone to resolve the issue of Windows could not complete the installation. Just follow the given article as your guide to fixing the errors on your Windows.

Why are you Facing the Issue of Windows could not Complete the Installation?

Windows is critical for your computer, it is very difficult to work with your device. If any Windows 10 installation failed error occurs then there is a lot of disturbance in your working with the device. When this error is something to do with the installation of the Windows update, it becomes more crucial to be resolved. A problem can be fixed only if you know the reasons causing such failures. Here are a few reasons that might be causing the issue:

  • Lack of storage can be one of the prime reasons why your window is unable to complete the installation
  • The third-party security software also sometimes restricts such installations, which might be a reason for your Windows installation failure.
  • The faulty hard drive is also among the reasons that are responsible for causing trouble for your device so you can look out for your hard drive and see if it is working fine.
  • Having a virus in your system is the root cause of many issues that you might be facing on your device. This virus can also lead to corruption in your device and further disabling it to complete the installation.
  • If your device lacks the requirements necessary for the update to run then also your Windows might not be able to complete the installation.
  • Corruption in the Boot Manager is also one of the prime reasons for causing the issues like Windows can not complete the installation in Windows 10.

These are a few reasons that might be causing Windows 10 installation has failed issue. There might be other reasons that are also responsible for Windows can not complete the installation but the above-mentioned are the most prominent reasons behind this issue with Windows.

How do I Fix this Issue of Windows being Unable to Complete the Installation?

No one wants to be stuck with an incomplete update of their windows and put all their work on pause. In order to help you find the best and easiest solution for your problem, here are some of the solutions to fix the issue of Windows can not complete the installation. Let us have a look at those options one by one and understand the steps to take those methods forward:

1. Clean Boot Installation

Clean Boot Installation
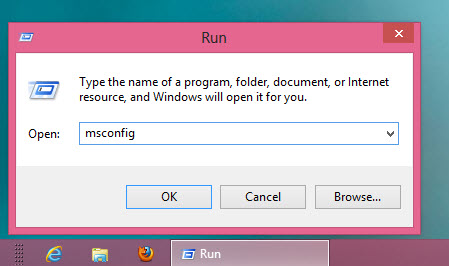
Using a Clean Boot installation can be really helpful when facing issues like Windows can not complete installation. So if you are also facing issues as such in your Windows then follow the below-mentioned steps to install a Clean Boot in your device:

  • Go to the “Run” dialog box and type “MSCONFIG”
  • Click on the option “OK”
  • After that select the “Boot” 
  • Now open the “General tab” and click on “Selective Startup”
  • Uncheck the option “Load startup items”
  • Move to the option of “Services” and click on it
  • Now check the option “hide all Microsoft Services”
  • Select the option “ Disable all” then.
  • Reach out to the “Startup” and click on “Open Task Manager”
  • Disable the items that were enabled and save the changes
  • At last, enable the necessary startup items and reboot your device

2. Clean up your SpaceClean up your Space

If your device lacks the space then also you might face Windows 10 installation failed issue. In some updates, there are requirements specifically for the storage to be free. So just have a look at the storage of your device. If you find your device lacking storage then you can just get rid of unused and unwanted files and applications. This would free some space in your device and allow you to have your installation completed by solving the issue of space in your device

3. Get Rid of the Language Pack

Get Rid of the Language PackThe language pack from the previous windows update can also lead to Windows 10 installation has failed error. So the removal of such a language pack helps you to solve the issue of Windows can not complete installation. Here are a few steps that would help you to uninstall your language pack:

  • Open the Windows search bar
  • Reach out for the option “change display language”
  • Launch the above-mentioned option
  • Select “English{US}”
  • Save the changes
  • Go to the search bar and search for “Uninstall display language”
  • Click on “Uninstall display language”
  • Delete the alternative language 
  • Finally, Reboot your device and check if the problem is solved or not

4. Run an Antivirus Scan 

Run an Antivirus Scan 
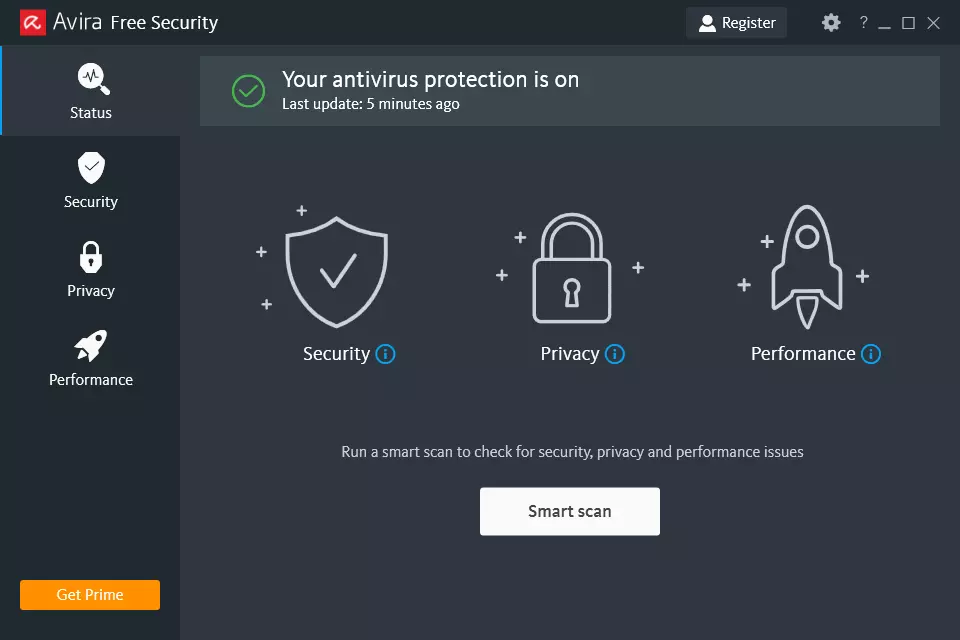
Viruses are the most harmful component of your device. They cause you several issues from improper functioning and situations where Windows can not complete the installation. In order to get rid of any such problematic virus, you can just go for a quick antivirus scan. Having this scan would help you to shut down the issues caused by any virus on your device.

Read More: GUIDE ON “HOW TO REINSTALL WINDOWS 10 WITHOUT CD” (2023)

The Final Say 

Don’t let the issues and errors of Windows stop you from having an updated Windows. You have all your solutions laid out in the above article that will help you to solve the issue of Windows can not complete installation. Use this information to help you find an easy and effective way to get your windows could not complete the installation error fixed. Hoping this article and all the information would be helpful for everyone you are going through the Windows 10 installation has failed error.

FAQs 

Q1. How do you fix Windows that could not complete the installation?

You can fix Windows could not complete the installation through the following ways:

  • Check the requirements of the installation and see if the device has all those requirements fulfilled. If not then try to manage all those things to fix this installment issue
  • Have a Clean Boot installation on your device
  • Get rid of the existing language pack from your device
  • Use account creation Wizard

Q2. Why does my Windows 10 installation keep failing?

Your Windows 10 installation keeps on failing because your device is not meeting the basic requirements that are mandatory for the installation. This clash in the requirements can make your Windows keep failing in the attempt of installation.

  • There are running programs in the background that are making your attempt at installation fail.
  • The corruption of the boot manager might also be responsible for the disabling of your Windows to complete the installation.
  • If the file extension that you are using is not proper then you might not be able to complete the installation.

Q3. How do I fix a Windows 10 installation that won’t boot?

In order to fix a Windows 10 installation that won’t boot you need to follow the given below methods:

  • Get rid of all the USB Devices connected to your system.
  • Give your device an antivirus and malware scan
  • Turn off your fast boot
  • Update the settings of your BIOS
0x8024001e

For Windows users, specifically, those who make an intentional effort to browse the Microsoft Store, the error code: 0x8024001e may be highly inconvenient. The code: 0x8024001e issue can prevail due to the occurrence of a myriad of difficulties, and this also stops the user from updating their system. These consist of computer viruses, incomplete updates, and faulty or missing DLL files. 

However, numerous factors may be to blame for the code 0x8024001e. This article as a guide will provide a thorough breakdown of the procedures that may be applied to fix this issue. Here, we have put up a list of fixes that can be used to repair each of the errors described.

What is Windows Update Standalone Installer Error 0x8024001e?

0x8024001e

When upgrading their operating system or installing programs from the Windows Store, many Windows users see the error code 0x8024001E. The installation of firmware upgrades and application updates is prohibited when the error code 0x8024001e is encountered. Both Windows 10 & Windows 8 seem to have this issue. Windows XP/7/Vista could perhaps possibly be impacted, unfortunately. The boot does begin, however it abruptly ends after quite a short while with a warning.

Causes of Code 0x8024001e

Users frequently experience Windows Store issues, and the issue with 0x8024001E is only one of numerous. Several causes, including the following described below, could perhaps cause error code 0x8024001E to show up –

  • Erroneous settings for time and date.
  • Microsoft Store cache issues.
  • Missing DLL Files
  • Infection with malware.
  • The operating system is outdated.
  • System files that have been damaged.

Methods To Fix Error 0x8024001e

The preceding solutions have been provided in a sequential manner according to their relevance. Readers are urged to choose one option at a moment. It is suggested that the user select the next option down the listing if one particular solution does not operate. Keep reading the article.

Method 1: Analyzing the computer’s internet connection

The error 0x8024001e code on a computer may also commonly be fixed in this way. The root of the code 0x8024001e issue on the system is frequently found to be unstable internet access. Quick instructions can be found online if there is a difficulty with the internet connection. In this case, the user needs to get in touch with their ISP. 

This error might infrequently also be brought on by inaccurate information about just the day and time in a specific location. The user should attempt restarting the machine to see whether the Microsoft Store problem 0x8024001e has been resolved after implementing this fix. Or else, it is suggested that you proceed with the next alternative on the checklist.

Method 2: Software Distribution Folder Rename

Here, you can try to modify the Software Distribution directory in an effort to fix the 0x8024001e error because it may occur even when the Windows Update service is active. The following is what you must follow properly –

  • First, when the run dialogue box appears, concurrently press Win + R, type services.msc, and then press OK.
  • Secondly, choose to Stop from the context menu when you see Windows Update inside the directory of services.
  • Next, go to Local Disk (C:) > Windows on This PC by opening it. services.msc,
  • Then, the SoftwareDistribution folder may be found by searching for it and selecting Rename from the context menu. Change the folder’s name to SoftwareDistributionOld or something similar.
  • Now, locate the Windows Update service again, and afterward repeat step 1 by right-clicking it and clicking Start.

Hence, to check if the problem still occurs after completing these instructions, restart your computer. 

Method 3: Start System File Check

SFC is one of the universal solutions that can help you fix 0x8024001e error, Error Code 0XC0000001, etc. There are a number of steps that have to comply in order to perform the SFC scan on Windows 10 –

  • First, go to the Start menu and type “Command Prompt” to launch it.
  • After the Command Prompt has opened, enter the command sfc /scannow. By doing so, the scan will start. Depending on how long it takes for the scan to finish, any faults it finds will be fixed automatically.command sfc /scannow.
  • You must reboot your computer and conduct the check once again if any issues are identified that cannot be corrected. In order to fix issues with your system image, you may also utilize the DISM utility.

Method 4: Restore your System

When a problem with your computer arises, restoring your system can be a useful step in the troubleshooting process. You can use your computer throughout the restoration process, which typically lasts less than an hour. Making a backup of your crucial files is always a smart idea before beginning a system restore, though. For Windows 10, follow the below-mentioned steps to perform a system restore –

  • First, type “Create a restore point” from the Start menu to launch it.
  • Secondly, the very first result that appears should be clicked.
  • Now, select “System Restore” from the menu in the newly opened window.System Restore
  • In order to select a restore point, follow the instructions.
  • Lastly, restarting your computer will complete the operation.

Method 5: Performing the Registry Key Repair

If the 0x8024001e issue continues, it may be fixed by repairing the Registry entry. Follow the steps provided to attempt to resolve the registry core issue and hopefully fix the 0x8024001 issue on your computer –

  • First, choose the Advanced Start-up Options option underneath the Start menu.
  • Secondly, access the general settings panel by selecting one of the search results.
  • Then, on the right side of the window, which is visible from the screen, is the Advanced Start-up option.
  • Now, to restart the computer in an advanced type of operation, choose the Restart Now option.
  • Next, select Advanced Options from the list that now displays.Automatic Repair
  • Now, select the option labeled “Automatic Repair” from the selection that displays. By doing this, the system will restart. Whenever such a dialogue appears, select the administrative account.

Method 6: Use the Troubleshooter in the Windows Store App

If you’re having issues with Microsoft Store apps, you may use the troubleshooter for Windows Store Apps. Perform these steps to launch the troubleshooter:

  • First, type Control Panel into the Windows key, then press Enter to continue.
  • Secondly, select Troubleshooting in the upper-right corner of the Control Panel by clicking View by: Category.
  • Then, choose Fix issues with Windows Update from the System and Security menu.Use the Troubleshooter in the Windows Store App
  • Now, in the bottom-left side of the forthcoming page, choose the Advanced link.
  • Then, pick Run as administrator at the bottom of the Advanced Settings screen by scrolling down. Enter the administrator password or any other confirmation information if prompted.
  • Lastly, whenever the troubleshooter is finished, close it down and attempt to update your application once more using the Microsoft Store.

Frequently Asked Questions (FAQs)

Q1: How do I fix error 0x8024002e?

Ans: To fix error 0x8024002e, you need to follow the methods –

  • Employ the Windows troubleshooter.
  • Turn off the firewall and antivirus software for a while.
  • Launch the computer in clean boot mode.
  • Put the value 0 in the registry entry DisableWindowsUpdateAccess.
  • Activate the Windows Installer service.

Q2: What may be 0x8024001e’s probable causes?

Ans: 0x8024001e may have a number of reasons-

  • Damaged system file
  • One of the Windows Update service’s issues.
  • Your antivirus software has an internal error.

Q3: What does the command WSReset do?

Ans: Microsoft Store vulnerability in Windows 10 is exploited by WSReset.exe. It is capable of deleting files on a host while avoiding detection by antivirus software. Users may diagnose and clear the cache for the Windows Store using the genuine diagnostic tool Wsreset.exe.

Rstrui exe

Are you experiencing rstrui exe error on your system? Is rstrui exe not working? If so, don’t panic. We are here with solutions. 

Well, Microsoft Windows includes the “rstrui.exe” package, which is defined as a command-line tool for starting System Restore. However, in other words, rstrui.exe is not something that can be termed as danger to the computer, but alternatively, it gives the users the option of going back in time to a former condition for the computer. An individual could explicitly set up a new system restore with System Restore, or can go back in time to one of the prior restore locations.

In this article, we will make you go through some of the best methods for fixing the “Rstrui.exe” issue on your system. All you need is to just read the article and follow all the instructions.

Causes of  “rstrui.exe” Issues On Computer

Here, let us go through the most common causes for which an individual can experience “rstrui.exe” issues on their computing device. The causes for this trouble are mentioned below –

  • A damaged or missing copy of the system file rstrui.exe.
  • The file system on the hard drive might be destroyed or damaged by malware, power outages, or drive write failures.

Methods to Resolve “Rstrui exe” Not Working Issue

Well, here we are going to discuss the most effective methods to solve “rstrui.exe” or “rstrui exe windows 7” not working on your device issue.

Method 1: Windows Operating System must be Updated

Occasionally, certain “Rstrui.exe” issues might also be brought on by an older version of Windows. Therefore, be careful to promptly install the most recent OS updates if your system hasn’t received an update in a while. However, you may upgrade the OS(Operating System) using the steps given below –

  • First, select “Start” and then choose the “Settings” icon on your Windows computer.
  • Then, a window labeled “Settings” will be presented to you. To continue, click on “Update & Security.”Update & Security.
  • Now, click the “Check for Updates” button there. Windows will proactively install any updates that are widely accessible. For the duration of the procedure, make sure your computer/device has a reliable Internet connection.

Method 2: Test out Safe Mode

In the Safe Mode, individuals were capable of utilizing Restore Point, irrespective of the fact that it was not operational. Because of this, you can always use Safe mode to attempt to fix problems. Follow the steps below.

  • First, go to Start then Settings then Update & Security. Next, select Restart now in the Advanced starting section by clicking Recovery on the left side.
  • Now, go to the Troubleshoot top, then to the Advanced Options, follow the Startup Settings, and then tap Restart.
  • Then, to choose Safe Mode hit the F4 key on the device.

Then, you need to Start a system restoration. By going through the steps listed below in Safe Mode you can do that –

  • Open the command tool and enter the search term “rstrui.exe”
  • Next, pick a generated restore point from the list in the System Restore window to proceed.
  • Then, the restoration point must be verified before clicking Finish to begin.

Method 3: Windows UpdateWindows Update

Well, an outdated/outmoded version of the Windows operating system (OS) can often be the cause of rstrui.exe glitches on your system. All you need to do is simply follow the steps mentioned below –

  • First, in the Start menu on your device,  choose Settings then Update & Security.
  • Secondly, whenever you click Check for updates, Windows will start downloading whatever updates it identifies.
  • After obtaining the upgrades, choose Install now. Then, after installing the updates on the device, the windows will require to be restarted for multiple instances.

Windows Update is the universal solution to resolve any issues arising in your system from Windows 10 taskbar frozen issues to windows not loading & more.

Method 4: Employ an Antivirus Programme

Employ an Antivirus Programme
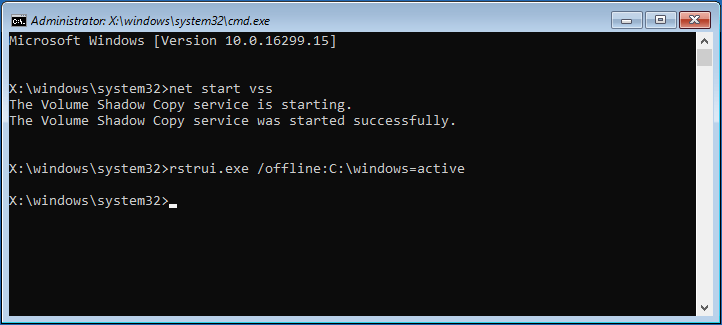
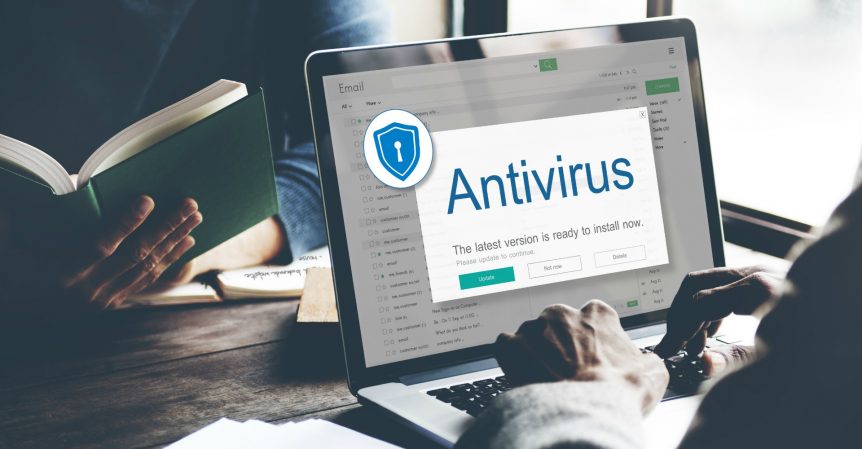
However, the Rstrui.exe not working or other errors could also be triggered by virus-infected files in the system, therefore an individual can completely utilize antivirus software to resolve the problem. Whereas, the users of Windows 10 may indeed employ the incorporated Windows Defender to identify and eliminate virus-infected data.

Method 5: Patching up the Windows RegistryPatching up the Windows Registry

Difficulties with your system’s registry might frequently be too responsible for the issue. Problems with rstrui.exe might be brought on by corrupted registry entries, therefore you will need to locate and eliminate the offending items. 

However, it is recommended to get registry cleanup software because doing this manually could result in a serious issue later. Hence, the situation really needs to be completely fixed. After you erase your registry, everything should start working as well.

Method 6: New User Account CreationNew User Account Creation

Your user account can be the cause of any issues you have while using rstrui.exe. The rstrui exe issue or even other issues might be generated by harm to the account. Therefore, on your Windows computer, carry out the following actions/steps to establish a proper new user profile on your system –

  • First, navigate to Accounts in the Settings application on your device.
  • Secondly, select “someone else to this PC” under “Family & other persons” in the menu bar on the left side.
  • Then, you may add a member without a Microsoft profile by picking “Add a user without a Microsoft account” if you do not have that user’s sign-in credentials.
  • After that, just type in the new account’s password and username and then press “Next” to finish the procedure.

Hence, log in and examine to determine whether your problem has been solved, once the account has been created there. 

FAQs

Q1: How can you fix “Rstrui exe” not Working Issue?

Ans: You can fix Rstrui exe, not Working Issue by implementing the following methods –

  • Update your Windows Operating System.
  • Patch up the Windows Registry.
  • Test out Safe Mode.
  • New User Account Creation.

Q2: What does Rstrui exe do?

Ans: System Restore may be launched using the command-line tool “rstrui.exe,” which is a Microsoft Windows component. The rstrui.exe is not a hazard to the device; contrary, it provides users the possibility of going back in time to a previous restore point of their system.

Q3: What is the System Restore point and why do we do it?

Ans: A system restores point is indeed defined as a copy of essential Windows operating system (OS) information and configurations that can be used to get back the system to its original period whenever it encounters a glitch or malfunction on the system/computer.

Q4: What does Wininit exe do?

Ans: The Ms. Windows operating system comprises the Windows Start-up application known as Wininit.exe function. A file with an executable extension has the moniker “wininit,” which represents Windows Initialization.

you must enable system protection on this drive

Are you not able to rebuild your Windows operating system? Have you noticed the error message on your computer that states “you must enable system protection on this drive”? Don’t worry if you are experiencing this on your system.

This specific article will serve as a guide to solving the error message “you must enable system protection on this drive” on your device. We will provide here some of the most effective ways to fix the issue quickly. Just continue reading this article till the end.

Why Does Windows Display the Message “You Must Enable System Protection on This Drive”?you must enable system protection on this drive

Here, we will discuss the reasons for the error message on the Windows system “You Must Enable System Protection on This Drive”. Well, most commonly there are two different things that might create the following issue on your device. The causes are mentioned below:

  • Your computer’s or the device’s System Protection service is not operating at all, in which instance you need to restart it appropriately. 
  • System Protection should not be switched on your system.

Methods To Fix the “You Must Enable System Protection on This Drive” Issue On The Computer

Well, here we will discuss all the possible methods to fix the “windows 10 system protection” or “system protection windows 10” issue on the computer. You can try applying any of the following methods by your own choice or can also try all the methods that are mentioned below to solve the issue as fast as possible.

Method 1: Reboot the Windows Computer

Before performing any other method, the initial action you must do anytime you experience a glitch be it your windows 10 Taskbar frozen to the system hanging frequently is to reboot your Windows computer. Restarting the device can frequently take care of a handful of uncomplicated difficulties. Follow the step below to perform this –

  • Select the Power switch and afterward choose the Restart option from the Start menu or the Windows icon just at the bottom-left of the monitor.

After that, verify to determine whether the “You Must enable system protection windows 10 on this Drive” problem has been solved after the computer/device has been rebooted or restarted.

Method 2: System Protection Service Reboot

On your Windows laptop, it is important to activate Protection System service. This can resolve various errors related to this, thus can also solve the “you must enable system protection on this drive”. You can really give it a try. Follow the steps below to apply this method to your device to solve the issue –

  • First, you need to press Windows + R and Cmd and after that, you need to click the Ok button. 
  • Secondly, the command below is executed when the command prompt is opened –System Protection Service Reboot
“Net Stop Vss”.
  • After that, you must type the following command written below and then press the Enter button –
“Net Start Vss”.

Hence, at this point, confirm that your computer’s System Protection Service has started its operation in the system.

Method 3: Use the Control Panel for System Protection

The System Protection feature could also be configured using the control panel in Windows, which serves as a substitute for the Command Prompt. Doing this could really be helpful or also might solve the “you must enable system protection on this drive” issue on your windows computer. Kindly, follow the steps mentioned below properly to apply this method –

  • First, inside the search field, type “control panel,” and click the resulting result to launch the desktop application.select System and Security > System
  • Secondly, to activate protection system menu, select System and Security > System. Next, the target drive should be selected underneath the System Protection section. To configure it, click the button.
  • Now, select the checkbox for Enable system protection. Then, on your computer, press OK and Apply.

Method 4: Change The Registry Files’ Names

You could activate the System Restore feature on your Windows Computer with the assistance of Command Prompt. Nevertheless, prior to actually executing it, you should indeed alter the names of the two windows registry files on your device. This could solve the “you must enable system protection on this drive” issue from the device quickly. Therefore, follow the aforementioned steps below to apply this method carefully and correctly –

  • First of all, the Windows Installation Disk should be connected to your computer.
  • Secondly, in order to access the BIOS menu, restart your Windows computer.
  • Then, you must now choose an option screen, proceed with the troubleshooting, then tap on the advanced options.Cd{067ed41ba9a2bcea5192cfba5c5678b094ea6af66db36aaabba2135c9da953a2}Systemroot{067ed41ba9a2bcea5192cfba5c5678b094ea6af66db36aaabba2135c9da953a2}\System32\Config.
  • The Config Folder Can Now Be Opened By Typing The following Command –
    Cd{50afa256e6562afb2cd7837d8db3fd71ce947f26b53ffff72a77bb9141ae121a}Systemroot{50afa256e6562afb2cd7837d8db3fd71ce947f26b53ffff72a77bb9141ae121a}\System32\Config.
  • Now, enter the following commands mentioned below to rename the files in the next step.
“Ren SYSTEM System.001”.
“Ren SOFTWARE Software.001”.
  • Finally, type the below-provided command to launch the System Restore utility on your device –
“Rstrui.Exe /Offline:C:\Windows=Active”.

Closing Lines 

We hope the above-mentioned methods would definitely help you out in fixing “you must enable system protection on this drive”. In this article, we have provided all the possible ways you can apply it on your device if you are experiencing the same on your device. For any further assistance, you can always get back to us 24×7.

Frequently Asked Questions (FAQs)

Q1: Where could I locate system protection?

Ans: To locate system protection on windows, follow the steps below –

  • First, hit the Windows Key + I or choose Start > Settings. 
  • Next, the System is situated on the left, click it.
  • Then, on the right, click About. 
  • Next, click on the System Protection tab.

Q2: How can you fix the “you must enable system protection on this drive” Issue On The Computer?

Ans: You can fix the “you must enable system protection on this drive” issue on the computer by applying the following methods mentioned below –

  • Change The Registry Files’ Names.
  • Reboot the Windows computer.
  • Use the Control Panel for system protection.
  • System Protection Service Reboot.

Q3: What does a System Restore do?

Ans: By “snapping” a few file systems and the Windows registry, System Restore generates Restore Points which can be used to rebuild a device. System Restore permits users to resolve installation difficulties or corruption of data without needing to reinstall the operational platform and restore a system to its previous state.

Q4: How come System Restore does not work?

Ans: Windows System Restore could not work correctly when the operating system is running in normal mode. If Windows is experiencing problems with hardware driver issues or erroneous startup applications or processes. You might therefore really have to boot the computer into Safe Mode. Prior to actually attempting to run Windows System Restore on the computer.

Q5: Can viruses be removed via System Restore?

Ans: Viruses as well as other malware that you can’t get removed may occasionally be eliminated with the assistance of a system restore. All of your data on your system’s hard disc and any viruses will be removed instantly.