While launching Windows 8, Microsoft decided to do away with the Start Menu and it got eliminated from the list. Because Microsoft wanted its users from the automatic way of execution of programs and applications. Basically, Microsoft wanted its user to be free from a batch script called autoexec.bat i.e. move away from a scripted and command-line environment as the previous version sometimes required when it was booted. That’s why it introduced the Windows 10 startup folder yet invisible, unlike its previous version. You can access and operate it in a different manner; functions are still operational, some even updated.
Windows 10 startup folder is a unique specification or folder in itself because it runs your favorite programs automatically, prompted under your control. Hence, if you are looking to learn to use the windows startup folder sophisticatedly so that your productivity increases, even more, you should not ignore the given below explanation and a resourceful guide.
A Little Bit More Understanding of Windows 10 Startup Folder
As mentioned above, the Windows startup folder is a special and unique folder on your machine (PCs or laptops) that will run your favorite programs or any automatically. If you are using Windows 10, you would keep your programs inside your Win 10 startup folder. It will run on its own when you start your machine, saving the loading time of the programs and the applications.
Read more: WINDOWS RESOURCE PROTECTION FOUND CORRUPT FILES BUT WAS UNABLE TO FIX SOME OF THEM
Accessing Windows 10 OS startup folder: Where it is?
As for its location, Windows 10 startup folder has two locations: One functions at the system level giving access to all the user accounts called the All Users folder, and the other works at the user level specific and unique to the user account called Current User Folder. You can also call the current user folder Personal User/Startup Folder.
It is important to understand the difference between All User Folder and the Current User Folder. Based on the understanding, you will be able to resolve the issues and glitches if encountered.
You can access the Startup Folder Windows 10 in different ways.
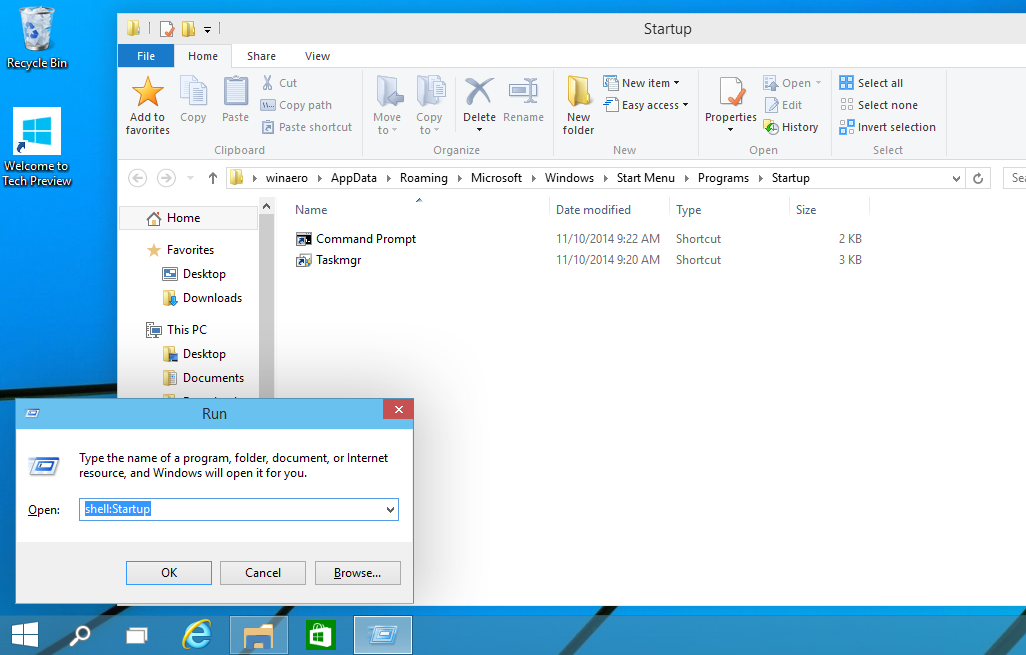
Access Windows 10 Startup Folder Using Command Prompt
- Step #1 – You can press ‘Windows+R’ to open the Command Dialog.
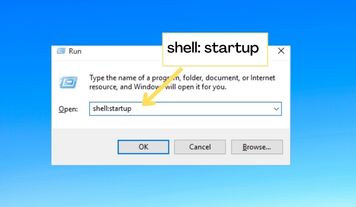
- Step #2 – Now, on the dialog box, type ‘shell:Startup’ to access the personal Startup folder. In order to access the Startup folder for all users, you can type ‘shell:common startup’. Then hit the Enter key.
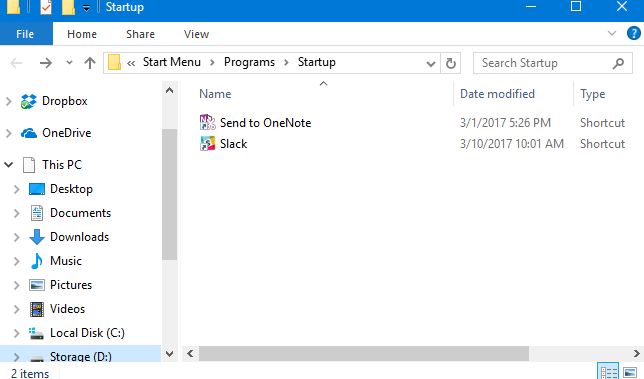
- Step #3 – All the Startup programs listed in the Startup folder show up.
Access Windows 10 Startup Folder Using File Explorer
You can use the below steps to access the Windows 10 Startup Folder depending on the user-specific, personal, or all.
For personal users:
- Step #1 – Please open the ‘File Explorer’
- Step#2-Please use this path ‘C:\Users\[User Name]\AppData\Roaming\Microsoft\Windows\Start Menu\Programs\Startup’ and enter in the given path for ‘File Explorer’
For all and shared users:
- Step #1 – Open the File Explorer again
- Step #2 – You need to enter the following path and press Enter to find the Startup folder for all users: Path: ‘C:\ProgramData\Microsoft\Windows\Start Menu\Programs\Startup’
Note: Locating the Startup folder using File Explorer, it is mandatory for you to enable the ‘Show the hidden files, folders, and driver and apps’ option.
Follow these steps in case you miss out.
1- Open the File Explorer Options
2- Find and click on ‘View’ to find Show hidden files, folders, and drives in Advanced settings and select it.
3- After that, click on ‘OK’
It is not only a shortcut to your programs, files, and applications but also a time saver to the loading time required for them to appear on your PCs while your OS boots up. This is how you will be able to save the major chunk of time required for your programs to load.
One important disadvantage is that when increasing the number of additional programs to the Windows startup folder, boot time might get a little slower. In that case, it is better for you to remove the unnecessary programs from the startup folder Windows 10.
Adding Programs to Windows 10 Startup Folder
Adding any programs to your Windows 10 startup folder is easy.
- Step #1 – Once you have located the file, right-click on the program you’d like to add. Then click on Create Shortcut, this will create a shortcut for your program.
- Step #2 – Now, press ‘Windows+R’ simultaneously to launch the dialog box, type ‘shell:startup’, and then press Enter. This will open your personal Windows 10 startup folder
- Step #3 – After selecting the program to be added, press ‘Ctrl+C’ and press ‘Ctrl+V’ to paste the created Startup folder.
Disabling Programs in Windows 10 Startup Folder
If you feel you do not want any particular program to automatically run, you can disable them or any using the three ways mentioned in the following manner:
1: Using Task Manager
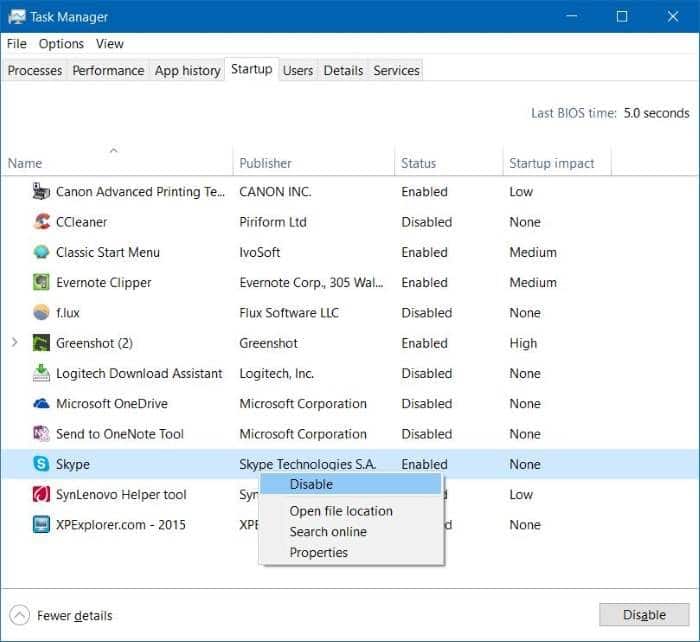
Step #1 – Launch the Task Manager by pressing ‘Ctrl+Shift+Esc’, click the Startup and find your program to delete.
Step #2 – The startup inside the Task Manager will show up on the list of programs. You can select the one you wish to disable. Select the program and right-click on it and click Disable to stop or disable.
2: Using Command Script
- Step #1 – Launch the Run window by pressing ‘Windows+R’ and then type ‘shell:startup’. This will reflect all Startup programs.
- Step #2 – Select your program to remove or delete and then click on Delete.
3: Using App Management
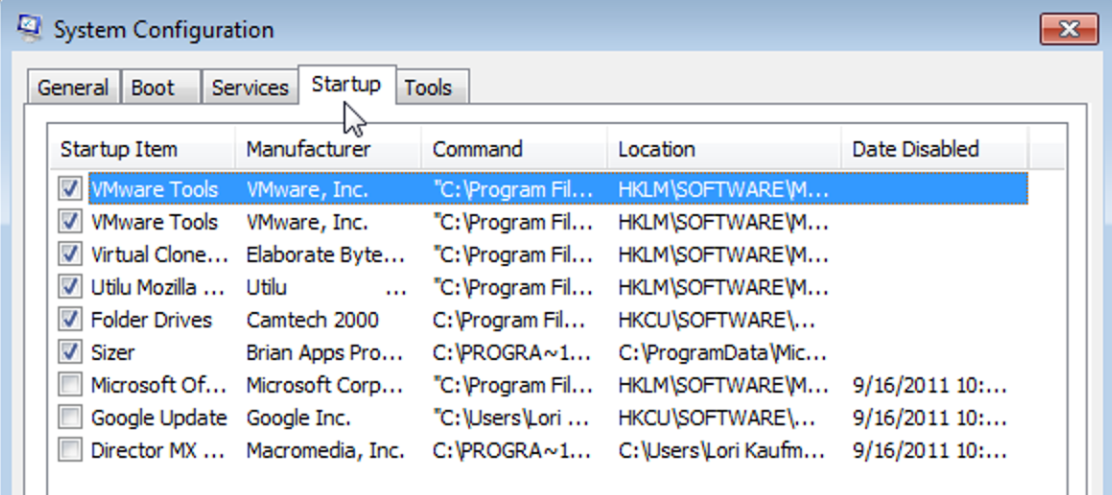
- Step #1 – Launch ‘Startup tasks’ in the Windows search box or Cortona and press Enter. It will show up on the list of the program interface.
- Step #2 – Select the one you want to disable and click Turn off.
Programs to Add and Disable to and from Windows 10 Startup Folder
Most importantly, you will add your frequently used-favorite files and programs to Windows 10 Startup Folder. You will also add the ones which run fast and appear on your system.
Based on your needs you will take the following precautions while adding the programs:
1- You will add antivirus software to avoid viruses and cyber-attacks. You have it running all day while you working on your PCs.
2- It is quite alarming to lose data, it is essential that you launch and add Cloud Storage software to Windows startup folder to store the back file there.
However, you will not add the following programs such as gaming software and large-scale software as they will slow down the boot time.
Read more: LATEST SOLUTIONS FOR “WINDOWS UPDATE CANNOT CURRENTLY CHECK FOR UPDATES”
Conclusion
Having a Windows 10 startup folder is a good practice as it reduces the loading time for programs and it also creates shortcuts. There are major ways by which you can manage your programs and maximize your productivity. You would need to keep in mind that you should not keep or put any programs that would take a longer time to load on.
Frequently Asked Questions
Q1. How to make a program run on startup windows 10?
You can use these steps:
1- Find the app to run on Startup Windows 10
2- Right click on it, select more and select Open file location.
3- Having the file location open, press Windows+R, type ‘shell:Startup’, and then hit OK.
Q2. How to remove a program from start-up?
There are three ways:
1: Task Manager
2: Using Command Script
3: From App Management
Q3. How to add a program to startup in Windows 10?
You can use the below-mentioned steps:
- Step #1 – Once you have located the file, right-click on the program you’d like to add. Then click on Create Shortcut, this will create a shortcut for your program.
- Step #2 – Now, press ‘Windows+R’ simultaneously to launch the dialog box, type ‘shell:startup’ and then press Enter. This will open your personal Windows 10 startup folder
- Step #3 – After selecting the program to be added, press ‘Ctrl+C’ and press ‘Ctrl+V’ to paste the created Startup folder.
Author Profile
Latest entries
 Technology2023.04.20How To Connect Roku To TV? Easy Guide To Follow
- Technology2023.04.20How to Connect Nintendo Switch to TV? (With and Without Dock)
- Technology2023.04.205 Best Barndominium Design Software (DIY & Professional)
- Technology2023.04.20What Is The Relation Between Behavior-Driven Development And Agile Methodology?