The leading computer operating system, Windows 10, often causes people discomfort to use. For specific instances, it is indeed pretty apparent that installing Windows 10 isn’t always relatively easy. The user may find themselves utterly baffled as to what actually transpired when a procedure is suddenly interrupted by an unforeseeable error.
In actual fact, these problems also significantly affect Windows 11, as it appears to be out. The same Windows 11 installation issues are being experienced by other customers who are attempting to upgrade to the newest operating system. Hence, the error code 0x8007025D is one of these vexing errors. When a fresh installation of Windows 10 is nearly complete but has not yet reached an irreversible point, this specific error problem typically manifests on your computing device.
If you are facing this issue on your computing device, no need to worry. In this article, we have brought up to you the latest solutions which will help you get rid of this frustrating error code 0x8007025d quickly from your device. Also, we will provide you with a full explanation of what it really is and the reasons behind it. So, without any delay, let’s move forward.
Windows Error Code 0x8007025d: Introduction
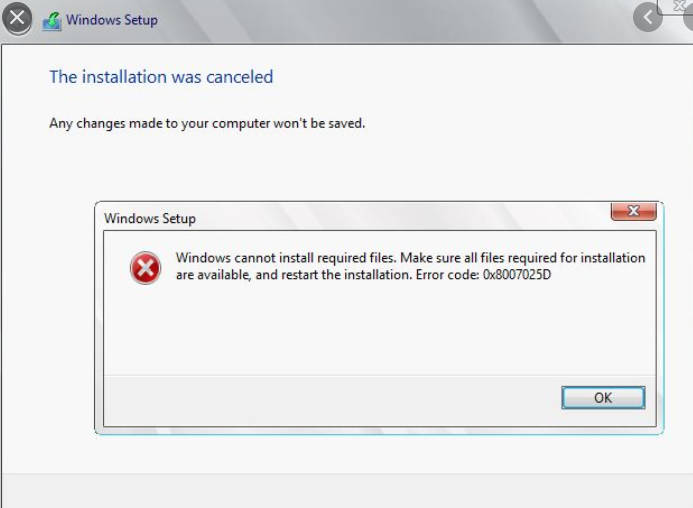
The error code 0x8007025D on Windows is one of the numerous errors that the Windows system generates on your computing device. This prevails in case of significant problems in the process of transferring or copying information from the source to the particular destination point. This Windows Setup error code “0x8007025D” is also known as the “The installation was cancelled” problem.
Indeed many individuals around the world have lately reported seeing this problem while performing a fresh installation of Windows 10. The vast majority of individuals who encountered this problem were attempting to install Windows 10 properly in the first place by using a USB flash drive, which merely indicates that the USB on the device is at fault for this issue.
But, it also occurs when upgrading Windows 10 to a more recent feature release or when switching from Windows 7 or 8.1 to 10 using a portable disk drive. When the installation commences, yet before the majority of the Windows files have already been transferred to the PC, perhaps the operation unexpectedly terminates and produces a white backdrop with the following below mentioned error pop-up message –
- Windows cannot install the required files. Make sure all files required for installation are available and restart the installation. Error code: 0x8007025D.
- Windows Setup.
Read more: GUIDE TO FIX WINDOWS UPDATE ERROR 0X80070057
Reasons Why You Might Receive Windows Error Code: 0x8007025d
Before jumping up directly to the solutions to resolve the Windows error code 0x8007025d on your computing device, you must be wondering for a while about what might be the primary reasons behind the occurrence of this specific error. No need to wait, here we have provided you with all the reasons:
-
Corrupted RAM
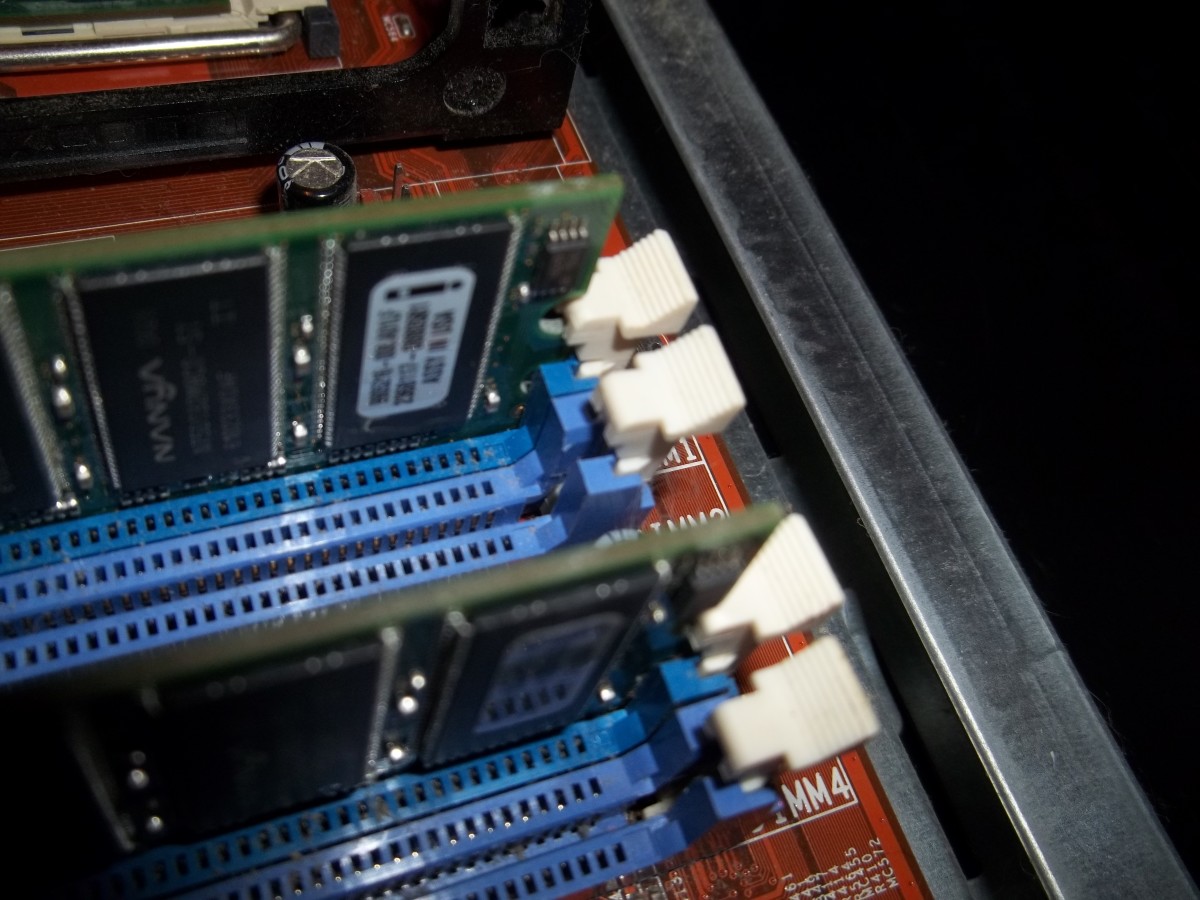
Since a fresh install does not compete for storage space with other software applications, almost the whole RAM may be probably committed to installing Windows 10. Therefore, even a tiny damaged or defective central part of the RAM might trigger this fundamental problem.
To install, Windows 10 requires at least 1GB of RAM. Hence, the buffering technology will experience an issue if data is transferred to a problematic area of the RAM, which will result in an error 0x8007025D that will be displayed on the screen of your computing device.
-
Defective HDD or SSD Space
When Windows attempts to copy data to a faulty sector or record on an HDD or SSD, an obvious error is eventually returned to the processor, which further displays the error code 0x8007025D on your device’s screen.
Therefore, when a storage space on your device has to be examined or formatted, or when disc space is used extensively such as when playing video games, several things could happen. Error 0x8007025D might also be apparently caused by a failing hard drive.
-
The Installation File itself might be Corrupt
Sometimes, the installation procedure could be abruptly halted if any file in the image is heavily damaged. Hence, some files may be unable to be decoded by Windows Setup, which results in Windows error code 0x8007025d.
-
If the USB Drive is Defective
At times, it is possible that the portable device on your computer is corrupt. Thus, an unreadable or faulty sector exists on the screen of your device, implying that the data contained in that sector cannot be read.
Latest and Simple Methods to Resolve the Error Code 0x8007025D in Windows
Hence, getting the perfect solution to fix the “Error Code 0x8007025D” on Windows in your personal device is what you are waiting for. Therefore, we have brought to you some of the best and easiest solutions to resolve it as fast as possible, which really works 100{067ed41ba9a2bcea5192cfba5c5678b094ea6af66db36aaabba2135c9da953a2}. The choice is yours.
You can try any of the solutions here. Also, if the first method does not work for you, try the next one because this specific error might be caused by a variety of problems. The following are the solutions –
Method 1: Check the Devices Connected

Before putting or performing anything on your computing device, it is important to be sure that all potential sources of interference have been eliminated. These comprise all linked peripheral devices. Before you perform the installation again, consider deleting all of them, whether they are extra USB sticks or Internet wires.
Windows copies all the contents from the USB flash drive or disc to the computer when you install your OS from a bootable media, and the installation procedure then proceeds from there. So, you can disconnect your USB device to observe what happens if the “Error Code 0x8007025D” issue only emerges after an advanced stage of the installation. The rest of the installation procedure should be completed without a glitch assuming it is no longer required.
Check again to see if it works. There are several different manifestations of patience in this situation. Without abruptly ending the installation or concluding that the process has become stuck, it may be patiently waiting a long time for the installation to be finished.
If it doesn’t work the first time, there are additional ways to try it. It is somehow possible that the 0x8007025D error is only a little glitch with no significant root issue. Possibly all that is required for Windows to install correctly is a reboot and another attempt.
Method 2: Make Your System Segmentation Smaller
Typically, a fresh clean installation will eventually result in the 0x8007025D problem. You have to choose the partition that you wish to use to install Windows at some point throughout the installation. The optimal amount of space required for Windows 10 installation is no more than 20 GB, however Windows 11 demands at least 64 GB of free storage.
The operating system is, of course, somewhat greater than that. Alternatively, if you continue to have installation errors, you may try to lower the size of your installation drive to approximately 125 GB. Hence, the probability that the area you are moving the OS to is damaged increases slightly as the partition size increases.
Now, after selecting Custom installation on the “Where do you want to install Windows?” page, just choose your installation partition and click the Extend button.
Performing this to fix the error ain’t going to help, of course, if your hard disc or SSD is corrupt or compromised in any other manner. Therefore, format the internal storage first before expanding the installation partition on your computing device.
Method 3: Use the Windows Update Troubleshooter
After attempting the aforementioned fixes, the Windows Update Troubleshooter may be able to assist you if the “Windows cannot install needed files” problem in Windows 10 is still a problem. Keep in mind that only when updating Windows with a feature build as opposed to performing a complete install, you are able to run this troubleshooter.
The Update Troubleshooter is easy to find on your computing device and also in Windows 10. All you just need to do is to just follow the below-mentioned steps:

- Simply choose the Start menu icon on your desktop. Select Settings by clicking on the Gear symbol.
- Now, a drop-down menu will appear; choose Update & Security.
- Next, choose the Troubleshoot tab on the Update & Security screen.
- Now, scroll down and click Windows Update in the Troubleshoot screen’s right pane.
- Lastly, simply choose Run the Troubleshooter under the Windows Update menu.
These procedures can assist you if you get the issue when attempting to run a feature update on Windows 11:
- First, simply choose the Start menu icon on your desktop. Select Settings by clicking on the Gear symbol.
- Secondly, when the Settings window appears, select Troubleshoot from the System tab by scrolling down.
- Then, when you reach the System > Troubleshoot page, select Other Troubleshooters from the menu.
- Once you reach the System > Troubleshoot > Other Troubleshooters screen, click the Run button next to Windows Update.
- Launching the Windows Update Troubleshooter will attempt to identify the issue. Later, when it has finished scanning, pay attention to and act upon any recommendations it provides.
Method 4: Examine your BIOS (Basic Input/Output System)
It is possible that your BIOS (Basic Input/Output System) has to be updated because it’s outdated. The reason the system usually produces issues like the error code 0x8007025D difficulty during installation is that it might not be able to maintain up with Windows 10’s modern technology. According to a number of users, changing their BIOS entirely resolved the problem.
Only in exceptional circumstances should you update your BIOS. You don’t need to do it if your BIOS is up to date or if you haven’t tried every potential fix. At first, see whether your computer has a BIOS update available, then follow the below-mentioned steps accordingly:
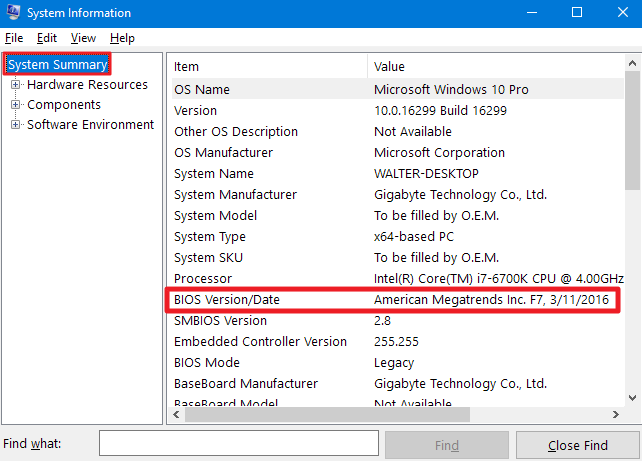
- Firstly, type “msinfo” into the Start menu to access it.
- Secondly, to open it, click System Information in the list of results.
- After your system’s name and model, look for BIOS Version/Date and make a note of the number. This is the BIOS version you are using. Remember to take note of it.
- Now, find the most recent BIOS version for your model by visiting the support page of the company that made your PC. The most recent BIOS release should be compared to the one you are using.
- Now, to download and unzip any updates that are available to your computing device.
- Finally, to install it, launch the BIOS setup and follow the on-screen directions.
Retry the Windows 10 installation after you have completed the update on your device.
Method 5: Create a Functional Copy of Windows 10
The chance exists that the picture you downloaded contains no errors. Instead, the problem is with the flash drive you are utilizing. You receive the Windows error code 0x8007025D when the system tries to read the portion of the Windows image.
Even if it is challenging to tell for sure whether the USB stick is defective, it can be the only option left if all other options have failed. In addition, installing Windows 10 on an outdated flash drive might not be possible. The same is true of Windows 11, as the new operating system has stringent requirements that render many devices that can run Windows 10 obsolete.
So, locate another USB stick, ideally one that is more recent, and connect it to your computer. simply create bootable installation media by visiting the official Windows 10 download page.
Note: Before connecting to the USB drive and starting the installation on your computer, it could be a smart idea to first make portable USB media on another computer.
Method 6: Background Intelligent Transfer Service(BITS) Restart
Restarting the Background Intelligent Transfer Service (BITS) can resolve the issue easily. Depending on your preference, Windows Update can download the ISO file for you. After finished downloading in the background, start the installation. The error “Windows cannot install needed files” with a white background may appear during the download, and you are essentially locked there. However, you may probably continue using your current installation after exiting that window.
Windows will just download the file again the following time in case of corruption. And you may go directly to Windows Update and trigger the download. Restarting the BITS service will ensure that the problem doesn’t occur again. What you need to do here, is just follow the steps properly:
- First, type “services.msc” into the Run box and then click OK.
- Secondly, select Background Intelligent Transfer Service in the right pane of the Windows Services window by scrolling down.
- Then, select Properties by doing a right-clicking on the service.
- Now, change the startup type to Automatic (Delayed Start) in the BITS Properties dialogue and then click Apply.
- Next, click the Stop option under Service Status at this time.
- Restart the machine by clicking OK.
Later, after a reboot, the BITS service will start up automatically. Launch Windows Update one again to add the functionality.
Method 7: Perform a RAM Memory Diagnostic
You can try removing one of the RAM sticks and reinstalling it if you have two RAM sticks with a combined capacity of at least 1GB (swap if the first one returns an error). Moreover, you may use the memory diagnostics tool in BIOS to look for RAM issues. To access this method you need to follow the below steps:
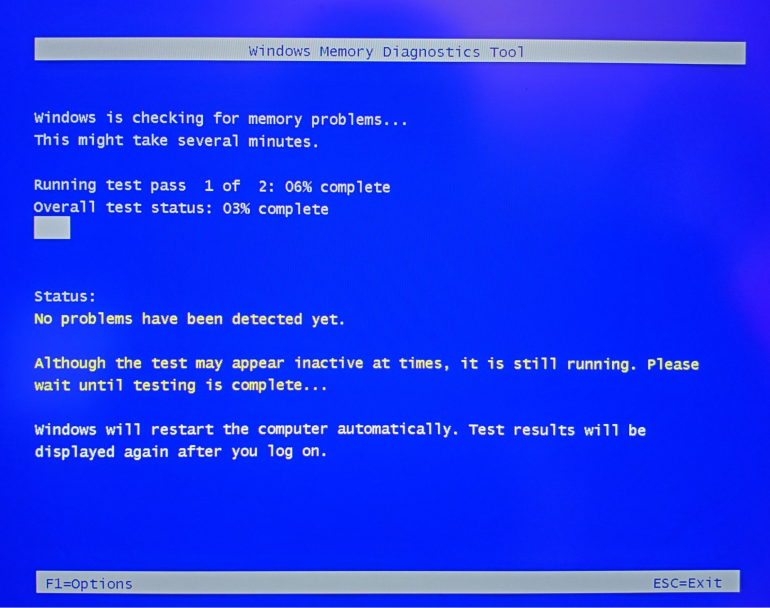
- As soon as your computer runs, depending on your computing system, repeatedly press the F2 key to open the BIOS configuration interface.
- Next, to choose Diagnostics, use the Left and Right Arrow access to all the relevant.
- Now, select the Memory Exam using the Down and Up arrow keys, and then click the enter key to start the test. Remember to keep track of the mistakes.
- Hence, replace your RAM and attempt the installation again if it continues or you discover a RAM problem.
Note: Replace your RAM and try again with the installation if the issue continues or you discover a RAM error.
Read more: HOW TO FIX: WINDOWS UPDATE ERROR 0X80070424 | FULL GUIDE TO RESOLVE
Closing Lines
We hope you have got your answer for “How to fix Windows error code 0x8007025d”. Hope this specific article, with the simplest solutions, will definitely help you to fix the particular issue. If you are still experiencing issues on this, please reach out to our team for assistance. We are happy to help you troubleshoot and fix this error. Have you been able to resolve the problem on your own using one of our methods? Let us know in the comments below.
Frequently Asked Questions (FAQS)
Q1: What is Windows Error Code 0x8007025d?
Ans: The error code 0x8007025D on Windows is referred to as one of the numerous errors that the Windows system generates on your computing device, when there are significant problems in the process of transferring or copying information from the source to the particular destination point.
Q2: How to fix Windows error code 0x8007025d?
Ans: Windows Error Code 0x8007025d can be fixed by following this methods:
- Check the connected devices
- Restart the BITS
- Examine your BIOS
- Use Windows Update Troubleshooter to troubleshoot issues with Windows Update
Q3: How do I reinstall Windows without a disc?
Ans: To access recovery, follow the steps below:
- “Start” > “Settings” > “Update & Security”.
- Click “Get Started” next to the “Reset this PC option.”
- After selecting “Remove everything,” select “Remove files and clear the disc.”
- Lastly, press “Reset” to start reinstalling Windows 10.
Author Profile
Latest entries
 Technology2023.04.20How To Connect Roku To TV? Easy Guide To Follow
- Technology2023.04.20How to Connect Nintendo Switch to TV? (With and Without Dock)
- Technology2023.04.205 Best Barndominium Design Software (DIY & Professional)
- Technology2023.04.20What Is The Relation Between Behavior-Driven Development And Agile Methodology?