Windows stop code

Windows stop code (a bug check), covers different types of errors a Windows computer can encounter. This error code displays a critical issue on your PC resulting in a BSOD Screen (bluescreen of death). The Stop Code: “CRITICAL_PROCESS_DIED” seems like a minor pop-up error but it must be taken into that a forced Windows failure will make you lose all your important data files of your system. So, let us get ready to counter this dreadful situation and fix this issue at the earliest.  Without further ado, let’s deep-dive into it. 

Overview of Windows Stop Code

A Blue screen (BSOD) or Blue screen of Death occurs on your computer system with a depressed emoticon. “:(” It happens because of a severe error encountered by your window. In that case, it tries to stop all the processes and restart or reboot the system. As soon as the OS triggers the error and crashes, it culminates in a hexadecimal code starting with 0x, with eight other characters. 

Windows Stop Code

That is the way of understanding every Windows 10 stop code. What is important here is there should not be confused with the identification of different Windows errors. Although they are similar, there are many sources for windows crash screens. Consider the error first, then start resolving the issue with us. 

Causes of Windows Stop Code

No direct and exact cause is enough to reveal this bug check code or bug check. Several inclusive drivers affect this Blue screen of the Death error code. The user-mode process & MS window components are never a root cause of the Blue Screen error. 

Contrary, they highly relate to hardware drivers/drivers installed using unauthorized web address software such as WNC(Wireless Network Cards), video cards, and others – Third-party driver, Hardware problem, MS window components, and Unrecognized sources.

Windows Stop Code

Discover Windows 10 Stop Code

Let’s say you didn’t notice the stop code as the Windows shuts down forcefully. Not just that, you have analyzed the minidump file created by the window while crashing but missed the error code or due to fast & forceful restart or rebooting didn’t allow you to notice the stop code manually. Whatever the reason, you can still find the Windows 10 stop code. See the steps:

  • The BlueScreenView tool (Nirsoft’s) can help you notify the error check code. 
  • Visit the page of Nirsoft to download and install the program. 
  • Open! and start finding the recent BSOD that occurred on the PC. 
  • Following the result, start the diagnostic of your system with a handy and classical tool. For more, you can use WinDbg discovering stop code. 

How to Fix Windows Stop Code: Basic Troubleshooters

For a particular window, several errors may occur in the OS. These errors are the specifics of finding the correct resolution for them. However, it is always good to try the basics before applying advanced concepts to any issue. Let us try them out. 

System Restart

Windows Stop Code: Restart

You must be clear with this, Right? Ok, everybody does the same, there is no issue in applying this method. It is the universal method for Basic to Advanced tech users. It quickly fixes the bug entered into your operating system. Switch it off & start again. 
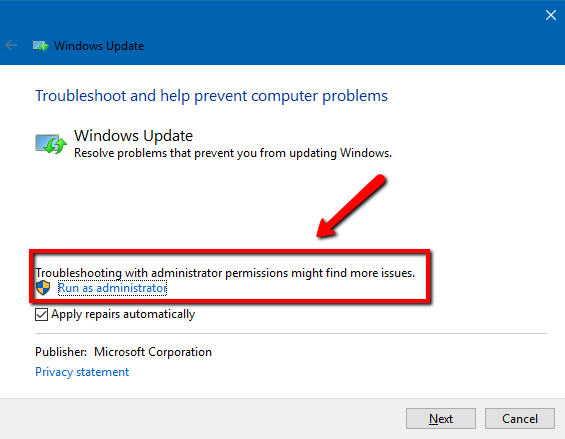
Update Your Windows

Every tech-savvy suggests Windows update to troubleshoot any technical issue.  Remove the outdated window now and install the latest version with these safety steps. 

  • Go to the Setting panel with “Window key+I.”
  • Hit the button “Update & Security.”
  • Move to “Window Update” and click “Check for updates.”
  • Save and install the file and restart the system for rebooting. 

Update the Drivers

contribution of the drivers indicates the timely update of hardware drivers/drivers. Possibilities are there that they are affecting your Windows system badly. Try removing malfunctioned devices and deleting outdated versions.

  • Click on the “Window Update” option in the “Setting Panel.” 
  • Click “View Optional Updates” (if available)
  • Navigate on the “Drivers Update” section to mark the outdated driver, further saving and installing the driver file.
  • Let the Windows update the driver and then reboot.  

Driver Update

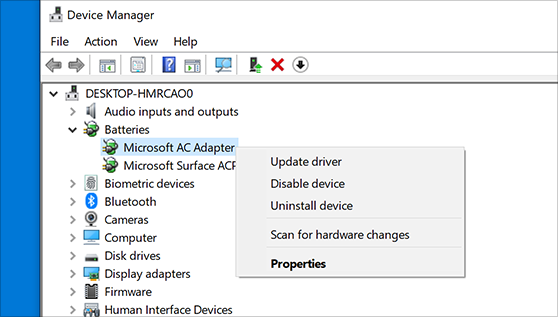
Update the Driver with Device Manager

  • Use the “Window+X” key to choose the “Device Manager” option.
  • Right-click the driver for updates and select ” Update Driver.”
  • Go for “Search automatically for driversto connect yourself with the internet and find the correct updates for your hardware drivers. 
  • In the end, install it. Restart the system to see the resolved Windows 10 stop code error. 

Uninstall the Newly Installed Software

  • Press the “Window + I” shortcut to go to the window (Setting Panel).
  • Select the “Apps tile.”
  • Move to “Apps & Features” to see the recently installed applications. 
  • Sort the “Install Date.”
  • Uninstall the recent time applications by clicking on the uninstall option.

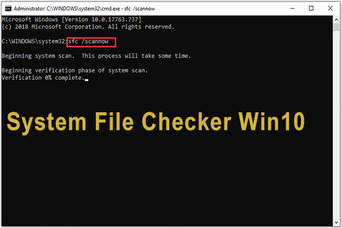
System File Checker Scan or SFC

SFC is one of the best ways for fixing the issues related to corrupted files scan and repairs. Corrupt files massively affect your OS and cause BSOD too. SFC tool helps to resolve almost all Windows issues, including the Blue screen of Death

System File Checker

  • Reboot the system with the F8 key during the boot screen visibility for entering WinRE. 
  • Use the “Choose an Option” screen to navigate the Troubleshoot-Advanced options-Command prompt. 
  • Enter “SFC /scan now” in the command section. Wait for the scanning to restart the system and find the error resolved. 
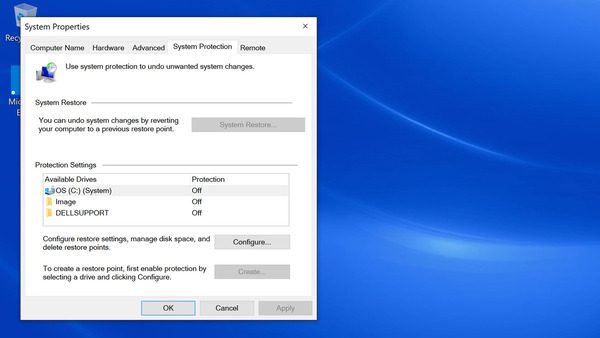
System Restore

It is among the super-effective methods of fixing windows stop code. On that note, you must understand what activities were present before the BOSD. Definitely! Your windows would have saved that point of the process. It is like going back to your past and resolving your past issues. Let us reveal the steps.

  • Find the “Search Bar” by clicking on the “Magnifying Glass Icon.” You can also do this by using the shortcut key ” Window+S.”
  • Type “System Restore” in the search bar and click on the “Recovery” option following the result. One can find it on the top of the “Best Match Category.”
  • It will redirect you towards the “Control Panel,” Where you see the “Advanced Recovery Tool Section” to click on the link ” Open System Restore.”

System Restore

  • Read the instructions carefully before moving to the next level. Here! You can restore “Past point in time.” Go for the manual option for restore point or direct yourself to choose the recommendations made by the system as “Window 10.”
  • Don’t forget to notify which files & applications will get affected by this method. 
  • Finally, click the “Finish Button” to wait for the window to be restored. Now, you can check the disappearance of the soft code. If that also doesn’t work. Try another Advance method or take professional help. 

Note: You can also follow the official documentation from https //www.windows.com/stopcode

Read more: A COMPLETE GUIDE FOR WINDOWS 10 STARTUP FOLDER USERS

The End Note

We hope these methods will sincerely help you in your Windows repair as these solutions are genuine and will not harm your PC for any reason. If questions are left unanswered for whatever reason from our side, you can always get back to us. We are available 24×7 with our experts for you.

Frequently Asked Questions

Q.1 How Do I Fix the Windows 10 Stop Code?

Window 10 error stop code occurs for various reasons. These reasons could be anything. First, you should identify them by reading the Stop code and follow these steps below.

  • Restart and Reboot the operating system.
  • Update Windows with the latest version immediately. 
  • Use Device Manager to update drivers.
  • Try an SFC scan to detect and repair the corrupt file. 

Q.2 What is an SFC scan in Windows?

SFC stands for System File Checker. It helps Windows users to detect their corrupted files in the system, scan them, and repair them After the successful SFC file scan, you must restart your Windows, & an automatic reboot will fix all your Windows issues.

Feature Update to Windows 10, Version 1903 - Error 0x80070002

You feel great updating your computer with the latest features released by Microsoft. Yes, we know they are crucial. Their presence can resolve several technical issues out there. But what about a time when the same update presents you with a feature update to windows 10, version 1903 – error 0x80070002? Now what! It is harsh for your time-consuming activities. Anyhow you have to resolve the issue. 

Don’t worry! We will play your part here and give you some reasons and solutions for it so that you may get what is yours. Let’s begin. 

Causes of Feature Update to Windows 10, Version 1903 – Error 0x80070002

No single point can define the exact cause of this error 0x80070002. We recommend scanning the system carefully and finding what mistake you have made before and during the update. So much will be there for you. We are sure. However, for reference, let’s join some common and popular causes creating this issue for the new and old tech users. 

Feature Update to Windows 10, Version 1903 - Error 0x80070002

  • For sure! You have installed some corrupt and malware applications that cause you not to update your window. 
  • Maybe you have missed or deleted the system file or created a mess with them. 
  • Possibly the system has no space to secure and save your update and installation.
  • Perhaps your external hardware device, which you added later buying them separately, has joined the hands of this error. 
  • No fixed pattern to describe the exact cause; however, like always! Solutions are there in a mighty format. 
Read more: HOW TO FIX WINDOWS UPDATE ERROR 0X80070001 | CHECK THE GUIDE TO SOLVE

Solutions for Feature Update to Windows 10, Version 1903 – Error 0x80070002

Make choices among the below-defined solutions because every solution is not for you and your PC only. Follow them below. 

Windows Update Reset (Fix it) Tool Download

The tool can help you drive power on your Windows update. 

  • Launch the official Webpage of “Wureset” and select your choice there. Download it based on your operating system & Double-click the “.Exe” file to open and install it. 
  •  Accept the term and conditions and install the Windows update reset tool. 

Usage of Reset (Fix it) Tool 

Windows Reset Update Tool

  • Choose the “Language” after opening the tool and press the “Enter” button. 
  • There are many options available to choose from the tool and act accordingly. 
  • Opens the system protection/Resets the Windows Update Components/Deletes the temporary files in Windows/Opens the Internet Explorer options/Runs Chkdsk on the Windows partition/Runs the System File Checker tool/Scans the image for component store corruption/Checks whether the image has been flagged as corrupted/Performs repair operations automatically
  • Cleans up the superseded components/Deletes any incorrect registry values/Repairs/Resets Winsock settings/Reset Microsoft Windows Store/Force Group Policy Update/Search Windows updates/Find the windows product key/Explores other local solutions/Explores other online solutions/Restarts your PC.

Disconnect Outer Devices for Feature Update to Windows 10, Version 1903 – Error 0x80070002

External devices create issues with your system. You think they are compatible with your operating system and increase your productivity in the project. On the contrary, they are hindering the most crucial task of your operating system and error code 0x80070002. Remove them instantly and retry the windows update. 

Review the Installed Updates
  • Click on the “Window” logo of your system, & search for “Control,” and follow the result” Control Panel. 
  • Hit the “Program and Features” option by pressing the “Program” option.
  • Select the “View Installed Updates” choice to uninstall the latest update made by you by marking the “Uninstall” button given next to the selected update. 
Disable the Antivirus

Disable Antivirus

After disabling the antivirus or firewall security, try to update the system. As soon as successful installation occurs, go to the antivirus section and reactivate it to remove any threat to your Windows 10-11 OS. 

Windows Update Troubleshooter

Use the in-built utility of Microsoft Windows and fix the error with these easy steps.

  • From the “Settings” Window of the device, tap “Troubleshooter” within the “System Tab.”
  • It will prompt you to see the issues over there and repair them on its part. 

System File Checker

  • Open “Command Prompt”  and type “SFC /scan now” & “Enter.”
  • It will scan the system or corrupted files and repair them immediately. 
  • Lastly, you need to restart the system and see whether the error 0x80070002 got fixed or not. 
Read More: HOW TO FIX FEATURE UPDATE TO WINDOWS 10, VERSION 1903 – ERROR 0X80080008

Conclusion

These methods specialize in many ways. They resolve not just this error of your operating system. They can seek any cause of concern and fix them if used rightly. Furthermore, write us back so we can understand your query and serve you the best of the time with your issue. 

Guide to fix Windows Update Error 0x80070057 (Latest 2022)

Not only you but there are many users all around the world who reported about this annoying Windows Update Error 0x80070057. When you attempt to install the Windows update on their device, this error appears. Hence, this particular issue might be caused by malware, each of which can be controlled or modified using the registry or faulty files or settings in the device.

Don’t worry. It is not such a difficult error that you could not even fix. In this article, we bring forward some easy, simple, and latest steps to fix windows update error 0x80070057 quickly. Let’s start. 

Overview of Windows Update Error 0x80070057

The 0x80070057 error code while updating Windows indicates that Windows encountered a storage problem, i.e., you ran out of storage on your hard disk drive or SSD card before attempting to download or transfer anything. Hence, this warning could probably imply a defective hard drive, an incompatible file system, or any other storage-related trouble. However, this specific alphanumeric error code “0x80070057” is frequently encountered by Windows Vista, 7, 8, and 10 users.

Windows Update Error 0x80070057

Depending on where the error in the update service is located, the message that appears when error 0x80070057 occurs may vary, but it is typically a variation of “Unknown error”, “Required services are not operating” or “Unspecified parameters encountered. Also, this particular error may alternatively show a slightly different message, like “Something went wrong.”

Read more: HOW TO FIX: WINDOWS UPDATE ERROR 0X80070424 | FULL GUIDE TO RESOLVE

Causes of Error 0x80070057

The 0x80070057 error code may appear to you for a number of reasons. We’ve touched on a handful of them here. Do have a look below – 

  • When you update Windows 7, especially on a Windows 10 computer.
  • When you are installing the latest Windows 7 operating system. 
  • If you are attempting to restore your files.
  • In case you set up a new profile in the Microsoft Outlook program
  • If you harm the system’s System Reserved Partition.

Simple Methods to Fix Windows Update Error 0x80070057

Here, we will share with you some of the common and easiest methods, which will help you eliminate Error 0x80070057 quickly. All you just need is to stick to these simplest methods.

Windows update

Method 1: By Using the Troubleshooter Option

 You may be able to resolve Error code by troubleshooting. to have it all repaired, take these steps:

  • Type “Troubleshoot” in the search box after clicking the Start button on your desktop. Then to make the  Settings window appear, double-click the output.
  • Next scroll down the right side of the Settings panel and then select Windows Update from the Get started section. 
  • Now, select the Run Troubleshooter button.
  • Allow the troubleshooter to finish diagnosing the problem. Now, select the Apply this repair option. Patiently wait for the troubleshooter to resolve Windows Update.

Lastly, close the troubleshooter and restart your computer after the repair is complete.

Method 2: Uninstall the Cloud Fogger from the Device

The Cloud Flogger application of the system might sometimes be the primary cause of Error 0x80070057. The installation of filter drivers that are incompatible with system calls by third-party applications like Cloud Flogger which is the reliable source of this problem. Therefore, removing the Cloud Fogger from your device might help you eliminate Error 0x80070057. Follow the below mentioned steps properly –

  • Open the Run Command box by simultaneously hitting the R and Windows keys on your computer.
  • Secondly, in the Run Dialog box, type ‘appwiz.cpl’ and press OK 
  • After that, open the new window’s “Programs/Apps and Features” area.
  • Next, move to the bottom to find the Cloud Fogger app. Thereafter, right-click on it.
  • From the menu, select Uninstall.
  • At this point, you must wait till the uninstalling procedure is finished.
  • Now, restart the system thereafter in order for the adjustments to take effect.

Lastly, to see if the error has been fixed, try updating the operating system.

Method 3: Change the Name of the Software Distribution Folder

This is also an effective method to help you get rid of Error 0x80070057. Therefore, to give it a try, follow the steps below – 

System Root

  • To begin, open the Run Command box by simultaneously hitting the R and Windows keys on the computer.
  • Then, in the Run Dialog box, type ‘{067ed41ba9a2bcea5192cfba5c5678b094ea6af66db36aaabba2135c9da953a2}systemroot{067ed41ba9a2bcea5192cfba5c5678b094ea6af66db36aaabba2135c9da953a2}’. To execute the command, press the Enter key on your keyboard.
  • You must now locate the ‘Software Distribution’ folder and right-click on it. Select the ‘Rename’ option from the menu.
  • Change the name of the ‘Software Distribution’ folder to ‘old.’
  • When Windows asks for administrator permission, click the Yes option.
  • After that, enter “services” into the Windows search box and l Launch the Services menu. Then, you must verify that the status is Started. You must now look for the running service with the name “Windows update.”
  • You need to log out of all system apps after making these modifications. Lastly, the system should then be restarted to save the modifications.

Method 4: Windows Date and Time Synchronization

If the date and time in the windows clock are out of their general settings, the Error code 0x80070057 might occur. Fixing it is not a tough task. Follow the below mentioned steps –

Windows Date and Time Synchronization

  • In Windows 10, choose Adjust date/time by right-clicking the taskbar.
  • If you’re using Windows 11, use Win + I to open the Settings program, then select Time & language > Date & time.
Note – Recommendations:
  • Manually set the time
  • automatically make adjustments for Daylight Saving Time
  • Manually set the time zone
  • Once they are configured, click Sync to confirm. 

Method 5 – Do/Run  Chkdsk

Chkdsk is considered as the quickest way to locate and fix damaged files where your whole hard disk could be searched by this Windows application for any faulty components.

Run Scan

  • Here, To run Chkdsk, click Win + E to open File Explorer, browse to This PC, right-click the system drive, and choose Properties.
  • At this point, select Check and Scan Drive from the Tools menu. The background check will be performed. If any issues are detected, you have an option in how to handle them.
  • Lastly, restart your computer after you’ve repaired them.

Method 6: Start the System Update Readiness Tool (SURT)

System Update Readiness Tool (SURT) is a Microsoft-developed force-update method designed to address update difficulties such as the one discussed below. SURT will assist you if you are using Windows 7/8/10. To run, follow the steps below – 

  • Install and save the SURT tool to a convenient location.
  • Select Run as administrator by right-clicking on the application.
  • Now, allow the procedure to complete before restarting your computer. 
  •  Lastly, check to determine whether the problem has been resolved.
Read more: FIX FEATURE UPDATE TO WINDOWS 10, VERSION 1903 – ERROR 0X80070005

Closing Lines

We hope this article got all your issues sorted out. We must have resolved “Windows update error 0x80070057” as these are the easiest and simplest methods to fix it. If you are still experiencing issues, please reach out to our team for assistance. We are happy to help you troubleshoot and fix this error. Have you been able to resolve the problem on your own using one of our solutions? Let us know in the comments below.

Frequently Asked Questions (FAQs)

Q1: What is Windows 10 error code 0x80070057?

Ans: Error Code 0x80070057 in Windows 10 states that the input is not correct. This signifies that you get an issue while attempting to display a user’s “greater accessibility” to a file.

Q2: How can I resolve error code 0x80004005?

Ans: To resolve error code 0x80004005 on your device, follow the steps – 

  • Launch the computer. 
  • During the launch, press the F8 key to start the computer in safe mode.
  • Now, press Start, Run,  and then enter regedit. Hit the OK button.
  • The registry subkeys HKEY USERS and the following ones should be deleted.
  • Close the Registry Editor window and then turn the computer back on.

Q3: What measures should I take to troubleshoot Windows Update?

Ans: Whenever you encounter an error code when downloading and installing Windows updates, the Update Troubleshooter can assist you in resolving the issue. 

Follow the steps below –  

  • Click on Start > Settings > Update & Security > Troubleshoot > Additional troubleshooters.
  • Then, under Get started, choose Windows Update > Run the troubleshooter.
  • After the troubleshooting has finished, restart your device.
  • Check for fresh updates next
  • Later, choose Start > Settings > Update & Security > Windows Update > Check for updates, and then install any updates that are available for your device. 
Windows Update Error 0x80070424

Error (0x80070424) pops up with the issue of Windows update. Various circumstances occur where you need to update your Windows for the smooth functioning of the device. However, System file non-registration is the primary cause of this issue. Furthermore, it usually happens when Microsoft releases any new version in the market, and the users try to update their Windows with the latest version. Here, we will try to help you know the numerous causes of this error (0x80070424)  and the solutions to fix it effortlessly. 

What Causes Windows Update Error 0x80070424?

  • Window Update Service

Here, at this stage, you must know what is happening in your Windows while updating it. Are all the services working properly? If not, try to resolve them. Otherwise, you will face the error code 0x80070424. 

  • Update System Files Registration

System files are the important components of your operating system. If they are safe and secured, you can run any update or program on Windows. The update requires system file registration. Their absence will not let you update Windows 10.

  • Low Storage

Low storage can also lead to error security (code 0x80070424). Any update and installation need space to download and save the file. If that is not available, you cannot update the Windows. 

0x80070424: Hardware Drivers

  • Hardware Drivers

Various hardware drivers are connected to the computer. The operating system manages all of them but they also create an issue sometimes and restrict any update in your system, including Windows updates.

  • Windows Update Standalone Installer Error 0x80070422

The (0x80070424) error appears because of updating your Windows via Windows Update Standalone Installer or Windows update added in the Computer Settings. Wusa.exe is a built-in facility & adopts “Window Update Agent API” downloading and installing Windows Update Packages. 

Read more: HOW TO FIX FEATURE UPDATE TO WINDOWS 10, VERSION 1903 – ERROR 0X80070005

Fix: Windows Update Error 0x80070424

Irritated with Window update failure! Solutions are there. However, they will work as per the cause and Windows situation. Here! We will quote some tricks to update Windows successfully and resolve security code 0x80070424. Have a look.

0x80070424

Note: Arrange Data Backup – We know it is a general practice, yet on many occasions, users get no data backup while troubleshooting anything on the system and face data loss. So before moving forward with any fix, arrange the data backup. 

Restart and Try Again

After reviewing various IT experts’ views, we found that; Never run more than one update together. They can lead to the message: Code (0x80070424). Better to complete the first update and restart the system before completing another one. 

Windows Update Troubleshooter

It is the best choice for most of the issues users face nowadays. There was a time when you triggered this issue but didn’t have a guide and tool to check and resolve it. Microsoft gives this tool in Windows 10 for safe use. Follow the steps below.

  • Use “Winkey + I” for the “Setting Option.”
  • Go to “Update & security” and hit the “Troubleshoot Tab” for the “Window Update.” option
  • Keep in the highlight & press ” Run Troubleshooter.”

              OR

  • Directly type “Troubleshoot” in the search box of the “Setting” option and use the window update troubleshooter. 

Update Manually

For the manual update process, go to the Microsoft Update Catalog Website and add the KB number for the update. For feature updates, go to the Windows Update Assistant and click the Download button along with following the further on-screen instructions. 

Register System Files 

Register System Files.jpg

We have taken this issue before in the same context as a cause. Now we will try to resolve this cause created code: 0x80070424. Window update is possible with update packages taking the help of “.Dll” Format system files. Let us register them to complete the window update.

  • Winkey + R will open the “Run check box.” 
  • Enter “regsvr32 Qmgr.dll /s & regsvr32 Qmgrprxy.dll /s” one by one to reboot and run the update. 
  • The system files are registered now. 

Pause the Updates

Use the “Setting” option for “Update & Security” and then go to “Window Update”. Scroll down to the option “Pause Updates” to switch it on. Now, restart the computer after rebooting, and again visit the screen to switch the “Pause Updates” Off. It will clear all the updates and you are good to go without the interruption of (0x80070424). 

Enable Window Update Service

The failure also occurs with Windows services, like Background Intelligent Transfer Services/Workstation/Window Update. For that reason, you must try to resolve the problems. Here are the steps below.

  •  Type “services. msc” within the Run field and locate non-active services. 
  • Open them one by one with a double click of the mouse. Meanwhile, be sure! To check the Automatic and Running Mode of the service is selected. 
  • If not found, switch the “Startup Type” to “Automatic” and press the “Apply” button to start the service. Finally, complete the rebooting and resolve Windows Update error 0x80070424. 

Inactivate Antivirus

Inactivate the Antivirus

While indulging in a series of troubleshooting of Windows updates, try antivirus inactivation. Sometimes, these antiviruses (third-party) solutions block all the updated files. On the other hand, you can allow “Window Update Servers” by visiting the “Antivirus and Firewall” settings. 

Window Registry

Window registry is among the severe causes of Window updates. It is the most crucial component of Window OS. Fix the error with these steps.

  • Open the Run check box by pressing Winkey + R and type “Regedit” in it. 
  • Paste “HKEY_LOCAL_MACHINE\SOFTWARE\Policies\Microsoft\Windows\WindowsUpdate” in the address bar.
  • Look for DisableWindowsUpdateAccess. Now, double-click with the “0” value setup.
  • Finally, enable “Windows Update” from “Registry” and restart the computer to check the update. 

System File Checker

System File Checker

Use the system file checker to scan and repair the files available on your computer or create issues with Windows 10 updates. You may need DISM to complete this. Kindly download this tool from the official link and start the procedure. 

Repair or Reinstall the Window

If nothing is working, try to go to the Setting option to repair the Windows or reinstall it. Make sure to reboot or restart it to check for the prevalence of the error. 

Read more: FIX FEATURE UPDATE TO WINDOWS 10, VERSION 1903 – ERROR 0X80070002

The Final Words

These methods are effective to troubleshoot codes (0x80070424). if used dedicatedly. We can’t say that they are enough because we don’t know what your Windows is exactly facing right now. However, these steps can resolve most of your PC and its issues. For any further assistance, you can always get back to us.

Feature Update to Windows 10, version 1903 - error 0x80070005

Feature update to Windows 10, version 1903 – error 0x80070005 is one of the latest developments made by Microsoft as a feature and adopted by users in a flash. But it turned into an error, Yes? It arises when you can not access Windows for several reasons. Meanwhile, don’t forget that possibilities are there that you don’t have the required permission to access the files for the particular update. 

Now! You should keep your PC or computer system up-to-date to keep away from all minor or major issues. This line is always a suggestion of every tech user. However, what if, someday, this suggestion itself; creates a problem for you? Frustrating right?

That’s the reason! We are sentencing some words for you to understand what mistakes you have made here to face this error. Let us start our expert analysis. 

Fix Feature Update to Windows 10, Version 1903 – Error 0x80070005?

One can go for both feature and cumulative updates for any Windows update. They may witness numerous attractive features, like “Windows Sandbox” and “Enhanced Search Mode.” So, being a technical concern, any advanced level technology can never guarantee 100{067ed41ba9a2bcea5192cfba5c5678b094ea6af66db36aaabba2135c9da953a2} satisfaction. Errors and issues would be there. No matter what the popularity of the tech utility. But, let’s resolve them then.

Feature Update to Windows 10, Version 1903 - Error 0x80070005

Permit Yourself to Full Access

We will start by applying the permissions method and then move to another option as per the initial result. We will use the “Setting” option here. 

  • Open the “Run Windows” using the Windows key + R and type up C:\Users\USERNAME\AppData. For the next step, replace C with the drive containing the installed Windows. 
  • After this, look for the option “App Data”. Right click and go for the option “Properties.” Select the “Security Tab” and hit Edit.
  • Choose the “Add” option & type “Everyone” for “Check Names”.  Hit “Ok.” 
  • Next, select “Everyone” and give “Full control” under “Permission for Everyone.”
  • Finally, Press the “Ok” button and complete the reboot of your system to update changes and fix the error 0x80070005.

Run Windows Update Troubleshoot

It is an inbuilt tool of Microsoft Windows 10 to detect the issues related to the installed OS. The troubleshooting will scan and fix the corrupt file automatically. For that purpose, it will download a new copy and start running its processes. 

Run Windows Update Troubleshoot

  • Under the Search Bar, type “Troubleshoot” and hit Enter. 
  • Go to “Windows Update” from the “Troubleshoot Menu” & click on “Run the Troubleshooter.” It may ask for administrator access so you need to choose ” Try troubleshooting as an administrator.” 
  • Then after successfully applying all the fixes, restart your system to check for the fixed issue.

Virus and Malware Scan

It is important to always give your system a full Virus and Malware scan from time to time. But in case you are not opting for a malware scan until now then it becomes a mandatory solution now to fix the Error 0x80070005. With your Antivirus, go for the Virus scan and your error will surely be resolved in seconds. Else the error still exists, move on to the next solution below.

Read more: FIX FEATURE UPDATE TO WINDOWS 10, VERSION 1903 – ERROR 0X80070002

Computer Power Cycling (Feature Update to Windows 10, Version 1903 – Error 0x80070005)

As a next step, try to use computer power cycling, a jump start to figure out the PC issues. That’s an act of erasing the wrong configuration of your system. It is to follow the “Restart Procedure” with the “Continuous Pressing of Power Button.” Run the Steps.

Computer Power Cycling

  • Switch off the “Computer & Router” together & continuously press the “Power Button” for about two to three minutes. 
  • Rest for five to eight minutes to come back on the power supply and device power to find whether the issue persists or not. Don’t forget to check the internet connection and then you must restart your PC.

Clean Boot

It can help you to assist in detecting what applications/programs are creating error code 0x80070005. Clean boot allows the personal computer to start with a few programs & drivers & figure out the real cause of concern and then troubleshoot it. Here is how you can do so.

  • Type “MSConfig” in the “Search Bar” of the “Start Menu” to find the dialog box for “Service Tab.” Find the radio box for “Hide all Microsoft Services” to “Disable All” to navigate the “Startup Tab” and click on “Open Task Manager.”
  • Choose the program you want to disable with the “Disable” button & confirm by the “Ok ” button and close the Dialog Box for restarting and applying the changes Via Clean Boot. 
  • Run the application that was creating trouble before the restart. If the issue remains the same, you must try another method because the disabled program was not the cause of the feature update to Windows 10, version 1903 – error 0x80070005. 

Extra Devices Removal

Extra Devices Removal

You may not be familiar with the fact that sometimes Extra devices also come as trouble for your feature Windows update. But they are. Many users & experts have witnessed this point in the past. As a recommendation, we would add this to fix your error. 

Some examples are better to take for proper understanding, like Webcams & Consoles. It is not a foolproof fix, yet it is practical and adaptable. Use this method in a safe mode by turning off the computer. Don’t worry! You can connect them back. Even after removing them, the issue exists. 

Use Manual System for Feature Update to Windows 10, Version 1903 – Error 0x80070005

It is the opposite of the automatic method. Most of the time, the auto mode doesn’t work and allows glitches with the setting option. Consider “Windows Update Catalog” and download and install the file for free by Microsoft for all category Operating systems, including Windows 10. 

  • Go to the “Windows Updates Catalog” web address to paste the code ” Windows Update Version.” within the search bar and click on the “Download” button. This way, you will find a new Windows with the pop-up.
  • Furthermore, 0x80070005 will ask you to press the link (.msu file) and then open the file to install it manually. To see the effect, restart the Windows after installation. 

Disable Antivirus

Possibilities are high that the third-party antivirus is blocking the Windows update. Don’t! Leave the chance to recognize It as it can be the original culprit of this particular error. Open the Antivirus now and disable it to check its authenticity. 

Disable Antivirus:Feature Update to Windows 10, Version 1903 - Error 0x80070005

For Windows Security Usage, Follow this:

  • Go to the Start button for “Setting”>”Update & Security.” Launch the “Windows Security” for “Virus & Threat Protection”> “Manage Settings.”
  • Put the “Real Time Protection” on “Off” Mode.

For AVG Users

As there are several modes to secure your device, you must follow the right steps for the installed file on your device. Here is the process below.

  • Double-click to open the “AVG icon” and press “Temporarily disable AVG” protection.
  • Hit OK.  

For Avast Users

  • Launch Avast and press the “Avast shields control”. 
  • Restart your system and check for the prevalence of the error. 

McAfee Users

  • Open the antivirus and Mark the “Exit” option to turn off the third-party protection for resolving error code 0x80070005. 

System File Checker for Feature Update to Windows 10, Version 1903 – Error 0x80070005

System File Checker

SFC helps to scan and repair the corrupted file of your system. 

  • Type “Command Prompt” in the “Search Box.”
  • Press ” Run as Administrator” from “Command Prompt Result.” Moreover, type “SFC/Scannow” in the pop-up Windows of the command prompt and press the “Enter Button.”
  • Wait for some time and let the process be completed.
Read more: HOW TO FIX WINDOWS UPDATE ERROR 0X80070001 | CHECK THE GUIDE TO SOLVE

The End Note

That’s all for now on the error 0x80070005. There will be no more persistence of this error 0x80070005 in your computer after applying these methods carefully. We hope you got all your resolutions but in case of any further queries, you can always get back to us.

DLL

DLL files also known as Dynamic Link Libraries are small files that contain code that is used by multiple programs on your computer. When a program needs code from a DLL file, it loads the file and then calls the specific function or variables that it needs. This allows programs to share code so that they don’t each have to include their own copies. DLL files are similar to EXE files, but they can’t be executed on their own. Instead, they must be called by another program. 

The article will describe everything you need to know about your DLL file including various other issues that may occur while engaging in the program functions. Let us understand what exactly it is and how to deal with it. 

What is a DLL File? A Detailed Overview

DLL is a file different from the usual files of your system. It entirely links with the Windows operating system and manages most of its tasks. The abbreviation of DLL is Dynamic linking library which dynamically handles the launching and running requirements of the applications. 

A library is handy for small programs yet practical for large programs when the need arises. Not only that, they are functional for multifold applications at one time based on the service of a particular program or application. 

.DLL file contains a particular code to attach to the programs. Sometimes these codes are not purposeful for any productive application due to their size or functionality. That’s how it helps resolve space issues. Meanwhile, you can witness the existence of these files in classes/variables/resources containing images/icons/files & particularly the user interface. 

How to Open DLL Files? 

What is a DLL File & How to Open and Edit DLL File

These binary files are in your window system in a deep folder. Because they have to perform multiple basic and advanced level tasks, it will be better not to disorder them. They hold various groups of functions/device drivers activated with the support of an application. Disarray can cause damage to your system or other functions and the DLL file may stop responding entirely. 

The file corruption will lead you to download and install them with messy methods. As a result, the file will become productive to malware and not be advanced carefully. Still, if you need to open, you need a specialized text editor like Notepad++ or HexEdit.  

How to Read a DLL File?

.DLL Files are available to open, read, and edit with this software like “Microsoft Visual Studio” “And Microsoft Visual FoxPro 9.0”. “JetBrains dotPeek,” “Resource Hacker,” Redgate.NET Reflector. 

Directions

  • Open the window folder of your system ( C:\Windows\System32 path). Lead yourself to program files. 
  • Now, hit the System 32 folder in the window folder.
  • Finally, you may find all the.DLL files saved on your device.
  • Give a right click of the mouse to open the required file. 
  • Find the “Choose Default Program” Choice. 
  • Now, open the file with any option described above, like Microsoft Visual Studio or Resource hacker.  
  • You must take this step, “Browse,” only if your window doesn’t screen the opening software you want to use for your file. Follow the search result, click on it and open the DLL File. 

How to Edit a DLL File?

How to Edit a DLL File?

After completing the opening and reading process successfully, you can edit the files to activate them about installed programs. Open the installation folder to switch editing. Check the steps.

  • In the search field, find “File Explorer.” Click on the icon or press (Window logo +E) to open it.
  • A pop-up window will open. Click on the “View” tab to check the “Toolbar.”.
  • Check to mark the “Hidden item” box. The Show/Hide part will show this checkbox in the Toolbar. Mark the button to unhide the files and folders saved in the window system. 
  • Now, you may exit the window of File Explorer. But before that, you should copy and paste the necessary files to the desktop.
Read more: WINDOWS FIREWALL IS BLOCKING QUICKBOOKS: COMPREHENSIVE GUIDE TO RESOLVE

Ensure the Editing with Hex Editor

  • First, download the Editor set-up file by following the link https://www.hhdsoftware.com/free-hex-editor. Open any browser active in your system and click on the result followed by the download link. 
  • Find the “free-hex-editor-neo” set-up file in the download section of the PC. Complete the installation to initiate editing. DLL File. 
  • Now, open the editor application and click on the “File” option added in the top left corner. 
  • A drop-down list will appear. Click on the “Open” option and go to the Open File” tab. 
  • The file location will appear on “File Explorer,” where you can choose the file to edit. 
  • The file will be opened in Hex Editor. Click on the “Edit Cell” option to edit the binary value or value removal.
  • Press Ctrl+Shift+S to save all the changes you have made in your file. 

Conclusion

The article has summarized everything about the question: What is a DLL file? The mismanagement of these files will make your computer corrupt and ineffective in running your applications. Again we would consider that if you have these files stored on your device, Don’t delete them or mess with them because it will be problematic to get the original versions of those files. On that note, we wind up our guide here to make you think more practically while using Dynamic linking files for application launchings.  

windows firewall is blocking quickbooks

Quickbooks is a robust accounting software created and marketed by Intuit. The company’s applications aim at small and medium-sized enterprises and also provide on-site accounting software. Often this software witnesses errors that must rectify as soon as possible. Once such an error message, was reported by many users “windows firewall is blocking Quickbooks.”
As a result, we decided to create an article to assist the users to address this problem. All you have to do is stick to this article till the conclusion.

So, let’s get started!

Windows firewall is blocking Quickbooks: Brief Overview

windows firewall in blocking quickbooks

Every time the error occurs, the user receives a window firewall blocking Quickbooks error message. This message is usually received when they attempt to launch the Quickbooks database server manager.
Moreover, users may try various actions such as checking the firewall ports, uninstalling or reinstalling QB, turning off the firewall, and running the File doctor tool, but they still may not be able to overcome the firewall or antivirus software may have blocked the connection error.

Read more: LATEST GUIDE ON “HOW TO TURN OFF ONEDRIVE” ON WINDOWS | 2023

Actual Cause of the Error “Windows Firewall is Blocking QuickBooks” 

After getting several complaints from various users, we began to research the issues and design an effective solution to entirely resolve the “security or firewall settings might be blocking the connection” error. In addition, we investigated the causes of its occurrence and listed them below:

  • Closed Ports

The windows firewall is blocking Quickbooks error happens when the computer fails to redirect the ports used by the program to connect to the internet. The application-specified ports must forward by the user in order to function correctly.

Moreover, QuickBooks, unlike other apps, doesn’t use a wide variety of ports; instead, it uses a single port based on the version of the application that you are running. Thus, it is advisable to use the best laptops for QuickBooks which comes with zero port and connectivity issues.

  • Firewall Blocked 

In rare circumstances, the program itself may have been blocked by the Windows Firewall. It is also feasible that a third-party antivirus program has permanently disabled the application.
After knowing the fundamental knowledge of what the issue is, we will move on to the remedies. Thus, to avoid conflict, make sure to implement these in the particular sequence in which they are actually offered.

Simple Steps to resolve Windows Firewall is Blocking QB Error

Solution 1: Reboot your Windows System

To fix the windows firewall blocking internet error, you need to reboot your Windows system. In such a circumstance, follow the below directions:

  • At first, select the Start menu option.
  • Then press the Power button.
  • Additionally, select the option Restart.
  • After that, wait for your machine to restart.
  • At last, when everything is successfully completed successfully, you are ready to restart QuickBooks and resume working.

After rebooting the system, you may see if the windows firewall is blocking Quickbooks error persists or not. If the issue continues to make trouble, you can proceed to the next solution and set the Windows Firewall and port settings.

Solution 2: Set up Firewall Ports

Configure firewall ports

In order to allow the program to connect to the internet, firewall ports must be set. Moreover, you may set up these ports automatically by downloading and executing this program. If you don’t want it to happen automatically, follow the instructions below:

  • At first, you have to click the “Port Monitor” tab in the “QB Database Server Manager.”
  • Ensure that you take note of your application’s “Port Number”.
  • Then, to open settings, press “Windows + I” and then select “Update & Security.”
  • Further, from the left pane, you need to select the “Windows Security” tab and then the “Firewall and Network Security” option.
  • Following that, from the list, select the “Advanced Settings” button.
  • This will enable you to open a new window and select “New Rule” from the “Inbound Rules” menu.
  • Then, select “Port” and press the “Next” button.
  • Also, select “Specified Local Ports” from the “TCP” menu.
  • Make note that different port numbers are merely assigned based on the version.
  1. Enter 8019 for QB Server Manager 2019. “
  2. For 2018 QB Server Manager, you need to enter the following values: 8019, 56728, 55378-55382
  3. Enter the following values for 2017 QB Server Manager: 8019, 56727, 55373-55377.
  4. For the 2016 QB Server Manager, you need to enter the following values: 8019, 56726, 55368-55372.
  • Then, after clicking Next, you need to select “Allow the Connection.”
  • Also, ensure that all three choices are ticked before clicking “Next.”
  • Click “Next” once again and provide a “Name” for the new rule.
  • Once you have entered a name, click “Next” and then “Finish.”
  • You can repeat the preceding steps for the “Outbound Rule” and see whether the problem remains.

Solution 3: Creating a Firewall Exception

Creating a Firewall Exception

It is crucial that the QB software has an exception in the Firewall since the Windows Firewall might sometimes completely block the application despite the ports being open. As a result, we will add the QuickBooks software as an exception to the Firewall in this step. For such a scenario:

  • First, navigate to the Start menu.
  • Then, enter Windows Firewall in the Search field and hit the Enter key.
  • After that, click on Advanced Settings in the Windows Firewall box.
  • Now, right-click on the Inbound Rules or, if you wish to create Outbound Rules, right-click on it.
  • Then, choose New Rule.
  • After that, choose the Program and hit the Next button.
  • Choose the option “This Program Route”
  • In addition, click the Browse button.
  • Also, you must locate and choose executable files with the .exe extension.
  • To proceed, click the Next button after selecting the file.
  • Next, select Allow the Connection and then press the Next button.
  • When a pop-up appears on the screen, ensure that all of the profiles are marked, and then click the Next button.
  • Then, add a rule and label it QBFirewallException (name.exe)
  • Now, the procedure comes to an end.

After you’ve completed any of the tasks, launch QB Desktop and switch to multi-user mode. If there are still any problems or difficulty displaying error messages on your screen, then configure your antivirus settings.

  • At last, install the antivirus or firewall software.

Please note that If you’ve previously set the firewall but it’s still causing the windows firewall is blocking QuickBooks problem, you should double-check your antivirus settings. Also, check that QuickBooks’s general permissions are not restricted.

Solution 4: Remove Antivirus Software

Most consumers use antivirus software to safeguard their Windows systems. There is a possibility that your QB program will be banned if you use antivirus software on your Windows system as certain apps’ permissions are revoked by the antivirus program and QuickBooks is one of them.
Moreover, QB is unable to connect to the internet as a result of such restrictions. So, in case the windows firewall is preventing you from using QuickBooks current or other versions, simply disable the antivirus application and resume working with QuickBooks.

Read more: WHAT IS A DYNAMIC LINK LIBRARY (DLL) FILE & HOW TO OPEN, EDIT DLL FILE? LATEST 2023

Frequently Asked Questions

How do I turn off the firewall in QuickBooks?

To turn off the firewall in Quickbooks, follow the below-mentioned steps:

  • First, navigate to the Control Panel
  • Then, select Windows Firewall.
  • Hit “Turn on or off Windows Firewall.”
  • At last, select Disable Windows Firewall.

Next, open QuickBooks to see whether the problem has been repaired and if the error notice “windows firewall is blocking QuickBooks” has been deleted.

What post does QuickBooks use?

Dynamic ports are now used in QB Desktop. These are individual QuickBooks firewall ports that are set during installation to ensure that the QuickBooks Desktop only utilizes a certain port. Moreover, QB Desktop port format is 8019, XXXXX, where XXXXX is the port number explicitly allocated.

How can I get around the Windows firewall that is preventing QuickBooks from running?

If QuickBooks File Doctor does not resolve your firewall issue, you can configure it manually by following the below instructions:

  • First, create a Firewall port exemption for QuickBooks.
  • Then, set up Windows firewall exceptions for QuickBooks apps.
  • After that, examine your antivirus and firewall settings.
  • Also, make an exemption for QuickBooks ports in your antivirus or firewall.
  • At last, start your computer again.