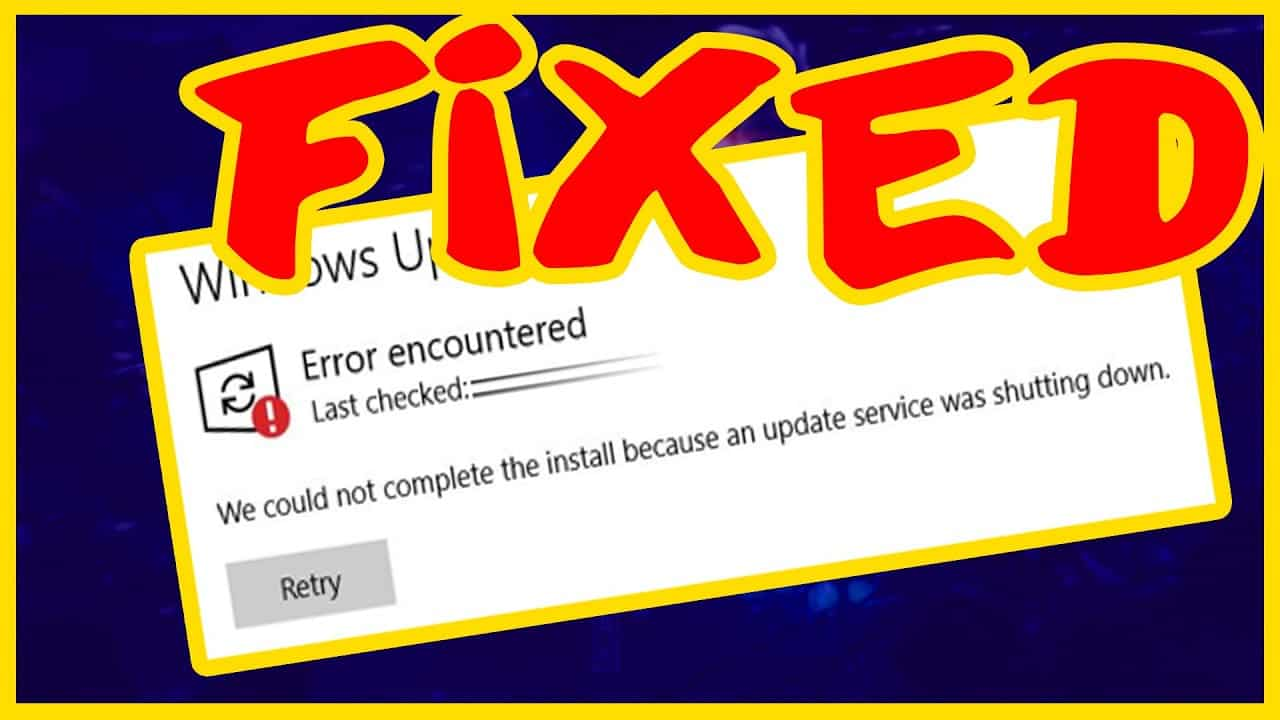
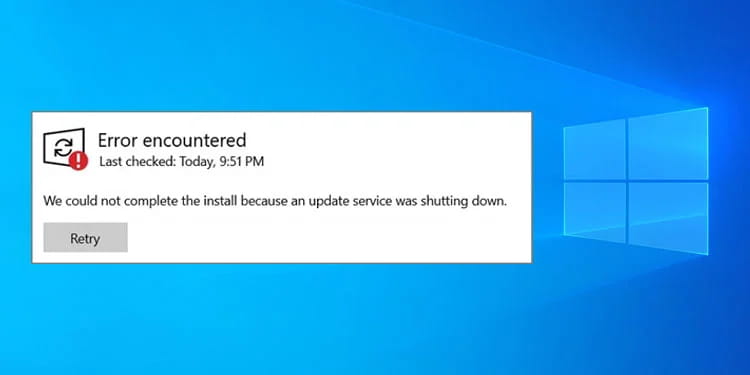
With the assistance of the Windows Update tool, users can check for changes to Windows versions, privacy and security settings, and much more. As it will keep your system largely error-free, it is a recommended habit to just let Windows download and install Windows automatically updates. However, occasionally users may run into an error message that reads, “We could not complete the installation because an update service was shutting down,” which prohibits Windows from updating applications or security features that are important for safety and performance.
Therefore, this article will help you as a guide to solve – “we could not complete the install because an update service was shutting down” issue.
Why Do Windows Update Errors Occur?
After carefully examining customer comments and technical authority, we have outlined the reasons for this issue. There are a number of potential causes for this issue, including –
Viruses/Malware
Viruses have a high propensity to damage system files, and it’s very possible that they’ve interfered with Windows Update Service as well. Sometimes, this situation arises, and it finally leads to issues similar to the current one.
Date & Time
Time and date errors prevent Windows from monitoring the deployment of security patches, which is what finally leads to this issue.
Program Records
Windows Update errors can occur as a result of corrupt programme records changing system files. According to reports, this issue frequently causes problems like this.
Other
This update problem might be caused by any recently installed settings, programmes, or other things. Root issues of this nature are generally hard to identify.
Fixing- We Could Not Complete The Install Because An Update Service Was Shutting Down Error
Note: Before proceeding to the techniques, don’t forget to backup the data from your system.
You might opt to restart the computer and see whether the Windows Update issue has been resolved before executing the next set of alternatives. Try each of the following below-mentioned techniques individually when rebooting the system does not really resolve the problem.
Technique 1: Activate the Windows Troubleshooter
The issue- “we couldn’t complete the updates undoing changes Windows 10” can occasionally be fixed using the Windows troubleshooter. Applying the following steps will allow you to launch the Windows Update Troubleshooter –
- First, navigate to settings from the Start menu. Many users experience settings not opening in windows 10 while accessing settings. It is recommended to fix this issue first before repairing the installation issue.
- Secondly, after that, click Update & Security.
- Now, select Additional troubleshooters by going to Troubleshoot in the left panel.
- Next, select Windows Update from the Get up and Running section.
- Now, choose Run the troubleshooter.
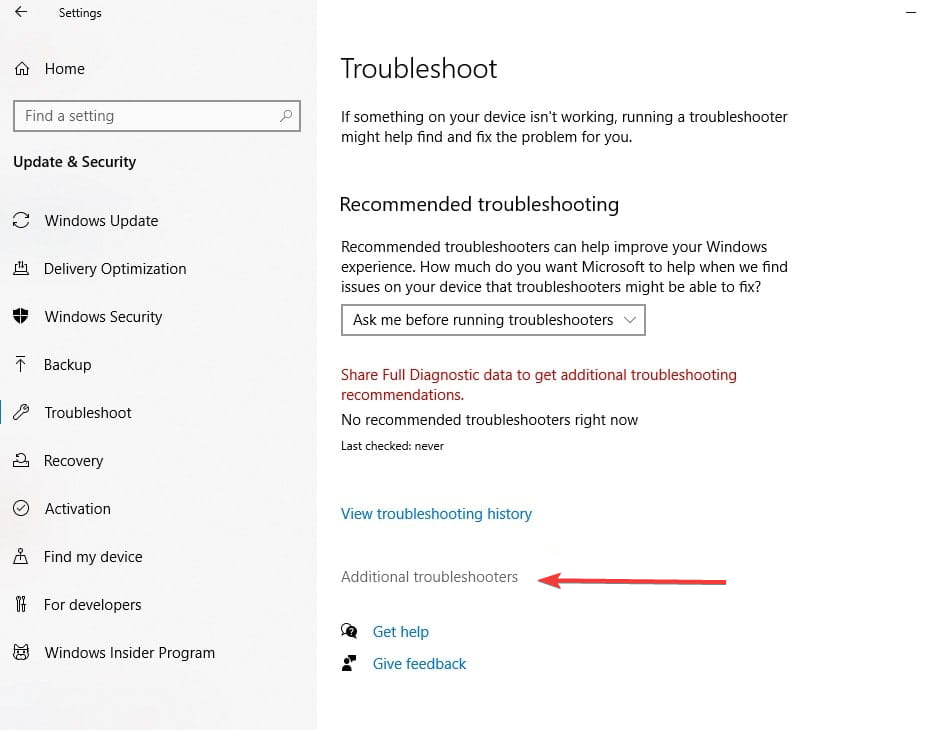
- Lastly, restart your computer when the debugging is completed.
This is the most basic solution to fix – “we couldn’t install some updates because the pc was turned off” or “we couldn’t complete the updates undoing changes”.
Technique 2: Download the Newest/Latest Servicing Stack Update (SSU)
Windows Updates are set up via the Servicing Stack component. Also included in it is the component in charge of Windows deployment components like DISM and SFC.
Any Windows update issue can be addressed by obtaining a Servicing Stack Update (SSU). Therefore, before downloading the SSU for your computer, you should first verify the sort of system you possess. Follow the instructions below carefully to perform this –
- First, navigate to settings from the start menu.
- Secondly, select System, then select About.
- Then, verify if your system is a 32-bit or 64-bit one under Device specs.
- Now, from the Microsoft Update Catalog, search for and download the newest SSU version for your system component.
Technique 3: Activate the Windows Update Service
You must make sure the Windows Upgrade Service is functioning in order to upgrade Windows. Therefore, the follow steps can be used to see if it’s running or not –
- First, open Run by pressing Windows key + R on your keyboard.
- Secondly, enter Services.msc into the search box.
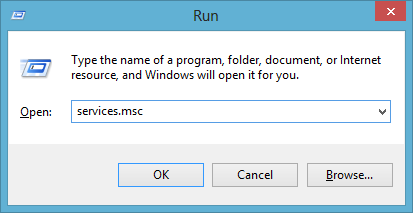
- Then, right-click on the Windows Update service you found.
- After choosing properties, click Start.
- Moreover, choose Automatic from the Startup Type dropdown option by clicking on it.
- Lastly, reboot your computer.
Technique 4: Get the Most Latest Knowledge Base (KB)
Windows users’ faults and the updates that address them are identified by the ID “KB” (Microsoft Knowledge Base). The Windows Updates are one of the many problems that may typically be resolved by downloading the most recent KB update. The downloading and installing the most current KB for your typically involves the steps listed below –
- First, visit the page for Update History.
- Secondly, for your particular version of Windows, locate the most recent KB number, then copy or write it down.
- Now, enter the KB number into the Microsoft Update Catalog search field.
- Then, download and install the latest update for your system component.
Technique 5: Run the DISM and SFC Commands
You would not be able to use Windows Update if the system files are compromised. Your PC’s corrupted files are found and fixed using the DISM program. All protected DLL files are scanned by the sfc command, and damaged ones are also replaced with a working copy. These two instructions will repair any PC corruption. Follow the steps below to utilize them –
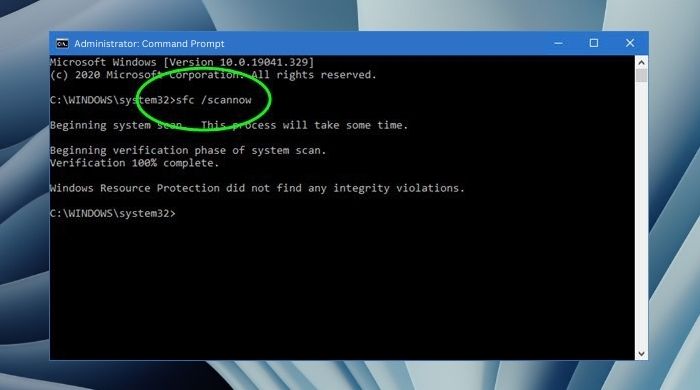
- First, go to the start menu and type Command Prompt.
- Next, run as Administrator by performing a right-click on it.
- Then, type the following command into the Command Prompt and hit Enter to execute it –
“DISM.exe/Online/Cleanup-image/Restorehealth”.
- Following the completion of the DISM command, type this SFC command and hit Enter – “sfc /scannow”.
- Now, restart your computer after the procedure is finished, then attempt to upgrade your operating system.
Conclusion
To recap, this article has reviewed various options for resolving the “we couldn’t complete the updates undoing changes windows 10” or “could not complete updates undoing changes”. Please try these solutions if you experience the same problem on your computer.
Frequently Asked Questions
Q1: What does it mean when an update service is shutting down?
Ans: When an update service is shutting down, it means that windows update is interrupted by antivirus software. The Windows Update elements may potentially be the reason for the problem. This occurs when an application on your computer triggers a false positive from the antivirus software.
Q2: How do you fix Windows 10 that could not complete the installation?
Ans: To fix Windows 10 that could not complete the installation, you need to –
- Check to see whether there is adequate room on your device.
- Look for any issues in Device Manager.
- Shut off any additional equipment.
- Perform many runs of Windows Update.
- Updates can be downloaded by checking third-party drivers.
Q3: Why aren’t my Windows 11 updates occurring?
Ans: When you attempt to update to the newest version of Windows 11, third-party antivirus or protection software may frequently result in issues. This program can be momentarily uninstalled before you update your computer and reinstall it thereafter.
Q4: What may lead to a failed Microsoft Windows Update?
Ans: Your system files may have recently been removed or damaged, that would clarify why Windows Update isn’t functioning.
Author Profile
Latest entries
 Technology2023.04.20How To Connect Roku To TV? Easy Guide To Follow
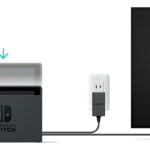
- Technology2023.04.20How to Connect Nintendo Switch to TV? (With and Without Dock)
- Technology2023.04.205 Best Barndominium Design Software (DIY & Professional)
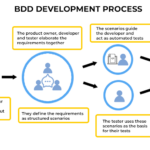
- Technology2023.04.20What Is The Relation Between Behavior-Driven Development And Agile Methodology?