You can attempt to start your Computer in Preboot Execution Environment (PXE) configuration if you desire to possess additional client PCs launched using a similar connection or preserve several machines interconnected across LAN. Understand what PXE entails and how PXE booting operates before proceeding to it. In this article, we have forwarded to you the whole information on “PXE boot”, which will further help you out.
What is PXE Boot?
Preboot execution environment provides remote computer booting over a network connection, often known as “Pixie”. Independent of its hard drives and installed operating system. PXE enables a client computer to boot from a server. PXE was created by the renowned “Intel” as a part of the Wired for Management (WfM) platform. Although Active Management Technology has now overtaken Intel’s System that can support it, many system administrators still consider PXE to be an effective instrument.
Typically, clients centrally administered computers and routers perform network bootstrapping in diskless situations. Increased security, lower operating costs, and more command over the program’s terminals are all advantages of consolidated computing environments.
To enable independent boot and setup, PXE code comes with computer hardware on a Memory chip or a bootable drive. Various network protocols are used during the operation, notably Trivial File Transfer Protocol (TFTP), User Datagram Protocol (UDP), and Dynamic Host Configuration Protocol (DHCP).
What are the Advantages of PXE Boot?
Here, we are now going to discuss its advantages and also determine when to utilize it on your device.
- The client device can be restarted in the instance of a software or hardware malfunction. As a result of automation, there’s going to be less potential for error and administration will be able to identify and perhaps solve issues.
- Given that it is vendor-independent, introducing more computers to the network is simple. Its use can cut down on the amount of effort spent on each server, and the deployment tools are consolidated and simple to upgrade.
- System software as well as a hard disk is not essential for the client computer.
How Does PXE Boot Operate?
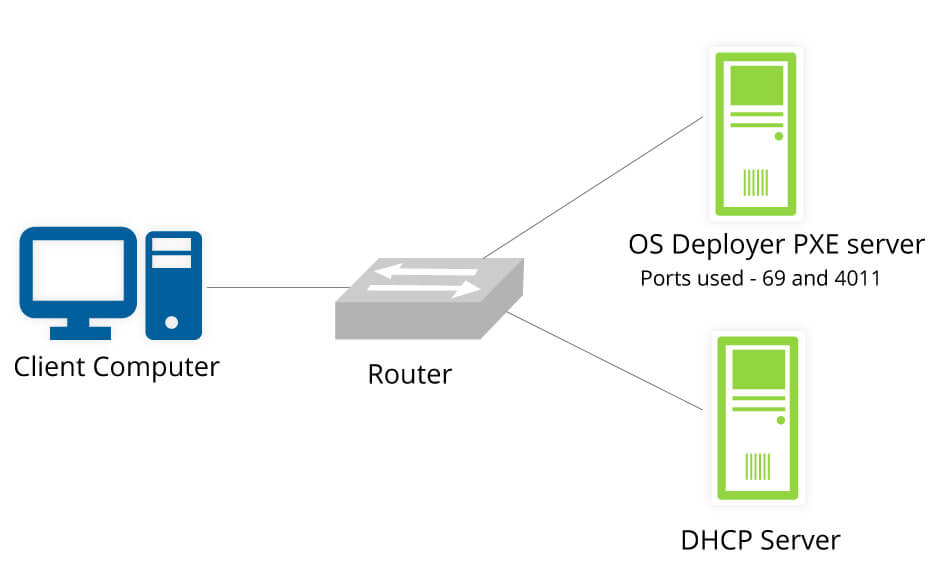
Well, this is where you will come to know how “pixie boot” operates. Prior to the PXE network booting, you must first establish the Dynamic Host Configuration Protocol/scope Parameters 66 and 67. After the client computer’s IP address being provided, the boot process commences.
Installation of DHCP
- Here, a “discover” signal requesting for network configuration is transmitted by the client computer as a broadcast. This packet will reach the DHCP server.
- Secondly, to the client, the DHCP server will broadcast an “offer” signal. The client will get the network configuration, such as an IP address and subnet mask after the packet has been inspected.
Now, come to the PXE boot process
- At first, the user will notify DHCP that it is leveraging a PXE server and the server will transmit the startup file name Option 67 and the IP address of the next bootable server to the user.
- To obtain a boot file, the user will communicate to the server. The client will get the starting file through TFTP from the PXE server (TFTP).
- Hence, settings 66 and 67 can be set up under range or server options on the DHCP server. The starting files for client PCs are loaded and started as a consequence.
How can you Conduct a PXE Boot?
Here, we are forwarding two methods by which you can perform a Preboot execution boot on Windows.
Method 1: Execute Windows 10 PXE Boot with no Software
To perform this method, you need to follow the steps very carefully:
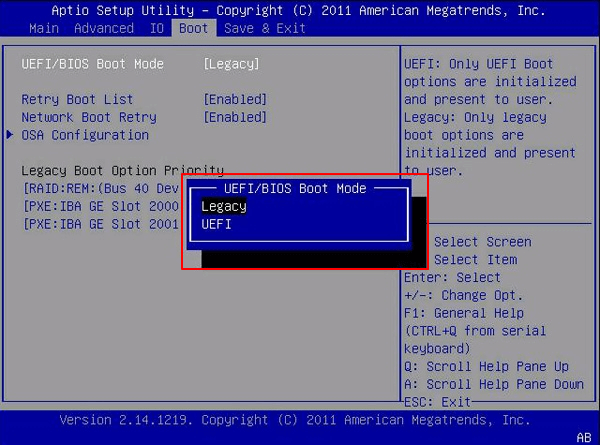
- Check to see whether the DHCP server and the TFTP server are accessible such that the PXE network environment is properly configured and enter BIOS after that.
- Afterward, ensure it is permitted. In order to open the Aptio Setup Utility, press the F2 key. Next, choose Advanced from the top menu bar, followed by Network Stack.
- After a server reset, the BIOS window will reappear. If you want to network boot, hit the F12 key instead of the F8 key.
- Within the Please Select Boot Device menu, you’ll find a table of the potential boot devices, then Press “after selecting its interface.“ Next, apply the on-screen directions to finish the PXE installation.
- Lastly, carry out the post-installation actions as directed by your operating system.
Method 2: PXE Boot Windows 10 via MiniTool ShadowMaker
Follow the steps below to perform this method:
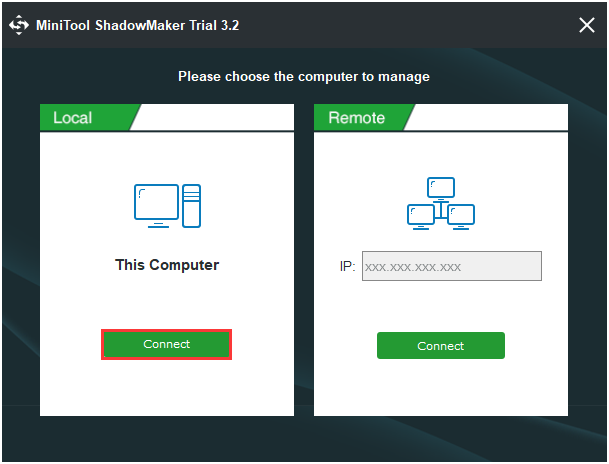
- Activate MiniTool ShadowMaker then to access its primary interface, select Keep Trial and then select Connect in This Computer.
- Next, go to the Tools menu and choose the PXE section. For the PXE service to launch, click the Start button. The MiniTool PXE Boot utility will automatically establish the necessary DHCP settings. Before clicking Start, you may adjust the parameters by clicking Settings.
- It launches the client PC connection service. It might need a bit of patience. All you have to do is wait quietly.
- You may configure the client PCs to start from the net in BIOS when the Connecting to the server notification appears and may easily maintain hard discs on a large number of customers if all client PCs boot from the PXE network.
Conclusion
Our guide wraps up here with our detailed analysis of the Preboot execution environment. We hope that you got the major information on “PXE Boot”. We believe that the above methods will definitely help you in the future. For any further assistance or other related queries, kindly let us know in the comments below. We are happy to help anytime anywhere.
FAQs
Q1: What does pxe boot stand for?
Ans: PXE boot stands for “Preboot execution environment”.
Q2: Where in a system do you configure pxe?
Ans: To configure pxe in the system, visit Software Library > Operating Systems > Boot Images > Boot Image (x86), right-click, select Distribute Content, then choose to Add the Boot Image to the PXE-equipped DP. For the Boot Image, repeat these steps (x64).
Author Profile
Latest entries
 Technology2023.04.20How To Connect Roku To TV? Easy Guide To Follow
- Technology2023.04.20How to Connect Nintendo Switch to TV? (With and Without Dock)
- Technology2023.04.205 Best Barndominium Design Software (DIY & Professional)
- Technology2023.04.20What Is The Relation Between Behavior-Driven Development And Agile Methodology?