can i upgrade my motherboard and cpu without reinstalling windows 10

“Can I upgrade my motherboard and CPU without reinstalling windows 10?” Hence, to find the answer, you need to be with us and read along. Hardware issues with Windows 10 sometimes emerge when a motherboard, CPU, or even other device is corrupted. If one is not happy with his present motherboard and CPU, he may decide to update or replace them. Presently,  residential and business clients report that executing a fresh install is not a difficulty just after motherboard and CPU modifications. upgrade motherboard

But it’s still important to refrain from doing this time-consuming operation. You’ll also need to reinstall and activate a handful of applications since the clean install will eliminate all previously installed apps, change the operating system, and transmit data. You would therefore prefer to update, similar to others as you get greater performance, quicker speeds, and support for the most recent components by CPU & motherboard upgrading. 

Can You Upgrade Motherboard & CPU Without Reinstalling Windows? (Licensing Alternatives)

Here, let’s comprehend the various Windows licensing alternatives to understand it better.   

Original Equipment Manufacturer (OEM)

OEM refers to the notion that Windows will indeed be pre-installed on the motherboard of your device. When you turn on the computer, it will automatically install. Reinstalling Windows 10 is still needed if you are switching to a newer motherboard. 

Volume 

Only individuals using different systems of Windows OS are entitled to volume licensing. Using the same license code will permit you to quickly activate Windows using this approach.

Retail

An online store is where you get a retail license. Upgrade your motherboard without reinstalling Windows if you possess a retail license. This seems to be owing to the fact that you may move your old license from one computer to the other, effectively reactivating your license. Hence, you may change your motherboard & CPU while keeping the hard drive in place. 

How Can I Upgrade My Motherboard and CPU Without Reinstalling Windows 10?

Well, here you can get the answer for “windows 10 new motherboard” or

“how to upgrade a motherboard” Just follow the methods.

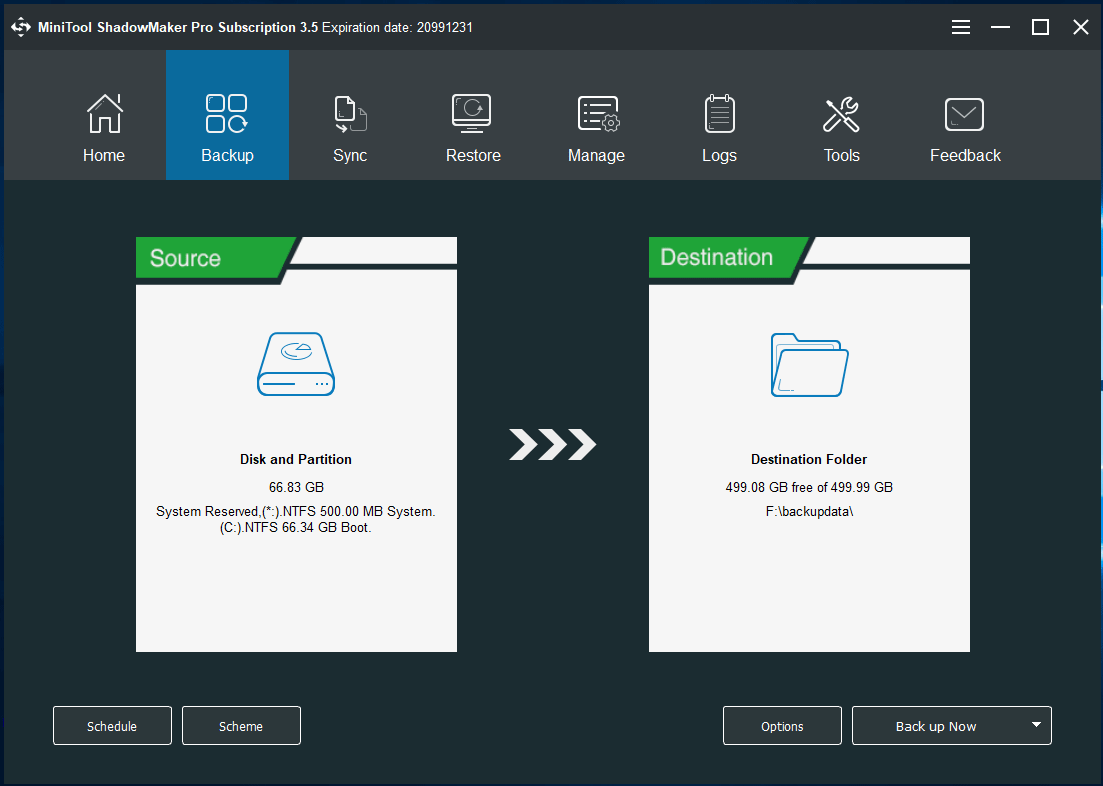
Method 1: Using AOMEI BackupperUsing AOMEI Backupper

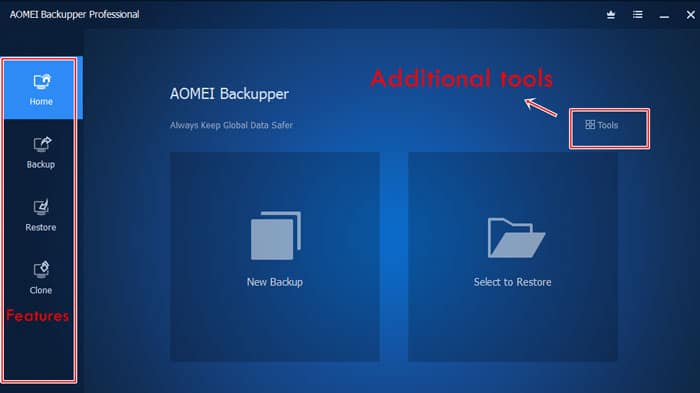
A feature of the backup software AOMEI Backupper termed Universal Restore helps individuals to restore their Windows operating system to a separate machine with distinct hardware. The user just has to recover the earlier system after replacing the motherboard & CPU. 

The distinction is that there are no strict restrictions by AOMEI Universal Restore, making it more convenient. Just employ AOMEI Universal Backupper to conduct a universal restore by following the steps below –

Step 1: Making a System Backup for All-purpose Restoration 
  • Install and execute AOMEI Backupper.
  • Select System Backup under the Backup tab. It will automatically select a backup source for you.
  • When you’ve decided where you want your backups to go, click Start Backup. An external drive, the primary hard disc, as well as the network path may be utilized for backups by the operator.
Step 2: Produce Bootable Media to Execute Global Restoration

The user should make the bootable disc in advance since Windows may not start after upgrading the motherboard & CPU.

  • First, you may make it by selecting Tools > Create Bootable Media.
  • By choosing Tools > Recovery Environment and switching on the AOMEI Backupper recovery body’s boot feature, a user may avoid generating a bootable drive.
  • It can also be utilized to reboot into Windows PE and perform restoration and backup operations.
Step 3: Start Recovering the Complete System

The process listed below should be followed to start a universal restore.

  • First, to modify the boot sequence and render the bootable disc, repeatedly press DEL or F2.
  • After that, the primary interface of AOMEI Backupper loads. Click Restore and choose the task or image file you want to restore from the previous backup.
  • To restore the backup snapshot, you should now choose an option. Two options are provided here, comprising Restore this system backup and Restoring a partition in this system backup. According to your requirements, you can choose one.
  • Hence, Select the Universal Restore option.

Also by using this method, you can transfer an operating system from one device to another with various device arrangements.

Method 2: Offline RegistryOffline Registry

Users upgrading the motherboard and CPU without first editing the registry can use this method to fix a boot error. To change the Registry, all you have to do is to use an installation CD and boot your system from it.

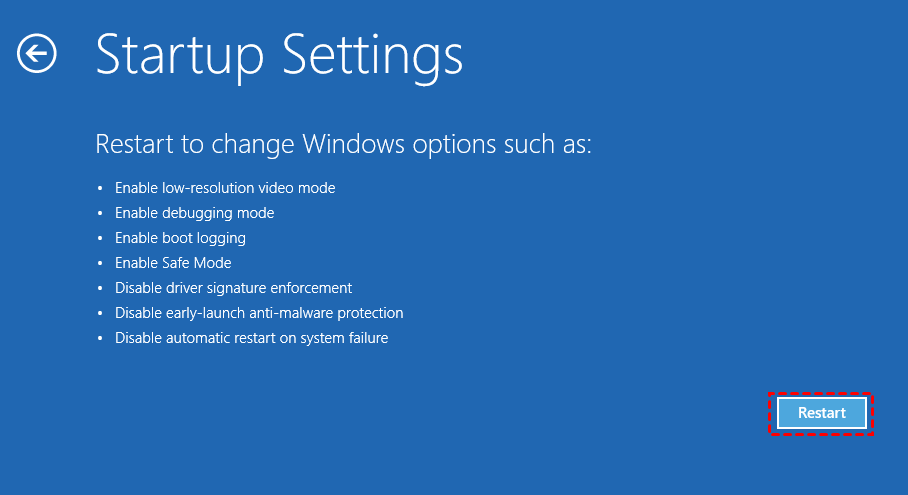
  • First, boot your computer from the installation disc, enter the BIOS by pressing F2 or Del repeatedly, select the disc as the initial boot option, and afterward press F10 to save adjustments and restart.
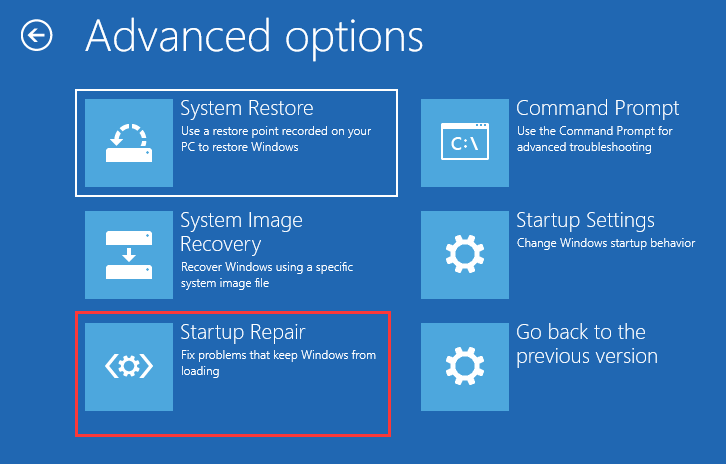
  • Select your preferred language and other options, and select Repair your computer to continue.
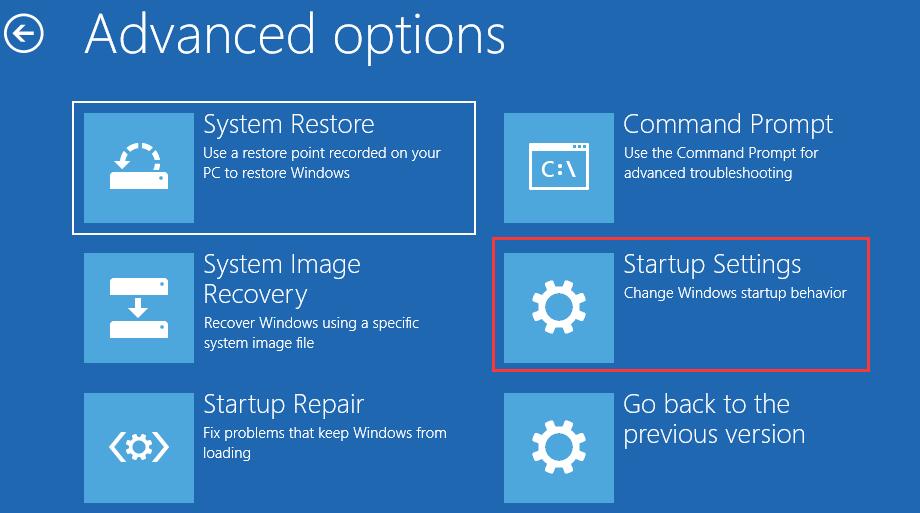
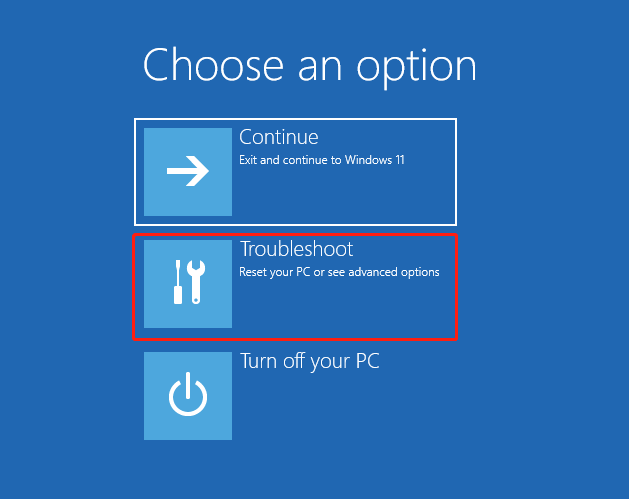
  • Now, choose Command Prompt under Troubleshoot > Advanced options. Therefore, to launch Registry Editor, use the command regedit.
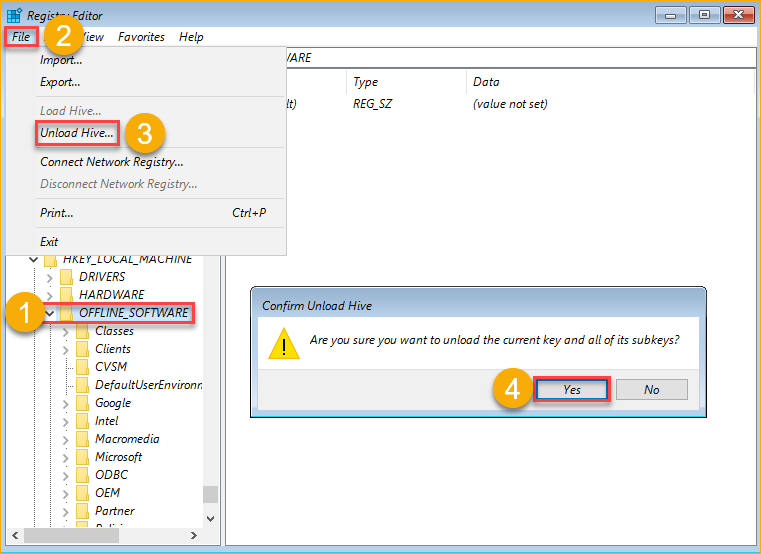
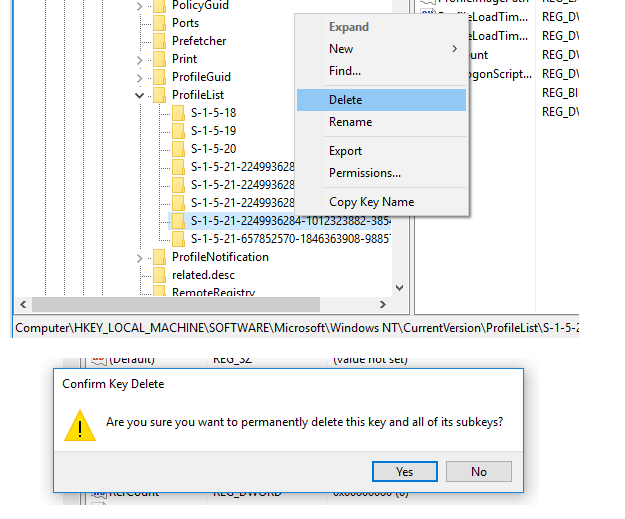
  • Now, choose the File and Load Hive where the HKEY_LOCAL_MACHINE key is visible. 
  • Access the system disc and launch the computer system. The typical location is C:Windows:system32:config:system. To store a key, enter Offline in the Key Name field and click OK.
  • Change the initial value for each of the keys to 0 by navigating to them in the correct sequence.
  • HKEY LOCAL MACHINE\Offline\ControlSet001\services\msahci
  • HKEY LOCAL MACHINE\Offline\ControlSet001\services\pciide
  • Hence,to put back the edits you made, choose the Offline key and then select File > Unload Hive. Open the Registry Editor and then shut it off.
  • Start your computer again to update the BIOS settings, remove the disc, and begin using it as normal.

Method 3: Using Registry 

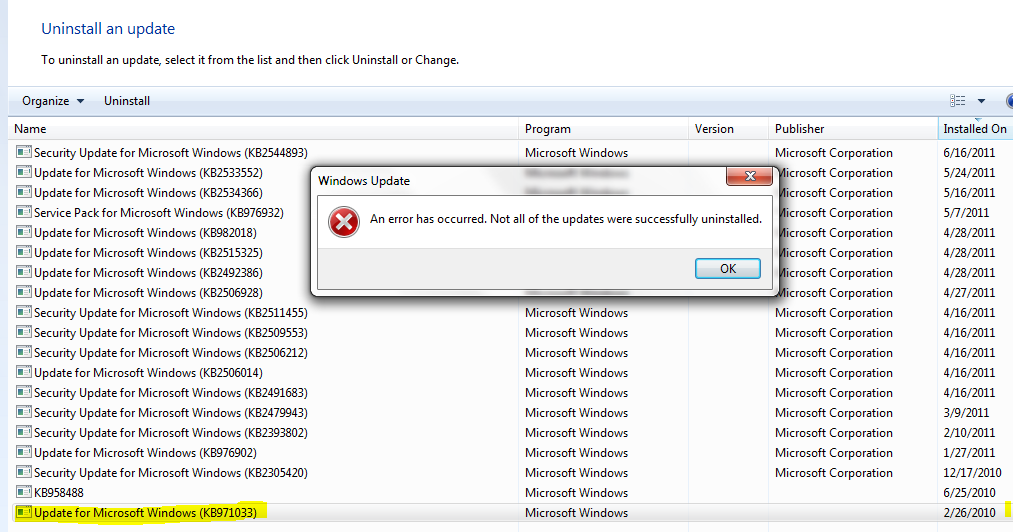
You should change the msahci key in the registry before changing motherboard Windows 10 and CPU. As you may already be aware, wrong Registry modification can lead to major problems, thus you should make a complete system image backup first.

Step 1: Authenticate Windows Account to Online Microsoft Account

You can reactivate Windows after CPU & motherboard upgrading only if you link your Windows 10/8 account to a Microsoft account. So please keep in mind to complete the following procedures after linking the account.

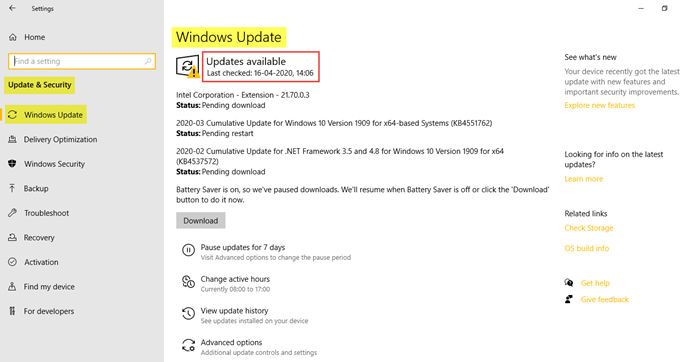
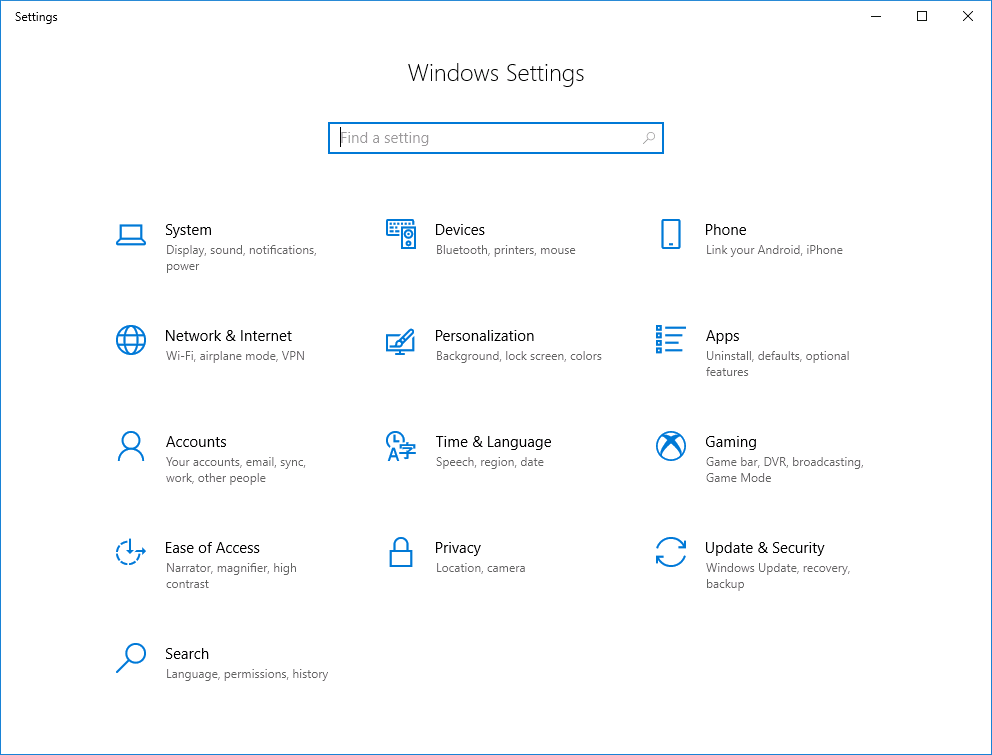
Select Activation from the left panel under Settings > Update & security under Start > Settings. In the right panel, click Add an account, and sign in using your Microsoft account.can i upgrade my motherboard and cpu without reinstalling windows 10

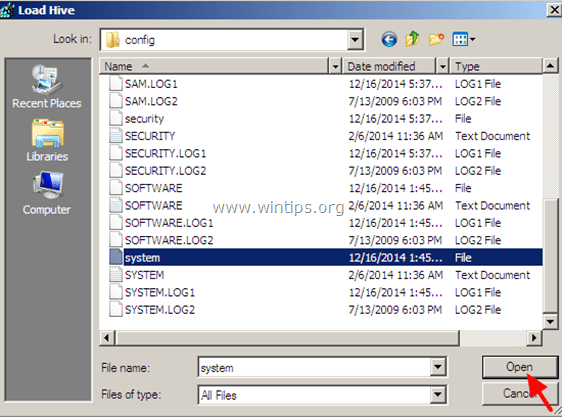
Step 2: Change the motherboard and Registry
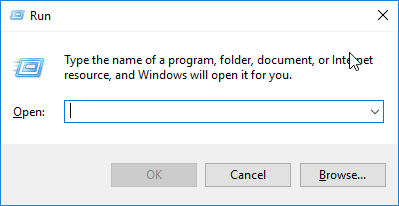
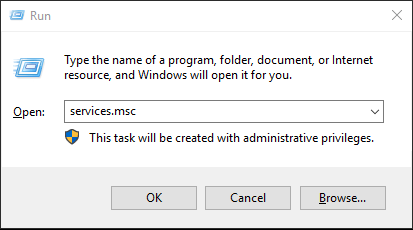
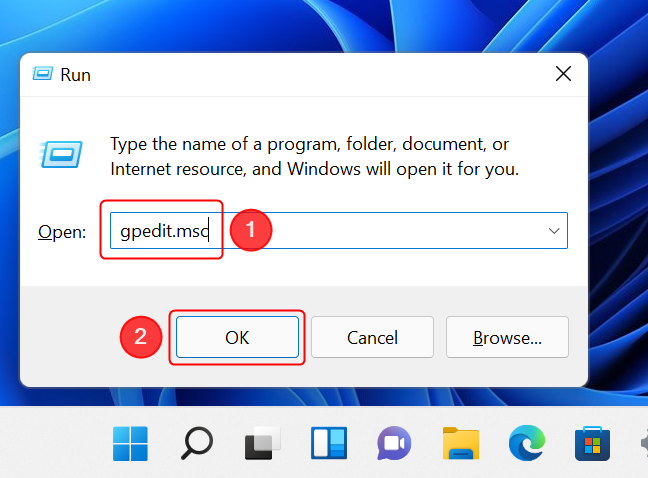
  • Type “regedit” into the Run dialogue box after pressing “Windows + R” keys to bring up the Run window. Open Registry Editor and go to the key below.
  • HKEY LOCAL MACHINE\SYSTEM\CurrentControlSet\services\msahci
  • Double-click on Start in the right pane and set its number from anything to 0. Additionally, set the DWORD value data for the following Key to 0:
  • HKEY LOCAL MACHINE\SYSTEM\CurrentControlSet\services\pciide
  • Conserve the modifications and quit Registry Editor. Reinstall new hardware. After that, Windows ought to start up properly.
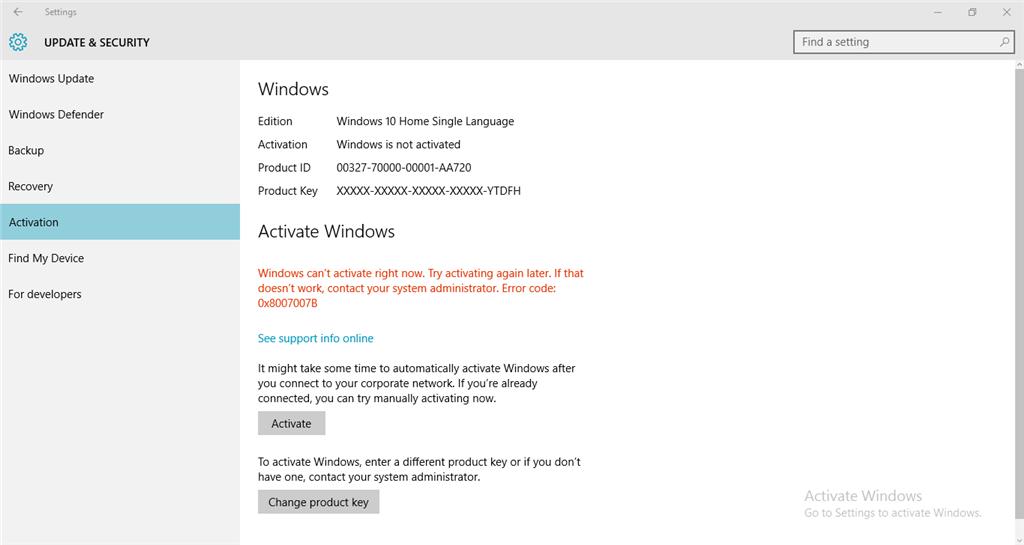
Step 3: Enable Windows

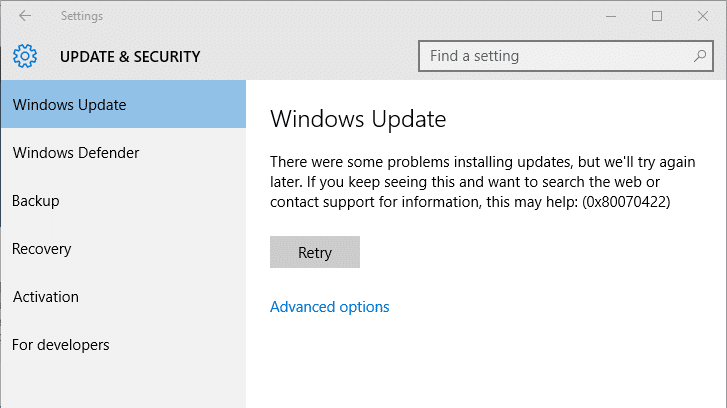
After updating your motherboard, you may want to activate Windows 10 or 8. Follow the instructions: 

  • Replace the motherboard and instruct Windows 10 to activate it just after boot by going to the option Settings.
  • Tap on Update & security and go to Troubleshoot. Tap on the option “I changed the hardware on this device recently.”
  • Log back into your Microsoft Account, then choose the Active option. The activation key will not work from your Microsoft account online. Hence, revert your Windows 10 account to the local account unless you’d like.
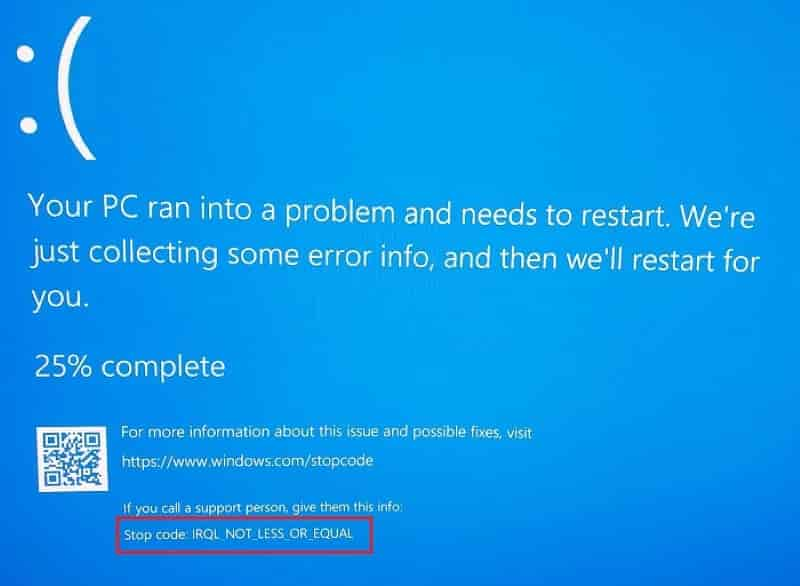
Read more: GUIDE TO FIXING IRQL_NOT_LESS_OR_EQUAL WINDOWS 10

FAQs:

Q1: Can I just upgrade my motherboard?

Ans: Yes, one can do that if the new motherboard is compatible with all of the old gear.

Q2: Can I upgrade my motherboard and CPU without reinstalling windows 10

Ans: Yes, you can upgrade the motherboard without reinstalling Windows by –

  1. Utilizing the offline registry. 
  2. Using AOMEI Backupper. 
  3. Using a registry. 

Q3: What happens if a motherboard is altered?

Ans: If a motherboard is altered, that may just work, however, once Windows builds itself up for the brand-new hardware, there might be a lot of driver conflicts present which can lead to reduced performance or perhaps even crashing.

Q4: What occurs if I replace motherboards?

Ans: If you replace a motherboard with a motherboard that is exactly the same, you won’t lose any of your hard drive data. Hence, the OS might need to be installed again if the motherboard is being changed to one of a completely different brand/model.

fix Methods to Fix this Error in Windows 10

If your device is also stuck in a blue screen with the error that shows up as “IRQL_NOT_LESS_OR_EQUAL” then you might also be facing this commonly occurring stop code in Windows. Such an issue is reported by many people and this makes the whole device and the user’s work suffer a lot. To fix this issue, there are a few different methods that would come in handy to resolve drivers IRQL Not Less or Equal Windows.

For the resolving of this error, we need to understand what this error is about and what are the reasons behind its occurrence. That understanding would be helpful to choose the method of fixation for your problem. So let’s have a look at this common error and its solutions.

What is IRQL Not Less or Equal Issue?

Before getting into the solutions we need to understand what is IRQL not less or equal. Speaking in simpler words, it is just an error that is faced due to memory-related complications in your device. If the driver of your device or the system process tries to reach out to a memory address without valid access rights. Then it might result in such an error being visible on your device with a blue screen. This error would lead to the following effects on your device:

  • It causes Windows to crash 
  • Brings a blue screen to freeze on your device
  • Runs data in the background 
  • Stops all the running application

Although it is a common error, it causes a lot of hurdles in the working of a device so it is very crucial to get rid of this issue. But you might wonder what could be the reasons behind the sudden occurrence of this error. Let’s figure this out in the further part of the article.

Reasons for IRQL Not Less or Equal

IRQL not less or equal

There might be a lot of reasons behind the occurrence of this error in your Windows but here we have listed the most prominent reasons behind it in the following points:

  • Corruption of Files in your System

Corrupted files in your system can be a reason behind such a mishappening in your device as they lead to such issues very frequently. So check for any such corruption in your system.

  • Hardware Issue

Having improper or faulty hardware can cause the error IRQL_NOT_LESS_OR_EQUAL in Windows 10. It makes your PC unable to connect and act according to your demands causing such errors.

  • Faulty Device Drivers

Sometimes when you get your device drivers updated they become incompatible with your use and result in causing such errors. Checking your compatibility with the device drivers to resolve driver IRQL_LESS_OR_NOT_EQUAL.

  • Improper Software Installation 

If your software installation is not done correctly then it creates a lot of problems for the working of your device. This can also be one of the reasons behind the occurrence of the error Driver_IRQL_NOT_LESS_OR_EQUAL Windows 10. Moreover, this can also lead to Page Fault in NonPaged Area errors.

Methods to Fix this Error in Windows 10

Methods to Fix irql_not_less_or_equal windows 10

To get rid of the error from your devices, there are a lot of methods to solve this issue. Let us look deeply into some methods that can be used to tackle the error IRQL_NOT_LESS_OR_EQUAL. Given below are the methods and steps along with it to fix the error:

  • Boot your Device

Cleaning your device with a boot can help you solve many issues and it is easy to perform on your device. Follow the given steps to perform a clean boot on your PC:

  • Firstly launch the “MSConfig” System Configuration utility on your device.
  • Use the shortcut key “WinKey+R” and enter “MSConfig”
  • Now go to the selective startup option and uncheck the option of “Load startup option”
  • Now move to the Service tab
  • Then click on Hide all Microsoft services and select “ Disable all”
  • Now allow your device to close windows by clicking on Ok
  • Solve your Disk Errors

Your disk has some corrupt files that can also make your windows experience such an error. So follow the given steps to check and fix errors in your disk :

  • To begin with, click on the Windows+R  keys 
  • Then open the jump list
  • Now select as admin the “Command Prompt”
  • In the prompt write, “chkdsk c:/f” and click on Enter
  • Then wait for a while for the process to complete 

This would check for any errors in your disks and then you can resolve them to fix your errors. 

  • Memory and Hardware Check

As this error is commonly concerned with memory issues, having a look over your memory and hardware becomes one of the obvious solutions for the fixation. Being a user of Windows 10, you have the opportunity to use the utility tool provided by your Windows. Given below are a few steps that would provide you the information on how to access this utility tool for your device:

  • Go to the “Start” button and reach out to the Search Box
  • Now search for “Memory Diagnostic” this will open your utility program.
  • Now select the option” restart and check for problems”
  • This will allow it to run a scan for you, if you find any errors then you can solve them and get rid of the IRQL Not Less or Equal
  • Get rid of Memory Caching

Your windows might be storing data in the RAM by using memory caching. This could result in the error IRQL_NOT_LESS_OR_EQUAL. To resolve this issue you can disable this feature and check if the IRQL error got fixed too.

The Final Say

Nobody likes to have a sudden freeze on their device or this continued error occurring on the screens. So everyone looks out for the simplest ways to fix errors like IRQL. To bring out ease in your life and make your problems go away with the quickest steps possible, this article brings you the best methods to troubleshoot the problem of IRQL. 

If you too are facing any such issues with your device then these methods would be very helpful for you to use. In the above article, we have mentioned many methods hoping to provide you with the best solution possible. 

FAQs

Q1. What is the IRQL_NOT_LESS_OR_EQUAL Windows 10?

This is a type of blue screen error that stops the functioning of your device. It shuts your device down anytime like in the middle of some process or just when you begin to use your device. It would cast a blue screen on your device and disable your use of the device.

Q2. What does stop code IRQL not less or equal?

Stop code IRQL_NOT_LESS_OR_EQUAL freezes your screen with a bluescreen and disables your device to perform further. It causes a lot of hindrance in the smooth running of your device.

Q3. What does IRQL NOT LESS OR EQUAL occur?

There might be a lot of reasons behind the occurrence of this error but given below are some of the main reasons behind this error:

  • Hardware and software are incompatible
  • Corruption of the files of your system
  • Faulty device drivers
  • Memory caching
Page Fault In Nonpaged Area

The dreaded Windows error known as a “Blue Screen of Death” (BSOD) can have devastating consequences on your computer. In the most extreme scenario, they could restrict you from launching Windows altogether and from obtaining any access to your data. Page Fault in Nonpaged Area has served as the stop code for a current BSOD issue that several Windows users have encountered. It is unclear from this quite general description of a stop code whether a system service or program is responsible for the problem.

Hence, this article will really be a very helpful guide for you as we will provide some useful methods to fix the “page fault in non paged area” error on your computing system.page fault in nonpaged area

What Causes The “Page Fault In Nonpaged Area” Error?

Page_fault_in_nonpaged_area BSODs are typically triggered by defective operating systems, system components, or malfunctioning drivers. Occasionally, this problem can come up with unauthorized security software. These comprise antivirus software, anti-cheat software, and much more. 

When a driver, system service, or application attempts to reach a page file that is supposed to be on your system but isn’t right now, your computer collapses with a Page Fault in Nonpaged Area BSOD. As an outcome, Windows pauses and collapses with Page Fault in Non paged Area BSOD stop signal.

How To Resolve “Page Fault In Nonpaged Area” Error? 

Given that this is a stop code that might reflect a multitude of challenges, we recommend beginning with the methods described below. Therefore, try the following techniques in Safe mode if you’re having difficulty finding Windows to load up the operating system.

Note: In the event that your computer malfunctions while in Safe mode, you could also deploy recovery media and CMD. 

Method 1: Restart your PC/Laptop

This is the first and the simplest method to get cut off from “page fault in non-paged area” or “page_fault_in_nonpaged_area windows 10”. By just restarting your computer, you may resolve many Windows errors. Furthermore, this universal method can also fix the user profile services failed the sign in issue.

This is due to the fact that when you reboot/restart your system, transient files are removed and any application using unnecessary RAM is discontinued, which makes your computer quicker.

Method 2: Remove Third-party Antivirus Softwaredisable antivirus

Some antivirus software might generate incorrect positives that can force you to quit the application you’re using. Some are incompatible and may result in PC driver issues. Uninstalling the antivirus software can be the remedy if, despite disabling it, you continue to experience the issue.

Therefore, to be confident that no virus is conflicting with your system’s functioning and resulting in the host process error, execute a full system scan before uninstalling the software. A complete system scan can assist in eradicating any malware and any related malware programs that may be the issue.

Method 3: Execute the Windows Memory Diagnostic Tool

You could perhaps consider using the Windows Memory Diagnostic tool to resolve the “page_fault_in_nonpaged_area Windows 10” error. Hence, you can adhere to the steps mentioned below to employ the Windows Memory Diagnostic Tool to solve the problem –

  • To start the procedure, type “Memory Diagnostic” into the search field and then hit “Windows Memory Diagnostic.”
  • Now, select “Restart immediately and check for issues (recommended)” from the drop-down menu.
  • Next, wait for the computer to detect the issues. Later, the system will highlight the issue identified on your screen after the scan is completed.

Method 4: Expand the Virtual Memory

Method 4: Expand the Virtual Memory
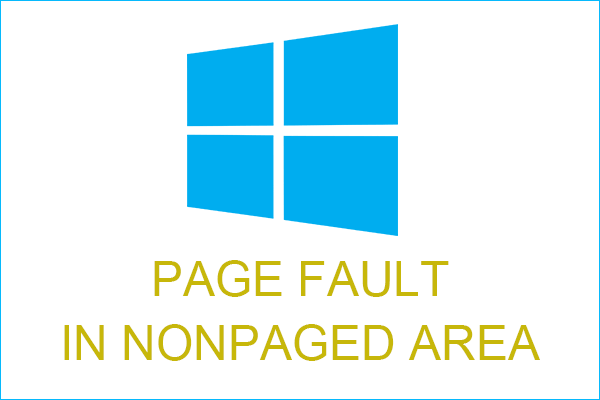
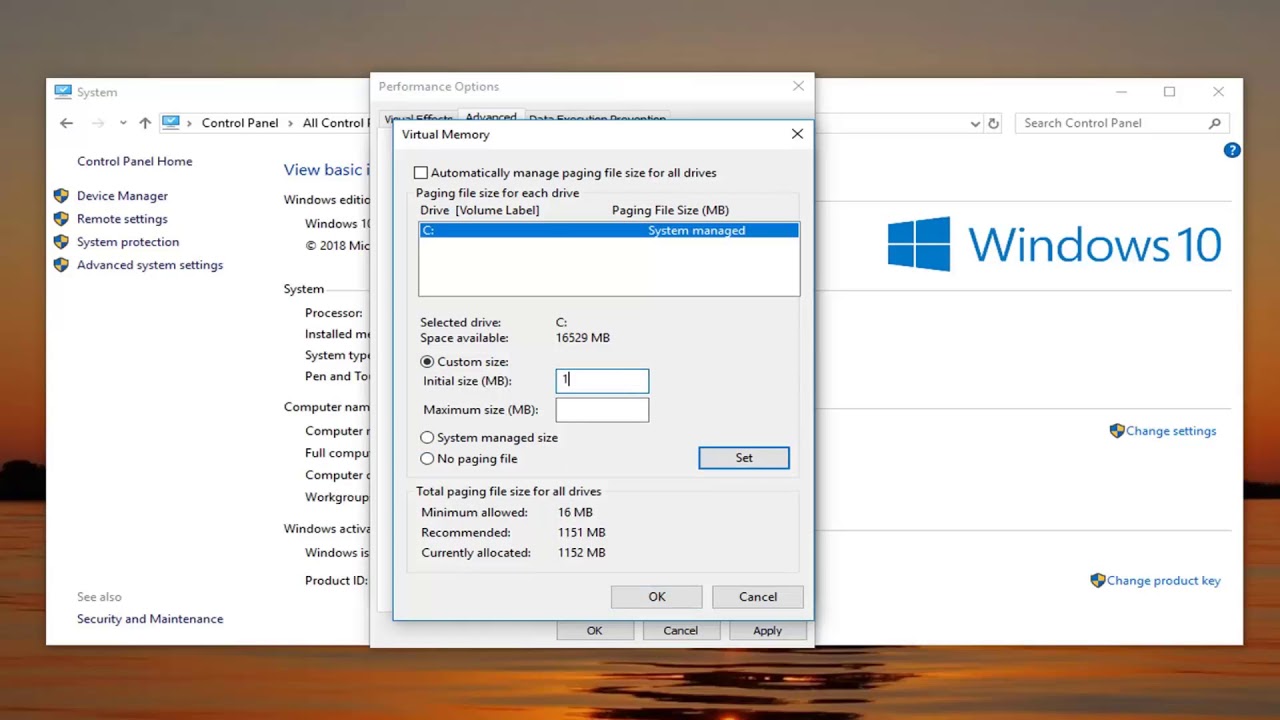
One can likewise expand the virtual memory if indeed the “page fault in nonpaged area” error still remains. Therefore, increasing virtual memory is possible as mentioned below:

 1: Launch the virtual memory’s settings window in the first step.
  • First, activate “File Explorer”. Now, right-click “This PC” and then select “Properties.”
  • Secondly, select “Advanced System Settings”. Now, click “Settings” on the Advanced Page of System Properties’ “Performance” box.
  • In the pop-up “Performance Options” window, click on the “Advanced” tab and select “Change” in the Virtual Memory box.
 2: Remove the automated management of paging file sizes.
  • First, select “Automatically manage paging file size for all discs” and deselect it.
  • Secondly, select the C drive as your section, check “No paging file,” and afterward click “Set” to preserve it.
  • Next, select “Yes” from the menu.
3: Configure the required virtual RAM on a non-system partition.
  • First, select a non-system partition and then pick “Custom Size.”
  • Now, to prevent the system from repeatedly requesting page files of various sizes set the same value both for “Initial Size” and “Maximum Size.”
  • Next, to save, click “Set”>” Ok.”

Method 5: Begin the Hardware TroubleshooterMethod 5: Begin the Hardware Troubleshooter

You can employ the Troubleshooter to determine whether your hardware is malfunctioning as hardware errors can also cause “page fault in nonpaged area” errors. Follow the steps below in order to apply this method –

  • First, to proceed, select Settings from the Start menu.
  • Secondly, on the Settings tab, choose Update & security to proceed.
  • Next, choose Troubleshoot and choose Hardware & Devices on the right. Next, choose Run the troubleshooter.
  • Right now, wait patiently for the system to detect any problems. Now, following the positioning process, the error will be highlighted if one exists. 

Method 6: Disable Fast Startup 

Windows starting time is slashed owing to Fast Startup. On your Windows PC, the such capability may, nevertheless, result in a great amount of blue or black screen issues. One may thus resolve startup issues like “page fault in non paged area” by deactivating the Fast Startup option. This approach can only be employed if your computer can start in safe mode or with the standard initialization phase. Below are the steps you need to follow –

  • First, start Windows or install media twice in a row without success, then boot into “WinPE”.
  • Secondly, click “Troubleshoot” > “Advanced Options” > “Startup Settings” to enter safe mode. 
  • Next, select “Enable Safe Mode with Networking” by clicking the F5 key after just a while.

Hence, following the procedures listed below, you may now disable the Fast Startup feature:

  • First, press the “Start” button and then select the “Settings” button.
  • Now, click on “System” and then “Power & Sleep”. Next, choose “Additional Power Settings.” Now, in the upper left corner, click “Choose what the power button does”.
  • Now, select “Change settings that are not currently unavailable”. After that, uncheck “Tap on fast startup” and press “Save changes”.

Closing Lines 

Hence, you are now knowledgeable of how to resolve the “page fault in nonpaged area” error. Well, there are various ways to repair the error, as you can see, so there’s no need to get concerned if you run across this one. To fix the problem, continue trying each of the aforementioned methods one at a moment. Don’t forget to apply Recoverit Data Recovery to effortlessly recover lost or unsaved data.

FAQs

Q1: What is a page fault error?

Ans: An operating system or program has contaminated the virtual memory if the appropriate page on the disc cannot be located, which leads to a page fault error. When such an incident occurs, the user must reload the software.

Q2: Can a computer run without RAM?

Ans: No, you won’t be capable of turning on your system without RAM, however, you’ll get numerous pings immediately to highlight this. RAM is a component of any computer system that transmits commands and information to the Processor.

Q3: What stops a computer from starting up?

Ans: Windows might not boot correctly due to a defective motherboard, graphics chipset, or RAM component.

Latest Guide To Fix “User Profile Service Failed The Sign In” Issue (2022)

The following error message “The User Profile Service Service failed the logon. User Profile cannot be loaded” Or “The User Profile Service service failed the sign-in. User profile cannot be loaded” might emerge when you register into a Windows-based computer, like Windows Vista/7/8/10/11. If your computer has antivirus software while you log on, Windows can occasionally fail to read the user account effectively. 

Please restart your system and sign in to the user identity again in order to begin. Assuming it does not resolve the problem, then employ the following alternatives that we will discuss in this article for “user profile service failed the sign in”. Just keep reading.Latest Guide To Fix “User Profile Service Failed The Sign In” Issue (2022)

How Do I Fix The Issue “User Profile Service Failed The Sign In”? 

The error message “The User Profile Service Service failed the logon. User Profile cannot be loaded”  essentially indicates that the user profile has indeed been destroyed. This problem frequently arises as a result of Windows updates, disk resizing, the formation of profile pages, system restorations, as well as other circumstances. Hence, to find the right methods or techniques to solve “the user profile service service failed the logon” or “user profile service failed the sign in windows 10” kindly follow us.

Method 1: Check the Status of your Profile Services by Operating in Safe Mode

You can try starting your computer in safe mode if the user profile service fails and an error message appears, and then check the status of the profile service to see whether a corrupted file needs to be fixed. At times, there can be a frequent pop-up of Windows Security alert so, make sure you remove the Windows Secuity Alert before carrying out the steps. 

  • First, you need to reboot your system three or four times before being brought to the Automatic Repair Window.
  • Next, in approval to progress, you should tap Troubleshoot > Advanced options. After opening the Advanced settings box, make absolutely sure you check Startup Settings.advanced settings
  • To proceed, you need to tap Restart in the following pop-up dialog. After that, press F4 to choose Enable Safe Mode.
  • Hence, in order to proceed, you may then hit the Windows key and the R key consecutively to open the Run window, and type services.msc into the box, and click OK.
  • Now, select the User Profile Service, and then you need to tap Properties from the context menu.
  • The next step is to adjust its Startup type to Automatic and afterward click the Start button to validate that the Service status is functioning in order to proceed further, just press the OK button.

Lastly, you can exit safe mode and restart your computer after completing all the instructions to check the problem persists or not.

Method 2: Using Registry Editor

You’ll need to sign in as a separate user to modify the registry, but if you just have a user account, you can indeed modify the registry in Safe Mode.

Step 1: Verify the User Profile Service’s Current Condition

In the search box, enter services.msc, then click it to display the Service window. Once you have located the Profile Page Service, double-click it, pick Automatic as the beginning type, and click Start in the Service status area. Check your capability to sign on using your user account afterward.service msc

Step 2: Evaluate the Registry Configurations

Here, {50afa256e6562afb2cd7837d8db3fd71ce947f26b53ffff72a77bb9141ae121a}SystemDrive{50afa256e6562afb2cd7837d8db3fd71ce947f26b53ffff72a77bb9141ae121a}UsersDefault is a common default profile key. On the other hand, if you updated your system from a prerelease version, this might have already changed. 

  • You must now launch the Registry Editor and restore the Default key back.
  • Press OK to launch Registry Editor after entering regedit.exe in the search field. the Default string should then be changed to {50afa256e6562afb2cd7837d8db3fd71ce947f26b53ffff72a77bb9141ae121a}SystemDrive{50afa256e6562afb2cd7837d8db3fd71ce947f26b53ffff72a77bb9141ae121a}UsersDefault by navigating to the next directory.
  • ProfileList might well be located at HKEY_LOCAL_MACHINESOFTWAREMicrosoftWindows NT CurrentVersion.

Therefore, after that, see if you can access the website using your user account.

Step 3: Configure the Registry

  • Here, locate the subkey and directories that commence with S-1-5 , continued by a substantial percentage, in the following path in the Registry Program window. In order to identify the user account profile that has the issue, double-click the ProfileImagePath item in each of the S-1–5 folders.S-1-5-21
  • Now, Windows NT Currentversion ProfileList under HKEY_LOCAL_MACHINE/SOFTWARE/Microsoft
  • There, you’ll explore two alternatives: the first in which you have two folders with the letters S-1-5 followed by lengthy numbers, the first of which finishes in.bak, while the other in which you only have one folder with the characters S-1-5 surrounded by long numbers that finishes in.bak. 
  • You must add.bak to a S-1-5 folder without.bak and remove. Back from the S-1-5 folder with. bak if you are in the circumstance mentioned previously.
  • When you discover yourself in this type of position, right-click the S-1-5 folder. bak, pick Rename, and then click Remove. Hence, in the end, go back.

Hence, your S-1-5 folder will then be delivered to you. Click it, set the RefCount and State values to 0, and then click back. You may then shut off the Registry Editor, restart your computer, and see whether you can access your user account.

Step 4: Eliminate the SID and create a brand-new profile

Hence, there are two options available to you for deleting user profiles:

1. Using Computer Properties

Type Search for “see advanced system options” and click it. Next, choose Settings from the User Profiles section of the System Properties dialogue box’s Advanced tab. Then, after identifying the profile you desire to delete, press Delete.

2. Make Use of the Registry Editoruser profile service failed the sign in

Locate the corresponding registry subkey using Registry Editor. Next, select Delete from the context menu when you right-click the SID you desire to delete. Then get into the system and create an entirely new account.

Windows NT Currentversion ProfileList at – HKEY_LOCAL_MACHINE/SOFTWARE/Microsoft

Method 3: Simply Abandon the Customer Experience Program

Well, this problem comes in some circumstances when you submit a particular file improperly to the customer experience software. You should disable the group policy editor’s setting at this stage. Hence, pay close focus to the directions below –

  • First, open the Run window by pressing “Windows” + “R then presses “Enter” after typing “gpedit.msc”.First, open the Run window by pressing "Windows" + "R then presses "Enter" after typing "gpedit.msc".
  • Secondly, the “Administrative Templates” window should expand before the “Computer Configuration” pane.
  • Now, click twice on the “System” folder and then the “Internet Communication Management” folder in the right pane.
  • The “Windows Customer Experience Improvement Program” entry will be there in the right pane of the “Internet Communication Settings” window. Next, double-click this entry to activate it.
  • Choose “Enabled” and then save your adjustments. Lastly, verify to determine whether the condition still is occurring.

Conclusion 

As a result, you can employ any of the mentioned methods to resolve “user profile service failed the sign in” problem. Simply make absolutely sure that you’ve performed a computer backup beforehand because making changes like this to the System leaves it in danger of breakdowns and issues, specifically when running multiple applications.

Frequently Asked Questions(FAQs):

Q1: How do I fix the user profile service failed the logon?

Ans: To fix “the user profile service failed the logon”, follow the methods below-

  • Making the User Profile Service Functional
  • Abandon the Customer Experience Program
  • Registry Configuration Modifications

Q2: How can I restore a damaged default profile?

Ans: By deleting the contents of C: UsersDefault and copying them from a healthy system, you may quickly fix the faulty default profile. However, be certain that the computer you copied off has the same operating system.

Q3: How can I repair a corrupt profile windows 10?

Ans: To repair, follow the steps below –

  • Build a fresh user profile then, utilize the Windows Registry to repair it.
  • Launch the DISM and SFC procedures.
  • Clean up the folder’s user data.
  • Download the most recent updates.
windows security alert

Windows Security Alert is an error message threatening your Desktop or PC. Is it genuine or fake? The user has to understand whether it is a harm to their personal or professional life or whether Microsoft has indeed sent it. Meanwhile, one should try to remove this threat as soon as possible once one discovers it. Otherwise, you may lose very personal details of your lifestyle.

Furthermore, if you don’t know how to counter this issue and get stuck somewhere, look at the article details below.

Overview of Windows Security Alert

Security warning popup is quite common for Windows users. Everybody knows that whenever a threat arises in your computer system, the Windows admin detects it to troubleshoot it. It informs us with some pop-ups to take action on them. However, fake alerts seem more active than the original ones. In that case, the user or the Windows operator can not identify the genuineness of the popup. 

A tech support scam is very compelling and makes you feel like you are really missing something. There are various ways to access your personal computer. Immediately after you trust these Microsoft scam popups, you let them access the remote access feature to make changes in the system. As a result, they install some malware programs on your device in the place of fixing the original system issues. 

Windows Security Alert

There are two types of communication with scammers. One, they display their number with a scam message or call you directly with a spoofed number. Either you call, or they do it to initiate voice communication. In both cases, they will cheat you with personal or financial data stealing. 

The fake solution services will ask you to agree to the single pay or take a subscription to restrain future issues. But you should acknowledge that Windows security popup is unwarranted and remove them by following the below-given explanations.

Know What Microsoft Says About Microsoft Scam Popup

  • It sends you a message about the system issue, yet it doesn’t provide a contact number to ask for financial or personal details. If any number is there or any call is trying to connect with you, be sure – it’s fake because Microsoft never does this job. Provided the user asks for it. 
  • Furthermore, It never encourages you to pay for such services until they come under the specified category. 
  • Never connect a call on the prescribed number at any cost because the user may counter a consequential financial crisis. 
  • In rare cases, Microsoft sends popup messages on the open-ended browser. Not just that, but it discourages you from downloading the required software from unauthorized websites. Always use the MS Partner website or MS store to restrain malware threats. 
  • One should browse with Microsoft Edge efficiently to stop the Microsoft scam popup. 

Windows Security Alert Solutions 

1. Close the Opened Browser

Close the Opened Browser

If you know the message is fake, then immediately close the opened browser of your computer system. However, in some cases, you may not close it down. Follow the steps to make it smooth. 

  • Check out the “Task Bar” for right-click on it for “Task Manager.” A Window will appear to click on the “processes” option to Find “Web Browser.”
  • Whatever the “Web Browser” you are using, right-click on it to go for the “End Task.” This way, the web browser will get closed. Furthermore, disallow the browser to show the last opened page while using it in the next term. 

2. Malicious Programs Uninstallation

The scammers try to install malicious programs or malware in your system, displaying the error windows security alert. For that cause, the repair should be relevant to malicious programs. Read the steps. 

Malicious Programs Uninstallation

  • Go to the “Control Panel” for the “Program Section” to press the option” Uninstall a Program.” 
  • Check the “Program and Features” screen to search the malicious program and “Uninstall” them via the left click of the mouse. 
  • Confirm the popup appears on the screen. 

3. Security Warning Popup Removal From the Microsoft Edge

  • From the three dots in the browser, open the “Settings” option. 
  • Follow the “Reset Settings” option to click on the “Restore Settings to their Default Values.” 
  • Press the “Reset” option and remove the threat. 

4 Malwarebytes Usage for “Windows Security Popup” Removal

Malwarebytes Usage for Windows Security Alert

  • Download the “Malwarebytes” from the authorized source and complete the installation process via “Agree and Instal” Norms. 
  • Start scanning the system to find the “Quarantine” to take off the “Malicious Programs” that appeared by the “Malwarebytes.” After the successful scan! Take off all the malicious files and “Restart the System.”

5 Use Hitman Pro for Windows Security Alert

  • Download the latest and compatible version of Hitman Pro and install it from the Download folder of your PC. 
  • After the successful installation, go to the complete system scan for the malicious programs installed on your Windows or operating system. 
  • Use the 30-day free trial by continuing for “Activate Free License” to enter the “Email Address” and pressing the “Activate” button. 

6. Windows Security Utorrentie Popup

  • Open the file location from “Task Manager” and check the properties of the ” Utorrentie.exe.” Move on to the “Security Tab” to select “Edit” and Deny the “Full Control” for users and the system. 
  • Visit the “Task Manager” again and remove all the relevant “(.Exe).” 

The Final Words

The prime cause of Windows security alert is due to usage of an easily approachable browser. If such a message appears on your computer screen, close the tab immediately to save yourself from unnecessary personal or professional data threats.

Frequently Asked Questions

Q.1 How to Stop Malwarebytes Popups?

Open Malwarebytes from the “Settings” option & stop the Malwarebytes Popups from the notification section. 

Q.2 How Do I Get Rid of the Windows Security Alert Pop-up?

To get rid of the Windows Security Alert Pop-up, make changes in the browser used by you last or install the Microsoft Edge browser. 

Q.3 Why do I Keep Getting the Windows Security Alert?

The alert is for some technical issues that prevail in your personal computer. 

how do I restore my computer to an earlier date?

Sometimes the user faces a lot of issues while using an updated device or finds the previous setup of the computer more friendly. In such a case, they need to just restore their computers to an earlier date. This process to restore a pc to the previous date refers to restoring the current updated version to the previous version of the device. A question like how do I restore my computer to an earlier date? will be answered.

There might be several reasons behind this but majorly it happens when the user is unable to adjust to the new setup and requires to get back his old setup. Now you might be thinking, how do I restore my computer to an earlier date? There are a lot of ways that can be used to restore a PC to a previous date. Given below are some of those different ways that you can use to restore Windows to an earlier date.

How to Restore My Computer to an Earlier Date?

There can be numerous ways that would help you out with the process of restoring your PC depending upon your choice. Let’s answer your question, “How do I restore my computer to an earlier date? ” Here are some of the possible ways that can lead you to smoothly carry out the process of restoring your computer.

1. Steps to Restore Windows System to an Earlier Point

  • Before starting the process you should also know how long does system restore take so that you can save all your files so that they might not be lost during the program.
  • After that click on the start button 
  • Choose All programs and then move to Accessories How to Restore My Computer to an Earlier Date?
  • Then select system tools and choose system restore.
  • Then you will be directed to the main Windows of the system to restore the main window.
  • Go to Windows vista and select the continue option 
  • After that, click on the next button, this would lead you to the list of restored points.
  • Now select the most recent restore date
  • Click on the next button twice and finish the process 
  • Finally, restart your Windows
  • After that, you would receive a confirmation message about your Windows being restored. This will restore the computer to an earlier date. 

2. Steps to Restore your Computer to an Earlier Date Without System RestoreHow to Restore My Computer to an Earlier Date?

  • Select the troubleshooting option
  • Then click on  Advanced options
  • After that select the system image recovery 
  • Move forward and select a system image
  • Now moving forward choose the location of the backup for the restore.
  • Refresh your system and this will make your image appear in the list.
  • Now follow up the direction on your screen and complete the full recovery.

3. Uninstalling Updates

  • Before beginning the process move to the Windows reboot to the recovery environment.
  • Now move to troubleshoot 
  • Then now click on the Advanced option
  • After that select uninstall updates.
  • Select your way of uninstallation procedure according to your convenience.
  • This will finish up the uninstalling procedure and hence would restore PC to previous date.

4. Steps to Restore Computers to Previous Windowsrestore system

  • Go to the start menu and click on the system properties
  • There you might find an option for System Protection, click on that
  • After that click on the option with system restore.
  • Tap on the next button.
  • Then you would be presented with a list of recent restoration points
  • Select the required date if you are in search of a particular date.
  • Then finish up the process by clicking the finish button.

5. Steps for System Restore PC in Windows 8restore in window 8

  • First of all click on the start button 
  • Type Restore and click on create a restore point
  • Then click on the System Restore button
  • This will lead you to the screen with all the restore points from your last updates.
  • Now you can select a restore point of your choice
  • Select next and finish up the process to restore the PC to the previous date. 

All this information must have given you the answer to your most thought-provoking question: how do I restore computer to earlier date?

Final Say 

If you too find yourself in a situation as such where you are not comfortable with the setup of your device then you might also think of getting your computer restored. This article here brings you all the information you need to know. The answer to the most thought-about question, “How do I restore my computer to an earlier date?”, this article brings you every detail you might need. 

There are different ways through which you can do a restore. Go through all of those steps and find whatever works for you. With the correct guidance from the above-mentioned steps, you can easily perform the process of restoring your computer to an earlier date. 

FAQs

1. How do I restore my computer to an earlier date without a restore point?

In order to restore the computer to an earlier date without a restore point, follow the below-mentioned steps:

  • Go on the troubleshoot option and click on the advanced options
  • Select the system recovery image
  • Now select a system image and select a location for your backup
  • Now after refreshing you will have to follow the instruction on the screen
  • It will finish up your process of restoring your computer to an earlier date without a restore point

2. How do I restore my laptop back to yesterday?

For restoring your laptop back to yesterday or the day before, you need to follow the given steps:

  • Firstly click on the “Start” button followed by All Programs
  • Tap on Accessories and select System Tools
  • After that, open the system restore window and click on next
  • Select the option “Show More Restore Points”
  • This would show you all the previous restore dates.
  • Select your restore date of a day before and you will be all good with your device restored back to yesterday.

3. Where do I find System Restore on my computer?

You can find System Restore on your computer by just doing a search on the taskbar. Find your control panel search box and search for recovery. Select the recovery option and open the system restore.

how long does system restore take

If you are stuck with questions like, What is Windows restore? How long does System Restore take? How to do Windows 10 System Restore? Then you’re at the right place. Here we’ll tell you all about Windows restore and how long does a System Restore take.

Computers have become an important part of everyone’s life. From students to businessmen to shopkeepers, everyone needs a computer to do their work these days. Even if there is the slightest problem with the computer, the work gets stuck. 

Windows restore of System Restore is a tool that protects and repairs computer software. If your computer gets hacked by someone then you can perform a System Restore to remove the viruses and malware from your computer and save the stored data. 

It is a very effective tool. But, sometimes it gets stuck. People using Windows 10 and 11 are facing the problem that while performing a System Restore, their computer starts hanging several times or gets stuck. If you’re one of them then don’t worry. Here we’ll tell you about different ways where you can perform a System Restore without your Windows getting stuck. 

How Long Does System Restore Take ? 

Windows restore

If you are wondering how long does System Restore take, generally, it takes 20-40 minutes or so for the system to restore. But if it’s taking more time then the chances are that your Windows is stuck or hung. If your System Restore is frozen then you might see something like “Please wait while your Windows files and settings are being restored, System Restore is initializing” or you might see the System Restore bar but cannot see the percentage. 

Windows stuck

If you see any of these, it means that your System Restore process got stuck then you need to rsync windows and take some action so that this process can be completed.

Ways to Fix the Issue

If your System Restore is changed then here we are going to tell you about some processes to fix this issue, follow our list given below. 

  • Run Startup Repair 

Advanced options

In this process, you force stop your computer from performing the System Restore process. 

To do this first, you need to enter WinRe. Go on Choose an option, then select Troubleshoot. Once the troubleshoot option is open, select Advanced Options & then tap on Startup Repair

This will stop the ongoing System Restore procedure. Give your computer some time and then perform the System Restore again. 

  • System Restore in Safe Mode

System Restore in Safe Mode

If you tried to shut down your computer but it did not help then you can try performing System Restore in Safe Mode.

  1. For this, first, you need to create an Installation Disc. For this, you need to go on the official Microsoft website from some other computer. Now, download Windows 10 or 11 tools and make an installation disc. You can also make a repair drive or repair disc.
  2. Insert that disc into your computer. Now change the boot order to boot your computer from the installation disc.
  3. Now click on Repair your computer to enter the WinRe file. 
  4. Click on Choose an option, then troubleshoot. Once the troubleshooting option is open, select Advanced Options and then click on Startup Settings. Now click on Restart
  5. Now click F6 to select the Enable Safe Mode With Command Prompt. This will start System Restore. 
  6. Here select an account and enter the correct password.
  7. Now type rstrui.exe in the command prompt & now press the Enter button on the keyboard. 
  8. Now you are ready to start the System Restore process in Safe Mode. 

This process of Windows 10 system restore from boot will force stop the ongoing System Restore process and will help you to perform System Restore with the help of another computer.

  •  Run SFC

Run SFC

System File Check (SFC.exe) will restore any corrupted files. If the System Restore procedure is taking more time then certainly some files in your system are corrupted. SFC will help in restoring the corrupted files so that the System Restore process can be resumed. 

  1. Enter WinRe with the help of an installation disc.
  2. Select Choose an Option, then troubleshoot, then Advanced Options, and then Command Prompt
  3. Here select an account and enter the correct password.
  4. Now type sfc /scannow in the popup window and now press the Enter button on the keyboard. 

This will help in restoring the corrupted files and will ultimately help in performing System Restore. 

Final Say

How long does system restore take? It can delay your work if the System Restore process gets stuck. But you don’t need to worry anymore. Here we have provided you with the best available solutions. If your Window gets stuck while performing system restore then you can try any or all of the above options. 

Frequently Asked Questions

Q1- How long is too long for System Restore?

In general, it takes 20-40 minutes or so for the system to restore. But if it’s taking more time then the chances are that your Windows is stuck or hung. If it’s been more than 40-45 minutes and you can see something like  “Please wait while your Windows files and settings are being restored, system restore is initializing” on your system screen then your System Restore process will definitely be stuck. 

Q2- What happens if you interrupted System Restore Windows 10?

If it’s already been more than an hour and your System Restore process is stuck then you might need to interrupt. You can force reboot the system but it might cause an unbootable system. To avoid this, use any of the procedures that we have discussed above like running Startup Repair or performing System Reboot in Safe Mode. 

Q3- How long does an average System Restore take?

An average Restore takes some 20-40 minutes. If it’s already been around an hour and you can see something like “Please wait while your Windows files and settings are being restored, system restore is initializing” or you might see the system restore bar but cannot see the percentage then the System Restore process is frozen.

Rsync Windows

Are you also in search of a helping hand in the syncing process of files on local and different devices? You can use the tool Rsync for rsync windows purposes. This article provides you with adequate information about Rsync for windows. If you are not looking up for Rsync to conduct this then you can check out the Rsync alternatives mentioned toward the end of the article. This article aims to rectify all of your doubts regarding tools for file synchronization.Why use Rsync Windows?

What is Rsync?

Rsync or Remote sync is a feature that helps to sync files and directories from one location to another. It provides you with the features such as copying files from one location to another, mirroring and transferring data from a source to the user’s selected destination. It carries the process of syncing files in two different ways:

  • The first process that can be used to sync files through Rsync windows is with a remote shell program.
  • The second process to perform the sync would be via TCP.

Rsync is the tool for syncing your remote items from source to destination. It allows the Large files to transfer either through transport or by directly connecting to Rsync Daemon.

Why use Rsync Windows?

You can use Rsync for the following purpose:

  • You can use this for syncing and copying files from one location to another.
  • It is a faster way to transfer files compared to other transferring commands used to copy items.
  • It comprises a unique feature of compression and decompression which consumes less bandwidth.
  • Also, it allows the usage of transparent remote shells such as ssh or rsh
  • It allows authenticated and anonymous daemons of Rsync

How to Use Rsync in  Windows 10?

If you are too working on Windows 10 and need to copy files from one local directory to another and don’t really have any idea how to do it. You can use Rsync Windows 10. Follow the given steps to use Rsync in Windows10. Before using Rsync Windows 10, you need to first install windows 10 on your Windows. To do that follow the given steps:

  • Firstly download the setup file ”MinGW-get-setup.exe“ from the site MinGW SourceForge Project.
  • Now click on the install option after you are done running the download
  • Now copy the below files from the MinGW MSYS bin folder: rsync windows

C:Program Files {x86} Gitbin

C:MinGWmsys1.0bin to the Git bin folder

After getting these things done, you can run the command Rsync on Windows 10. For that just do the following things:

  • Firstly, open the command window.
  • Then as an administrator type wsl-install
  • Finally press enter.

Alternatives to Rsync Windows

1.GoodSync rsync windows goodsync

This alternative for Rsync is an easy-to-use and trustworthy software. It provides facilities such as backup of files and syncing of files. This works by automatically backing up and syncing your files. This syncing of files takes place between any device, computer, phone, or even drive.

2. Syncthing

Syncthing is an alternative to the Rsync window which provides the service of syncing files between two or more computers. It provides its transferring services free of cost to the users. Moreover, it has very supportive customer service as they are available 24×7 live support to its users. It does not allow the involvement of any third-party cloud storage and is compatible to run on Windows, Linux, Android as well as Mac.

3. Free File Sync

This is one of the file-syncing service providers which aims at synchronizing files of all sizes and also creating an automatic backup. It allows you to back up on disk space some files of specific types. Along with syncing it also works effortlessly with external and internal drives. It comes with the feature of syncing two or more folders of different cloud storage. so, if you too are looking for something that would be useful to move your files or create a backup to the location of your choice then you must check this out.

4. Rclone Rclone

Rclone is a command line tool that can be used to manage cloud storage. It supports more than 40 cloud storage products that can be managed through it. Also, compatible to run on Windows, Linux, Mac, and many more. It acts as a link between different cloud storage. Among these different cloud storages, you can copy, move and sync files. If you are a regular user of cloud spaces in general and are required to move and sync files among them then you can use this tool to make it easier for you. All in all, it provides you with the best services for cloud storage and syncing files among them.

Final Say

There are several times when a person requires to move, copy, and sync files and other stuff from one location to the other. This can become a very hectic process if done manually. To provide aid in such a situation, file synchronization tools come in handy. So, to make it easier for you this article has been curated with the introduction to a command called Rsync windows along with some alternatives for it. This would help you get knowledge about how and why you should use the Rsync in windows as well as it will throw some light on the features of the alternatives selected for the purpose of file synchronization. 

FAQs

1. How to use Rsync?

In order to use Rsync you first need to install it. Then you need to decide on your source device as well as your destination device. Now, you need to create SSH keys on both of your devices. This will allow the devices to copy each other’s authorized keys. Copy those keys to the Ubuntu Server. These steps will give you access to move your files from the source to the destination.

2. How does Rsync work?

Rsync works by linking two devices, one being the source and the other being the destination. It acts as a tool to transfer and sync files from that source to the other.

windows 11 sucks

Since the time Windows 11 came to the market, there has been a lot of hassle in using it. People have very mixed reactions to it. Some of you really liked the upgraded version. But on the other hand, people don’t like it as it comes with a lot of hassles to use. A lot of people say that Windows 11 sucks? Does it really? To answer all of these questions with Windows 11 issues, we are here. So, just go with the flow of this article and find answers to your every question. 

Windows 11 sucksWhy does Windows 11 Sucks?

People were expecting too much from Windows 11 but it is not like what people may have expected. A lot of users run into problems while using Windows 11. Compatibility issue, Oracle virtual box issue, etc. Actually, there are so many reasons for windows 11 issues.

5 Major Issues with Windows 11

We are providing you with 5 major problems that people are facing while using Windows 11. Through the following information, you can figure out whether it really sucks or not? But we can also suggest an easier solution: Re-install Windows 10 and get all the issues with this latest OS resolved.

Hardware Requirement isn’t available

This Windows 11 has some standard hardware requirements which don’t allow a lot of hardware connected to it. If this happens, then it shows errors. Windows 11 CPU requirements are another major aspect one should look at. Normal requirements of RAM, Graphic cards, etc will always be there, but Windows 11 also requires a TPM 2.0 chip and a 1 GHz Processor.

Problematic Task Bar and ManagerWindows 11 sucks task manager

Task Manager in Windows 11 is not so personalized you can not move the taskbar as per your choices. It feels so downgraded from Windows 11. You can not open it easily. This is why we found windows 11 issues.

Lacks Default Web Browser 

Windows 11 issues occur as it allows you to use only Microsoft Edge browsers. If you are the one who is more familiar with Google chrome then you need to open webpages via chrome by default.

Difficult User Interfaceuser interface

Another Reason for which we can say windows 11 issues is the default user interface. You may see this interface when you are trying to shut down your computer or upgrade your Windows. You need to spend some time becoming familiar with these Windows. This new feature makes it slightly difficult to use. You need to click several times to get into any of the functions such as Wi-Fi and the context menu option etc.

Availability of Control Panel windows 11 Control Panel

To make it more simplified,  Windows 11 lacks features. For example, there is a settings app and also a control panel. Both things simultaneously make Windows a mess. Also, Windows 11 is not stable, It always needs an update. The start menu always lacks because of oversimplified features. These are the major reasons why Windows 11 sucks.

Windows 11 What’s New? (Features)

Every coin has two sides similarly Windows 11 also comes with many advantages. This is why it is an upgraded version of previous Windows. Despite all the shortcomings, there are a few new features that you should know. You can check the advantages below. 

Windows Security

Windows 11 security offers a more secure version. It has very good security technology inbuilt. Also, not only software technology. It also offers high security to hardware gadgets. This security makes it better than other Windows options available to you.

SecurityXbox Tech

Windows 11 provides a better gaming experience as it comes with two new features for Xbox gaming users. These two features allow the computer to run smoothly while you are gaming. The features are Auto HDR and Direct storage to PC.

Microsoft Teams

Microsoft teams are integrated with Windows 11. This feature is very much useful and easy to use as it is present in the taskbar and you can launch it anytime easily.

Multitasking Feature

In this Windows, you can handle various tasks easily. You can use multiple desktop features to handle your work firmly. You can use your operating system for personal use, For office purposes, and for gaming at a time. 

Leveled up Android Apps

Integrated android apps are also a feature of why one should go for Windows 11. Amazon app store is freely available in Windows 11 and another option is the Microsoft store. You can install any app from the two.

How to Upgrade Windows 11?Update Windows

If you want to upgrade to Windows 11 then you can simply do it by the following steps. Also, we would like to advise you to wait until your Windows notifies you that the update is ready. If you are getting these notifications then you can update Windows.

  1. Select start
  2. Goto Settings
  3. Updates and Security
  4. Click on Windows Update. 

Conclusion

We have provided you with full-fledged information on Windows 11. We are hoping that you may get the answer to the most asked question: Does Windows 11 sucks? Now, you are able to figure out what is best for you. If you still have any confusion then you can ask in the comment section below.

FAQs

Q1. Is Windows 11 good?

It is a good idea. But if you have Windows 10 then you won’t be getting any other exceptional features. so, you can do it only for a few upgraded features.

Q2. Should I get Windows 11?

You can get Windows 11 if you really want. But we would like to suggest that it wouldn’t be a great idea. As it doesn’t come with extra features. Also, it is very complex to use.

Q3. Is Windows 11 good for gaming?

Indeed, Windows 11 is very good for gaming as it comes with upgraded technology to Windows 10.

Q4. Is my computer compatible with Windows 11?

Your device must be running Windows 10 or other versions. So, you can easily upgrade your computer to Windows 11 and it would be compatible as well.

CMR Vs SMR

Which is better, CMR vs SMR? When determining which hard disc to purchase for a particular purpose, a large number of people question this concern. Owing to the notion that diverse capturing techniques perform significantly and might, consequently, sometimes be superior and usually worse for the intended purpose.

Therefore, this article will explain to you SMR and CMR drives and discuss how to differentiate between them.

CMR VS SMR: Explanationcmr vs smr

CMR (Conventional Magnetic Recording)

Conventional Magnetic Recording is formerly known as PMR (Perpendicular Magnetic Recording). Without having to rewrite or transfer any current data, CMR technology enables information to be written to free regions of the computer’s hard drive. 

Plates are magnetic both vertically and horizontally. Without initially writing the data back onto the hard drive, it is feasible to write straight to the spot where the information will be kept forever. 

SMR (Shingled Magnetic Recording)

SMR or Shingled Magnetic Recording is a mechanism where the reading head of the hard drive is broader than the write head. Therefore, data should store on a hard drive in an overlapping pattern.

Due to space savings, the very same plate now can hold a much higher volume. The writing head of an SMR disc is broader but less watermarked than that of the reading head. As a result, the grooves can indeed be partially overlapping, allowing for the storage of extra information. The concern is that while their data remains intact, the tracks covering the data must be overwritten when the hard disc adds information.

SMR VS CMR: Advantages & Disadvantages

CMR Advantages

The best option for active storage is CMR hard drives when large volumes of data or high transfer rates need to be read and written. When a redundancy mechanism is present, this hard disc is the one the NAS devices choose to be using. Moreover, it performs effectively for a range of items, like –

  • Streaming with music
  • For utilization on NAS servers or broad sense servers, video, music, or image analysis.

CMR Disadvantages

Especially in comparison to an SMR hard disc, a CMR hard disk drive prices more.

SMR Advantages 

  • If primarily used for data preservation, SMR hard disks are a feasible choice. Suppose the data was once written and only seldom accessed. You may use this for extremely long-term photo and video archiving. SMR hard drives should not utilize in NAS systems, particularly when a failover system (RAID) is in operation.
  • There is an enhancement in storage efficiency of up to 30{50afa256e6562afb2cd7837d8db3fd71ce947f26b53ffff72a77bb9141ae121a}. In comparison to CMR drives, SMR drives have a greater amount of storage while consuming less power.

SMR Disadvantages

  • The hard drive for PC might be unable to transport data quickly enough, for example, terminate a RAID with just a warning as a result of this behavior, which can worsen with several minor movements and adjustments. A raid rebuild may cause this, necessitating the rewriting of a significant amount of information.
  • Previous data already stored on the drive frequently is required to be transferred in conjunction with new information since they are sometimes partially covered and unreadable as a result. In order to avoid overwriting other data, certain older data needs to rebuild. The material is broken down into sections or zones that are maintained collectively to prevent this from necessitating the rewriting of all data on hard drives with high-capacity usage.SMR VS CMR: Advantages & Disadvantages

How Do I Choose Between “CMR VS SMR”?

To choose the finest hard drive for you, you need to consider the backups and storage capacity. In general, an SMR hard drive would provide you with greater storage than a CMR HDD for a little less money per drive. Its use will be less adaptable, which is its fundamental disadvantage.

Like CMR drives, SMR drives provide rapid data access through random-read capabilities. The fact that they require constant loads and a bit of idleness makes them perfect for customized systems that utilize more of their structure and massive volume. In order to increase drive functionality at a sensible rate, you should purchase an SMR hard disc for backup and preservation. 

The reason is that less drive access means better performance. Because SMR drives provide a comparable volume on fewer drives, companies that want to purchase high-capacity drives prefer them.

Tips for Data Backup to CMR or SMR DrivesCMR or SMR Hard Drives

It would be a good idea to back up your data to the largest hard drive, whether you use CMR or SMR. Start a data backup on your PC by downloading and installing MiniTool ShadowMaker Trial Edition. Remember, the Computer system should attach to your hard disc. Hence, to apply this, follow the below steps properly –

  • First, one’s computer should always attach to the hard drive. Double-click the.exe file to begin installing MiniTool ShadowMaker Trial Edition by following the directions after obtaining it. 

Note: Upon your SMR vs CMR drives, do not install MiniTool ShadowMaker.

  • Secondly, go to the Backup page by navigating. You could discover that this backup program automatically backs up the system. By selecting Folders and Files under Source, you can backup data. Simply select OK following checking off at every item you wish to restore.Data Backup to CMR or SMR Drives
  • Now, in order to store your duplicate copies, click the Destination option, next specify a destination and select OK. You have just a selection between the Administrator, Library, Computer, and Shared destination pathways. The endpoint might well be either your CMR or SMR hard drive there. Moreover, you have to develop a planned strategy for the backup. You may back up your computer utilizing MiniTool ShadowMaker nearly every day, weekly basis, each month, and whenever an event takes place. Before choosing the Back up Now alternative, select the Schedule button. Afterward when, select the program because then MiniTool ShadowMaker will commence storing up your data continuously at a point in time.
  • Lastly, to start producing a backup on your system, choose the Backup Now button.

Conclusion 

Well, the rationale and regions of implementation for every technology like SMR and CMR are distinct. Beyond all else, SMR is a plausible choice when you require massive hard discs employed only for data storage and have cheaper material and current consumption expenditures. 

CMR hard disks are indeed a better alternative for undertaking everlasting writing tasks and transmitting large quantities of information with significant transfer rates, or when the reliability of big information transfers is important.

We hope this article will definitely help you differentiate between “CMR Vs SMR”. Moreover, if you are still facing issues, kindly let us know in the comments section below. 

Frequently Asked Questions

Q1: SMR vs CMR; Which is better?

Ans: This technology’s value is an up to 30{50afa256e6562afb2cd7837d8db3fd71ce947f26b53ffff72a77bb9141ae121a} improvement in supercapacitors. In comparison to CMR, SMR drives have a greater amount of storage while consuming less energy. Therefore, being used predominantly for the protection of data, SMR hard disks are a feasible option.

Q2: Who produces SMR drives?

Ans: Seagate produces SMR drives. In 2013, they started distributing sensor SMR hard drives, hence boasting a 25{50afa256e6562afb2cd7837d8db3fd71ce947f26b53ffff72a77bb9141ae121a} enhancement in nameplate storage versus non-shingled memory.

is winzip safe

File compression and management are the major concerns of people. Without this, it would be very difficult to manage the files as the device has limitations over storing them. In such situations, software such as Winzip becomes something that aids a lot of our demands together. It offers us the facility of compressing files as well as management of those files. But in some cases, Winzip and its security are often doubted by the users. if you are thinking of whether is winzip safe then here is the guide.

To clarify any such confusion here we are with a detailed review of WinZip which would clear your mind about the fact that, is Winzip safe. Let’s get into the article further to get this wholesome review. 

What is Winzip? What is Winzip? 

Winzip is one of the leading software for utility management and compression of files. It is a multi-service provider as it provides the user with two services of management as well as compression of files. Winzip is something that ranks among the most popular compression-providing services. Also, allows you to detect duplicate files and convert them along with exporting them. Winzip provides numerous facilities for the users as it converts and resizes and watermarks the images in the process of compression which makes the work for the user even more easier and convenient.

It allows you easily share through the cloud, social media, and emails. It is so good in its services that many big organizations too believe in its capacity and use it for their work.

Features of Winzip

After a complete understanding of Winzip and what it aims to provide let’s have a look at some of the best features of Winzip:

  • It makes the process of compressing, sharing, and managing files very quick and easy to use for the user.
  • It allows integration with the services of the cloud in a direct way.
  • Supports the use of the “zipx” file format and also supports DLL file extension with AES 256-bit encryption.
  • It automatically modifies and reduces the size of the compressed image.
  • Allows the amalgamation of multiple PDFs in a single file.
  • Adds a watermark on the images and PDFs automatically.
  • It comes with an in-built sharing functionality.
  • Allows backup to be stored locally on the cloud.
  • You can use a zip extractor to access these files on your device. Now you might think, is a zip extractor safe? Yes, it is safe to use as it is protected against all the threats that might cause you problems.

Tools of Winzip

For the smooth running of all the services it promises to provide, WinZip has different tools that run such services for the users. Following are the tools provided by WinZip for the running of the different features provided by it:

  • Winzip Safe Share

This tool provided by WinZip provides the feature of sharing, encrypting, and compressing files. It allows the user to run all these features in a single interface. It allows a secure and safe process as it has strong security layers built up.

  • Winzip Duplicate File FinderDuplicate File Finder

This app WinZip helps to find out any kind of duplicate files present. It detects and finds out for you any kind of duplicate file and then notifies you automatically. This comes to be a very helpful service for the user as duplicate files are something that causes a lot of inconvenience to the user but with the help of WinZip, you can easily get rid of this problem of duplicate files.

  • Winzip Image Manager

This is one of the unique features provided by Winzip. Through this, the users are provided the services such as organizing images and even editing them along their conversion and many more such services.

  • Winzip PDF Express

One of the other tools of WinZip is Winzip PDF express which provides the feature of exporting PDF to other file formats such as word files, images, etc, and also is a PDF reader. It provides you with all these features for your PDF, all sorted in one place.

How to Install Winzip? How to Install Winzip? 

If you want to install Winzip, then the following steps will help you to do that in the easiest way possible:

  • Firstly go to the official website of Winzip to install it.
  • Then click on the “Get” option. This would enable the process of downloading.
  • After finishing the download you need to install it.
  • Once done with the installation you can find it on the start menu’s all-program list.
  • After that simply open the application and get the free trial version and enjoy all the services provided by it.
  • Just by clicking on the particular tool, it would direct you to its use.

Is Winzip Safe to Use? 

This question, “is Winzip safe?” has been confusing in the minds of many. But here are some of the points which will prove that WinZip is safe and very much secure to use. Let’s clear out all the questions on safety through the following points:

  • Winzip is a secure application as it is free of any kind of virus and malware.
  • Its worthiness is proven as many prominent and government-oriented organizations along with a plethora of private companies are using WinZip on a large scale.
  • If you only download the application from the official site, it is the one to be trusted, not just any site or link that might be misleading. In case you have downloaded the application from the wrong site then you should uninstall Winzip. 

How to Uninstall WinZip

Here are the steps that might help you to uninstall WinZip that might be not from the official site:

  1. Firstly click on the start button
  2. Then go on the system
  3. Choose apps and features
  4. Select Winzip and click on uninstall.How to Uninstall WinZip

This will uninstall the wrong app. After you are done with that, get your application from the official site.

  • Never open unknown files as they are not safe and then would lead to the confusion that Winzip is the one causing problems but it would be those unknown files.
  • Keep your application updated as it ensures keeping your experience bugs-free.
  • Keep your device always scanned with antivirus as there might be other viruses causing you trouble but the conclusion you might get would lead you to a wrong impression about Winzip.

Winzip is a safe app to use if you run it with all the instructions mentioned above and not being careless about the factors that might lead you to trouble. If used in the right way it can be one of the most useful applications for you that are all secure for your use. All the above-mentioned points might have answered your question, “is Winzip safe? “

Conclusion

All of the previous points may have answered your question, “Is Winzip safe?”. If you too find yourself often in a situation where you are confused about the safety and security of Winzip. This confusion might lead you to be unaware of the great features provided by Winzip. This article will bring an end to your confusion as it gives you a detailed overview of everything you need to be sure about before using Winzip.

Everything has two sides, in the same way, there might be a few things that you need to keep in mind while using it. If followed in the correct way and aware while using Winzip, then it is not something that is not secure. Just take the above-mentioned information as your guide and make your way clearer while using Winzip. 

FAQs

1. How trustworthy is Winzip?

Winzip is a very much trusted application as it has its security laid in the layers of encryption. Its trustworthiness is reflected in the number of users it caters to. These users are not mere individuals or private companies but also large firms and government organizations. This makes it very much clear that WinZip is a trustworthy application. 

2. How do I get rid of the Winzip virus? 

The Winzip virus is something commonly called the WinZip driver updater. If you want to get rid of it then follow the given steps:

  • Uninstall the Winzip Driver Updater the quickest
  • Then run your antivirus to check for any virus on the device.

These steps will help you get rid of the virus and establish a safe setup on your device.

3. What happens if I delete Winzip? 

If you decide to delete Winzip then you might lose all the files that were installed by Winzip. It would also delete everything related to the application such as shortcuts, entries, etc.

OneDrive Sync Pending

Are you also facing issues regarding your OneDrive sync pending? This has been a matter of concern for many people who are using one drive in Windows 10. If you too are getting such a problem then this article has it all for you the causes and their resolutions for OneDrive upload pending. Let’s get an understanding of each of the elements involved in this process and the reasons behind it. Before getting to any point the first thing that needs to be understood is what is on the drive and what causes it to not sync to Windows.

Introducing One Drive

One Drive is cloud storage that is a source of free space for anyone who has a Microsoft account. It is just an alternative to external or additional storage for your device. It has many advantages being a cloud space as it can be easily accessed anywhere the users want to have their one drive opened. 

One Drive

Everyone in their lives requires some extra space for their devices because with time and use the existing space would not be enough to satisfy the requirements of the user. In such situations, additional storage like one drive comes in handy to get your device some extra storage. It is a keeper of all your files and data stored in one place which can be very easily accessed anywhere just with your Microsoft account.

This creation of Microsoft is available for all Microsoft users for free. It provides 5GB of free storage but if you require more storage than this, you might have to pay some extra charges. This is one of the most reliable cloud storage out there as it is a built-in software of Windows. One drive allows you to sync your files to the device as well as to the cloud. Now, this process sometimes gets disturbed for several reasons and results in sync pending OneDrive. 

Why is OneDrive Sync Pending?

Many people face this problem of one drive upload pending in their Windows. What could be the reason behind your sync pending Windows 10? There can be a lot of reasons behind this thing happening in your device. Let’s see what the possible reasons behind OneDrive sync pending:

One Drive Sync pending Error

  •  OneDrive not updating regularly could be one of the reasons for its pending sync as an older version might have trouble functioning well. If you too are running an older version of your one drive then it might be the reason for your pending one drive sync.
  • If your one drive just stopped uploading a file then the problem might be in the file. One drive has a limit on the size of the uploads. If the file that is being synced is not according to that limit then the one drive may not sync it.
  • Hoarding of cache files in the OneDrive can also result in drive sync pending
  • If the storage on your one drive is running low then also it might be unable to sync files.
  • OneDrive requires certain permissions to complete the sync but if permission is not allowed to it then it would be impossible for it to complete the process of syncing.

These were some of the reasons for sync pending onedrive and now let’s get on to the solutions for this trouble in the further part of the article.

Solutions To Getting Rid Of Pending Sync of One Drive 

1. Update Your Windows

Everything that runs on a device is affected by the situation of the Windows and not having your Windows up to date can cause your pending OneDrive sync. To not let your Windows lack of update bug with your one drive sync, follow these simple steps to update your Windows:

Update and Security

  • Go to the start button and open the Settings
  • Then click on Update and Security
  • After that open the option with Windows Update
  • Click on the check for updates option and get an update for your Windows.

2. Update Client OneDrive

When the automatic download access to update client OneDrive is denied then it should be updated manually. Not having your OneDrive client updated can be one of the reasons for your OneDrive pending sync. So, to resolve this issue just update your OneDrive. Remember before updating OneDrive, you must turn off OneDrive

3. Storage Check

Many times people are not sure if they even have space left in one drive to carry the syncing process. So, to solve your pending sync you need to check for your storage. Follow the given steps to know about the status of your storage in your OneDrive:

Manage Storage

  • Login into your one-drive account
  • Then click on “Manage Storage”
  • This would lead you to the page which would show you the space status. How much of it is used and how much is left?
  • If you are running down on space then you can either clear out some space or get more storage for your OneDrive.

4. Check The Size Of Your File

OneDrive has set a limit for the size of the file that can be uploaded on it. If your file exceeds that limit then you won’t be able to sync the file to your OneDrive. The size limit depends on the type of files, your device, and your account type. So check your compatibility with one drive and coordinate with the files you are trying to sync. Make your adjustments accordingly and get your pending OneDrive sync resolved. 

The Final Say

There might be a few reasons that are making it difficult if your onedrive sync pending to your Windows 10. But the above guide provides you with every detail regarding this issue along with the solutions for it. Whenever your one drive is unable to sync with your Windows, you can now get that resolved with the simplest yet effective steps given in the article. Use all the steps provided above and solve your issue of not getting your pending one-drive sync. 

FAQs

1. What does sync pending mean?

Sync pending means when you are unable to sync your files somewhere. Sync pending is commonly seen in one drive when a user is unable to sync a file to his OneDrive due to different reasons.

2. How can I sync one drive to my computer?

In order to sync one drive to your computer follows the given steps:

  • Click o the start button
  • Search for OneDrive
  • Login into your OneDrive account 
  • Then select the files and folders to be synced and you can easily sync anything to your one drive.

3. How do I fix one drive sync issue?

If you too are facing some issues with your one drive to sync then you can use the following method to fix your one drive issue:

  • Update OneDrive
  • Restart your one drive application
  • Check your storage left
  • Update your Windows
  • Reinstall OneDrive.
system interrupts 100 cpu

If you are a dedicated user of a computer then you might be aware of the importance it holds in the whole setup. It carries out the major functions along with hoarding the pressure of the performance of your device. As the CPU has a lot to offer for the working of the device, it sometimes gets overloaded with ongoing processes. This leads to the overuse of the CPU. Now, this high usage of CPU can be very harmful to the smooth running of a device. Now you might wonder why such high usage occurs and what should be done to solve it. Before heading into this, we might have a look into the system interrupts 100 CPU as it is something that is very much responsible for the connection between the CPU and the hardware. 

What is Meant by a System Interrupts 100 CPU?

System interrupts are that part of the operating system that ties the CPU with all the other functionalities of your device. It allows the CPU to have the idea of when to run or close a running program. It is a link that ties you to other processes that require the usage of the CPU. The function shows you how much and when any hardware is using up the CPU.  system interrupts 100 CPU

You can find it on the task manager. Now, how is this important for the concept of high CPU usage? It has quite a role to play here as it shows the percentage of the usage of the CPU. If you see a high percentage then you might know that it needs to be fixed but if you see a system interrupting 100 CPU then you know that it needs some quick solutions. After getting the concept of system interrupts, let’s see what the causes of system interrupts 100 CPU are as well as solutions for those.

Causes and their Solution for High CPU Usage and System Interrupts 100 CPU

1. Disable your Internal and External Devices

If your device is connected to external devices they tend to have quite a pressure on the CPU which might be the cause of your high CPU utilization. Similarly, if we talk about the internal devices they also send some signals to the CPU which eventually causes a load on the CPU resulting in the CPU being at 100Re. For the solution to this problem, you can disable your external devices to lower the usage of your CPU. Follow the given steps to disable your external devices:

  1. First of all, press Windows key+X and select “Device Manager”
  2. Then go on the “Universal Serial Bus controller”
  3. Here you would be provided with the list of external devices 
  4. Now select all the devices and disable them.Disable your Internal and External Devices

2. Faulty Hardware Drivers

The hardware of the devices, each has its drivers which connect it to the CPU. Now, these drivers are responsible for the sending of commands and signals to your CPU. Sometimes these drivers have some issues in them which create unnecessarily and a lot of load on the CPU causing high CPU usage. To check your hardware driver, you can use many applications available for the purpose. If you get any kind of issue in your hardware device then you can solve it or update the device manager. 

3. Malware and Virus Check

The issue of the system interrupting 100 CPU is an issue regarding the hardware but sometimes viruses like MEMZ virus and malware can be responsible for the improper working of the hardware. Now it would have an indirect effect on the usage of your device. So you can run down a scan for viruses and malware to avoid such a risk.

4. Get your BIOS UpdatedGet your BIOS Updated

BIOS is something that gets resolved for all your device’s bugs and other glitches only if kept updated. As it aims at resolving these problems it would help you down with resolving system interrupts 100 CPU. If you are facing this problem, then try updating or getting BIOS for your device.

5. Sound Effects

Several applications use enormous sound effects which cause a lot of load on the CPU at 100Re. This is one of the most neglected things but it has serious effects on the performance of the CPU. Sound effects can also be a major reason for the system interrupting 100 CPU. For getting this resolved you should disable these extra running sound effects from your device. Follow the given steps:

  1. Firstly click on the speaker icon
  2. Then open the sounds\ playback device menu
  3. Click on the default speaker of the device
  4. Next, go to its properties with a right click
  5. Now click on enhancement and select the option which says disable all sound effects.Then open the sounds\ playback device menu

This would solve your issue of the system interrupting 100 CPU.

Conclusion

If you were struggling with constant high CPU usage and didn’t have the clue to get it resolved then this article is all you need to go through. Here you will be provided with aids to lower your high CPU utilization. It states the causes of such a system interrupts 100 CPU along with their solution. This would make it easy for you to identify your issue and then resolve it with the steps mentioned with them. With this guide to resolve all your high CPU utilization, you can ease up all the lag and slow processes in your device. Keeping these things in mind would allow you to have a smooth experience altogether.

FAQs

Q1. How do you lower CPU usage?

If your CPU also has a higher usage then you can use the given ways to lower CPU utilization and run your device without any lag or default:

  • Reboot your device
  • Disable the external devices
  • Update your windows
  • Get rid of any applications running in the background
  • Give your device an antivirus check

Q2. Why is my CPU usage so high?

There are several reasons behind your high CPU utilization. It is mostly because there is a lot of load on your CPU which causes CPU 100{50afa256e6562afb2cd7837d8db3fd71ce947f26b53ffff72a77bb9141ae121a} usage. 

  • A lot of applications running in the background of your device 
  • Faulty hardware drivers are also one of the leading causes of high CPU utilization
  • The internal and external devices of the devices also cause your CPU usage to be high
  • Running heavy applications on your device
  • Malware and viruses can also be one of the reasons for high CPU utilization

Q3.What is CPU usage?

Cpu usage is the number of units processed by the CPU in a moment. It is the workload on the CPU because of all the functions running on your device.

windows 7 build 7601 this copy of windows is not genuine

Looking to repair the “Windows 7 Build 7601 This Copy Of Windows Is Not Genuine” ” concern? This copy of Windows is indeed not legitimate. Windows 7 OS (Operating System) version 7600/7601 which has been installed improperly would only operate for a few weeks. This copy of Windows is not genuine and will then display as an alert.

Well, in this article, we will provide you with solutions to resolve the windows not genuine issue. Let’s start. 

Causes Related to “Windows 7 Build 7601 This Copy Of Windows Is Not Genuine” 

“This Copy of Windows Is Not Genuine” warning on Windows 10/7 may appear for the following main causes –

  • Viruses have infiltrated the PC.
  • After the trial period expired, you still haven’t activated Windows OS.
  • The license for your operating system has expired or has been suspended.
  • Your computer’s OS does not have a working license key.windows 7 build 7601 this copy of windows is not genuine

Solutions To Fix Windows 7 Build 7601 This Copy Of Windows Is Not Genuine”

There are specific solutions to restore “windows genuine” or “make windows7 genuine”. Therefore, you can use the solutions mentioned below to effectively resolve it. Keep reading. 

Method 1: Resetting The Windows Activation

The “This Copy of Windows Is Not Genuine” message will remove by resetting the licensing details for Windows activation. So that you may reset the license information, just adhere to the steps mentioned below –window activation

  • First, run a command prompt search. Next, click on the first result with your right computer mouse, then choose Run as administrator.
  • Secondly, enter the command SLMGR -REARM and then press Enter.
  • Now, if the aforementioned command returns an error, try SLMGR /REARM instead.
  • Now, remain patient and let the command finish running. When you see the message “Command Completed Successfully,” choose OK. Do restart your machine. In the wake of a Windows backup, adhere to the activation instructions (when they exist).

Method 2: Discard the KB971033 Update 

If there is indeed a problem with update KB971033 deployed for Windows Activation Technologies, “windows 7 build 7601 this copy of windows is not genuine” may start showing up. The update should reinstall to enable you to resolve the situation. You may reinstall it by completing these procedures-

  • Click the Start button to open the Control Panel.
  • Select Programs and Features while switching the display to Small Icons.
  • From the left pane, choose the View Installed Updates option.KB971033 is recognizable in the table of updates.
  • KB971033 is recognizable in the table of updates.
  • The update will remove by performing a right-click and selecting that option.
  • To validate the update removal, select Yes.
  • Reboot your computer following the removal.

Method 3: Simply turn off the Plug and Play Policy.

Users have also used deactivating the Plug and Play Policy to permanently resolve the “windows 7 build 7601 this copy of windows is not genuine” problem. As a result, you may also disable the Plug and Play Policy by following the instructions below –

  • First, activate the Run program by pressing Windows+R.
  • Secondly, on your keyboard, enter after typing the rsop.msc command.
  • Now, go to the Computer Configuration, choose Windows Settings, then pick System Services under Security Settings. Search the list on the screen for Plug and Play.

Note: Move on to the following step when Plug and Play also aren’t Defined. If not, move on to the next repair.

  • Along with Plug and Play, locate the Group Policy. Set Not Defined as the Group Policy setting.
  • Run the program once more, then enter the command gpupdate /force.
  • Start your device up once more. After Windows restarts, finish the necessary activation step.

Method 4: Run a Malware Inspectionrun a malware inspection

The “window is not genuine” can frequently be put on by malware attacks or MEMZ virus. As a result, it is wise to run a virus check on your computer.

Therefore, to conduct malware scans, you can use any reputable and secure antivirus software available on the market.

Method 5: Block Windows Updates Automatically

In Windows 7 or Windows 10, you may disable automatic updates to make sure that the “This Copy of Windows Is Not Genuine” notification never displays.

  • First, select the Control Panel from the Windows System menu by selecting the Start/Windows icon.
  • The Windows Update option. Next, to install updates automatically, select that option. Hence, to stop checking for updates, click this link. 
  • Lastly, to restart your device and apply the modified settings, select Apply.

Method 6: Enter an Accurate Key

The “this copy of windows is not genuine” in Windows 10/7 bug can come from inexperienced computer users failing to enter the proper product key. So, in order to activate Windows, you must input a genuine product key. Therefore, you can use the following steps to change it or enter a unique product key –Enter an Accurate Key

  • First, hold the Windows+R keyboard shortcut, and the Run dialog box will come up.
  • Secondly, enter slui.exe 3 into the box that appears on the screen using the Enter key on the keyboard.
  • At last, when asked on screen, enter the product key.

Beware of Using Third-Party Cracks

Countless programs and cracks are accessible online to help you solve this issue. However, your PC will be significantly harmed by these tools. Your operating system can be compromised by installing any fix, keygen, or activator, and it may even lead to the installation of malicious software.

This could also result in data loss or the infestation of other computers linked to your network by your computer.

Frequently Asked Questions (FAQs)

Q1: How can I activate a copy of Windows 10 that isn’t authentic?

Ans: To activate a copy – you should buy a license key for Windows 10 to use this operating system. Once that is done, activate it by going to Settings > Update & Security > Activation.

Q2: How to remove “Windows 7 Build 7601 This Copy Of Windows Is Not Genuine”?

Ans: To fix “Windows 7 Build 7601 This Copy Of Windows Is Not Genuine”, follow the methods below:

  • Block Windows updates automatically
  • Run a Malware inspection
  • Simply turn off the Plug and Play Policy.
  • The Windows activation data will reset.
  • Discard the KB971033 update.

Q3: Why does my computer indicate this copy of Windows is not a genuine copy?

Ans: Windows verifies the authenticity and authorization of your operating system before updating a file. You do not have an authentic copy of Windows if you get the warning “This Copy of Windows Is Not Genuine.”

Your Device Is Missing Important Security And Quality Fixes

Microsoft constantly releases updates to resolve problems and enhance the security system, which is just one of the several good aspects of it. Install the upgrades as soon as possible. It is to your greatest advantage. However, the warning message Your Device Is Missing Important Security And Quality Fixes. appears at times when Windows Update appears to have problems accessing updates.

Therefore, this article will walk you through some simple remedies to this frustrating error, if you’re having trouble and need some help.

Excluding Critical Security and Quality Improvements

If you haven’t blocked Windows 10 from installing updates. they often install by themselves and are security-related to maintain your computer from malware. Your PC’s upgrade procedure is simple and quick. Additionally, clicking Check for updates will enable you to directly install upgrades. Unfortunately, there are issues with updates that linger, such as the fact that “your device is missing important security and quality fixes”. However, the error message continuously displays again after you click the Check for updates button and you see “you are not up to date.

The versions of Windows 10 1809 and 1803 in particular experience this type of problem every time users strive to update it.

Don’t panic, we have solutions ready below. Keep reading the article. your device is missing important updates (Fix)

Methods to Resolve “Your Device Is Missing Important Security And Quality Fixes”

There are various methods to fix “your device is missing important updates”. Here, we have picked the best and most simple methods for you all. You can try any method of your choice.

Method 1: Run the Update Assistant to Update Windows

Update Windows with the Update Assistant is the first approach, which has generally been successful for users. The steps to apply are as follows:

  • Get Windows 10 Update Assistant now
  • Click Update Now in the Windows Update Assistant after its launching, then await for the updates to download.

Method 2: Use the Windows Update Troubleshooter

Allowing Windows to do an issue analysis is another simple repair you might attempt. However,  The steps to use this method are as follows:our Device Is Missing Important Security And Quality Fixes

  • First, to bring up the Settings window, press Windows + I on the keyboard. After That, select Update & Security.
  • Click Additional troubleshooters after choosing Troubleshooter in the left column.
  • Next, run the troubleshooter after choosing Windows Update.
  • If there are any instructions to repair the issues, wait till the diagnostic is finished.

However, to see if the issue notice has vanished altogether, check Windows Updates once more. Try the following methods below if this one doesn’t work.

Method 3: Service Windows Updates Reset

Your Windows upgrades utilization of existing software may be corrupted. If the warning “Your device is missing important security and quality fixes” displays. Through Command Prompt, you may manually reset them. The detailed steps and mentioned below:

  1. Type “command prompt” into the search box next to the Start screen, and pick “Run as administrator.” Select Yes when asked whether you want to continue.
  2. The Command Prompt box should now include the commands that you copied and pasted. Each instruction must be executed individually by pressing the Enter key: net stop wuauserv, net stop bits, net stop appidsvc, net stop cryptsvc
  3. Press Enter after pasting Ren{50afa256e6562afb2cd7837d8db3fd71ce947f26b53ffff72a77bb9141ae121a}systemroot{50afa256e6562afb2cd7837d8db3fd71ce947f26b53ffff72a77bb9141ae121a}SoftwareDistribution SoftwareDistribution.old into the Command Prompt window.
  4. One at a time, copy and paste each of these command lines into Command Prompt. To make it execute, press Enter after pasting each and every command: 1. net start wuauserv 2. net start bits 3. et start appidsvc 4.net start cryptsvc

Method 4: Software Distribution Folder Name ChangeSoftware Distribution Folder Name Change

The transient Windows update files included in the software distribution folder can be relocated as an additional workaround for this issue. The problems with Windows Updates are therefore resolved by changing the program distribution folder. follow the steps below.

  • Enter the command prompt from the Start Menu, then click the right mouse button to Use Administrator Mode
  • To disable the Windows update processes, enter the instructions : 

          “net stop wuauserv” and “net stop bits”.

  • Moreover, to rename the program distribution folder after stopping, just copy and paste the command prompt : 

rename c:windowsSoftwareDistribution SoftwareDistribution.bak

  • Begin the Windows update programs yet again by running the code: 

net start wuauserv and net start bits.

  • Try upgrading Windows and check.

Method 5: Installing Windows security Updates Again

Finally, it is time for the last method. Corrupted Windows updates can be the cause of this problem. When a recently installed Windows update causes the issue, this solution is most likely to be successful. Below are the steps you need to follow –

  • Firstly, update history may be found by typing it into the search box beside your Start button, then clicking View your update history.
  • Here, you should discover the timeline of quality and security modifications and remove updates.
  • Next, select Uninstall from the context menu when you find the most current update.
  • Now, restart your computer after removing the most current Windows update.
  • Then, reinstall any available updates after checking for Windows updates once more.Windows security Updates (our Device Is Missing Important Security And Quality Fixes)

Conclusion

In a nutshell, to aid you in resolving the problem that your device is missing important security and quality fixes, we’ve offered five options with clear instructions in this article. After reading this article, hopefully, Windows 10 will allow you to resolve the issue on your own. Remember to make backups as early as you can since updating Windows alone won’t be sufficient to keep your PC secure.

FAQs

Q1: How to resolve “my device’s missing important security and quality”?

Ans: To resolve this, follow the techniques –

  • Run the Update Assistant to update Windows
  • Use the Windows Update troubleshooter
  • Service Windows Updates reset
  • Installing Windows security updates again