Are you also not receiving calls? Are all your calls going to voicemails? If so, then you must rectify it soon, as it can be really frustrating when someone needs your help in an emergency. Hence, you must resolve it as soon as possible, but how? Well, we have got your back this time again with our top 11 troubleshooting methods, through which you can actually eradicate the most frustrating issue of phone goes straight to voicemail. All the below written resolving methods are easy to perform. You just need to tweak some settings on your device and let all your calls back on track. Without adding further ado, let’s get started with the guide.
Reasons For Why Phone Goes Straight To Voicemail
Before you get to dive into the resolving methods section, you must know the exact reason responsible for the issue. This way, you will resolve the issue more efficiently. However, there are various reasons for the issue phone goes straight to voicemail Android or iPhone. Let’s know all the causes in the below pointers.
Call forwarding is enabled
Network providers error
You have blocked all the numbers
Outdated carrier settings
Driving mode
Do not disturb mode
Announce Call Settings
Your phone may be connected to Bluetooth
11 Resolving Methods For ‘Phone Goes Straight To Voicemail’
Now that you know all the reasons why the phone goes straight to voicemail, the time has come to get it resolved. You can simply get into the solutions and let your phone calls work again easily. However, all the below-given solutions are properly researched and reason based. So, you must not worry about anything. Just follow the simple steps and get your calls.
1. Disabled Call Forwarding
Many people don’t find that the call forwarding option is enabled on their phone, which is why the call is forwarded and leads to voicemail. If the number to which your call is forwarded is not activated then, you are more likely to get the issue. Well, you can simply disable this by getting into your settings. Let’s see how you can do so.
On iPhone
Launch the settings tab.
Click phone.
Now, locate the call forwarding option.
Here, You must disable the option by toggling the disable enable option.
On Android
Launch your phone app.
Click three dots coming in the upper right corner.
Click setting, then calls.
Here, you can see the call forwarding option; simply disable it.
There are various Android phones in the market; different brands come with different settings options. Hence, the steps for android settings can be varied for your device. However, the steps we have provided you are the most common of them all.
2. Problem At Network Provider’s End
You must check if the problem is only with you and your phone or if the problem persists with other users too. For this, you will require to ask the same network user in your location if they are also facing the same issue.
If you find that a lot of people are facing the same issue of the phone going straight to voicemail iPhone or any android user, then it is a problem with the network company’s end. Hence, you must contact them and ask what the issue is and when it gets resolved.
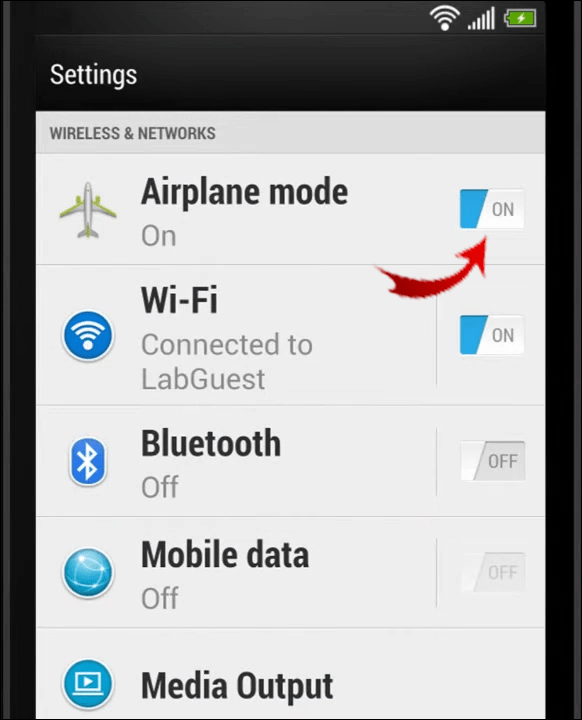
3. Toggle Airplane Mode or Restart Device
Another troubleshooter, which is quite common in every kind of error, such as Ip address, does not found. You must try toggling airplane mode on and off a couple of times. After doing so, you must check whether the issue of my boyfriend phone goes straight to voicemail has been resolved or not. If the issue is with your network, then it will get quickly resolved, as enabling airplane mode will help your network to get a refreshed start.
4. Tweak Phone Settings
You must check your phone setting if the above method doesn’t work out for you. It is possible if you have made a setting in your device for ‘do not disturb mode.’ In that case, you will be required to turn it off as its enable won’t let your phone ring. Thus, you are required to turn it off. Many times, you turn it off to have a relaxed bedtime but forget to turn it on, which can create the issue of a phone call goes straight to voicemail.
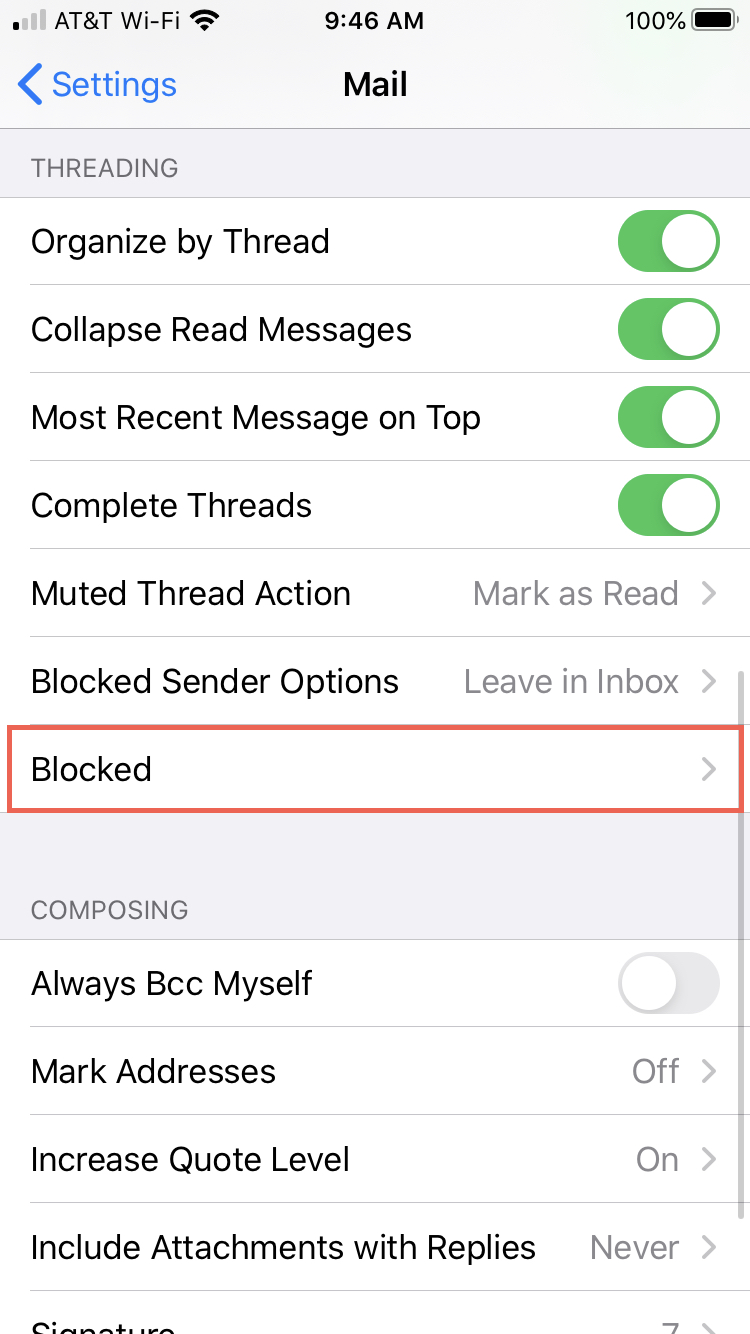
5. Clearing Blocked Numbers
There are chances when people accidentally block the number, which is why phone goes straight to voicemail without ringing. Thus, you will be required to check your blocked list and unblock the person. There are also times when a person accidentally blocked all the personal numbers, which is why the issue of direct voicemail is coming on your device. However, now you are required to unblock all the numbers. Let’s see how you can do so.
On Android
Well, unblocking phone calls on an android phone can vary from brand to brand. Thus, you may need to add your rationale too. Well, we are compiling some of the most common steps to give you a little idea about where the blocked numbers are located.
Click the phone from the upper drop-down menu.
Select settings.
Click pone settings
Here, you will be able to locate the blocked numbers list.
Now, you can unblock the options.
Or else you can set the toggle option off for ‘blocking private numbers’
On iPhones
Launch Settings
Click the Phone option coming in the menu.
Locate Silence Unknown Callers option.
Make sure it’s not toggled on
6. Disconnect Bluetooth From Your Device
Your device may be connected to Bluetooth, which is why you are not able to hear the ring that your phone does while ringing. It may happen if your device is connected to any Bluetooth device, then you are more likely to face the issue, as this can lead to all the calls coming on your device to the rejection. Hence, you are required to turn your Bluetooth off and disconnect the device.
7. Change Your Device and Test SIM Card
The problem can be with your sim card. This issue only comes when your sim gets too old and starts rejecting calls. In this case, you are required to go to the Sim network provider; they will change your sim but won’t replace your account.
One thing you must ensure before going to the sim provider is if the issue is actually with your sim or not. You can check this by inserting your sim on another phone and checking if the sim is still creating issues or not. This way, you can check if the problem is with your sim or not.
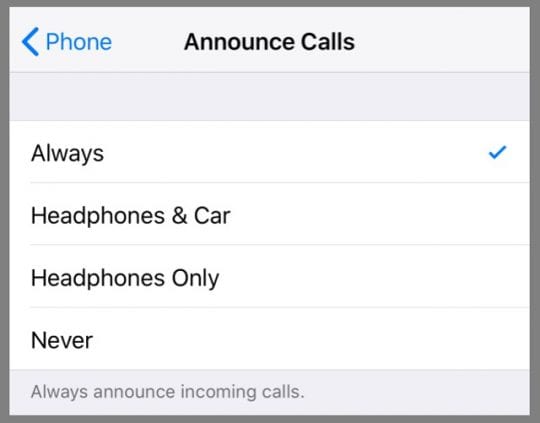
8. Change Announce Call Settings
Another possible reason why the phone goes straight to voicemail iPhone is the wrong announce call settings. If you use an iPhone and are facing the issue, then you can get it resolved by simply keeping your announce call settings on. Many users have resolved the issue simply by keeping their announce call settings to always. Let’s see how you can do this.
Launch the Settings
Click the Siri & Search option
Locate the Announce Calls option.
Here, you must choose the Always option from the drop-down menu of Announce calls.
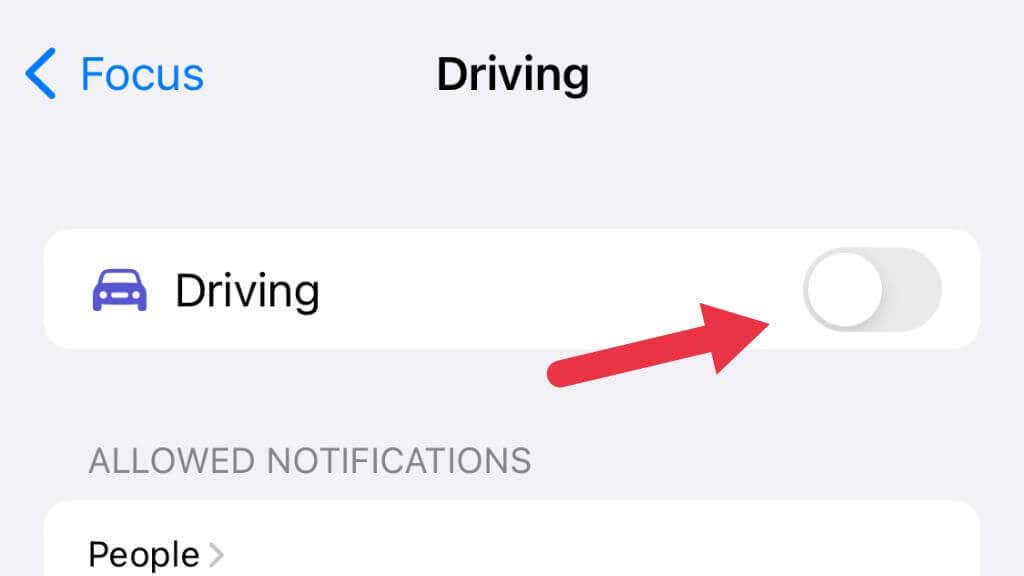
9. Do Quick Tweaks in Driving Mode Settings
Most of the time, when you connect your phone to the car’s Bluetooth then, your phone automatically enables the driving option, which may reject your calls and creates the issue phone goes straight to voicemail iphone. If you forget to turn it on after you are done with the diving, then you are more likely to get the issue. Let’s check how you can turn this setting off on your iPhone.
Launch your settings and click the focus option.
Here, you can see the driving option toggle it off(if on).
You must see further in the screen where you will see the ‘turn on automatically option.’ You must select a manual option here to avoid further problems like this.
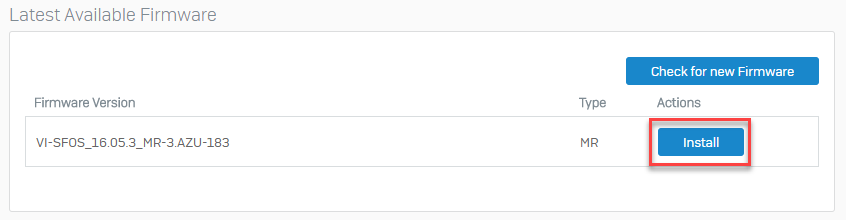
10. Upgrade Carrier Settings
Carrier settings are the settings that one will need to update timely as they connect your device to the network. If the settings are outdated, then you will face the issue. So, let’s check how you can update your carrier settings in the below steps.
Launch your settings and click general options.
Click about; here, you can see if your carrier settings need to be updated or not.
If your carrier demands an upgrade, get done with that.
On the other hand, for an android phone, you don’t need to make much effort. You just need to get into your phone’s ‘about’ and check for updates. Upgrade your device if needed and get done with the process.
11. Close Voicemail Box
If any of the above methods don’t work out for you, then you can close your voicemail box to get direct calls or to avoid call rejections easily. If you don’t have a voicemail box, then no one will be directed to the voicemail option. For this, you will need to maintain your text messages. If you are having issues like not receiving text messages, then you must rectify it first. Hence, you will get calls on your phone. Well, there are other messaging apps floating on the internet that one can easily use to call you or to drop a text.
Frequently Asked Questions
Q1. Why does the phone go straight to voicemail?
There are various reasons responsible for why you are facing the issue of the phone goes straight to voicemail no ring. Maybe your device settings are not on point. Another reason your phone may be on DND mode or driving mode is that you are not getting calls on your phone.
Q2. When a phone goes straight to voicemail?
When your phone number is not approachable from the dialer’s end, then your phone will get directly into the voicemail box. Thus, you are required to check why you are not getting the calls.
Q3. Why is my iPhone not receiving calls?
If your iPhone is not receiving calls, then it must be an issue with your end. You must check if the ‘do not disturb’ mode or the driving mode is on. Moreover, if your phone is connected to Bluetooth, then there is also some chance for automatic rejection of calls.
Conclusion
Not getting important calls can be exhausting, but ending up receiving voicemails will be more frustrating. In a nutshell, we have given you a full and detailed comprehension of the issue of why your phone is not ringing, and all the phone goes straight to voicemail. We have given 11 measures to resolve the problem. All the resolving methods are reason-based and 100% working. You can try any one of them and resolve the issue. If you are still having any issues related to it, then you can connect us anytime.
Are you unable to make transactions with the cash app? Facing ‘server lost’ or ‘payment declined’ problems frequently with the cash app? If so, then this guide is for you. We compiled eight surefire ways through which you can get your cash app working again easily. In the article below, we have discussed all the possible reasons why is cash app not working. From server problems to outdated apps, we have covered them all along with the accurate ways to resolve them. You just need to read the whole article all the way through its conclusion.
Why My Cash App is Not Working?
If your cash app is not working, then here are some of the reasons that you must know before getting into the resolving methods, as the reasons will give us a better insight into how one can actually resolve the issue. Let’s check them out.
Server Problem: If the app is in the process of its development, then you are likely to encounter the issue of payment declination or lost connection. It can also happen on websites as well.
Lousy Internet: Generally, payment apps require a high-end internet connection to work efficiently. If you are not able to provide your app with a high-end internet speed, then you will definitely be going to face the issue of cash app referral not working.
Wrong PIN: If you enter the wrong PIN while doing a transaction, then also your payment will fail, and you will end up asking why is my cash app not working. Hence, you need to remember the exact password, or you will have to reset your password.
Outdated App: Outdated apps won’t help you to achieve the efficiency you want from the app. It won’t allow you to use it with the latest scanners and will result in a decline in transactions.
Unwanted Cache: If your app has too much data, then it won’t be able to perform well and efficiently. In that case, you will need to remove extra data to let it work in a better way.
8 Ways To Fix If Your Cash App is Not Working
Now, you are aware of the reasons why your cash app is not able to work on your device. Hence, the time has come to know more about it by diving into the resolving method. We have provided you with the top 8 methods through which you get your cash app working again and get easy access to cash app transactions and cash app loans to meet your expenses. So without further ado, let’s get into the process.
1. Cash App Servers
You must check the cash app servers; if the problem is with the server from the app’s end, then you can not do anything except wait for them to get it resolved. Sometimes, app developers try to resolve the problem or work on something related to the app, which is why the server goes down; hence it may create some problems with the efficiency of the app.
In that case, you will need to wait for them to get the matter resolved. Well, your cash app will inform you prior if something like this is going to happen. Furthermore, there are various sites on the internet that can help you to know if your cash app is down. You can test with those sites to know the reason if your app hasn’t informed you earlier. Well, there are so many app that stops working when there is a server issue, such as Snapchat won’t open if the server of the app is not working well.
2. Improvise Internet Connection
Another possible solution that you can try to improve the efficiency of your cash app is improving your internet connection. Most of the cash app needs a high-end internet connection. Otherwise, it can show up with the issue of the cash app not working. Hence, you must ensure that you are using a proper internet connection. You can toggle your wifi and restart it if the problem is with your internet. You must try restarting your Wi-fi. If you are using the phone’s internet, then you can simply toggle to airplane mode to refresh your internet. Moreover, you can test your internet speed too. You can use an ethernet splitter and cable to power up your internet connection.
3. Update The Cash App
Upgrading your cash app can resolve the issue of why is cash app not working. Maybe the version you are having is the older version, which you need to upgrade. An older version won’t be compatible with the upgraded scanners and other related things. Well, it is one of the easiest fixes to perform. As you just need to get into the play store and upgrade the app. And the task is done; check if you can transfer your money or not. Upgradation is very important if you don’t upgrade your device and apps, then you are more likely to encounter Gmail app crashing and other issues.
4. Clear Unnecessary App Data
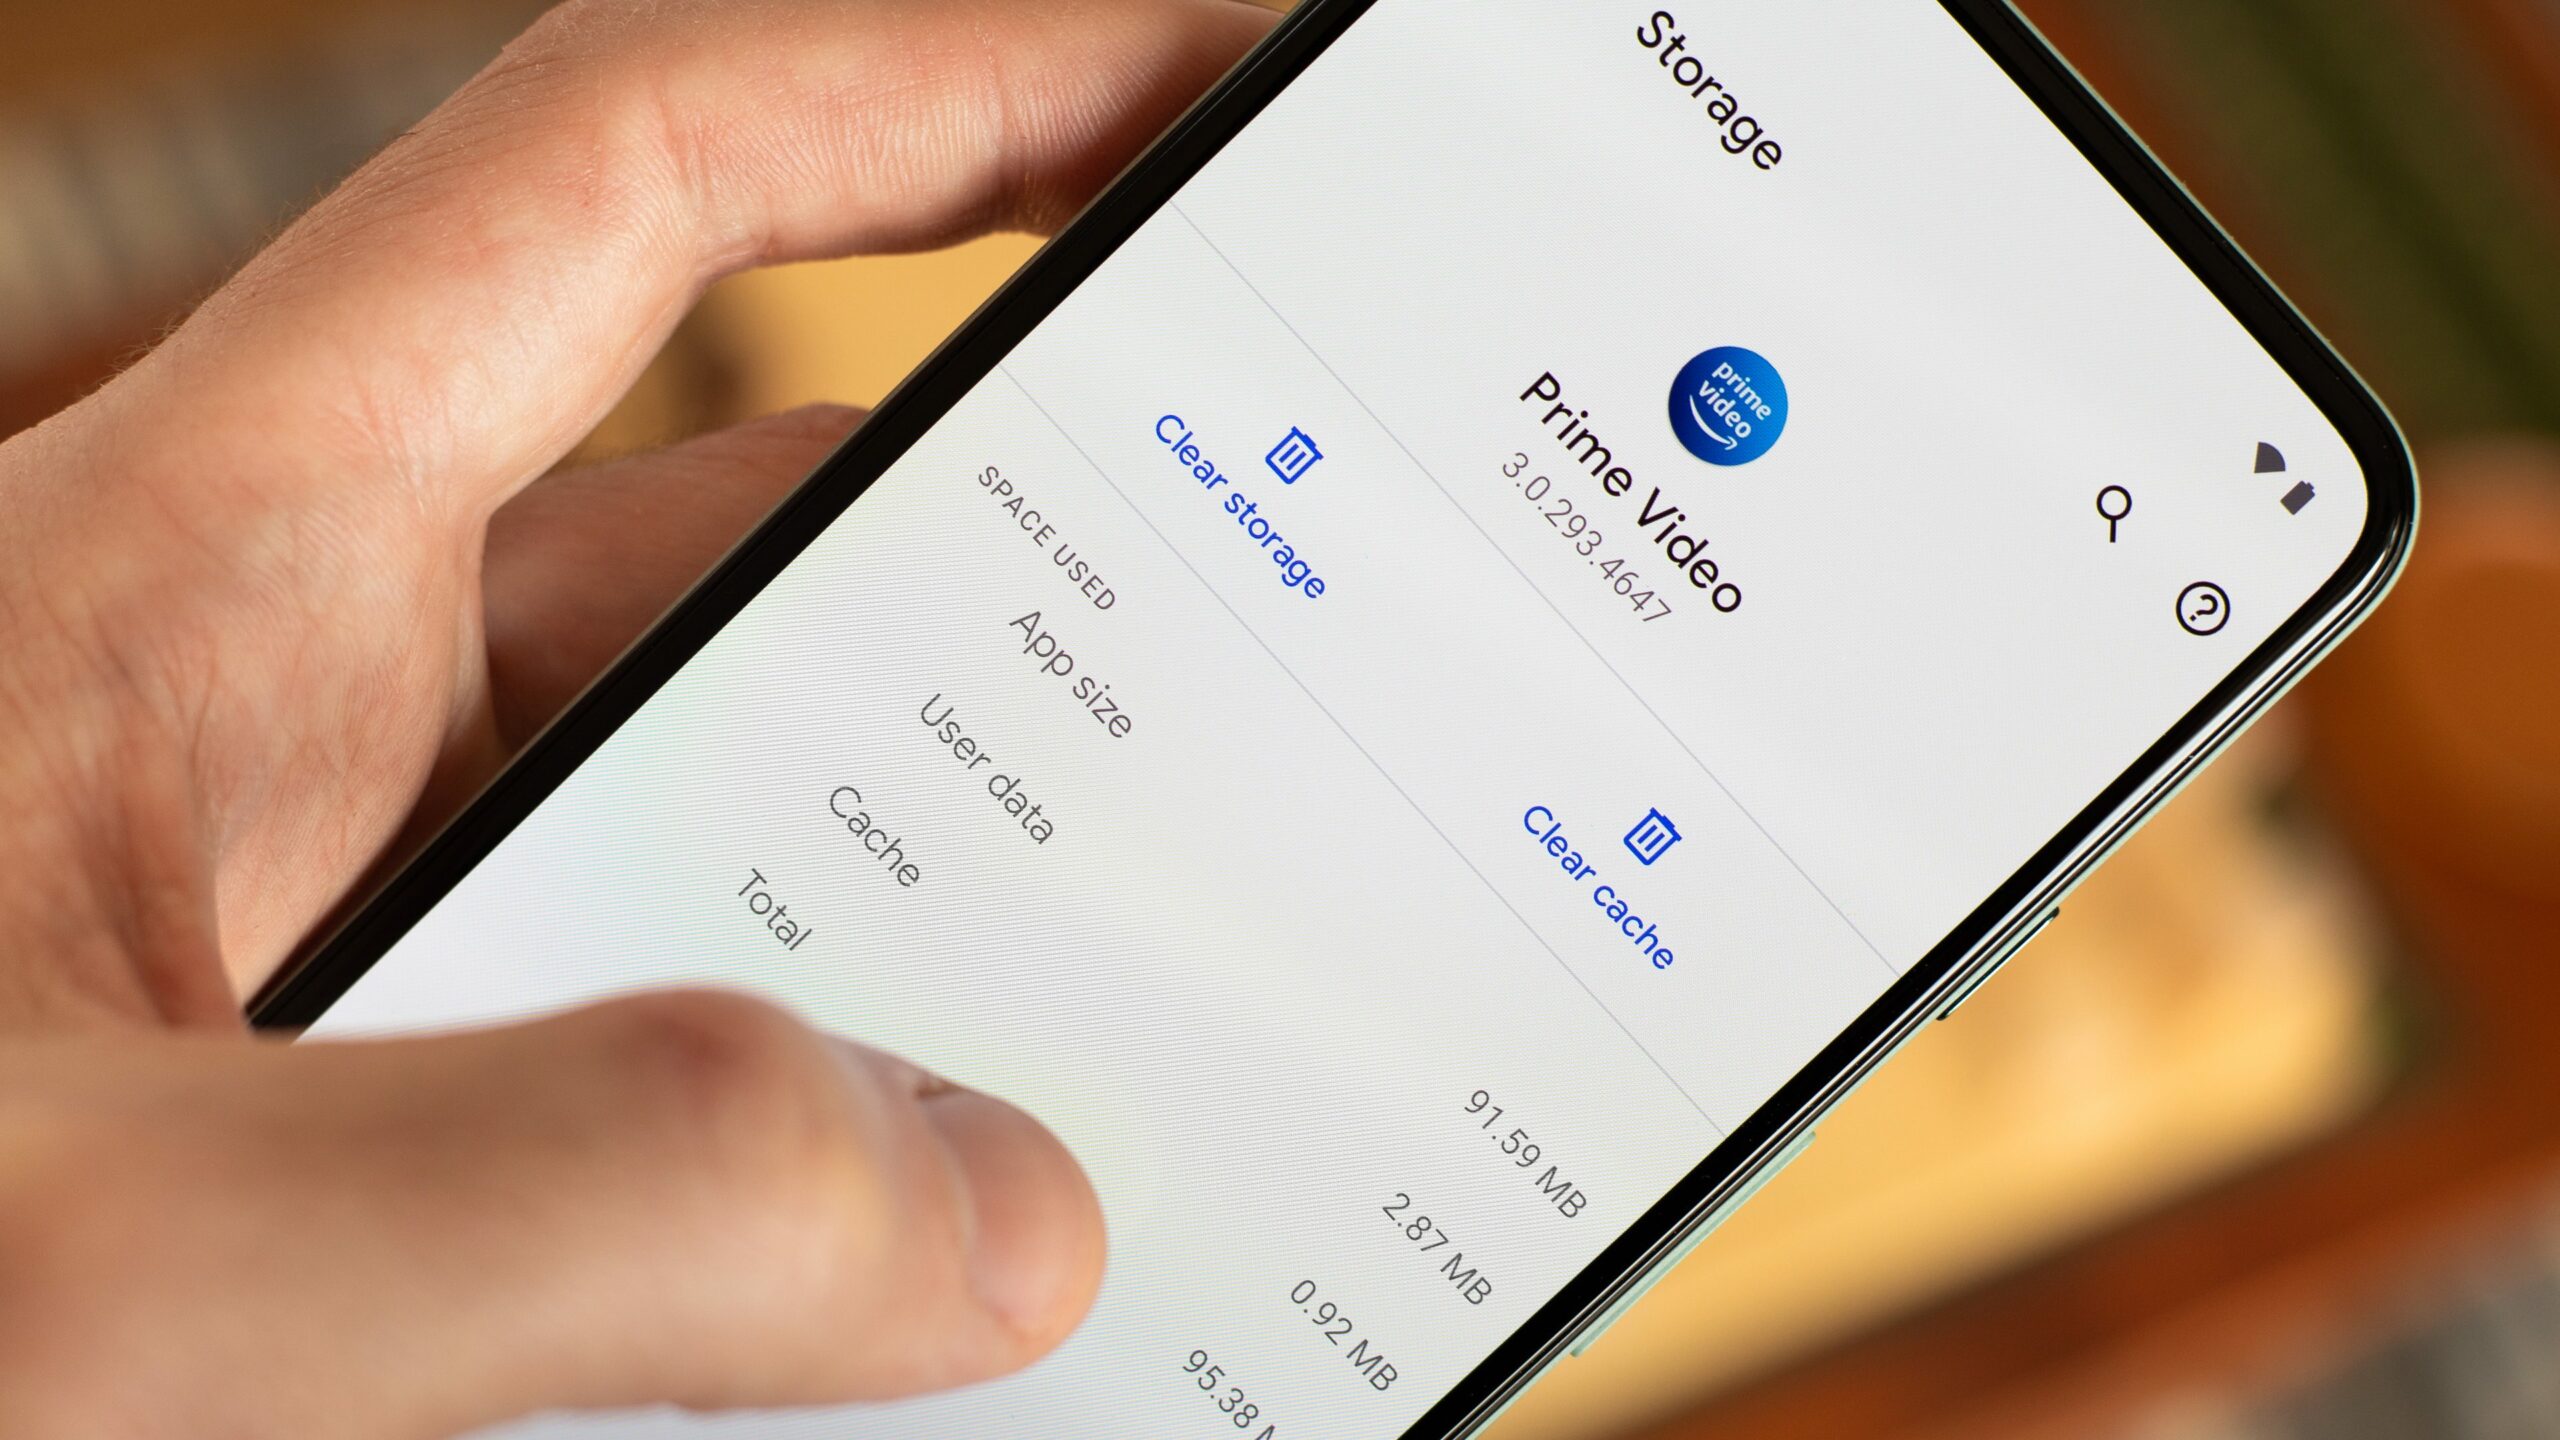
A possible solution that you must perform is clearing your cash app data. The unnecessary cache of the app can trigger the efficiency of the app. Hence, you must keep clearing this cache to avoid the problems related to the cash app not working on android. Let’s check how you can clear your cash app cache.
Launch your device settings and click the general option.
Tap iPhone storage and then locate the cash app you are using.
Now, select delete the app.
Now, when you have deleted the app, you are required to reinstall it.
While deleting, you will encounter a prompt asking that it will delete all the data. You must click confit as you are required to clear the cache.
5. Change Your PIN
If you enter the wrong PIN, then again, your app won’t work. Many times, a user forgets the correct PIN, as you may be trying to enter it after an extended period. Well, to rectify this situation, you will need to change your PIN. You must remember your PIN this time. However, the question that comes in here is how one can change the cash app PIN. Here, we have enlisted easy steps through which you can change your PIN easily.
Launch your cash app.
Click your profile icon, coming in the upper right corner of the screen.
Locate privacy and security option.
Here, you will see the change pin option; click it.
This will require your face ID. after getting verified; you will be able to reset the PIN.
6. Use the Website
If your cash app is not working on android, then you can simply consider using a website of the same app, as websites are more reliable and efficient when it comes to performance. Maybe the problem is with the app. Hence, you must try to get into the Website. However, if you are confused about using the website, then you must not worry about it, as the website has almost the same functions and interface as the app does. If you have the same issue you are getting with the website too, then you must contact and check the other possible causes and the ways to rectify the problem.
7. Contact Bank Branch
If you have found that the problem is not with the app, then you must ensure that the problem is at your end not. For this, you may need to check your bank account’s server. Maybe the bank server is down, which is why you are not able to make any payment and getting the issue of ‘cash app not working on my phone.’
However, banks can decline your transaction for a number of reasons. So you must contact your bank as it will be the most convenient way to come out of the problem. Maybe your bank has not identified the cash app; hence you will require to give your cash app number to the bank to carry forward your transaction.
8. Consider Using Customer Support
If none of the above methods have worked for you, then you must come to this method, as this will definitely resolve your queries. You must contact customer support to rectify the issue easily. You can message them, or you can search for their customer support number. The support system supervisor will assist you in a better way for what the problem exactly is and how you can rectify the cause.
Alternative To Cash App
If you are unable to rectify the issue from the above methods and want to transfer some amount urgently to someone, then this section is specially designed for you. Here, we are coming up with some best alternatives for cash apps through which you can actually transfer money instantly if your cash app is not working with debit card or with any means. Let’s check them out.
1. Venmo App
When it comes to transferring the amount or receiving money from a friend, the most trusted and secure app that will come into your mind is Venmo. It has always been helpful and efficient to use every time. It’s server and everything is on point. You can use this app to send or receive money in your account as an alternative to the cash app.
Moreover, it doesn’t charge any kind of platform fees or any transferring fees. It also comes with some social features; you can interact with your friends and family on the platform without any restrictions. But one thing that you must keep in mind is that the app has the potential for some risks and fraud, as with every other financing app. Well, you just need to be more careful whenever you make payments through the app.
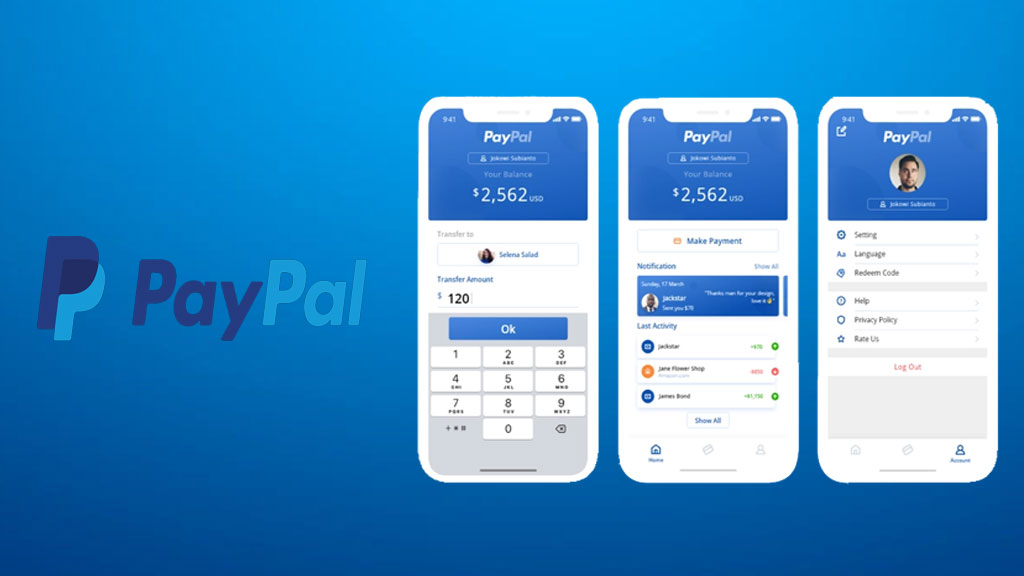
2. PayPal App
Another popular app that comes after Venmo is PayPal. PayPal is widely used in the world. Paypal is the most convenient app that has been used for years. It won’t charge you money for using its platforms. It takes money from the merchants as it is a more reliable option for their business.
This app is highly secure, and its easy user interface lets anyone use it without hassles. Paypal is very tough when it comes to the security of its customer’s accounts; it takes no time to freeze the account, which can make things difficult for the user sometimes. Anyways, the app is highly reliable to use, and you can use the app when your cash app doesn’t perform well.
3. ATM Cards
If you are not likely to use any other app to transfer money, then you can simply make your payments in cash. You can use your debit card to take some money from your nearby ATM to resolve the urgent crunch of money. Well, this method won’t fail you in any way. Thus, you can consider using ATMs in the place of cash apps if it is not working.
4. Apple Pay
The most reliable and efficient solution for my cash app not working is apple pay. You can use Apple Pay as the best alternative for any financing app. Using Apple Pay is the most secure way to make online transactions. However, Apple Pay uses NFC technology to ensure the safety purpose of its users.
Also, it is very easy to use, and one can easily make payments without battling much with the new technology. If your cash app not working with debit card, then this way to make payments will be the best option available for you. All in all, this app is the way to go for you if you are not able to use your cash apps. Well, it comes with some downfalls, too; one of the major cons is that it is only accessible on apple devices.
5. Zelle
Zelle is one of the most trusted payment apps used for years by so many users in the market. This app is compatible with every type of bank and account. It offers you an option to use it with even credit unions too. You can use Zelle with an Android or an IOS as well, unlike the cash app. It is easy to use and charges no fees for its platform. It can integrate with other payment apps too. But it can transfer funds from a credit card.
Frequently Asked Questions
Q1. Why is my cash app not working?
There can be various reasons responsible for why your cash app is not working. Maybe you do not have a proper internet connection, and another possible reason is the outdated app and server issues. You can check more possible reasons in our above article.
Q2. How do I get my Cash App back to work?
If you want to get your cash app working again, then you must try the above-written tweaks. However, the simple measure that you can use — you can upgrade your internet connection and your app; moreover, you can try clearing the cache of the app and much more.
Q3. Where are my Cash App settings?
You can simply get into the cash app setting by clicking your profile icon coming on the upper right side of your phone’s screen. Click it here you can see all the related settings options, such as notification, privacy, etc.
Conclusion
If your cash app is not working and you are required to transfer some amount to your friend, then you must get irritated about why the app is not working. Well, we have resolved this in the above guide. We have given a detailed overview of why is my cash app not working and what are the possible ways through which you can actually fix the issue. You can try any of the above methods to get your app working again. Moreover, we have provided you with some alternatives, too, so you can use them as well. If you are still left with any confusion, then you can connect us anytime.
If you and your system are struggling with frequent internet problems, then ethernet splitter will be a way for you to go. With splitters, you can split your ethernet signal into two or more PCs at the same time. It means there will be no troubles and buffering between your entertainment. We know how frustrating it is when you get a buffering circle on your screen. Hence, we have cut the slack. With ethernet splitters, you can enjoy seamless internet connectivity without any interruptions.
In the below guide, we have compiled a full and detailed comprehension of ethernet splitters, their types, pros & cons, alternatives, and the best models available in the market, along with the most discussed competition, ethernet splitter vs switch. You just need to read the whole article all the way through its conclusion and get all your related queries to it resolved.
What is Ethernet Splitter?
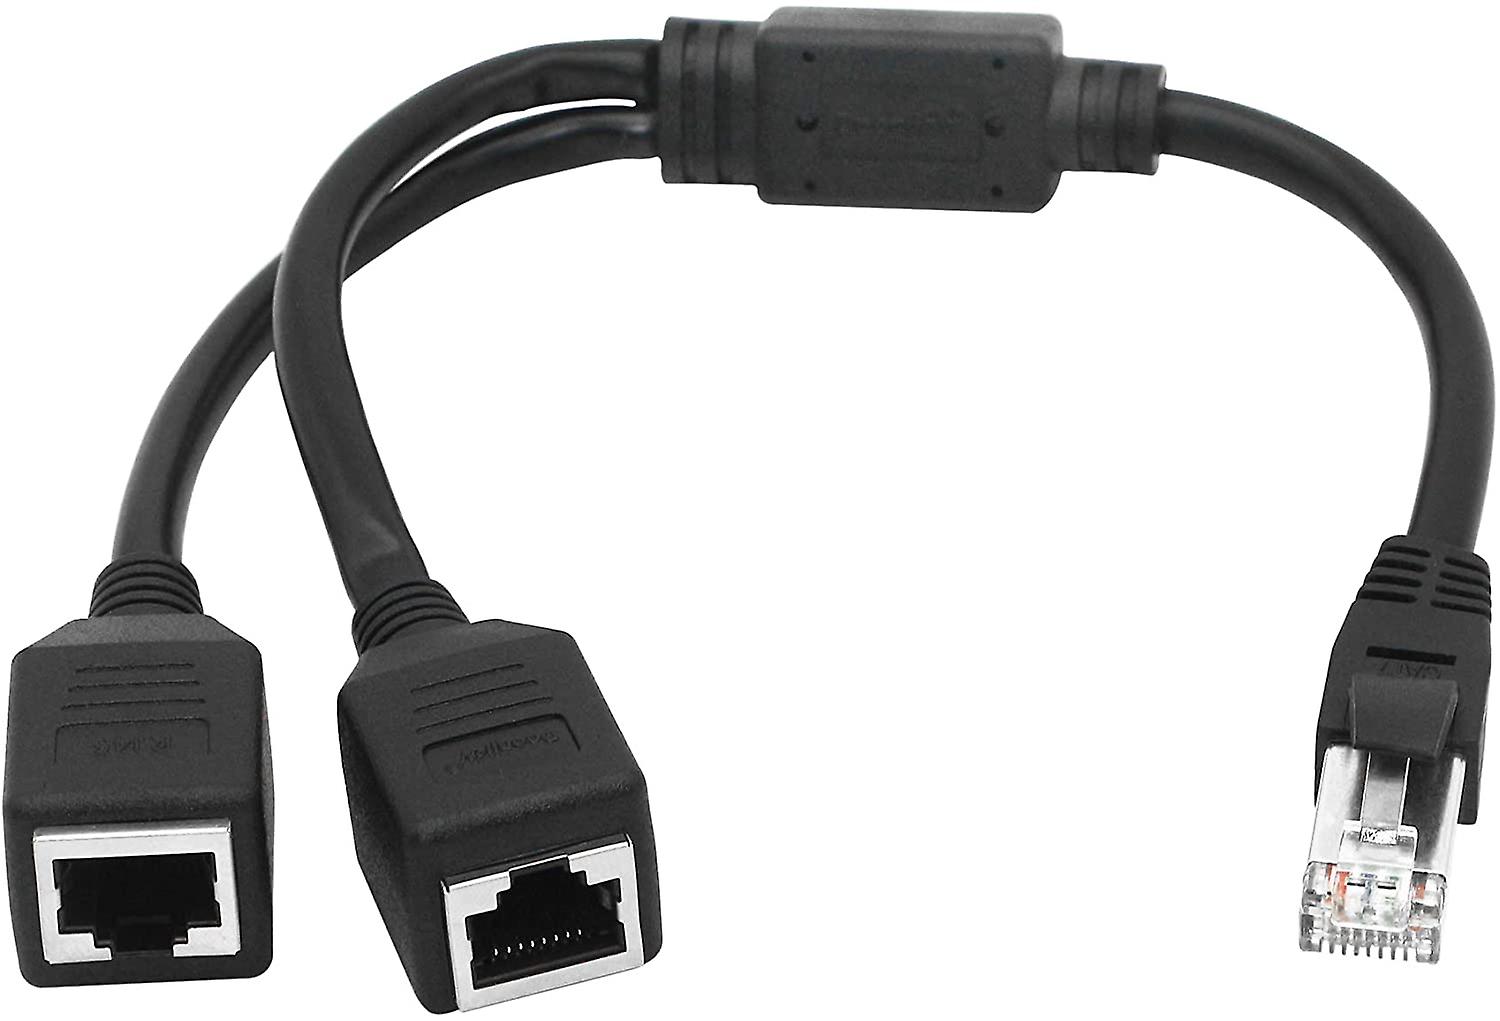
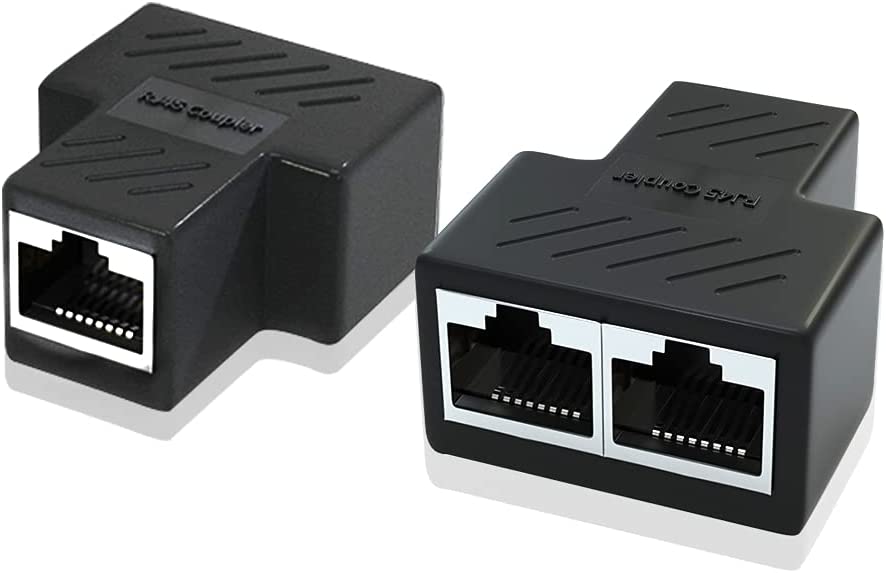
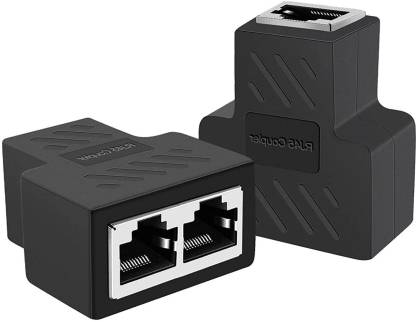
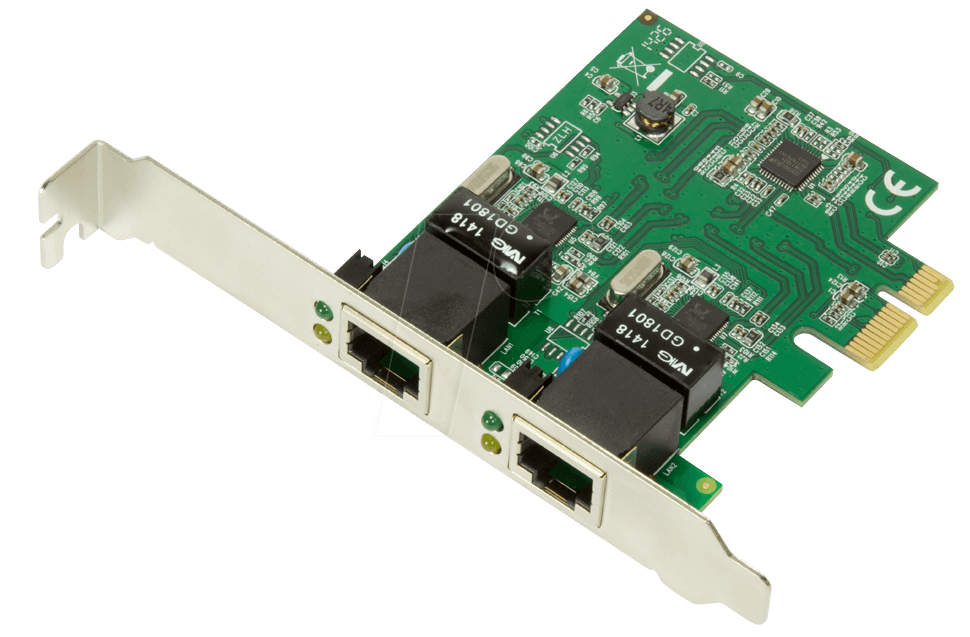
An ethernet splitter is a cable consisting of three ports connecting the USBs. Two ports are on the same side, and the other is on the other side. As its name suggests, it’s a kind of splitter used by many technical experts. Through a splitter, you can actually split the ethernet signal into two. It works on a premise of 10 or 100 Mbps. It divides the ethernet signal into two and enhances the efficiency of your ethernet signal. Moreover, with this cable, you can enjoy the same thing on two PCs Without much hassle with your signal.
The Two Types of Ethernet Cables Splitters
There are two types of ethernet cable splitters available in the market that you can use in your system. Well, which one is better and compatible with your device is the question your mind is prompted with. Don’t worry; you will get it answered all in this section. Read the below part and know which is for you.
One is the data cable splitter, and the other is the power over ethernet (PoE). Both of the cable splitters are well and good. However, PoE requires too much effort to get started, while the data cable splitter only requires to get plugged in and also costs less. Thus, the normal data cable ethernet is a way to go for you.
Ethernet Splitter vs Switch
Ethernet switch vs splitter is the most asked competition in the technical world. Both transporters have the same number of pros and cons. Then which one is best? Which one should you use? Thus, we are here to clear this out. In this section, we are going to look at the areas where the ethernet cable is best and where the switch is best. Ultimately, which one are you going to use?
Well, ethernet splitters and switch both provide a plug-and-play solution. Thus, you are not required to worry much about their application. Both of them work quite well when it comes to the quality of the work. The only difference is the price. The switch is a bit costlier than the splitter. Hence, we would recommend a splitter to use in the competition of ethernet splitter vs switch.
The Pros and Cons of Ethernet Cable Splitters
This section consists of all the pros and cons of ethernet splitters. So that you can actually get a justified overview of ethernet cable and how it works, let’s check if it is really worth it or not. Well, there are a bunch of pros and a few cons, but that also matters. Hence, you must look deep into this section to get a better rationale for ethernet cable splitters.
Pros
Inexpensive: The best part of using this cable is that it is free of cost and doesn’t require much investment from your side. Hence, you can simply buy this at a low cost and take all the benefits of it.
Simple and quick: Another best part of using this cable is that it is simple to use and quick to connect. No hassles are required to connect your devices to each other. You just need to connect the wires and start using your device as you are done with the process of making a connection.
No setup or configuration: You are not required to set up any configuration before using the ethernet, even for the first time. You just need to connect the ports, and here you go.
Cons
Speed: The speed of the ethernet cable is a very important thing that it misses. The major con of using ethernet cable is its speed. It doesn’t work well with high-end computers, but if you are using a transmission of under 200 Mbps, then it is a good option as it can give you 4000 streaming in a go.
It still takes up two ports: Another con in our list is that it takes up two ports. You are required to have a splitter at each end of the port to let it work well. This way, a splitter cannot save your port near the router.
Cable Splitter Alternatives
There are many alternatives present in the market through which you can substitute ethernet cables easily. If you are not finding ethernet cable worth for your use, then you can use alternatives. Thus, in this section, we have compiled all the possible alternatives that you must give a try.
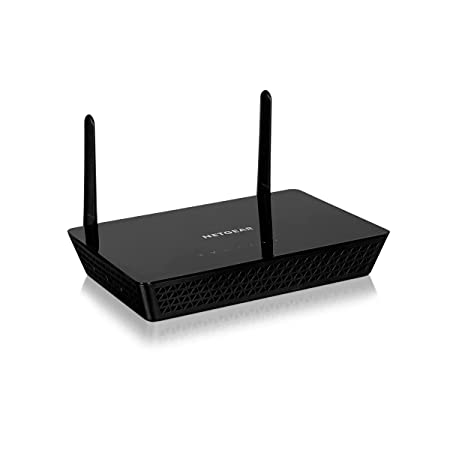
Wireless Access Points
One of the best alternatives that you can use in place of a cable splitter is wireless access points. These gadgets are installed in your place to give proper connectivity to your device. These wireless access points are installed on the walls of your room to provide you with an internet connection.
However, you are not required to buy any product from the market. If you have an old router, then you just need to run it on the access point mode. This way, you are all set to have the ethernet signal on every device without spending much on it.
Powerline Ethernet
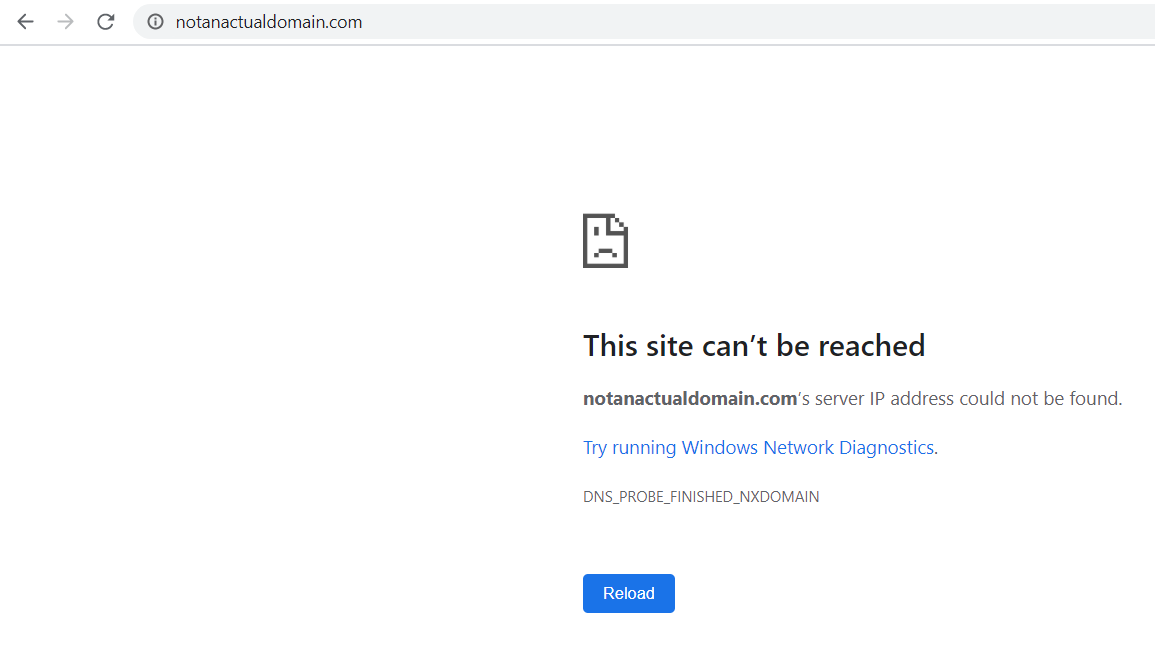
Powerline ethernet is the cabling system that is used as the most convenient alternative to splitters. It works when attached to the electricity socket, which is why it gives a high-end internet speed. Another best part of using this alternative is that it doesn’t require any wall mounting process or any connecting procedure. However, it comes with next-generation AV2 technology. Thus it gives you a very high internet speed. For your information, the internet speed will also depend on the quality of the cabbling at your place. If you are having problems with internet connectivity, such as Server IP Address Could Not Be Found or anything else, then you must use this way to get your internet back on track.
Network Switches
Network Switches is a plug-and-play solution. It does not require any difficult steps to get started with it. You just need to plug your cable into the device, and you are all set to use your device with full internet potential. However, it is easier to use than the router and any other means of passing ethernet signals. It is not much costly, you just need to spend a few dollars, even less than $20, and you are all set to connect with ports. It has a total of 5 ports to connect cables.
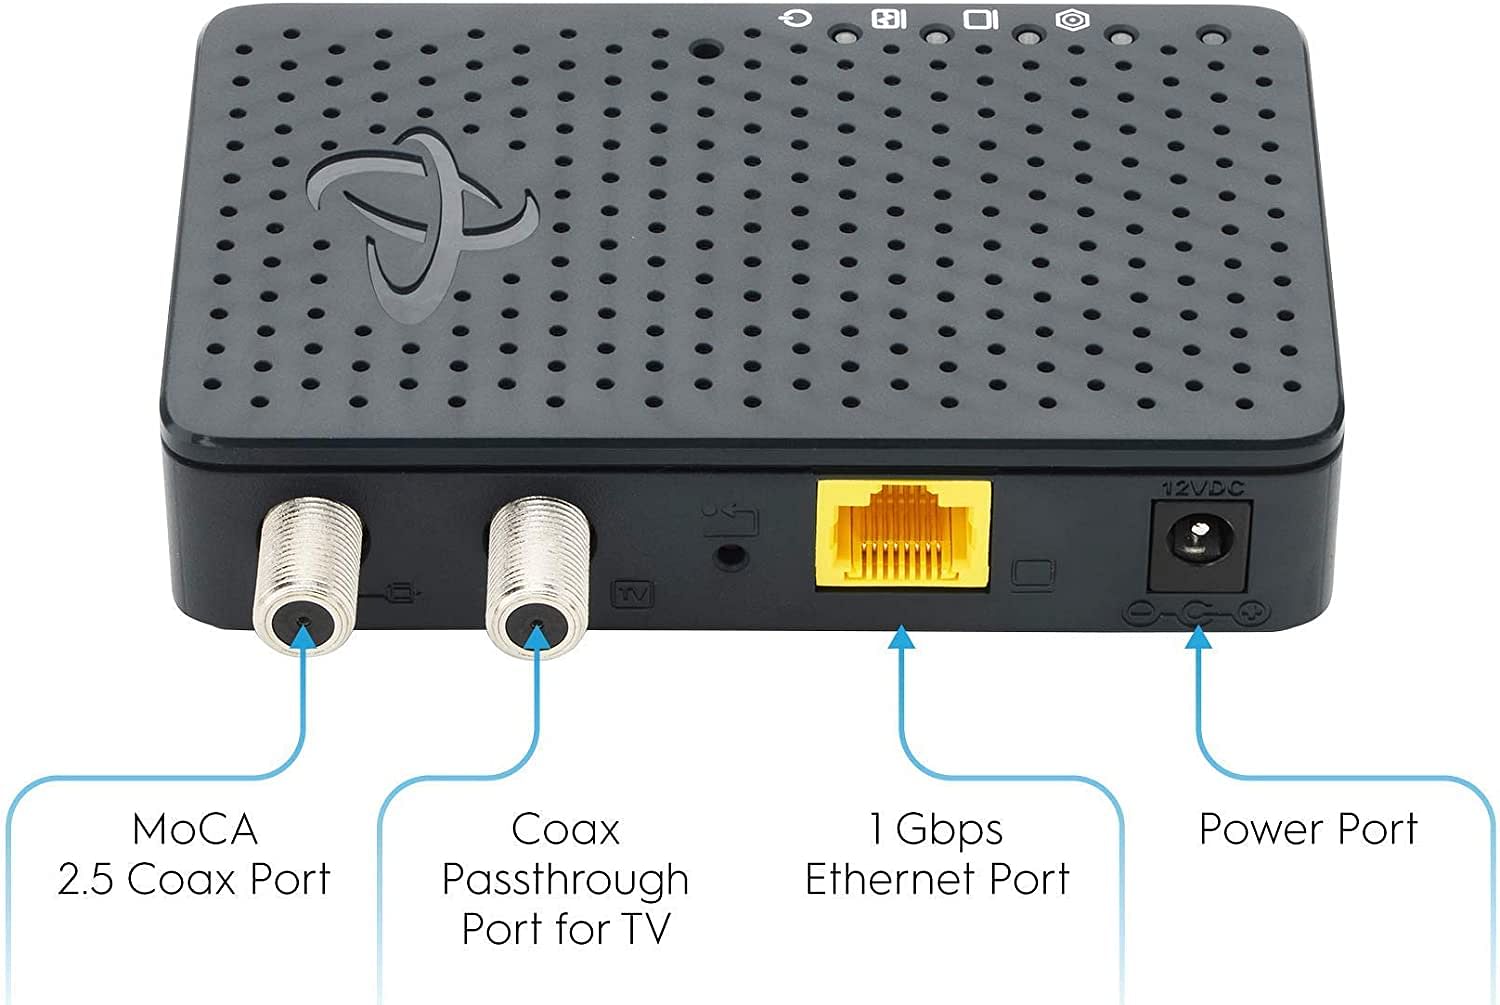
MoCA (Multimedia over CoAx)
MoCa adapters are very convenient for carrying off TV signals. Thus, if you use it for carrying an ethernet signal, then also it can work too well. MoCa has too many different ports for different purposes. It can offer you up to 1000 Mbps coaxial, which will be more than enough. Hence, using this as the substitute for the ethernet cable is a good way to go.
Best Ethernet Splitters In The Market
From the above article, you must know what ethernet cable is, how one can use it, and much more about it. If you have made up your mind to buy an ethernet splitter, then this section is specially designed for you as we are coming up with the top 3 splitters that you can buy. For your information, all of the below-listed splitters are worth enough of your money as our technical ex[erts have tested them. Hence, they made it to our list.
RIOUSV Ethernet Splitter 2-Pack
RIOUSV is the best ethernet splitter on the basis of price and quality, which is why it has topped our list. It comes in a combo pack of two. Thus, you can have 2 splitters at the cost of one. Moreover, it contains three RJ45 female ports; it has eight cables inside, which makes it CAT5 or a better version. Hence, you can buy this cable without thinking about its quality and other aspects we have covered in our expert list.
Wuedozue RJ45 Network Splitter Adapter
Wuedozue RJ45 has come on the second platform on our list. It is a kind of passive adapter which needs two perfect splitters to split the signals. Moreover, it requires USB power to work efficiently. Well, it provides you with the high-end speed of the internet; hence you can choose this splitter for your PC and device to have limitless performance.
NOBVEQ RJ45 Ethernet Cable Splitter
Another model that we would love to recommend to you for using a splitter is NOBVEQ. It is very reliable and convenient to use. It has three ports, but you can use a high internet speed on a single port. But it is a very cheap and helpful way to split the internet easily. There are various computer labs that have cheaply benefitted from these splitters.
Frequently Asked Questions
Q1. How to use an ethernet splitter?
Using an ethernet splitter is not a difficult task to do. You can simply use a splitter as it is plugged and play solution. A splitter contains 3 ports, one on one side and two on the other side. You just need to connect the wires, and your work is done. You just need to use your system and devices to enjoy seamless internet speed.
Q2. How do I set up an Ethernet splitter?
Setting up an ethernet splitter is a straightforward procedure. You don’t need to go through any steps. As we have told you, an ethernet splitter is a plug-and-play solution. Thus, you just need to make a purchase of an ethernet cable splitter and connect the wires to its ports, and you are done.
Q3. Where can I get an ethernet splitter?
Buying a splitter is not a difficult task. You can simply buy it from any nearby computer store. Also, you can purchase it from online sites. If you are also living in the US, then the Ethernet splitter Walmart is a way to go for you.
Conclusion
Losing internet speed between your gameplay or any meeting session can be really exhausting sometimes. But no more for you, as we have provided you with the solution ethernet cable splitter. We have compiled a detailed comprehension of it. From what it is to how to see the best 3 models in the market. We have covered everything. You can purchase anyone from our list of top three. Also, if you don’t want to use an alternative in place of the splitter, we have provided information about them as well. If you are still surrounded by any queries and doubts, then you can connect us anytime.
Technology works in various ways. Traditionally we did not even have computers, and now we can even communicate from one computer to another. Now when we talk about computers communicating and network connections, most of you think about Wi-Fi as a means of communication. However, the ethernet cable is also a quite famous way that helps computers to connect over a network. Now since ethernet has launched, it has modernized to cope with the technology. Each ethernet standard brings something new. In this article, we have covered everything about this wired communication technology, including ethernet limitations, standards, and how it differs when comparing ethernet vs Wi-Fi.
What Is An Ethernet Cable?
Being invented almost fifty years ago, ethernet has been in the market ever since, and it never disappoints. Although ethernet is not only good, you can also find ethernet limitations, and you might not like them. Starting from the top, ethernet was invented to link computers through a wiring connection. It basically includes a protocol, port, cable, and computer chip that is connected to a computer that is under a local or wide area network. Although most of the locations are using wireless devices with new coaxial and fiber optic cables, ethernet speeds have improved, and it continues to reign the market. Many businesses and organizations rely on this wired network because they are more secure and less interfered with when compared to wireless networks.
A computer is connected to a LAN or WAN, which in turn is connected with other devices like printers, laptops, or scanners and all of these devices are linked with a few ethernet cables, making a whole network of linked devices. Along with a router and ethernet connections, you can easily create a local area network. Ethernet can connect devices all over a building or even over an area.
Ethernet is evolving along with the technology to present better speed and serve you the speed you expect. Adding on to that, even wifi routers have ethernet ports. Many of you are so unaware that we use ethernet in our day-to-day lives, like connecting landlines or printers to computers, etc.
The best feature of ethereal connection is its adaptability. It can work in almost any environment and therefore is used universally.
How Does Ethernet Work?
Ethernet is a wired connection that connects devices and computers over a network so that they can communicate with each other. The signals are transferred via the wires. The entire ethernet setup operates on protocols. Basically, every device on this wired network has a card, we most popularly call it network interface controller (NIC). These devices that are connected over a network and are called nodes that communicate with each other via protocols. These protocols are the language of communication.
Nodes send small pieces of information which are called frames. The protocols state how frames are established. Moreover, every frame has a source address that identifies the sender and the receiver of that specific information and every frame has a unique source address. You can also refer to the devices that are connected by ethernet cable as a medium.
When an ethernet cable is long, there are chances for signals to get lost while traveling. Therefore repeaters or signal boosters are installed at equal intervals to avoid this from happening.
Components Of Ethernet
Since ethernet is a completely wired set of cables that are used to connect devices over a network, it comes with different components. Below is the list of major components of ethernet:
Protocol
The protocol is the language of communication between devices. This means that the ethernet protocols contain a set of rules that states how data is created and sent with these wired connections.
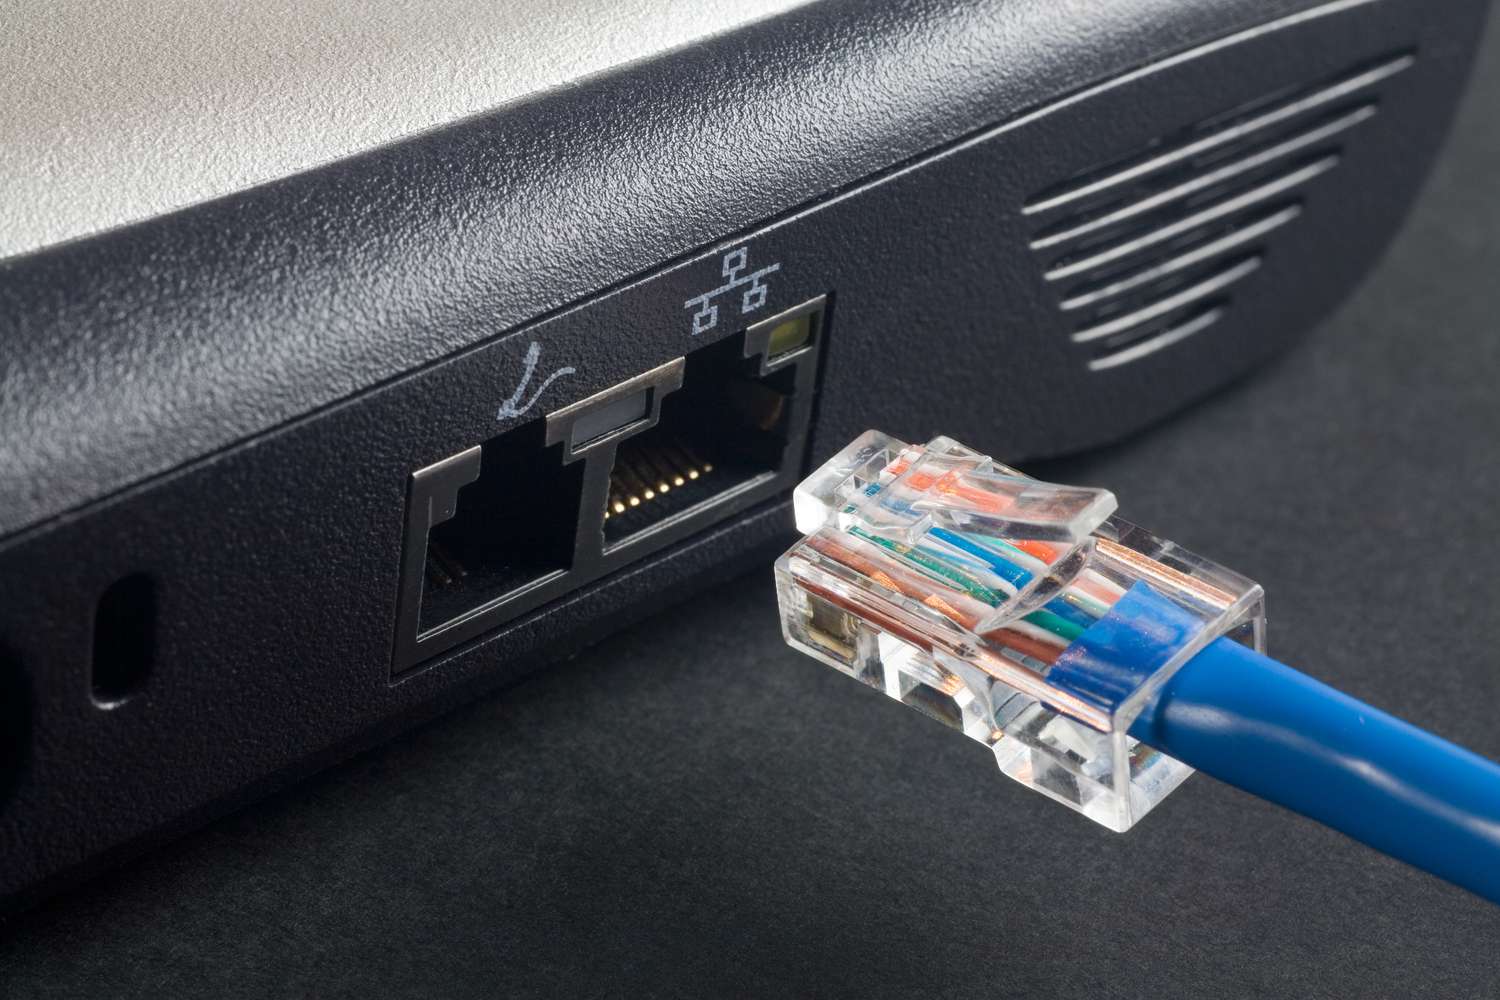
Port
Port is an opening provided on any device for connecting your ethernet cable. These ports only support RJ-45 cables. You can use ethernet wires mostly to connect computers and their equipment. This port is connected to the network adapter that is present on the motherboard. There can be multiple ports that can be used to link multiple devices.
Network Adapter
The network adapter of ethernet is basically a chip or a card-like thing that you can insert into a slot on the motherboard. This card helps the computer to connect over a local area network. Earlier, ethernet was only operated with computers but now it has evolved and operates with laptops and even desktop motherboards.
Cable
The ethernet cable connects your computer to a router or a network switch. This cable contains a plastic jacket, internal cabling and an RJ-45 connector.
Various Ethernet Standards
Ethernet was launched nearly 50 years ago and we all have been using it ever since. But times have changed. Technology is not the same as it used to be back then. Therefore to meet the standards of the new tech, ethernet has evolved accordingly. With time passing, there are several major and minor changes to the very old ethernet cable that makes it fit the generation. This whole set of properties, functions and construction details of different ethernet cables are called ethernet standards.
ethernet standards contain information about different ethernet media types. Below is the list of different types of ethernet starting from the start.
1. Ethernet With Coaxial Cable
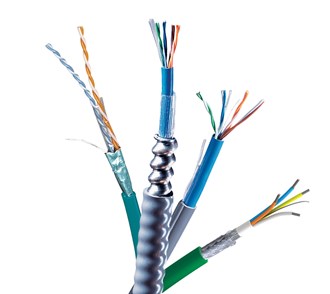
A coaxial cable, also known as coax, has a copper conductor along with an insulator wrapped around it as a protector. The conductor and insulator wraps an electric wire which is future shielded with a braided metal mesh. This prevents interference and crosstalk. Ethernet cable 10Base2 and 10Base5 also known as IEEE 802.3 and IEEE 802.3a uses coaxial cables for data transmission.
10Base2: This ethernet standard is also called ThinNet or IEEE 802.3a. Along with coaxial cable, it provides an ethernet speeds of 10 mbps covering up to 200 meters. However, it is not used now in the modern technology era.
10Base5: This coaxial cable is known by either IEEE 802.3 or ThickNet. This ethernet standard provides 10 mbps speed that covers up to 500 meters but its use is discontinued.
This types of ethernet cable can further be divided into different cable types:
Tri-axial: It uses extra copper braided protection for more prevention from interference and to provide extra bandwidth. Mostly used to connect cameras or televisions with cables.
RG-6: You can use RG-6 if you want an improved quality the signal. This cable’s di-electric insulator is thicker. Used in wireless routers or televisions with cables.
Hardline: When a network of ethernet cables demands stronger signals, you use hardline cable. They are mostly used in internet and television connections.
2. Ethernet With Fiber Optic Cable
A fiber optic cable is made with two glass layers. It transfers information through light signals via the core which is layer one. The cladding is the layer that surrounds the core and its refractive index is lower than that of core. This prevents the light signal from staying within the core. The fiber optical cable is further devices into two different types:
Single mode fiber: The single mode fiber (SMF) cable comes with a narrowed-down core. This only allows one single ray of light to move and deliver the data.
Multiple mode fiber: Multiple mode fiber is similar to single mode fiber but with a much wider core that allows multiple light rays to pass and deliver data. Additionally, it is less expensive.
10BaseF: 10BaseF uses fiber optic cables to transfer data at the ethernet speeds of 10 Mbps for up to two kilometers.
100BaseFX: This ethernet standard also goes by the code IEEE 802.3u. It uses fiber optic cable to transfer data at the speed of 100 Mbps. If you use Single mode fiber, it can transfer data up to 10 km, but multiple optic cables covers up to 2 km.
100BaseBX: The ethernet standards of 100BaseBX states that it can deliver data up to 20 km at the rate of 100 Mbps via fiber optic cable.
100BaseSX: This ethernet cable ran at the ethernet speeds of 100 Mbps and was launched as an alternative for 100BaseFX. Because it covers a shorter distance up to 300 meters only.
1000BaseFx: This ethernet standard covers up to 500 km and runs at the speed of 1000 Mbps. However, this cable only supports multiple media fiber.
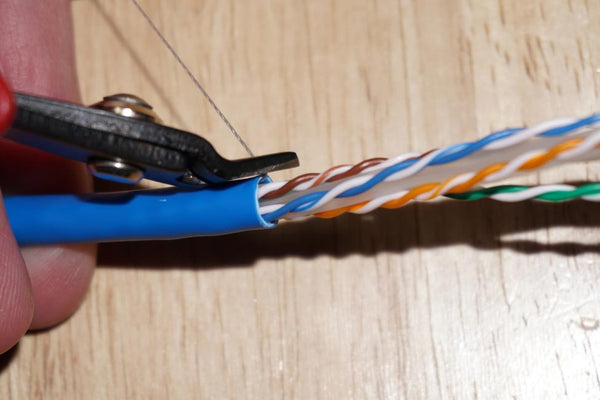
3. Ethernet With Twisted Pair Cables
Twisted pair cable as the name suggests, has a pair of two conductors, with each one having an insulator. These cables are guided media, and both the conductors are twisted together and hence the name. The more the twists are, the better quality of the signal will be transferred. To be precise, the twisted pair cable is divided into two types. These are:
Shielded twisted pair: These cables have a copper braid covering for extra prevention from external interference. The shielded twisted cable is costly but provides a high transmission rate and covers more distance.
Unshielded twisted pair: These cables are the same as shielded ones, except they are not shielded with an extra covering that prevents interference. It is composed of just two copper wires that are insulated and twisted together. The unshielded twisted pair is very common and is frequently used in computer networks.
You can find this type of wiring in ethernet cable 10Base-T, 100BaseT/TX, 1000BaseT, 10GBaseT, and 100BaseT4.
10Base-T: The ethernet standards of 10Base-T or IEEE 802.3i states that an unshielded twisted pair wiring is used that delivers data at the speed of 10mbps covering 100 meters.
100BaseT/TX: This ethernet cable also goes by the IEEE code 802.3u. Using an unshielded twisted pair of wiring, it transfers data at the rate of 100mbps covering up to 100 meters.
1000BaseT: You can recognize this cable by IEEE code 802.3ab. This cable transfers data at ethernet speeds of 1000mbps using an unshielded twisted pair covering 100 meters.
10GBaseT: 10GBaseT is also called IEEE 802.3an. It transfers data at a very fast pace of 10 Gbps with an unshielded twisted pair covering a distance of 100 meters.
100BaseT4:The ethernet standards of this unshielded twisted pair state that it covers up to 100 meters. IEEE 802.3u has an ethernet speed of 100 Mbps.
4. Fast Ethernet
One of the different ethernet standards. It was composed and hit the market in 1995. During that time, fast ethernet was the fastest network connection that allowed data to transmit at the speed of 100 megabits per second within a local area network. You can find this wiring in 100 BaseX, which also goes by IEEE code 802.3u. The length of this cable went up to 100 meters initially, but now it can go from 400 yards to 25 miles.
5. Gigabit Ethernet
Gigabit ethernet is one of the ethernet cables that transfer data in gigabits. This ethernet supports both full and half duplex modes. Using gigabit ethernet you can transmit data anytime you want without having to worry about contention. You can get low costing services just by installing this ethernet. This cable transfers data with ethernet speeds of 1 gigabit per second. This ethernet uses fiber option or any other high-tech cable.
6. 10/40/100 Gigabit Ethernet
The aim of launching this was an even faster data transmission. This cable transfers data 1000 times faster than the first and originally launched ethernet. It serves at an ethernet speed of 10 gigabits per second. However, It is defined by ethernet standards of 2002 IEEE 802.3ae. It even supports a full duplex, wherein data can move in both directions at the same time. You can find different ethernet cables that offer this speed, like 10GBaseSR, 10GBaseLR, 10GBaseER, 10GBaseSW, 10GBaseLW, and 10GBaseEW. It covers a distance of around 82 meters to 40 km. It uses fiber optical cable.
Similarly, you can find a 40-gigabit ethernet that covers 40 km when run with single mode fiber and 7 meters if operated on copper wire. It goes by the IEEE code 802.3ba and transmits data at the ethernet speed of 40 Gbps. Furthermore, 100 gigabit ethernet cable transmits data at the rate of 100 Gbps via fiber optic cable. It covers a distance of around 100 km and goes by IEEE codes 802.3bj and 802.3bm.
7. Switch-Based Ethernet Cable
You can call an ethernet cable that includes a hub or a switch a switch-based ethernet. The work of the switch is to move data from one device to another without any disturbance. Basically, when you connect a device to a switch, it will note its MAC address which is available on the network interface card. The ethernet cable is connected to the network interface card on one end, and on the other end, there is a network switch. Similarly, all the devices that are connected to the switch will have their MAC noted down. This address will be used by the switch to keep a record of which system is sending and receiving data. When the data is transmitted from one device to another without any harm to the hardware present in the network, the work of the switch is completed successfully.
8. Wired Ethernet
Just like the name, this ethernet connection is linked with ethernet cables. The major advantage is the ethernet speeds, which are a lot higher than those of wireless connections. This is because the devices are directly connected. The setup of a wired connection in a local area network or wide area network is all via ethernet cables. In this entire setup, one side of the cable is connected to the modem and the other end is connected to a device. If you are an individual use, this is an excellent choice of link for you.
The whole setup of wired connection can be spread up to 10 km and connects a maximum of fifteen devices. But with modern and wireless technology, the wired ethernet has been lagging. Having said that, it still is a great alternative for small businesses and individuals because of its fast data transfer that transmits even larger amounts of information like movies. Moreover, because of a direct connection, there is less scope for interference and data getting lost in the way.
9. Wireless Ethernet
A wireless ethernet is not connected to cables and is wired and communicates through radio signals. The higher the frequency of the radio signal is, the faster the data will transmit. Most of you are aware of wireless ethernet, which we very popularly call Wi-Fi, which does not require cables to communicate with devices. This is very famous and is adopted worldwide. You do not need wires to connect your device, it will connect if it is under the router or modem’s periphery or within a range of radio signals. The wireless ethernet setup will consist of Ethernet ports, wireless NICs, hubs, and switches.
Ethernet Cable: Usage And Benefits
Wireless connections are so famous nowadays, that most of you are quite unaware of the wonders an ethernet cable can do and where it can be used. Let us look at the different uses and benefits of ethernet cables.
Better internet experience
Ethernet connects to the modem at one end and the other end is linked to the device. Due to this direct connection, the internet speed is quite high, even higher than wireless networks.
Higher Bandwidth
The range of rate at which your data is transmitted within a band (network), is called bandwidth. Ethernet cables offer higher bandwidths that start from 10 mbps, 100 mbps, 1000, 10000, 40000, and 100000 megabits per second. The ethernet speed was originally in megabits per second but now it has increased to gigabits per seconds.
Multiple Choices
The cables of ethernet standards are quite wide ranging. You can get different cables based on your budget, location, and ethernet speed requirement.
Pocket Friendly
Ethernet cable is quite affordable and it is extensively used because it is cost-friendly. Moreover, its performance is quite plausible given the price. Therefore many businesses, hospitals, schools, colleges, etc use it.
Wi-Fi Dead Zones
It is undeniable that wifi is universally adapted and is very extensively used all around. But there are certain areas where installing Wi-Fi is quite impossible because of the location or other factors. Ethernet cables are required in such areas for device linking and communication.
Better Security
Anyone connected to your wifi signal can easily access the data when it is being transferred by a radio signal. In contrast to this, since ethernet transfers data through wires, the chances of data theft are very low. Also, you can maintain the CPU’s overall performance with this, and you can also eliminate the CPU over-temperature error.
Ethernet Cables: Setbacks
Ethernet cable is not all good. Everything has a set and here we are going to discuss ethernet limitations and setbacks. If you are thinking of installing ethernet cables, you must know all its aspects including ethernet limitations.
Mobility
When ethernet was initially launched, it was launched keeping in mind computers at that time and therefore the systems had a port for ethernet connection. But since technology is evolving, many new devices that are portable like laptops require a proper setup to use with an ethernet cable. This makes it less practical and suitable.
Distance
A common ethernet cable covers up to 100 meters. This limits its distance and can only be used in devices within the range.
Proper Setup
Setting up an ethernet connection requires a lot of work like drilling through walls, arranging several cables, cutting from concrete, etc. this is not always possible, which makes installing this network much more difficult and sometimes impossible.
Backward Locations
It is nearly impossible to install and run an ethernet network in remote areas where the electricity is constantly going on and off. This is because the ethernet works and takes power from the electricity, in the absence of which, it becomes completely useless.
Cables
There are multiple cables coming from here and there in an entire ethernet network. But speaking of ethernet limitations, when a single cable is damaged or has a little cut, it can disturb the entire network. This cable will only work properly when replaced or repaired. Therefore, you need to take good care of all your cables.
Expenses
When you install an ethernet network, you require hubs or switches, devices and wires. This means there is a lot of work required to install them. In case you decide to expand your network, that will just add to your expenses.
Ethernet vs Wi-Fi
Both ethernet and Wi-Fi have their advantages and disadvantages. However the major difference between them is, the former is a wired connection while the latter is wireless. In order to understand deeply how exactly ethernet cables suffer from Wi-Fi, here is what you need to know:
Speed
Ethernet has always or most of the time proven to be faster in speed when compared to Wi-Fi. This is because it is directly connected. The highest ethernet speeds in today’s times is around 10 Gbps or more. The highest Wi-Fi speed is 6.9 gbps but the real speed is actually lower, i.e. up to 1 gbps. Moreover, you can make your computer faster by using ethernet cables.
Security
Wi-Fi shares data through radio signals and therefore anyone connected to it can steal the data between transfers. In contrast to this is ethernet cable as it transfers data through a cable and thus has less chance of theft.
Reliability
An ethernet cable is insulated which prevents external interferences or cross-talks. It is protected from physical objects as well. However, Wi-Fi on the other hand is not reliable as it has too much exposure due to data transmission via air (radio signal).
Large Files
Ethernet speeds are higher than Wi-Fi and therefore it is a better fit for uploading large files. Its speed is the main factor that leads to faster data transfer even with larger files. Therefore to avoid latency, ethernet is the better option if compared to ethernet vs wifi.
Convenience
Ethernet standards require a complete setup with several wiring attached here and there. You need a proper infrastructure to work in an ethernet network. Therefore there is no mobility as you cannot move because of the cable. But if comparing ethernet vs wifi, Wifi saves the day. As it provides better mobility.
Devices
You can use ethernet connection on devices that have ports available to connect the cable. When you compare ethernet vs wifi, WiFi can be connected with laptops, computers and even mobile phones. There is no need for a port to connect wifi.
Installation Procedure
Wifi is wireless, this means there are no wires. This makes the installation process quite easy and quick. But when it comes to ethernet, the installation process is very hectic with several \wires, switch or hub and devices. One of the ethernet limitations is that It takes a lot of effort to install it.
Conclusion
Ethernet cable is a wired connection that is used to connect different devices in a LAN or WAN to allow communication between them. Basically an ethernet network is set up with one end of the ethernet cable attached to the switch and the other end to the device. When we compare this wired connection with wireless one, like ethernet vs wifi, we realize that ethernet offers good speed but wifi offers mobility. One of the biggest ethernet limitations is that you need a lot of effort to install it and while working in an ethernet network, you cannot move around.
If you are thinking to install ethernet at your workplace, house, school etc., this article will help you make an informed decision. We have compiled actual and deep researched details about everything related to ethernet. In this article, you can review every aspect of this wired network along with ethernet limitations and how it works. You can find a detailed description containing how an ethernet cable transfers data using protocols, frames and nodes. This help guide is designed to help you learn about this cable and assist you in making an informed division whether this network is suitable for you or not.
Frequently Asked Questions
Q: What is ethernet?
A: Ethernet is a setup wherein devices are connected via cables, forming a local area network. The information in an ethernet network moves around through protocols, i.e. a set of rules explaining how data should move. These protocols help avoid cross talks and interference. Ethernet can connect devices all over a building or even over an area.
Q: Is ethernet faster than wifi?
A: Ethernet cables connect the device directly to the modem and therefore offers faster speed if compared to Wi-Fi. The highest ethernet speeds in today’s times is around 10 gigabit per second or more. The highest Wi-Fi speed is although 6.9 gbps but the real speed is actually lower, i.e. up to 1 gbps.
Q: How does ethernet work?
A: Ethernet will break down information you send to different devices into smaller pieces that are called frames. Every frame will have an address of sender and receiver. No two frames have the same address. The devices that are connected over a network are called nodes that communicate with each other through protocols. The protocols state how frames are established and how data will move in a network.
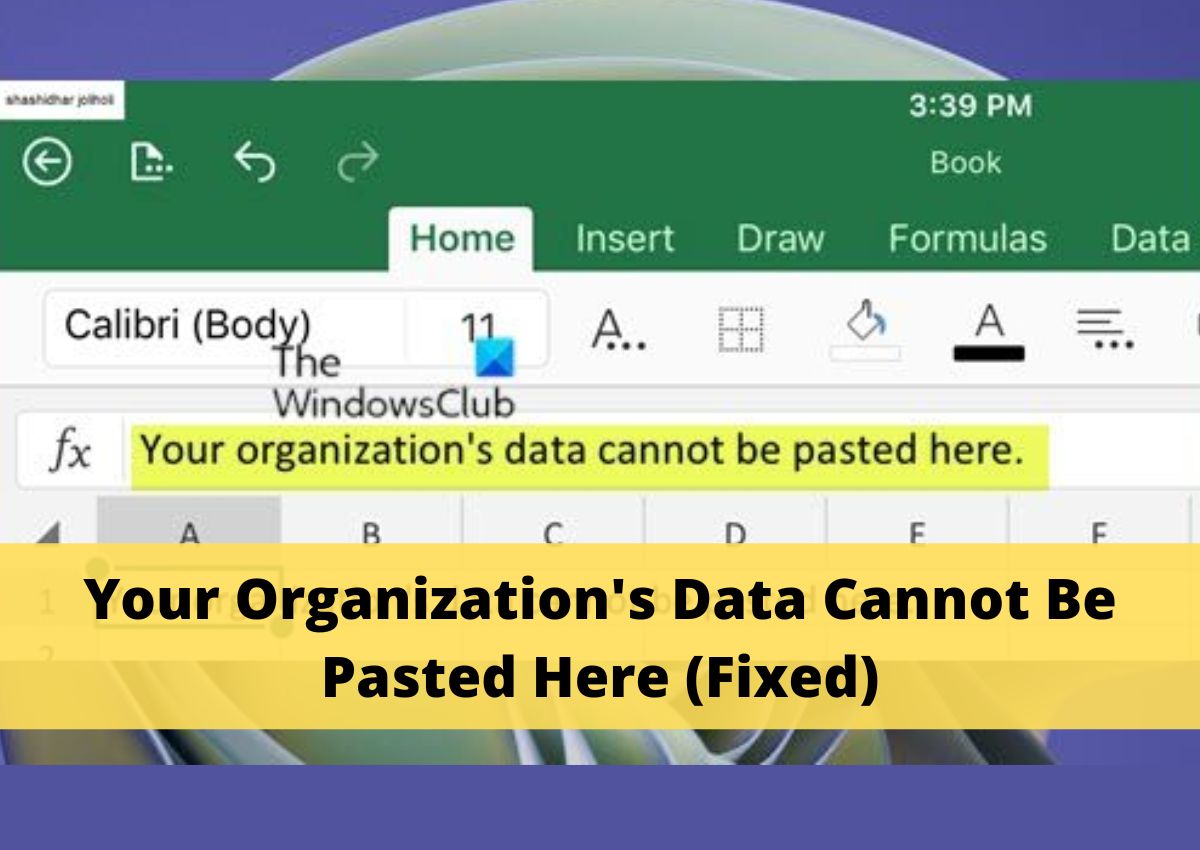
The ” your organization’s data cannot be pasted here” error message typically appears when a user is trying to copy and paste data from an external source (such as a personal computer or another website) into a specific application or system that is managed by an organization (such as a company or government agency).
This error message is a security measure to prevent users from accidentally or intentionally pasting in potentially harmful data, such as malware or sensitive information. It can be seen when the system has been configured with specific security settings. Which restrict certain actions in the application. When you copy information from Outlook and paste it on any application, it ends up with this error message. This is simply because of Microsoft Intune Policy Management.
Additionally, this message may also appear when the clipboard is blocked by the administrator or application, and in this case, you will need to check your device setting or company policies such as Intune Policy in order to enable clipboard access. Consequently, this post is extremely useful and helpful. You can use this for resolving an error notice indicating that your organization’s data cannot be pasted here. Consequently, if you are seeking a solution to this problem, this article may be of great assistance to you.
What is the Meaning of this Error Message?
This error message generally indicates that the system or application you are using has been configured with specific security settings that prevent users from copying and pasting data from external sources. It also means, as described above, that due to the Microsoft Intune policy, you do not have access to copy and paste due to security protocols.
If this error message appears, it is likely because the format of the data isn’t compatible with the platform or software being used, or there are restrictions set by that platform, such as Intune Policy which prevents confidentially-sensitive data from being shared. It could also be because the user attempting to paste the information doesn’t have appropriate permissions to do so.
To rectify this issue of error message, which is your organization’s data cannot be pasted here, users should check either the format of the data they are working with or their permissions on that particular platform before continuing or bypassing the restriction posed by Intune Policy. Additionally, organizations should ensure they are able to audit and control access concerning any confidential information they may have stored on other platforms.
Possible Causes Leading to Error Messages when Copying and Pasting
There are several possible causes for the error message when trying to copy and paste information from one source to your application. Some of the most common causes of the error message include are:
Restriction policies: If a restriction policy has been configured to prevent data from being copied and pasted. Then users will see this error message when they try to do so.
Conditional Access policies: If a Conditional Access policy has been configured to block access to apps or data for a specific group of users or devices. Then users may see this error message.
Network security policies: If a network security policy has been configured to block access to a specific website or network. Tthen users may see this error message when they try to copy and paste data from that website or network.
App protection policies: Intune allows administrators to create and apply policies that restrict the use of certain apps or app functionality, such as copying and pasting data.
Outdated version of application: Some applications, like Outlook, are redundant and old. This is resulting in this error notice of your organization’s data cannot be pasted here.
Steps to Fix the Error Message Blocking Copy and Paste
Before actually going in for troubleshooting steps, try to fix this error by investigating the source of the problem and taking the appropriate steps of troubleshooting to resolve it. Here are some general steps you can take to troubleshoot and fix the issue: Basic Steps before Troubleshooting
Verify that the data you are trying to paste is in a format that is compatible with the destination application. For example, if you are trying to paste text from a Word document into an email, make sure that the text is plain text and does not contain any rich formatting.
Check to see if there are any restrictions on the data you are trying to paste. For example, some applications may prevent you from pasting data that contain certain types of content, such as scripts or active links.
If you are pasting data from one application to another and the data contains tables or other complex elements, try pasting the data into a different application that is more compatible with the source format.
If the problem occurs only in one document or program, determine if it is a Microsoft product and whether it is in “Protected View” or “Restricted View” mode. You will also need to circumvent Intune Policy.
Try copying the data to a new document or application, and then paste it into the destination application. This can sometimes resolve formatting issues that may be causing the error.
In Some cases, it might be the security setting of the destination application that causes the error message of your organization’s data cannot be pasted here. You can check the permissions or settings for the application, if you have the necessary access, try to grant yourself access to perform copy-paste action.
If these basic actions do not assist, try the troubleshooting methods and document formatting listed below:
Edit Microsoft Intune Protocol
Modifying a Microsoft Intune protection policy involves the following steps:
Click on Devices and then select Device Configuration.
Select Profiles and then click on the name of the protection policy that you want to modify.
Make the desired changes to the policy settings. Some common settings that you may want to modify include the requirement for a passcode, device encryption, and restrictions on certain apps or functionality.
Click on Save to save the changes to the policy.
Assign the policy to the appropriate groups of devices. You can do this by clicking on the Assignments tab and then selecting the groups to which the policy should apply.
After you have made the changes and assigned the policy, it will be pushed out to the assigned devices the next time they check in with Intune.
Please note that if you want to apply new settings to devices that are already under management with Intune the settings will be enforced immediately on the device.
Also, you can use the Compliance Policies option, where you can check the compliance status and also make remediation actions on the error of your organization’s data cannot be pasted here.
Modify and Reinstate Office Document
Recreating and reinstating an Office document, such as an Excel file, involves the following steps:
Open Microsoft Word/Excel/Other word on your computer.
Click on the File menu, and then select New.
Select the type of document that you want to create, such as a Blank Office/workbook or a specific template.
Add the data and formatting that you want to include in the document. You can use the various tools and features in Word/Excel, such as formulas (for excel) to create a professional-looking document.
Save the document by clicking on the File menu and selecting Save. You can choose to save the file to your computer or to a cloud-based service like OneDrive or SharePoint.
Modify or Update the Office Suite Manually
Updating the Office Suite manually involves the following steps:
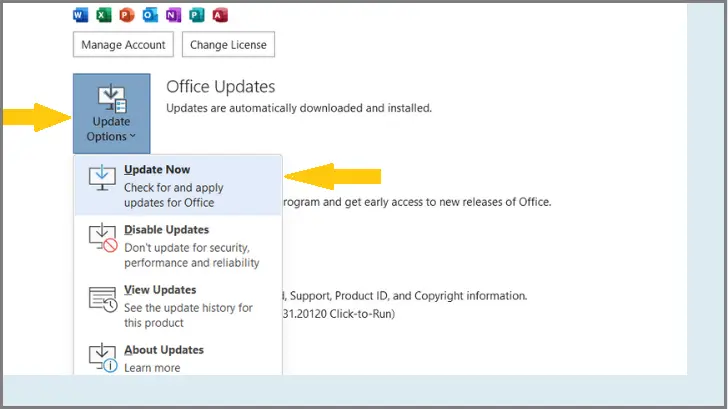
Open any Office application, such as Word, Excel, or PowerPoint.
Click on the File menu and then select Account.
Under the Product Information section, click on Update Options and then select Update Now.
If there are updates available, Office will download and install them automatically. Depending on the size of the update, this process may take a few minutes to complete.
Once the updates have been installed, you will be prompted to restart the Office application. You can choose to restart now or later.
Please note that updating Office manually only updates the specific Office application you have open.
If you want to update all the Office apps, you have to repeat the steps on each of them.
Alternatively, you can install the updates via the Microsoft Update service to offset your organization’s data cannot be pasted here error that is integrated into Windows.
Open the Settings app (Windows key + i)
Click on “Update & Security”
Under Windows Update click on Check for Updates.
It will check for updates and install them if they are available.
Frequently Asked Questions
Why do we come across the error “your organization’s data cannot be pasted here”?
This error message is a security feature that’s designed to prevent sensitive information from being accidentally shared outside of the organization. It comes as part of Intune policy/endpoint security solution as well as network security appliances or Cloud security configurations
How can you offset or bypass the error message of your organization’s data cannot be pasted here?
You can check the format compatibility of the data. Moreover, you can try to paste the data to the new application and then to a destination application. You can request permission for access. Finally, you modify Microsoft Intune policy, recreate Office Document, and update Office Suite manually.
How can you modify Intune Policy to avoid having error message of your organization’s data cannot be pasted here?
Here are some steps you can follow to modify the Intune policy:
Log in to the Microsoft Endpoint Manager admin center.
Select Devices > Configuration policies.
Select the policy you want to modify.
Scroll down to the Platforms section, and select Windows.
From the Settings section, and select Windows 10 Security Baseline.
Go to the Configure Windows Information Protection (WIP) settings.
Conclusion
This is how you may get around the bottleneck caused by the error notice “your organization’s data cannot be pasted here.” Fix the problem of not being able to copy and paste in your specific documents or applications. As a result, attempt to find the core reason for the limitation on your job first. Once you’ve identified the underlying cause, which might be one or many. You’ll be able to quickly fix the error messages.
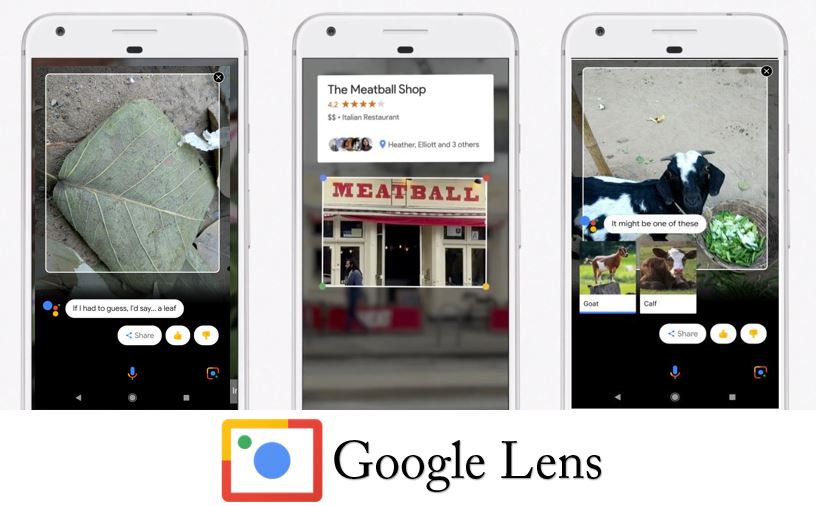
Google has been working diligently to make human life easier and simpler with the latest technologies, and one of the best outcomes of its innovation is the incredible tool Google Lens. What if we say you can search images and get the location, similar products on the market, and much more? Especially in no time. Well, you can harness the power of this fantastic tool through a direct search of the image.
However, you must not miss out on one of the most helpful tools powered by Google. If you are new to Google Lens, and don’t know how to activate Google lens then this article is best for you. Read this article all the way through to its conclusion so that you may take away all the best pieces of information with you.
What is Google Lens?
Google Lens is an AI-powered tool presented by Google. It combines AI technology with deep machine learning. It is one of the most profound announcements that Google made in 2017. However, it offers features like scanning, shopping, copying text from the image, translation, and much more. It has already been used for so many years. And indeed become too helpful for a pool of people. Let’s check the section below to get its uses with deeper insight.
Why Use Google Lens?
There are various features for why you should use Google Lens. Taking advantage of AI is nothing bad at all. You can unlock various new features and privileges with the new technology. And make this work your oyster!!
Simplify Your Shopping: You can simply search for the image of the item you want to purchase. Google Lens will show you all the related products to it on various shopping apps through which you can compare the price and quality at the same time.
Explore Locations: You can simply search the image with any landmark located near you, and you can get the exact location where the image was taken. Also, you can search the review rating section by searching a single image of the landmark.
Identify Objects: Another feature of using Google Lens is easy identification. You can easily identify anything. For example, if any random plant has grown in your garden, you can simply search its image and get every piece of information about it.
Smart Text Translation: If you are a student, you can take the most out of this app. As you can simply scan the homework question and get all the related searches to it. Another thing is that you can copy the text of an image and even translate it in no time.
Smart Scan of Barcodes: You can scan any barcode from this and get the related result for the same. Previously, you needed to download a third-party app for it, but with Google Lens, you can simply search for any barcode.
How To Activate Google Lens on Phone?
When it comes to actually using Google Lens, people are usually stuck on How To Activate Google Lens On Phone? Well, you won’t be facing this as we have given a simple step-wise guide below for both android and apple users.
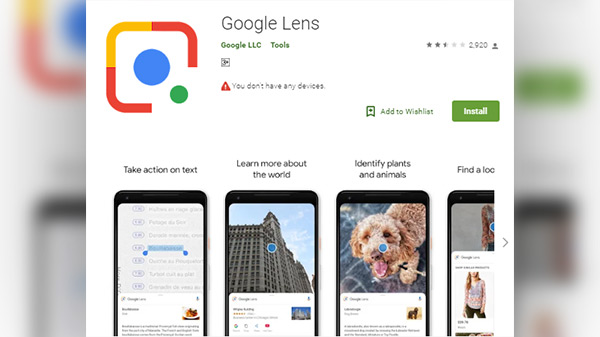
One thing that you must keep in mind is if you have a new version of your phone, then you won’t need to download it. Otherwise, you can download it from the play store if you are using an older versioned mobile phone. Downloading it or not will completely depend on your phone’s model.
Here we are dividing the following into two sections, one for android users and the other for iPhone users. Read below and get the answer to how to activate Google Lens on your phone.
On Android Phones: if you are an android user, then you can simply find Google Lens on google search assistant and also in the google search app. If you have an old phone, then you will need to download the app from Google Lens.
On iPhone: if you are an iPhone user, then you can not use the Google Lens at google assistant. But it doesn’t mean that you can’t take advantage of Google Lens. Well, you can download the Google Lens app, where you can try every feature of Google Lens.
How To Use Google Lens?
If you don’t know how to use Google Lens, then don’t worry, as we have arrived to rescue you this time as well. Here are two ways through which you can use Google Lens. One is with the gallery photos, and the other is with the on-time photos. Let’s check the below section and find out how one can do so.
With The Saved Photos
Well, with the saved photos, you can simply access Google Lens with the google photos folder. Let’s check the detailed steps for better rationale.
Open the google photos app.
Here you can see all the images saved on your device. Navigate to the image that you want to search for with Google Lens.
Open the image; in the bottom coming options, you can locate the logo of Google Lens and click it.
Now, bubbles will start to appear on the image.
You can see all the visual matches to your image in the below area.
You can tap on the specific item for better results. If you are not able to find the exact result, then you must try focusing on the pacific item.
With The Camera
If you want to use Google Lens with the live camera option, then also it is quite easy. Look below for the easy steps.
Open google assistant.
You can see a microphone search logo. Besides that logo, there’s another logo of Google Lens.
Click that logo and focus on the item that you want to search for.
After clicking the photo, you will get all the related searches for your photo.
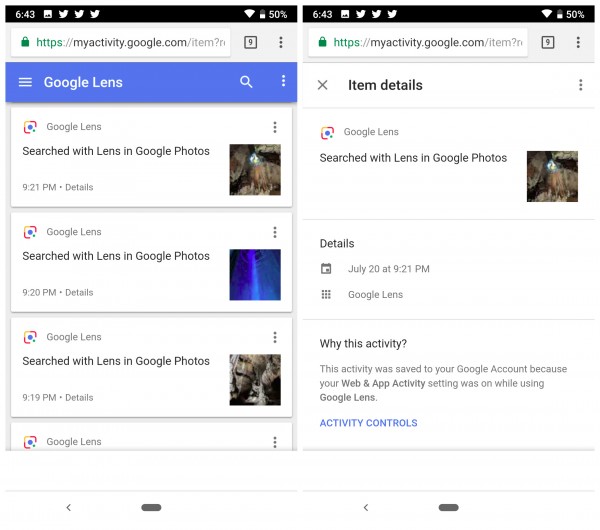
How To Check Activity Status?
Do you want to check the activity status of your Google Lens? Not a big deal. If you have saved the history of all your google activity to your account, then the Google Lens history has also been saved in your account. You can easily access the history. Let’s check the easy steps to access history.
Open the settings on your phone and get into your google account.
Navigate to the data and privacy option and open it.
Scroll down; here, you can see the history settings option. Open it.
And manage your history here with full ease.
What To Do If Results Don’t Match?
There are two tricks that you can use when your result is not coming matchable to your image. Let’s check them out.
You must try to tap on the target object for better results.
If the above doesn’t work out, then you can follow the following steps.
Scroll down till the end and look for a message saying, Do you find these descriptions useful?
Click No, and a prompt message will come up saying, What could have been better?
Give your feedback here.
This way, you can let Google know what things it needs to optimize for better results in this newly launched AI tool.
Is Google Lens Worth a Shot?
As we have already told you, Google Lens is a combination of AI tech and deep machine technology. Thus, it can not be 100{50afa256e6562afb2cd7837d8db3fd71ce947f26b53ffff72a77bb9141ae121a} perfect all the time. Sometimes, you may focus on something else, and google targets something else. In this case, you can try to tap the target for matching results. Regardless, you can get better results after doing so. However, Google Lens has become one of the most used AI tools for images since its release. We would like to advise you; you should not miss out on this incredible tool.
It comes pre-enabled on the latest devices. However, if you are struggling with the old version, then you can follow the below steps.
Get into the list of search engines and select the one you want ot edit.
Get into the overview section and navigate to the search features.
Besides search settings, you can get the option to enable or disable image search.
Q2. How do I search with Google Lens on my phone?
If you are not getting the option in the google assistant tab, then you must get down in the google app and tap the option coming to discover more. Here type Google Lens and start doing your searches.
Q3. Is Google Lens free?
Yes, Google Lens is completely free, and you can use it with any device you have, either an android or an iPhone. You can use it free of cost.
Conclusion
In a nutshell, we have given a detailed comprehension of Google Lens. We have answered all the possible related questions about it. Such as how to activate Google Lens. And how to use Google Lens? We are hoping that this guide has made everything clear to you, and now you are able to use Google Lens to every extent possible. However, if you are still left with any queries, then you can connect with us in the comment section.
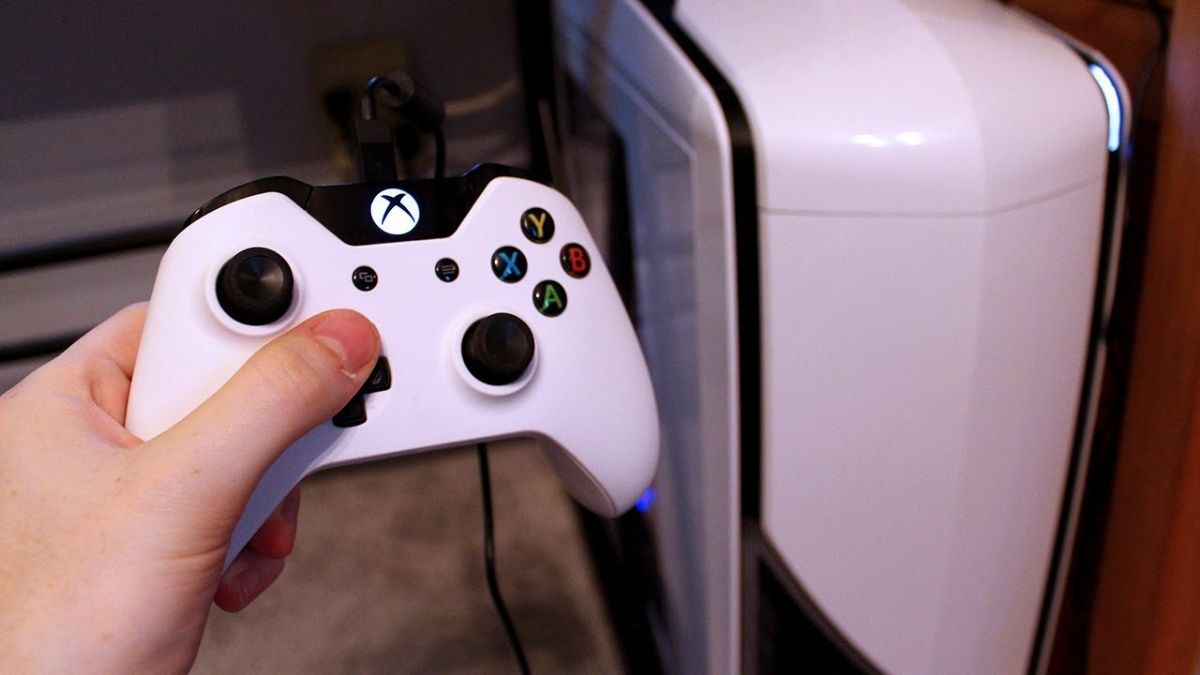
Stuck with a blinking Xbox Controller which doesn’t connect to your PC? If so, then you must be looking for some resolving methods. Right? And what if we say you have landed on the right page that is going to assist you in every way possible? Well, it’s true. In this article, we are going to tell you everything about the Xbox Controller connection problem. However, we have given 6 possible solutions through which you can establish a connection between your PC and the Xbox one controller. All you need to do is read the article all the way through its conclusion to get your Xbox one controller back to normal and to get it working as intended.
Are You On The Right Track For Establishing a Connection?
You must check if the way you are establishing the connection is right or not. If not, then you must get the right way to get your connection established once again. However, the process of connecting the controller and the PC is very simple. You just need to turn on your Bluetooth and check the availability of your controller.
Furthermore, you must check if you are facing Xbox Controller Not Connecting to PC problem and then where the problem is coming from. To test this, you can try these 2 below-written approaches.
Try Pairing It With Other Device
If your Xbox one controller is not connecting with your PC, then you must try to run tests with your controller to check if the issue is with your controller or with your system. You can try connecting your controller with another system and check if it gets connected. If not, then you must replace your controller as the problem is with your controller. If Xbox one controller not connecting to the other device, then the problem is with the controller.
Recognize Your Xbox Controller
Before everything, you must identify your controller; what type of connectivity it establishes with your PC? Or what kind of version your controller has? And if it needs any other accessory to work?
However, it is very simple to identify your Xbox controller. There are mainly two models; let’s check what you have.
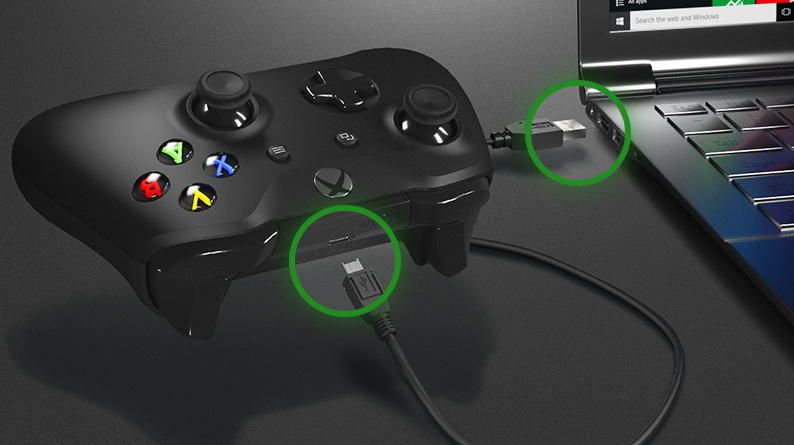
If you have a newer model, then you don’t need anything, as it uses standard Bluetooth to establish a connection. You can simply figure it out by the guide button, surrounded by the same plastic as the whole body.
If you have an older model, then you will require a dongle to establish a connection. You can identify an older version easily if you are not able to connect it without the dongle, then simply you can come to the answer that is an older version.
6 Ways To Resolve “Xbox Controller Not Connecting to PC”
There are six easy ways that you can try to resolve the issue of the Xbox controller not connecting. After doing the above tests, you must know where the problem is located, whether the problem is with your controller or with your computer. You can try all these six methods irrespective of the issue. You can not only be able to connect Xbox connect to a PC, but also you can improve the overall gaming experience and also you can resolve the problems like “ps5 not turning on”. However, the following methods are based on the research done by pro gamers and technical experts. So without further ado, let’s get dive into the troubleshooters to remove the issue “Xbox one controller not connecting”.
1. Use a USB Cable
If you are looking for a wireless connection but are stuck in connecting to the PC, then you must try establishing a USB connection. And check if it works. However, most gamers sit near their system for better gameplay, and also it resolves the issue of the sudden battery falls and charing. Hence., you can try using a USB wire to have a good connection and gameplay.
In addition, you can check the problem’s location/. Confused how? Well, use a sound USB wire and check whether the issue is at the controller’s end or your system’s end. However, if this way doesn’t work out for you, then you must get on the other method listed below.
2. Yank Batteries & Toggle Bluetooth
If you have a wireless controller, then the issue you are encountering is the network’s errors. Thus in order to refresh the network, you must toggle with your Bluetooth. Try to turn it on and off a few times. This can help you to have access to Bluetooth connectivity on your PC.
In addition, you can try to yank the batteries of your Xbox. It is also possible that the batteries connecting to your Xbox have loosened the connection. Thus fixing it back can help you to have a better battery connection. This method will help you to have a seamless connection with your PC.
3. Change Batteries
Another possible cause that you can encounter is an expired battery. Yes, maybe the batteries of your Xbox are not working properly. If you haven’t changed it for an extended period of time then it is time to change these batteries. This can definitely help you to be able to establish a perfect connection between your Xbox controller and your PC. And you can rectify the problem Xbox Controller Not Connecting to PC.
4. Update Windows and Controller Firmware
Outdated stuff is more prone to create errors and shutters. Thus, you are required to keep updating your Windows drivers and every other hardware. This way, you can improve the overall performance of your PC. Along with this, upgrading will help you to eliminate the issue of the Xbox Controller Not Connecting to PC. But how can you do so? Well, look below for the easy steps for upgrading windows and controller firmware.
For Upgrading Windows
Open your system settings.
Click the option “Update and Security.”
Choose the option to search for an update.
Update your Windows if needed.
For Xbox Controller
Install an app called Xbox Accessories.
Connect your controller with a USB wire.
Open the installed software.
A prompt will come up automatically; now, you must follow all the on-screen wizards.
Updating these can help you remove the issue. However, this issue also comes when your controller firmware is unable to establish the connection due to the unmatching versions of updated apps. Hence, you are really required to have the latest updated versions of every connected device to eliminate the issue Xbox Controller Not Connecting to PC.
5. Improve Signal Strength
The signal strength issue is another prominent cause of why your Xbox controller not connecting. However, Bluetooth comes with one of the best connectivity in all other wireless means of establishing connections. Thus, you must ensure there is no error in the connectivity oath. If there are so many other Bluetooth devices, then it must be getting difficult for your controller to get connected to your PC.
6. Try USB Bluetooth Adapter
There are various kinds of controllers in the market, which creates a hassle for establishing a connection via Bluetooth. Thus, you must try using a Bluetooth adapter of any third-party brand. It will definitely help you to establish a proper connection between your PC and the Xbox controller.
You can purchase any Bluetooth adapter of a reputable brand, but we would advise you to go for the Xbox wireless adapter for Windows 10. It consists of a lot of features. We have enlisted all the features of this adapter in the below pointers.
It can connect eight simultaneous controllers at a time.
Provides support for in-game chats.
Provides wireless stereo support.
Frequently Asked Questions
Q1. Why does my Xbox controller keep blinking and won’t connect to the PC?
There can be various responsible reasons why your Xbox one controller not connecting with PC. Common reasons are– outdated drivers, firmware, and Windows. If you have problems related to it, then you are most likely to face all these kinds of not connecting errors.
Q2. How do I connect my Xbox one controller to my PC Wireless?
You must connect your Xbox controller to your PC via Bluetooth, as it will be the most significant and efficient way to establish a wireless connection. Simply turn on your system’s Bluetooth and turn on the controller and look for the match on your system and connect with your controller.
Q3. Do all Xbox controllers connect to PC?
Yes, all Xbox controllers connect to PC. You just need to make a proper connection via Bluetooth so that you will be able to establish a connection. However, if you are unable to make the connection, then you must use a Bluetooth adapter from any third party.
Conclusion
In a nutshell, we have provided you with the top resolving methods in the above article. Through this resolving troubleshooters, you can connect your Xbox to your PC. You can not only resolve the error of connection, but also you can improve your system’s gameplay. If you are still facing any hassle or have any queries in your head, then you can connect us anytime.
The running battery of the Nintendo Switch Controller is ruining your gaming sessions? Seeing the flashing prompt of low battery in the middle of the game is the worst thing you will ever experience while playing. Fortunately, there is a way out of these flashing warnings. Once you get to know about “How to Charge Nintendo Switch Controllers?” You will be ready to unlock lengthy gaming sessions on your own. Well, in this article, we are coming up with so many options to charge Nintendo Switch Controllers. Read this article all the way through its conclusion and get your lengthy gaming session back to life without low battery interruptions.
Charging Nintendo Switch Joy-Cons
If you are a pro gamer, then you must know the pain of losing the game in the middle because of the low batteries in the Nintendo switch. To reduce these terrible instances, we are coming up with three ways through which you can charge Nintendo Switch Joy-Cons in accessible ways—charging Nintendo switch controller is not a tough task to do. It simply depends on where you are and what resources you have. Thus, let’s see various ways to charge Nintendo Switch controller.
How to Charge Joy-Cons while Playing? (Attach to the Switch)
The easiest way to give your Nintendo switch controller the juice of charge is by attaching it to the switch. However, this method is only useful when not playing with your controller. Let’s get a more deep dive into the charging procedure (attaching to the switch method) with easy steps. However, if your Xbox controller keeps disconnecting, then also you can use this method to charge it properly as one of the main reasons for it to disconnect is a low charge.
Simply attach your joy cons with a switch. You can do this by sliding the switch between the joy cons. Also, you must ensure the right side and the left side are placed well. Only this way you can charge it efficiently.
Now, you are just required to plug your switch into the dock. Here again, you are required to make sure that the switch is on and fitted correctly in the ports. After ensuring this, check if your controller is charging or not.
Here, you are advised to charge it without playing it. Otherwise, it won’t charge efficiently and fully. For your information, if you charge it handheld or while playing, then it automatically stops charging after 50{50afa256e6562afb2cd7837d8db3fd71ce947f26b53ffff72a77bb9141ae121a} in order to save the life of the battery.
How to Charge using the Charging Grip?
Another option through which you can charge the Nintendo Switch controller easily is the grip. The charging grip is another tool that will help you to do the charging. The best thing about using it is that you can use it while playing games on TV without much hassle. This is different from other charging methods as it comes without the switch hence charging your joy cons more efficiently. Let’s look at easy steps to perform charging through the Charging grip.
This also is in a slider frame. Attach this grip with your joy cons by sliding joy cons in the sliding bars. Make sure you slide the right joy cons on the right and vice-versa. Otherwise, it won’t charge.
Now, you have to take up a USB cable and connect it to the grip and the switch; this way, you can establish the connection for charging Nintendo switch controller
How to Charge using the Charging Dock?
This is another best way to charge up your Nintendo controller. With this charging dock, you can charge up to 4 joy cons at a time. So, you must use this charging way to charge up your joy cons. Furthermore, it comes with a USB cable, so that you won’t need to purchase it separately. The only con of charging it with docks is that you can not play with it while charging. However, this is an excellent way to save the overall battery life of joy cons. Let’s see how one can do so.
First, connect the USB cable to the switch and the post.
Simply attach joy cons with the dock by sliding the cons into the correct bar.
You can check your joy cons if they are charging or not through the red lights coming on the top of it or not. When the lights turn green then, it means your joy cons are fully charged, and you can remove the charger.
Charging Nintendo Switch Pro Controllers
If you have Pro Controllers, then you must know about their amazing battery life. It works for 40 hours if charged once. Pro controllers take almost 6 hours to charge completely. There are two ways to charge it: one is using a cord, and the other is using the dock.
Using a USB Cord
Pro controllers always come with a USB cord, no matter what brand you buy. The same is the case for Nintendo switch controller charger accessories. The Nintendo Pro controller comes with a USB cable. Let’s see how one can use it to charge the pro controller.
First, you are required to attach the cord with the Switch to the controller.
After establishing the connection, you will observe an orange light turns up on the controller, which means that it is charging. After it gets completely charged, the light will automatically turn off.
Here, the best thing that you must note is that you can use this way of charging while playing, as the switch is not required to be in the dock while charging the pro controller. Hence, you will not need to compromise your game because of less charge. However, low charge is also one of the primary reasons why your Xbox party chat not working thus, you are required to charge it properly.
Using a Charging Dock
Another way through which you can charge your pro controller is a dock. There are various third-party docks present in the market. You can buy any dock of a reputable brand. Some docks give you the exceptional feature of charging joy cons and dock together. Let’s see how one can charge a pro controller with a charging dock.
Connect your pro controller with the dock.
You must use the USB cable for it. Must ensure that your controller is off or in sleep mode for an efficient charge.
You will notice the lights on the dock will get red which means that it is charging. After it gets charged completely, the lights will turn green which justifies that the charge is full.
Frequently Asked Questions
Q1. How long does Nintendo switch controller take to charge
A Nintendo switch controller pro takes almost 6 hours to charge completely. If you are not using it while charging and can give you up to 40 hours of seamless playing. On the other hand, the Nintendo Switch controller joy cons take 3.5 hours to charge completely and give a seamless play of about 15 to 20 hours.
Q2. How long does the switch controller battery last?
If you are using a pro switch controller and have charged it fully without interruptions of using it while playing, then this battery will last for about 40 hours, which is more than enough.
Q3. Which is the best way to Charge Nintendo Switch Controllers?
The best way to charge Nintendo Switch controller is using a USB cable with the dock. This way, you can charge it while playing. Also, you can charge up to 4 joy stocks at a time.
Conclusion
In a nutshell, we have provided you with easy ways through which you can charge Nintendo switch controller. In addition, we have provided you with the way through which you can charge it while playing. We hope this guide has resolved every possible question about “How to Charge Nintendo Switch Controllers.” If you have any other queries, then you can contact us anytime.
Who is not familiar with GoPro! Most youngsters, along with adults, use GoPro regularly nowadays as it is among the most sophisticated action cameras on the market at the moment. It is exactly renowned for its incredible capacity for producing high-quality recordings or footage. However, many among them are complaining that they are encountering a “GoPro SD Card Error” issue that pops up on the screen while they try to use it. Are you also the one who is experiencing the same trouble?
Well, despite the development of digital memory devices, they are nevertheless susceptible to malfunction. This specific error specifically appears on the screen if the user has inserted or fixed the card not properly. But, also, this can occur for some other serious reasons at times. So, how to get rid of it?
In this article, we have researched and brought out to you some specific solutions which are easy and simple to apply for all (even for a non-technical person) to get away from “sd card error GoPro” instantly. Don’t wait anymore, start reading.
What Do You Mean By SD Card Error On GoPro?
Whenever your GoPro camera’s LCD screen flashes with pop-up messages such as – SD ERR, SD Card error, or NO SD, it literally implies that perhaps the SD card is just not functioning with the video camera or that you are experiencing a “GoPro SD Card Error.”
What Are The Major Causes of The Error “GoPro SD Card Error”?
Well, the “GoPro sd error” is currently occurring on your go pro. However, sometimes it occurs suddenly might be due to various reasons. Well, for some of you reading the article, knowing about the reasons might not feel necessary. But, in actuality, giving some time to read the reasons of why “sd error GoPro” is occurring. It will not make you feel regret instead will make you know more about it. Thus, spend some of your valuable time in this section to know the causes –
1. Insufficient Read and Write Speeds of the GoPro SD Card
The “GoPro SD Card Error” issue commonly happens following high-resolution or high-frame-rate recording. The only viable solution for fixing the underlying “sd card error GoPro” issue is to eventually replace the old and outdated SD card that you are currently using. Also, at times, security policy prevents use of camera and can result in such an error.
2. Dirty GoPro SD Card
It is indeed possible that the dust and debris of the outside world is to blame if your SD card has been being used with GoPro for several months or years and suddenly and unexpectedly stopped working, causing you to encounter the Error.
3. The Nand Cells Might be Currently Running Out of Time
The Nand cells, employed in SD cards to store the data, have just a built-in endurance of many write cycles before they degrade. Hence, your SD card might start to behave abnormally, and the error message “GoPro SD Card Error” might appear if these cells start becoming severely depleted.
4. Check The SD Card
The pop-up warning message “GoPro sd error” will certainly appear on the LCD screen of your GoPro camera; nevertheless, if the SD card has been inserted incorrectly or is not completed properly connected.
How To Recover Data From An SD Card Displaying An Error On A GoPro?
However, before you jump away to the solution part to get rid of the “sd error GoPro” error appearing on your GoPro camera screen, it is extremely necessary that you restore the relevant data from your SD card in order to safeguard yourself from loss of data.
Therefore, to do data recovery, we will be using Disk Drill, which is considered to be one of the best among the most popular programs. Disk Drill is compatible with the primary file formats used by GoPros and can effectively repair SD card errors on GoPros. The user interface is simple to use, and it has extra capabilities like a byte-to-byte backup that make data recovery simple.
Instructions for Recovering the Data
Well, to recover data from an SD card displaying an error on a GoPro by the use of Disk Drill, you need to follow the instructions very carefully as we have mentioned below for you –
First of all, download the Disk Drill installer from the authorized Cleverfiles website to just get started.
Open the Disk Drill installer by selecting the Start button, and then start the installation procedure. By selecting the Options option, you can voluntarily choose where Disk Drill will be installed. Now just watch for the installation to successfully complete.
The SD card should now appear on the list of devices and discs you may scan for data recovery after the software has been properly installed. Make sure to insert it at this stage.
Choose your SD card and press the “Search for lost data” button. The scanning procedure will begin as a result. By clicking the Review detected objects option while the scan is still running, you can immediately see what Disk Drill has discovered thus far. The results may also be seen by clicking the button when the scan is complete.
Following the scan, you may browse all of the files on the results screen to decide which ones you wish to recover. If you are able to recall the filenames of deleted files, you may also utilize Disk Drill’s search feature. After identifying the media you wish to recover, check the boxes next to each of their file names. Press the Recover button.
When the files are retrieved, a popup will appear asking where they should go.
Click OK after choosing the place for the files in your selection. It is advised that you save your data in a distinct sector than the one that you scanned.
The media recovery process will then begin with Disk Drill.
“GoPro SD Card Error” (FIXED with Easy Methods)
Following these easy and simple solutions, you will surely get rid of the “sd card error GoPro” trouble you are currently experiencing. So, without wasting a single, let’s dig into the solutions.
Solution 1: Clean the Memory Card in your GoPro
This is the first and the easiest solution to apply on the list of our solutions for removing the “GoPro SD Card Error” pop-up error appearing on the GoPro camera screen. The word “cleanup” refers to both internal and external cleaning of a computer’s memory card. Cleaning is important because the card may become covered in dust and debris, rendering it impossible for the computer to identify it properly. Therefore, you need to use isopropyl alcohol to clean your memory card. You can fix a card malfunction like the “sd error GoPro” error with the assistance of cleaning with this alcohol. How to do it? To know, you will need to follow as we have instructed below –
First of all, clean the metal or contacts on the SD card. Grab your toothbrush and dampen the bristles with isopropyl alcohol.
The contacts should then be cleaned with a damp brush.
Use a cloth to pat your card dry. In the event that you still see dust on the metal contacts, repeat the operation.
The memory card should be inserted into your GoPro camera once it has dried completely.
However, after completing the following process, examine whether the error “sd card error GoPro” has now been removed and the camera is operating properly. If it still appears, there might be some other issue, so you need to proceed to the next solution.
Solution 2: Use CHKDSK to Inspect for SD Card Errors.
The second most effective solution in the list is to resolve the “sd card error GoPro” error that you are currently experiencing by the use of CHKDSK. A built-in utility in Windows termed CHKDSK basically monitors file systems to detect faulty SD card errors like “GoPro sd error” and fixes them if required. So, to run the CHKDSK, you need to follow the instructions we have mentioned for you below –
Check to see if your PC has the SD card installed.
Open File Explorer after that. After doing that, right-click your SD card on this PC and choose Properties.
Go to the Tools tab in the Properties box. Select Check from the Error checking menu. This checks your drive to see if there are any fixable issues.
Now, you will receive information stating that CHKDSK was unable to find any errors, but you can still opt to scan even in those cases. Choose Scan and repair drive from the menu to finally begin the scan.
Solution 3: Format GoPro’s SD Card
The “GoPro SD card error” can be a frustrating issue, as it means that you won’t be able to take any photos or videos. Thankfully, there is an easy fix: formatting your GoPro SD card. Read on for step-by-step instructions on how to do this.
Step 1: Start by powering off your camera and removing the memory card from its slot. You should also make sure that the camera is not connected to any other device or power source. After that, insert the memory card into your computer’s built-in card reader or an external one if necessary.
Step 2: Once the memory card is inserted into your computer, open up File Explorer (or Finder on Mac). From here, select the memory card and click on Format in order to start formatting it. Make sure you choose either FAT32 or exFAT as the file system type before clicking Start.
Step 3: After a few minutes, your memory card will be successfully formatted, and any errors should now be gone! Now insert the memory card back into your GoPro and turn it back on again. Try taking some photos/videos with it to see if everything is working correctly now.
Solution 4: Re-install Disc Drive
The “GoPro error.” is common among its users, and there is an easy fix that doesn’t require too much technical know-how. All you need to do is re-install a disc drive to resolve the problem. Read on for step-by-step instructions on how to do it.
Step 1: Access the Device Manager
The first step in fixing this issue is accessing the Device Manager. To do this, go to your Control Panel and select ‘Device Manager’ from the list of options. Once you have opened the Device Manager, look for ‘Disc Drives’ and expand that option by clicking on it. You should see an entry listed as ‘SD Card Reader’ or something similar; if not, move on to Step 2.
Step 2: Reinstall Disc Drive
If you don’t see an entry listed as ‘SD Card Reader,’ then you will need to reinstall the disc drive in order to fix the issue. Right-click on ‘Disc Drives’ and select ‘Uninstall Device’ from the drop-down menu that appears. A confirmation window will pop up asking if you are sure about uninstalling. Select Yes and wait for it to finish. Once it has finished uninstalling, restart your system and then install it again using Windows Update (you can find this by going back into your Control Panel). This should resolve any issues related to your GoPro SD card error message.
Step 3: Troubleshoot
If, after following these steps, you are still having trouble with your GoPro SD card error message. here may be some other issue causing it that needs to be addressed before being able to use your device again. It may be worthwhile checking out some online forums or contacting customer service directly for help troubleshooting this issue further.
Solution 5: Install the Latest Version of Firmware
The main reason why you need to install the latest version of firmware is that it contains important bug fixes and performance improvements that have been released by GoPro. By having these updates installed on your camera, you will ensure that any potential problems are resolved quickly and effectively. Moreover, installing the latest firmware can also help improve your camera’s overall performance. Which means you’ll be able to capture better-quality videos and photos.
Installing the latest version of firmware on your GoPro camera is easy. First, make sure that your camera is completely off before proceeding. Then, download the relevant software from GoPro’s website onto your computer and follow the instructions provided on-screen in order to complete the installation process. Once completed, power on your camera to see if this has resolved the “SD card error” issue. If not, then it may be worth trying a different SD card in case there is an issue with compatibility or corruption with the current one in use.
Frequently Asked Questions
Q1: Why does the SD card on my GoPro always report an error?
Ans: Any time your GoPro camera displays the messages “SD ERR,” “SD Card error,” or “NO SD,” the SD card isn’t communicating properly with the device. This error can be caused by a number of reasons, including improper storage memory card formatting or using a damaged SD card in the camera.
Q2: Why are just 10 minutes of video being recorded by my GoPro?
Ans: A GoPro wouldn’t be able to record more than 9 to 10 minutes of video at a time at its maximum quality if it didn’t segment the video into volumes.
Q3: Is 128GB sufficient for the GoPro 9?
Ans: Even though the GoPro Hero9 can better accommodate memory cards with a storage capacity of 256GB. or regular use, 128GB cards perform well. You don’t technically require an ultra-fast micro SD memory card.nstead, you merely need one that has a minimum U3 spec rating since the bandwidth, even in the Hero 9’s 5k shooting mode, is just up to 100Mbps, or 12.5MB/s.
Q4: Can videos that have been damaged be fixed?
Ans: Use Ontrack EasyRecovery or another video file recovery program to actually accomplish this. Ontrack EasyRecovery provides a number of advantages. All user profiles, including individuals who have little computer knowledge and expertise, may easily utilize it because it is so simple to use. Your damaged file may very well be recovered with only a few clicks due to this robust and reliable utility value.
Q5: What should I do if the SD memory in my GoPro is full?
You must follow the instructions that we have listed below when your SD card is full –
From the SD card in your camera, copy any desired files to Quik or your computer.
Swipe downward on the touch screen.
Click Preferences.
Now, select Format SD Card from the Preferences menu by scrolling to the bottom of the page.
Tap the Delete button.
Conclusion
All the solutions mentioned above are working perfectly fine. You can pick any one of them that suits you the best. Remember, these techniques are only for “GoPro SD Card Error”. So don’t try it on another type of error because it might damage your camera permanently. Also, if nothing seems to be working, then there is a possibility that your GoPro camera is facing some other problem. So in that case, the best thing would be to take it to the nearest service center.
You may be wondering why you can’t get out of the bottleneck caused by HBO Max not working. Many users have complained that they cannot access content on HBO Max or that the service is malfunctioning. If you’ve been looking forward to this as a chance to catch up on your favorite series, it might be really disappointing. Fortunately, there are certain things you can do to get this streaming platform working again.
Therefore, this article will go through the reasons why HBO Max can be malfunctioning and provide some fast fixes. In addition, we will discuss some broad tips and tricks for making the most of HBO Max programs. If you follow these guidelines, you may fix and get out of the issue of HBO Max app not working and prevent any future complications from arising; read this article all the way through to its conclusion so that you may take away its best practices as a troubleshooting guide.
What are the Issues and Troubles Causing the Streaming Service Malfunctioning?
Sign-in difficulties, no video issues, sound issues, HDCP failures, password issues, service errors, and “not in service area” problems are just some of the troubles that users may encounter while attempting to use the app. There are several potential causes for such difficulties of HBO app not working, such as faulty hardware, interrupted service, or incompatibility between devices and servers. Some users may encounter problems if they have an older version of the app loaded on their devices.
Here are some of the most crucial factors that may be causing problems with your streaming experience:
Network connectivity issues: HBO Max in UK, US, or any other nation requires a stable internet connection to stream content. If your connection is slow or unreliable, the HBO Max won’t play.
Server outages: Sometimes the HBO Max servers may experience a temporary outage, causing the app to not work.
Compatibility issues: HBO Max may not be compatible with certain devices, especially older models. This can certainly cause the app to not work properly.
Outdated app version: If you have an older version of the app installed on your device, it won’t play.
Device or app settings: Certain device or app settings such as proxy or VPN settings, can cause the HBO Max app to not work properly.
Overload of a number of devices: At times, increasing the number of devices used to stream may cause issues and HBO Max won’t load.
Credential issues: There might be other issues arising out of login issues or password issues.
As a result, these are some of the most crucial concerns and factors that are impacting your streaming experience. We’ll be addressing these HBO Max app issues in the following manner.
The Best Troubleshooting Steps to Fix the HBO Max App Malfunctioning
It’s preferable to implement some fundamental troubleshooting measures before diving into more in-depth troubleshooting. If you’re having trouble with the app, try the following steps.
Run a speed test: You should run a speed test to check the bandwidth and connection speed to make sure it meets the requirements for streaming HBO Max.
Restart your router: Restarting your router can help to reset any network issues and improve streaming quality to fix issues of HBO Max not working.
Update the HBO Max app: Make sure that you got the latest updated version of the HBO Max app.
Check your internet connection: Verify that your internet connection is working properly and that there are no other devices using the same connection.
Clear the browser cache: Clear the browser cache and delete any incompatible extensions.
Reinstall the app: If the issues persist, try uninstalling and reinstalling the HBO Max app.
Upgrade your router: If the issue is still not resolved, you may need to upgrade your router for better performance.
Check your subscription: If your subscription plan is not active, you will not be able to access the content.
If these basic steps didn’t work, try the following more advanced steps and some of these steps include error-specific troubleshooting:
Fixing the App Crash
Here are some steps you can take to fix issues with the HBO Max app crashing:
Restart the app: Restart the app and try streaming again.
Check for updates: Make sure that you have the latest version of the HBO Max app installed on your device.
Clear the cache: Go to Settings > Apps & Games > Manage All Applications and clear the cache of the HBO Max app.
Reboot your device: Reboot your device and try streaming again which might resolve the issues.
Disable VPN or Proxy: If you’re using a VPN or proxy, try disabling it and see if that resolves the issue. Some VPNs or proxies can block access to certain streaming services like HBO Max.
Uninstall and reinstall the app: Try uninstalling and reinstalling the HBO Max app.
Check your internet connection: Verify that your internet connection is working properly and that there are no other devices using the same connection.
Check for any network issues: Check for any network issues and try connecting to a different wireless network.
Upgrade your router: If the issue of HBO Max not working is still not resolved, you may need to upgrade your router for better performance.
Fixing the Error Code 321
To fix HBO Max Streaming Issues: Error Code 321, you should try the following steps:
Check if HBO Max is down: Check if HBO Max is down by visiting the official website or checking for any service announcements.
Disable VPN: Any VPN or web proxy may be responsible for the HBO Max Error code 321, so you should disable the VPN or web proxy from your device.
Check for an unstable internet connection: Check for an unstable internet connection that may be causing the error that says HBO Max won’t load.
Check internet speed: Make sure that your internet speed meets the requirements for streaming HBO Max.
Clear HBO Max cache: Clear the cache of the HBO Max app by going to Settings > Apps & Games > Manage All Applications.
Update HBO Max: Make sure that you have the latest version of the HBO Max app installed on your device.
Reinstall the HBO Max app: Uninstall and reinstall the HBO Max app if the issue persists.
Restart your router: Resetting your router can help to eliminate the HBO error code 321.
Fixing the Error Code 100 and 420
To fix HBO Max Error Code 100 and 420, you should try the following steps:
Check the HBO Max servers: Check if the HBO Max servers are down in your area.
Update or reinstall HBO Max: Make sure that you have the latest version of the HBO Max app installed on your device and reinstall it if necessary.
Disable VPN: Disable any VPN or web proxy from your device, as this may be responsible for the error that says HBO Max won’t play.
Check your location: Check if you are accessing HBO Max from the United States or a U.S. territory.
Clear HBO Max cache: Clear the cache of the HBO Max app by going to Settings > Apps & Games > Manage All Applications.
Wait for HBO Max to resolve the server error: Wait for a few minutes and try streaming again after the server error is resolved.
Force close HBO Max: Force close the HBO Max app and reopen it again.
Fixing the Sound System
There’s also the possibility that the audio system may just stop operating. Here’s how to fix the HBO Max app’s faulty sound:
Check the app’s audio level: Check if the audio level of the app is low and adjust it accordingly.
Check the sound format: Try changing the sound format and see if that resolves the HBO Max app issues.
Check the audio setting on the media player: Make sure the audio levels are properly set on the media player and device.
Power cycle the streaming device: Turn off the streaming device and then turn it back on again.
Reconnect the HDMI cable to the Smart TV: If the HDMI cable is loose, try reconnecting it and see if the issue is resolved.
Logout and log back in: Try logging out of the HBO Max app and then logging back in.
Disable Bluetooth and Do Not Disturb (iOS): Try disabling Bluetooth and Do Not Disturb (iOS) to see if it resolves the issue of HBO app not working.
Try the audio stream on a different HBO Max title: Try playing a different HBO Max title to see if the problem is resolved.
Check the audio stream on a different streaming device: Try streaming the title on a different streaming device to see if the problem is resolved.
Update the HBO Max app: Check for updates for the HBO Max app and install any available updates.
Fixing the Internet Connection
If your internet connection drops often, you’re better off with a wired (broadband) connection than a wireless one. However, regardless of your internet connection, you may use the instructions below to address the issues.
Unplug the power connection from the network devices (modem, router, etc.).
Wait 30 seconds.
Reconnect the power to your modem and wait for it to connect.
Open a new browser window and search for ‘Internet speed test.’
Run a speed test to check your internet connection.
You need a minimum download speed of 5 Mbps or HBO Max won’t load.
If videos are buffering, check your internet connection.
Download an Internet speed test app from the Google Play Store or Apple App Store.
Check for any network outages in your area.
Contact your ISP if you still experience issues.
Not just your Max app, if you have a connection problem, you may notice that you are having trouble with Snapchat won’t open.
Frequently Asked Questions
Why is the app for HBO Max streaming not working?
The app may not be working due to a variety of reasons. Some common causes include Internet connection issues, Router or modem problems, Device software issues, Subscription issues, Server outages, Location restrictions, App bugs or glitches, Incorrect login credentials, etc.
Are there any temporary fixes to fix HBO Max streaming not working?
There are a few things you can try if the app is not working:
Check your internet connection,
Restart the app,
Clear the app’s cache and data,
Update the app,
Check device compatibility,
Restart your device
Check your subscription.
Do I need to uninstall and reinstall HBO Max?
In most cases, you do not need to uninstall and reinstall HBO Max in order to fix issues with the app. However, clearing the app’s cache and data or restarting the device can often resolve the issue. If you’re still experiencing problems with the app after trying these solutions, you may want to try uninstalling and reinstalling HBO Max.
What are the possible causes of the HBO Max app not working?
There are several possible causes of HBO Max streaming app not working, including Internet connection, App updates, Device compatibility, Server issues, Subscription issues, Geo-Restriction, Device issues, and Device Configuration.
Conclusion
If you complete these steps in order, you should be able to resolve the problem that is preventing you from viewing the content. As we saw above, there is a wide range of potential origins for these problems. If the issues causing HBO Max not working, try following the standard troubleshooting steps first. If the basic troubleshooting methods don’t work, try the ones we’ve outlined for each error-specific problem.
To summarize, there are several steps you may take to diagnose and repair the problem. First, ensure that the service is operational and that there is no network interruption. Then, if required, try closing and restarting the program, as well as restarting the device or browser. Check the speed of your internet connection and the strength of your WiFi signal.
Furthermore, you may also attempt to clean the app cache or delete and reinstall the program. If all else fails to resolve the HBO MAX app not working issue, contact your internet service provider as well as HBO Max support team to see if they can assist and also see if there is any subscription issue. With these troubleshooting techniques, you should be able to resume streaming your favorite HBO Max episodes in no time!
Are you stuck with a google server IP address that could not be found? In order to resolve it, you ended up scratching your head. If so, then you no longer need to worry, as we are here to rescue you from this frustrating error. However, we are coming up with a guide that has 9 resolving tactics to rectify and eliminate the error in a few clicks. Fortunately, we have got all covered, from its meaning to the causes and to the top resolvers. Well, if you want to resolve the error server IP address cannot be found, then you must read our guide and get your chrome working again.
What Does “Server IP Address Could Not Be Found Error” Mean?
If you search for something and your system shows “Server IP Address Could Not Be Found Error,” you must get freaked out first, and you will start to look for the resolving methods. But before that, you must know what it actually means. Well, it means that the server of your system and the server of the site that you want to reach are unable to connect. Thus, it showed the error “couldn’t find the IP address.”
Causes of “Google Server IP Address Could Not Be Found”?
When it comes to finding the cause of the error, then you can find it on your end and the site’s end as well. However, the solutions are reason based. Thus, you must understand all the possible reasons to resolve your error with our reason-based solutions coming in the further section.
Bad Internet Connection: If the internet connection through which you are connected is weak, then you are more prone to see this error. You must check your internet connection. You can try accessing another site to check where the problem is located.
Problematic Cache: If the random and unnecessary cache in your computer takes up important space, then you are likely to get the error. In order to resolve this, you can try deleting unwanted cache from your system. This will not only result in eliminating the error, but also it will help you to improve the smooth running of your overall system.
Down DNS server: If the DNS server is down at your end, then again, you will encounter this error. You can simply detect the cause of the error coming on your screen If it writes, “the DNS IP address could not be found.”
Site is Down: Another possible cause for the error coming on your screen is the server of the site that you want to access is down. You must wait for a while to get your chrome back on track for this cause, as the problem is not at your end.
Top 9 Troubleshooters For “Server Could Not Be Found”?
After getting a proper rationale for its meaning and the causes, one must look for reason-based troubleshooters for the error. Thus, we have prepared detailed stepwise troubleshooters for you. Try the following method one by one and rectify your error within a few clicks.
1. Restart Google Chrome
The best troubleshooter for any kind of problem in chrome is restarting it entirely. Restarting chrome will help you to re-establish the connection with all the sites and the pages you want to browse. Hence, re-establishing it will help you to surf limitlessly.
Simply exit the chrome with the coming red cross option in the top right corner. And relaunch it. Check if you have eliminated the error or not. If not, then you must try the other following methods enlisted below.
2. Make Sure Your Internet Works
The most common and significant reason for the error is that the google server IP address could not be found in the lousy internet connection. Thus, you must check if the error is from your side. Also, try fixing your internet connection. You can try restarting your wifi if your internet is not working. In addition, you must try connecting with a wired connection as it is meant to be more stable and frequent than the wifi connections. Furthermore, you can check if your connection is lacking by connecting to any other site.
3. Verify Your Proxy Settings
Another possible cause for the error coming on google chrome is your proxy server. Might your proxy server be creating a problem with your internet connection. This is why your google chrome is not able to run efficiently. Hence, you will need to tweak some settings on your pc with a proxy. This way, you can manage to eliminate the server error. Let’s see what tweaks you can perform to eliminate the error.
Go to the start menu and look for proxy settings.
Here, you can see two options coming on the screen. One Automatically detects settings, and the other uses a proxy server.
You need to turn on the automatic detect setting option and,
Turn off using a proxy server option.
After doing this, you must check to open your google chrome and connect to any site. See if the error has gone or not. If not, then simply get on the next method written below.
4. Turn Off Your VPN
If you are connected with a Vypr VPN or any other, then only this step is relevant for you. Either way, you can skip it. A VPN server is most likely to have less connectivity, which ultimately results in showing server IP address cannot be found. In this case, you must turn off your VPN connection to eliminate the error. Furthermore, sometimes the site you want to reach is not approachable to the proxy location, thus resulting in an error. Hence, you must turn off your VPN and try establishing the connection with a standard wifi connection.
5. Use the Internet Connections Troubleshooter
If the above-presented methods fail for you, then you must try using an in-build internet troubleshooter in your system. But what does it do? Well, it simply detects the problem and gives you a way to resolve it. Thus, trying it can give you a productive outcome. Let’s check how one can do so.
Launch your settings app on your computer.
Open Update and security option
Select troubleshooter and see in the right pane, and select additional troubleshooters.
Navigate to internet troubleshoot
Click “run the troubleshooter.”
After a few minutes, your system will detect the problem and will show you the solution too. You just need to follow the on-screen wizards to remove the error.
6. Clear the DNS Cache
If your DNS cache is creating problems, then clearing it can bring you productive results. Clearing unnecessary cache can help you to improve the overall performance of your PC. you can optimize the smoothness of running programs. Also, it will help you to remove the random errors coming on your device, such as Server IP Address Could Not Be Found and AMD driver timeout. Let’s check the following steps through which you can perform the cleaning.
Open your command prompt. You can simply search the command prompt in the search windows.
Type “IPconfig /flushdns” in the command prompt and press enter.
Here’s how you can delete all the DNS cache from your system
The above steps are valid for every other Windows computer, but if you have macOS, then you must try out the following steps.
Open terminal Utility.
Type “sudo killall -HUP mDNSResponder” command in the terminal.
Put your password and click enter to delete the cache.
7. Clear Chrome Host Cache
Another thing that you can perform for the seamless and errorless performance of your pc is clearing the host cache from your google chrome. It is quite simple. What you need to do is listed below. Follow the easy steps.
Launch your chrome and type chrome://net-internals/#dns
Click enter.
When you get to the next screen, you must select the DNS option coming on the left pane.
Now, you will get the option “clear host cache.”
Click it and check if your error has been reduced or if you can access your favorite sites.
8. Enable Dynamic IP Address on Your Windows PC
Enabling a dynamic IP address is one of the significant methods that you can try to remove the error server IP address could not be found. It happens when you manually set the IP address for your system, and your system is unable to show you the result with this inappropriate IP address. Let’s check how one can do so.
Launch the settings app on your PC.
Navigate to the network and internet options.
Click the “change adapter” option.
Now, you will get the network adapter option; right-click it.
Select properties.
Here, you will get a list where you can set the ‘protocol version 4’, click it, and then open its properties.
In the next screen, you must choose the obtain an automatic server address.
You must press okay to save the changes. Also, you must not forget to restart your system for better execution of the changes you made. Try opening your google chrome and check if the error is eliminated or not.
9. Update Your Network Adapter Driver
Another possible cause for the error is your outdated network driver. Thus, you must keep updating your network drivers timely. If you are confused about how to do so? Don’t worry. We have covered it as well in the below pointers.
Open the device manager; you can simply enter the search bar and type device manager.
Now, you can see the list of all the connected devices to your system.
Navigate to the network drivers.
Click the drop-down menu and right-mouse on the network device.
Click to update the driver option.
After doing the above steps, you will encounter a prompt that will ask you whether you want to search automatically for the driver or not. Then you must choose the automatic search option; this way, you can make your upgrading process easier.
Frequently Asked Questions
Q1. Why does it keep saying the server Cannot be found?
There can be various reasons responsible for the error you are getting on your google chrome. One of the most common reasons for it is a weak internet connection. You must check your internet connection to see if it is working well. Another possible reason is the unnecessary cache in your computer.
Q2. How do I fix being unable to connect to the server issue?
There are various ways to fix the server error you are getting in chrome. You can re-establish the connection, and you can try clearing the unwanted cache from your system. Another thing that you can try is to upgrade your network drivers.
Q3. What is the meaning of couldn’t connect to the server?
When your system and phone show that it is unable to connect to the server, then it means your network adapters are not able to connect with the local network servers.
Conclusion
If you are struggling with the chrome error “Server IP Address Could Not Be Found,” then you must be freaked out at first, but you can resolve it with our top 9 methods that we have listed above. You can use any of the above methods to resolve the error. However, you must check to reach other sites if the issue is at your end or the site’s end to which you want to navigate. If you are still left with any query unanswered, then you can connect us anytime.
The lessons we’ve learned from the Covid 19 pandemic and the need to quickly adjust to new circumstances have prompted some of us to acquire technical knowledge on our own time. Due to the ever-changing environment, not only in terms of technological background and context but also in terms of social and cultural issues, it is necessary for any of us to discover on our own how to fulfill our needs. Since MS Teams are so ubiquitous these days, it’s clear that knowing how to set up a teams meeting is essential in this day and age.
There is no such thing as wasted knowledge since every learning eventually pays out in some way. Understanding how to manage MS teams is also crucial and has got the same importance as any other knowledge you would pursue. This idea is for individuals who are here to learn the fundamentals, but for those whose work, education, or other pursuits depend entirely on online meetings, mastering MS Teams is an absolute must.
Therefore, you’ll find a wealth of information here regarding what a Microsoft teams meeting is and how to create a Microsoft Teams meeting link on a desktop computer or other device, whether you’re using a calendar or a scheduling channel to organize your meetings.
What is the Microsoft Teams Meeting, and Why Do You Need it?
Whether you want to host or attend a virtual meeting, conference, or webinar, Microsoft Teams Meeting is the perfect tool for you. With features like screen sharing, video conferencing, and file sharing, Teams Meeting makes it possible for users to communicate and collaborate in real-time. Users of Teams Meeting can take advantage of the app’s recording and saving features to keep track of important discussions, and the app’s note, task, and action item creation capabilities can help improve teamwork.
Therefore, Teams Meeting is an excellent method for teams to remain connected and productive, regardless of where they are in the globe. As a result, understanding how to set up a meeting in Teams is always a valuable skill to add to what you already know.
As for its various uses, you may apply it to coordinate briefings among your team members who are spread across various geographical areas, creating a virtual setting that resembles your office atmosphere. You can use Teams to provide educational training, resources, or courses. You may also plan a general questions and answers session with your friends. So, you may have a variety of meetings using Teams meetings.
A Detailed Tutorial on How to Create Meetings on Microsoft Teams
As we have discussed above, you can schedule meetings using MS teams for a variety of purposes ranging from formal, business-related meetings to educational and social gatherings. You may control the meeting calendar so that both persons from outside the organization and those from inside the organization can attend. In other words, this is the way how to set up a Teams meeting for both internal and external contacts. You may also establish meetings on a channel that everyone on the team can access and join. Furthermore, you may specifically tailor the meeting such that only the team members that you have invited will be allowed to join.
As a result, we will go through a variety of methods of setting up Teams meeting on several platforms, generally, desktop and mobile, starting with the desktop version of Meetings.
Teams Meeting Link on Calendar (Desktop version)
To schedule a Teams meeting on a desktop PC, go to the Teams app and select Calendar. Select + New Meeting and give your meeting a title. Decide on a date and time, then enter the names of individual attendees or add a channel to select a class team channel to meet in. Finally, review your meeting details and select Send. This adds the meeting to your calendar and your attendees’ calendars.
As for a detailed oriented procedure, please follow the below-mentioned steps to create Microsoft Teams meeting:
Open the Teams app on your computer
Click on the “Calendar” icon on the bottom navigation bar.
Hit the “New Meeting” button in the top right corner view.
In the “New meeting” window, enter the meeting title, date, and time.
Choose your desired video and audio options.
Click the “Add online meeting” button to generate a link for the meeting.
Click the “Send” button to share the link with your desired attendees via chat, email, or another method.
This is how to set up a meeting in teams using the Teams calendar platform.
Optionally, you can also schedule the meeting from Outlook or Outlook on the web by clicking the “New Meeting” button in the top left corner of the calendar view and then following the steps from step 4 onwards.
Schedule a Meeting and Create its Link on a Teams Channel (Desktop Version)
Teams channel meetings make it simple to arrange appointments though you cannot make private channel meetings. You can easily create teams meeting by following the procedures outlined below.
Launch the Teams app and go to the channel where you want to arrange and start a meeting.
Click on the team and channel where you want to schedule the meeting.
Click on the “Meetings” tab in the channel.
Click on the “Schedule a meeting” button.
Fill in the details for the meeting, including the title/name, date, and time.
Click on the “Add online meeting” button to generate a link for the meeting.
Click “Save” to schedule the meeting.
You can also click on “Send” to share the link with the members of the channel.
The meeting link will also be visible in the channel’s meeting tab for anyone to join the meeting on time. This is how to set up a Teams meeting through the Teams channel platform.
Create Meeting on Teams and Link for People Outside of the Organization (Desktop version)
To schedule and create a Microsoft Teams meeting for people outside of a particular organization, follow these steps:
Open MS Teams and click on the “Calendar” icon on the bottom left corner of the screen.
Click on the “New Meeting” button to create teams meeting.
Enter the required information for the meeting, such as the subject, date and time, and duration.
In the “To” field, enter the email addresses of the attendees who are outside of your organization.
Click on the “Add Teams” button to add attendees from inside your organization.
In the “Meeting Options” section, choose the audio and video options that work best for your meeting.
Click on the “Send” button to send the invitation to the attendees.
These are the steps of how to setup a teams meeting requesting people from outside the organization join the appointments.
Once the attendees have accepted the invitation, the meeting will appear in their calendar and they will receive a reminder before the meeting. During the meeting, use MS Teams to share your screen, collaborate on documents, and communicate via audio and video.
After the meeting, use the chat feature to follow up on any action items or next steps, and to share any relevant documents or recordings. You can customize the procedures of creating the appointment or you can follow the same steps on how to set up a meeting in teams in the future.
Schedule an Appointment on Microsoft Teams Chat (Desktop version)
To schedule and create an appointment on Microsoft Teams chat, follow these steps, though this feature is only available for users who are using Teams on the desktop app or web version:
Open the Microsoft Teams chat with the person or group you want to schedule a meeting with.
In the Teams chat, click on the Schedule a meeting icon (under the box for the new message).
Fill in the meeting details, such as date, time, and duration, in the schedule card that pops up.
Add an optional meeting agenda and location if needed.
Press the “Send” button, to send the meeting invite to the attendees.
Attendees will receive a notification in their chat and in their calendars, and they can join the meeting. Hence, following these steps you will be able to schedule an appointment through this MS team appointment using the chat platform does not let you set up how to create a Microsoft teams meeting link because you directly approached the invitees or team. So, In this circumstance, there is no such thing as a link.
During the meeting, use the Teams’ meeting feature to share your screen, collaborate on documents, and communicate via audio and video. After the meeting, use the chat feature to follow up on any action items or next steps and to share any relevant documents or recordings.
As a result, this is an effective and quick approach to meeting individuals for briefings, particularly in an office or commercial setting. Finally, understanding how to setup a Teams meeting on the Microsoft Teams Chat platform is simple, fast, and useful for business
Schedule the Appointment and its Link using Microsoft Outlook (Desktop version)
Remember that this feature requires that you have a Teams account and that your Outlook account is already connected to Teams; in order to create an appointment and link, follow the below-mentioned steps:
Open Outlook and click on the “New Meeting” button to create a new calendar event.
Fill in the meeting details, such as date, time, and duration, as well as any other relevant information such as the location and agenda.
Click on the “Teams Meeting” option under “Meeting options” at the bottom of the page.
Click on the “Add Online Meeting” button to create Microsoft teams meeting link.
Add the attendees to the “To” field and click on the “Send” button to send the invitation.
Attendees will receive an email invitation with a link to join the Teams meeting.
During the meeting, use the Teams’ meeting feature to share your screen, collaborate on documents, and communicate via audio and video. Additionally, after the meeting is over, you can use Outlook to follow up on any action items or next steps and to share any relevant documents or recordings.
Something might be lacking in your work life if you are a professional and do not know how to utilize Outlook and MS Teams integration. Because Outlook is the professional backbone of the workplace environment. Furthermore, MS Teams have developed as the same counterpart through time. As a result, if you are still unsure about how to set up a Teams meeting, these methods will undoubtedly be of great assistance to you.
Schedule Appointments on Mobile Devices
You should stay logged in to your Microsoft account to schedule an MS Teams meeting and also that you need to have a subscription plan to access the full version of Teams. Provided that you meet all the requirements, you can follow the below-mentioned steps to set up appointments and meetings; this is a general step on how to set up a meeting in Teams applicable to both Android and Apple devices (however, based on device-specific, there might be slight changes which need to be mindful while setting up the appointments).
Open the Microsoft Teams app on your mobile device.
Tap on the “Meetings” tab located at the bottom of the screen.
Tap the Schedule meeting button at the bottom of the screen.
Select “Schedule a Meeting” from the options that appear.
Enter the necessary information for the meeting, such as the meeting title, start and end time, and attendees.
Tap on “Schedule” to create the meeting and send out the invitation.
Optionally, you can also join the meeting by tapping on the “Join now” button from the meeting invite, or from the calendar view.
Select which team you want to schedule a meeting in.
Inside your team, go to the Calendar tab and select New Meeting.
Enter the meeting details, such as the subject, start and end times, and desired participants.
Select Save at the bottom of your screen.
Invitees will receive an email notification with a link to the meeting.
How can I prevent my team from leaking information during an MS Teams meeting?
To prevent your appointments and sittings from leaking information during an MS Teams meeting, you can use Data Loss Prevention (DLP) policies. DLP policies allow you to define rules that prevent people from sharing sensitive information in the Microsoft Teams channel or the chat session. Also, you can follow Microsoft’s ethical as well as compliance rules and regulations.
What’s the difference between an MS Teams meeting and an Office 365?
The main difference between a Microsoft Teams meeting and an Office 365 meeting is that Microsoft Teams is a unified communication and collaboration platform, while Office 365 is a suite of productivity tools that includes Microsoft Teams, emails, online offices, etc.
Conclusion
Microsoft is, needless to say, a vibrant and ever-evolving technology brand. How could anybody refuse to use anything from such a brand? Learning how to set up a Teams meeting will assist you in remaining informed of all the developments occurring in the technology world, whether it be MS Office, Outlook, Azure, or MS Teams, as well as being productive.
Overall, Microsoft Teams offers an easy-to-use platform for setting up and conducting meetings, whether one-time or recurring, with a plethora of tools to improve your meeting experience.
Are you receiving the message “there are some data after the end of the payload data” when you try to use the 7-Zip application an archive must be retrieved ? If so, you are not the only one, many like you have encountered this warning message till now. Considering that the process of extracting remains relatively unaffected, this is hardly a generalized error but instead just more of a radical caution message. So, can this issue be solved by any means? Is there a solution?
Yes, there are solutions to solve this error. In this article, we will provide you with multiple solutions to get rid of the warning pop-up “there is some data after the end of the payload data” issue. So, what are you waiting for, go grab the solutions now.
Reasons for the Error “Warning There Are Some Data After The End Of The Payload Data”
We have found out various reasons why this irritating pop message is occurring and disturbing you currently. The reasons are:
1. Presence of Error in 7-Zip
Viewers have highlighted that the problem is exclusively tied to the RAR compression for a specific type of data, yet somehow the developers have really no satisfactory justification for the potential problem.
2. An Archive Fault Reported by 7-Zip
The most recent versions of 7-Zip are set up to alert you to issues while dealing with specific file formats. With the most recent version, you will see this error message informing you that the archive you are trying to extract has defective sectors. Until recently,7-Zip would not detect faulty sectors from TAR files, but now it does.
3. The Type of the Archive Cannot be Determined by the 7-Zip Programme
The error “there is some data at the end of the payload data” may also appear on your phone screen if the 7-Zip programme persistently refuses to acknowledge a certain archive type.
Easy Fixes to“There Are Some Data After The End Of The Payload Data” Issues
Here, we will explain to you all the possible solutions for fixing the “there is some data at the end of the payload data”. Try each and every solution from the list, until you find that the warning message stops appearing in your device.
Solution 1: Update 7-Zip Build to the Newest Edition
To proceed with this effective solution, all you need to do is follow the instructions described for you below –
Open the 7-zip, go over to Help (in the ribbon bar), and then click on About 7-Zip. Once that is done, determine if somehow the build number is more recent than version 16.02.
Secondly, you must upgrade the compression tool if the build number on your version of 7-Zip is older than or roughly equivalent to version 16.02. So, click on the Download button for 7-Zip version 18.5 on the 7-Zip download page. After that, verify that the version you download is compatible with the Windows architecture on your computer.
Install 7-zip by choosing a destination and hitting the Install button after launching the installation software.
Click Yes to restart your computer to finally finish the installation after the 7-Zip build has now been installed correctly.
After doing all this , try extracting an archive with 7-Zip after restarting your computer to see whether the warning signal “there is some data after the end of the payload data” is still appearing. If it is still appearing, you need to try out our second solution from the list.
Solution 2: Use Universal Extractor
This is the second most ultimate solution in our list of solutions for eliminating the warning pop-up message “ there are some data after the end of the payload data ” or Amazon CS11 Error from your device. If updating your 7-Zip build to the latest edition does not solve the issue, using the Universal Extractor can definitely help you out.
Check out legroom.net (Universal Extractor). Once you’ve done so, click UniExtract Installer in the download part of the page.
To install the Universal Extractor on your Windows pc, decide to launch the installation executable and adhere to the instructions displayed on the screen.
Right-click the archive when the installation has been finished. After that, you need to choose UniExtract files.
By selecting a target directory, complete the final extraction process.
Solution 3: Change File Extension from From.Zip to.Rar
As per the reports, most customers who have personally encountered the aforementioned error message notice have indeed been able to resolve the issue by radically changing the extension from.zip to.rar. So, there is nothing that you could not give it try for yourself to fix the issue.
The extensions must first be made visible. You may accomplish this by launching File Explorer and selecting View.
Verify that the File Name Extensions box is carefully selected. After doing so, simply check to see whether it is there.
Rename the archive by selecting it from the context menu when you right-click on it and extract.
The A.rar extension should be added after.zip. After that, click Yes to approve the action.
Frequently Asked Questions
Q1: Compared to WinRAR, is 7-Zip better?
Ans: Although WinRAR is best suited for RAR computer files, which 7zip can also open, 7zip is superior to WinRAR since it supports more file types, is simpler and easier to use, and features right-click context full integration. RAR files can only be actually produced just using WinRAR.
Q2: Is 7-Zip a reliable program?
Ans: Using 7-Zip to compress files is secure. It allows for interruption-free compression and decompression of files. However, to avoid having a sluggish computer while using the file compression program, you really need to be completely aware of which files are required to be compressed.
Q3: How do you fix “there are some data after the end of the payload data”?
Ans: To fix “there are some data after the end of the payload data fix”, you can follow the methods below.
Update 7-Zip Build to the Newest Edition
Use Universal Extractor
Change File Extension from From.Zip to.Rar
Q4: Can files be compressed with 7-Zip?
Ans: File compression and uncompression may be done using the open-source and free file archiver 7-Zip. This application can compress your data into an archive with a .7z extension if you need to reduce the amount of storage space they take up or make them more easily portable.
Q5: What is causing the zip file to corrupt?
Ans: It is indeed possible for ZIP files to have become severely damaged when being downloaded. Unreadable data may end up becoming an element of the downloaded ZIP file. This makes it challenging at times to extract the data if the download was abruptly halted, even briefly, by a power interruption or an unexpected application termination.
Q6: How does a file become 7-Zipped?
Ans: You can 7-Zip a file by following the below-mentioned instructions –
Open the 7-Zip File Manager.
Click Add after selecting the file or folder you wish to compress.
Once the Add to Archive window appears, confirm that the Archive format is selected to zip and click OK to continue.
The file will be compressed and saved in the same location as the original file as a zip file.
The Bottom Line
Hence, that’s all about the fixing solutions of the warning message “there are some data after the end of the payload data” on your device. You really need not worry if you are facing this presently, lots of other individuals like you have faced this issue and have also fixed it within a few minutes. Each and every solution we have mentioned in the article is really very effective to get you off this issue. But, do not choose any random solution out from there to solve it as it might not fix the issue. For any further assistance, you can get back to us.
In the present day, as the technical world has been developing rapidly and making work easier, the rate of technical problems has also been at its peak. Among all the problems, “security policy prevents use of camera” is an issue that many individuals are experiencing nowadays. As per reports, whenever an individual launches his or her camera to capture some moments, a pop-up message “security policy restricts use of camera” appears on the screen, which is very frustrating. Hence, is there any solution to get rid of this?
Absolutely, there are solutions to fix this issue. In this article, we have earlier tested and selected some very easy and simple solutions especially for you. So, without any further ado, let’s get started.
Reasons For The Pop-Message “Security Policy Prevents Use Of Camera”
Moreover, this “security policy prevents the use of camera” issue on your smartphone arises for multiple reasons. We have done proper research on the occurrence of this issue and we have found some very specific reasons why this “application has violated security policies” occurs. Knowing what might be the reasons for this issue in some cases is really very necessary. Hence, we thought about sharing it with you all. Just take a look at the possible reasons that are described below –
The Settings on the Phone’s Camera App are Improperly Configured: Misconfigured settings either for the phone or the camera could be the root of the current camera malfunctioning i.e, “security policy prevents the use of camera”.
Corrupt Data or Cache of the Camera or Security App on the Smartphone: Sometimes, you will receive a security policy pop-up like “security policy prevents use of camera” if the camera application’s cache or the data, or perhaps the relevant information of any connected applications, is being fully corrupted.
Application Direct Interference from a Third Party: In some cases, the camera may not easily start and a pop-up message “security policy prevents the use of camera” appears if any third-party software on the smartphone is compromising its features and functionality.
Enabled Phone’s Sensors: You might experience the “security policy restricts use of smart switch” issue when you start your camera on your cellphone if the sensor of your smartphone is turned off or is disabled.
Resolve The “Security Policy Prevents Use Of Camera” Issue? (Easy Solutions)
The “security policy restricts use of camera” issue that you are currently facing in your smartphone is not an uncommon issue. Many individuals like you from around the world have faced this issue at times and also have got it fixed easily. Hence, you are also capable of fixing the issue out very easily. To help you out, get rid of it, we have collected some best solutions for you. Try out each and every solution given below.
Solution 1: Reboot your Android Phone
This is the first solution in our list of solutions to resolve the pop-up message “security policy prevents use of camera” on your smartphone. Rebooting your cell phone by removing the SD Card and the SIM Card is one of the easiest solutions you can apply to fix it. By doing this, refreshes the whole device and can solve this type of issue within seconds or a few minutes. Therefore, giving it a try is worth it.
To reboot your smartphone, you can kindly follow the step-by-step guide that we have provided below –
First of all, turn off the handset and after that take the SIM or SD card out.
After doing so, switch the smartphone on charging and simply wait for it to eventually finish.
Now, start the phone up once it has finished charging without a SIM or SD card.
Once done, determine whether the camera system functions appropriately this time.
Solution 2: Remove All Data And Cache From The Camera Application
It’s critical to regularly remove the cache and data associated with your apps. The smooth operation of your app and the avoidance of unintentionally using dated data are both continued to improve by doing this. Also, the current issue you are facing can be surely fixed by applying it. Hence, to apply this solution, all you need to do is follow the steps as we have instructed below for you –
First of all, on your smartphone, launch the Settings application.
Secondly, simply select the Apps and Notifications.
After doing that, in the All applications section, directly choose Camera there.
Next to that. tap the Storage button.
Hence, to clear your cache and data, just click the Clear Data and the Clear Cache option.
Solution 3: Camera in Safe Mode
This issue might happen if you customize your phone in a method that interacts with the image sensors in some specific circumstances, such as by using a launcher different than the one that came with it. Therefore, using your camera in a safe mode in cases, reves this type of issue for sure. You must give this effective method a try for sure. It surely might remove the “security policy restricts use of smart switch” issue and you can operate the camera of your phone peacefully.
Firstly, press and hold the phone’s power button until the power menu shows.
Press and hold the power icon for a while until the Safe Mode pop-up appears on the surface.
Then, validate restarting the phone in safe mode, and once in safe mode, verify that the camera is operational.
In that case, restart the phone in normal mode and try to determine whether the camera problem has been resolved.
Next, if not fixed, slide either downward or upward on the phone’s screen to see if turning either on or off the Sensors Off option fixes the problem.
Solution 4: Update the Phone’s OS
The device’s operating system update may help you in this circumstance to resolve this issue or any other closely connected associated problems. To execute this solution to fix the issue, all you need to do is to follow the instructions that we have provided below –
Open the System by using the Settings application on the phone.
Select the Software Update from the About Phone menu.
After doing so, check for the Updates. Then, download and install each and every Operating System update that is readily available for the phone.
Finally, start your smartphone immediately after that.
After following all the mentioned steps, open up the camera and immediately check whether the pop-up message “security policy prevents use of camera” issue has been finally removed or not.
Solution 5: Uninstall the Third-Party Applications
This is one more brilliant solution to fix the “security policy prevents the use of camera” issue that is currently appearing on your smartphone. If a third-party application has been installed on your smartphone, the camera may exhibit this malfunction or even other problems too though. Therefore, in this case, you may remove the security policy that forbids the usage of the camera by completely eliminating any incompatible third-party applications from your device.
To apply this solution, just follow the step-by-step instructions that we have provided below –
Locate the Settings application on your phone.
On the menu, choose Applications and Notifications.
Go to the See all applications option.
Choose the application you would like to delete.
Next to that, choose Disable or Uninstall.
Solution 6: Turn Off the Secure Wi-Fi Features Camera App
You might not be aware that if the Camera app is set up to utilize secure Wi-Fi, the camera on your smartphone may not open and the pop-up message “security policy restricts use of camera” or another warning message may show up on the screen.
Thus, to turn off or disable the camera application from the secure wifi feature, you need to follow the instructions:
Open the Connections from the Settings menu on the phone.
Go ahead and press Advanced after choosing the Wi-Fi connection.
Open Secure Wi-Fi and then click on the Apps.
Uncheck all applications connected to the camera or related to the camera, and then restart your phone.
Solution 7: Factory Reset your Smartphone
This is the last solution in our list of solutions to get the pop-up message issue “security policy prevents use of camera” completely resolved. If none of the above solutions in the list worked for you, try this solution. It will really make you get rid of the issue and make you free to use your camera to capture your happy moments with no further trouble. Moreover, this solution can help you resolve any Android issues from Security patches to Android Auto not working problems.
Note: Remember to make a backup of any highly essential photographs, feature films, personal conversations, as well as other essential items collected and stored on your smartphone before proceeding with this sort of approach.
Access Backup & Reset, and enter Settings on the phone.
Open the Reset Device and choose Factory Data Reset.
To reset the device, touch the Erase Everything button now and wait until it’s finished.
Now, create a second Gmail account on a computer that is not connected to the existing email ID if the problem continues after the factory reset.
Reset the phone to factory settings once more, and then, as you set up the device, check to see if the camera problem has been fixed using the new Gmail ID you generated.
Frequently Asked Questions
Q1: Why does the security policy restrict use of the camera in my camera app?
Ans: If the camera application, phone app, or security device’s cache and data are prone to corruption, this could be the cause of the camera’s security policy issue; hence effectively removing those items may very well correct the problem.
Q2: How can you resolve the “security policy prevents use of camera” issue from your smartphone?
Ans:
Reboot your Android Phone
Remove All Data And Cache From The Camera Application
Camera in Safe Mode
Update the Phone’s OS
Uninstall the Third-Party Applications
Turn Off the Secure Wi-Fi Features Camera App
Factory Reset on your Smartphone
Q3: How can You give someone access to my camera?
Ans:
Go to the home screen of your Android device and launch the Settings app.
Select Apps & Notifications.
Select the icon for the web browser you were previously using by tapping it (in this case, Google Chrome).
Select Permissions.
Turn on the camera permissions.
Q4: Why are my microphone and camera being blocked by Chrome?
Ans: It is indeed probable that you haven’t granted your browser the ability to access your cameras and microphones. If you can’t just switch off your microphone or camera, you will see a red cross adjacent to those icons in your bottom navigation toolbar.
The Bottom Line
We understand that encountering the “security policy prevents use of camera” issue when you launch your phone’s camera is really very irritating. Therefore, we have provided the best solutions in this article. Do not thereby choose any random solution for fixing the issue as that solution might not fix or that might be the reason. Try each and every solution from the first to the last until you see that the issue has been totally removed from your device. If you still have any confusion or if you still cannot get rid of the issue, reach back to us directly for instant solutions.
Have you also opened up Snapchat only to experience complete and utter frustration? Everything seems to be working just fine while your phone is closed, but as soon as you hit the app, nothing happens and Snapchat won’t open or just keeps crashing. Panic starts to set in, as memories of all those pictures you took this morning that probably should never resurface again start coming back. You tried everything from switching off and on our phones to reinstalling the app but nothing seemed to work.
Well, Snapchat has become an integral part of our lives; a place to document and share special moments. But when it stops working suddenly, it can be really disheartening. It doesn’t have to be so bleak, however — with a few simple fixes listed below, your snap sessions can be up and running again in no time!
Why Snapchat Won’t Open | 5 Reasons
From slow internet connections to outdated versions, there are a few common reasons why won’t Snapchat open or freeze or not launch at all.
1. Poor Internet Connection
One of the most common reasons people run into difficulty with their Snapchat app is because of poor internet connection. A slow Wi-Fi connection or an unreliable cellular signal can both cause problems when trying to launch the app and access its features.
2. Outdated Version of the App
Another common issue with apps like Snapchat is that it may not be updated to the latest version available in the App Store or Google Play Store. This can cause your app to run slowly or even crash completely when you try to launch it.
3. Low Storage Space
Low storage space on your device can also lead to problems with opening and running apps like Snapchat.
4. Corrupted Data/Cache Files
Sometimes corrupted data files or cache files can also prevent an app from loading properly on your device as well.
5. Unsupported Device
If you are using an older model phone that isn’t supported by the latest version of Snapchat (or any other app for that matter), then it won’t load properly either due to compatibility issues between the two products. Hence, you could experience Snapchat wont open issues.
6. Too Much Data Usage
If you have been using too much data while using other apps or browsing online, then this could cause issues with opening up Snapchat as well! To check the data usage for this month, go into Settings > Data Usage and take a look at the data usage (and by which apps). If necessary, consider reducing background data usage for certain apps or limiting yourself from browsing online while connected to WiFi networks until the next billing cycle starts anew!
7. Outdated Phone
Before you check solutions for why wont Snapchat open repeatedly, check if your phone is outdated, If yes, it might not be able to support the latest version of the Snapchat app. This is especially true for older Android models running operating systems before a certain version. To find out which operating system your phone is running, go to Settings > About Phone > Android Version. You can even check the version of your model in iOS as well.
Fixing Snapchat Won’t Open Issues with the Best Methods
1. Check if Snapchat’s Servers are Down
Before attempting to fix the issue of Snapchat not opening for you, you should take the time to determine if this is a server-side issue. The easiest way to do this is to visit the @snapchatsupport Twitter page and see if they’ve mentioned any outages or technical problems. This will help save time as it can be very frustrating to try and troubleshoot a problem that’s due to an external source, rather than something you’ve done yourself. That being said, if there are no reports on the account, then you can proceed with diagnosing and fixing your individual problem.
2. Close Other Applications
By closing other apps running in the background, you can reduce the amount of system resources and memory being used, leaving more available for Snapchat. You’ll need to access your phone’s app switcher to do this – usually done by a double-tap of the home button – then simply swipe away any running applications. While this might only provide a temporary fix, it can help improve your overall device performance and reliability for in-app experiences like Snapchat.
3. Restart Snapchat
Restarting Snapchat can often troubleshoot many issues, as a simple reboot of the application is sometimes all that’s needed to get things running again. Users have reported, however, that in certain cases a bug may be causing the issue and preventing it from opening, so giving the app a quick restart should be your first course of action in trying to solve this problem. If you find that simply restarting the app doesn’t do the trick, then move on to more involved diagnostics and repair methods.
4. Force Close Snapchat
Sometimes an app that won’t open or is freezing can be easily resolved by force closing the application. To force close Snapchat, there are different instructions depending on the device you’re using.
On iOS devices such as iPhones, force closing is done by swiping up from the bottom of the screen or double-clicking the home button to pull up the App Switcher. You must then swipe up on Snapchat to close it out.
In Android devices, you would go to Settings > Apps & notifications > App info (See All Apps) and click on Snapchat in order to close it out. Once you’ve force closed the application and restarted it, your issue should be fixed and you can return to using Snapchat normally.
5. Check for Updates
If you are experiencing the Snapchat app won’t open issue, one of the first steps would be to check for updates. Keeping your apps up-to-date is essential for effective functioning; outdated versions may be causing your issues. Many times, by simply updating the app, you’ll have a running and functional performance without having to jump through more complex hoops.
Check for app updates on Android:
Click on the Google Play Store.
Tap on Snapchat.
If an update is available, all you need to do is tap it and you will be automatically upgraded to the newest version of the app!
This ensures that you always have access to the latest features and bug fixes your apps may have included with their latest release. So make sure to check back as often as possible!
6. Check Permission Settings
In most cases, the issue can be solved simply by changing your permissions settings. On Android devices and iPhones, go to your device’s settings and search for ‘Snapchat’. This should bring up all related app permissions, such as access to photos, camera, etc. Check these off if they’re not already enabled, then try opening Snapchat again – more often than not this should solve the problem. Make sure if any of these were disabled before that you only use trusted sources when re-enabling those permissions so that your data is safe.
7. Clear Cache
Clearing your cache may be the best way to fix an issue where the application won’t open issues arises be it for Snapchat or for Android Auto not working & others.
Steps to do this on Android –
First, open the Snapchat app and select ‘Info’ from the menu. Scroll down to ‘Storage’, which will then give you a few options – one of which being ‘Clear Cache’. Click on this and it will then clear all stored data, making sure that your application is working correctly.
On iPhone –
First, open the Snapchat app on your device and select your profile picture in the top left corner. Next, tap on the gear icon to access the Settings menu. Scroll down until you find Account Actions. Then select Clear Cache and confirm to complete the process.
8. Make sure you have an Internet Connection
If you run into issues while trying to open and use Snapchat, one of the first things you should check is whether your device has an internet connection. Without an internet connection, it can be impossible to access any online service or feature! Make sure your device is connected to a Wi-Fi network or that you have enabled mobile data services so your device will be able to communicate with the web. If all else fails, restart your internet modem and router. This simple step can oftentimes fix the issue! After verifying that you have a strong internet connection, try launching Snapchat once again – if all goes well, you should be able to start using it!
9. Reinstall App
If Snapchat won’t open no matter what you do, the best solution is to reinstall it. You’ll have to delete it before you can install it again. The process is slightly different depending on your device:
If you have an iPhone –
Simply press and hold the home screen app or any app icon until all your apps start tilting.
Tap ‘Remove App’ and confirm the deletion. Subsequently, go to the Apple App Store and search for Snapchat. Once you’ve identified it selects ‘Install’ to reinstall the app.
For Android –
Android users just need to long-press the app icon until some command options pop up. From there, select Uninstall. Head over to the app store of your choice and download the latest version of Snapchat. That should have it running smoothly in no time!
10. Restart the Mobile
If you’re having trouble getting Snapchat to open on your mobile, a restart is often the quickest and simplest way to get it running again. To make sure that restarting your device is performed correctly, start by ensuring that no apps are running in the background or any files are being downloaded; then turn off the Wi-Fi connection, if applicable.
Afterward, turn off your phone by pressing the power button. Some devices may require you to hold the button down for several seconds and swipe the option that comes on the screen.
Once you’ve done that, wait 10-15 seconds before turning it back on again.
Finally, connect to Wi-Fi and sign into Snapchat as usual with your credentials. Restarting your device should restore its connection with social networks like Snapchat and should resolve any issues you’re having with being unable to open it successfully.
11. Log Out and Log Back In
If you’ve tried restarting your device and still have not had any luck getting Snapchat to open, then the next thing to do is log out and log back in. To accomplish this, open the Snapchat app. Then select the gear icon located in the top right corner of the screen. From there select Log Out and give it some time to fully disconnect your account from all other devices. Once you have logged out, close the app completely before reopening it again. Finally, log back into your account using your ID and password information.
Upon successfully logging in, your snaps should start loading again on their own – if they do not load automatically, simply refresh your feed manually until each entry appears on the screen.
Some Last Words
With Snapchat being an integral part of daily communication, it is essential to get any issues resolved as quickly as possible. Thankfully, by following any one of the 11 solutions above, you can quickly and easily get your Snapchat working again. Each solution is simple, efficient and worth trying as a potential fix. If one doesn’t work, simply move on to another one without a sense of discouragement. So take some time to test out these solutions, find which one works best for you and get ready for an uninterrupted Snapchat experience!
FAQs
Q1. What to do when Snapchat won’t open Frequently?
The Snapchat wont open issue could be because the device you are using isn’t compatible with Snapchat, due to cache, outdated apps, or because your internet connection is weak or unreliable. If you are having this problem, try these steps:
Make sure your device is compatible with Snapchat. Check the App Store or Google Play for compatibility requirements.
Check that your internet connection is strong and reliable (restarting your router may help).
Try deleting and reinstalling the app if all else fails.
If you have tried all of the above steps but are still facing the Snapchat app not opening issue, then there might be another issue at play. It could be due to an issue on their end. There are often server-side issues that can cause apps like Snapchat to not work correctly. If this happens, then all you can do is wait for them to fix it. In the meantime, you might want to check out some other social media apps in the meantime!
Q2. My Snapchat won’t open after I Update It?
It is possible that there may be a bug in the new version of Snapchat that prevents it from working properly on certain devices. To fix this issue –
Try uninstalling/reinstalling the app on your device. This should solve any compatibility problems between the app and your device’s specific software/hardware configuration.
Additionally, if you are using an older device such as an iPhone 5s or lower, these devices may not have enough processing power to run newer versions of apps like Snapchat. In this case, try updating your device’s operating system (iOS for iPhones and Android for Android phones) if possible to see if that fixes the problem.
Lastly, make sure you have access to Wi-Fi when installing/updating apps. Downloading them over cellular data can often lead to errors and corrupted files. It prevents them from working properly on your device.
Q3. Snapchat App Not Opening Even After Performing Solutions?
If all else fails and none of the methods seem to work for you, then it’s time to contact customer support directly via their website or through social media channels like Twitter & Facebook so they can better assist you with troubleshooting this issue further!
Make sure that when contacting support staff members include detailed information about what has been done already in an effort to resolve this issue (including screenshots) as well as any other pertinent info such as what device & OS version are currently being used etcetera. This will ensure that they can provide more tailored assistance based on each user’s specific situation rather than generic advice which may not actually apply in every case.