Norton Antivirus

Most IT professionals agree to the fact that having different layers of security is the best antivirus protection. When we talk about multiple threats existing in cyberspace, multiple walls of security are a must. When a user starts updating their security using the free patches, Microsoft will give a warning to them. If there is no existing antivirus software on their PC, it advises you to install one. One of the best antivirus protection software programs present in the market is Norton AntiVirus software. Today, this article will deal with all the features of Norton AntiVirus that give your system strong protection.

Features Of Norton Antivirus

Features Of Norton Antivirus

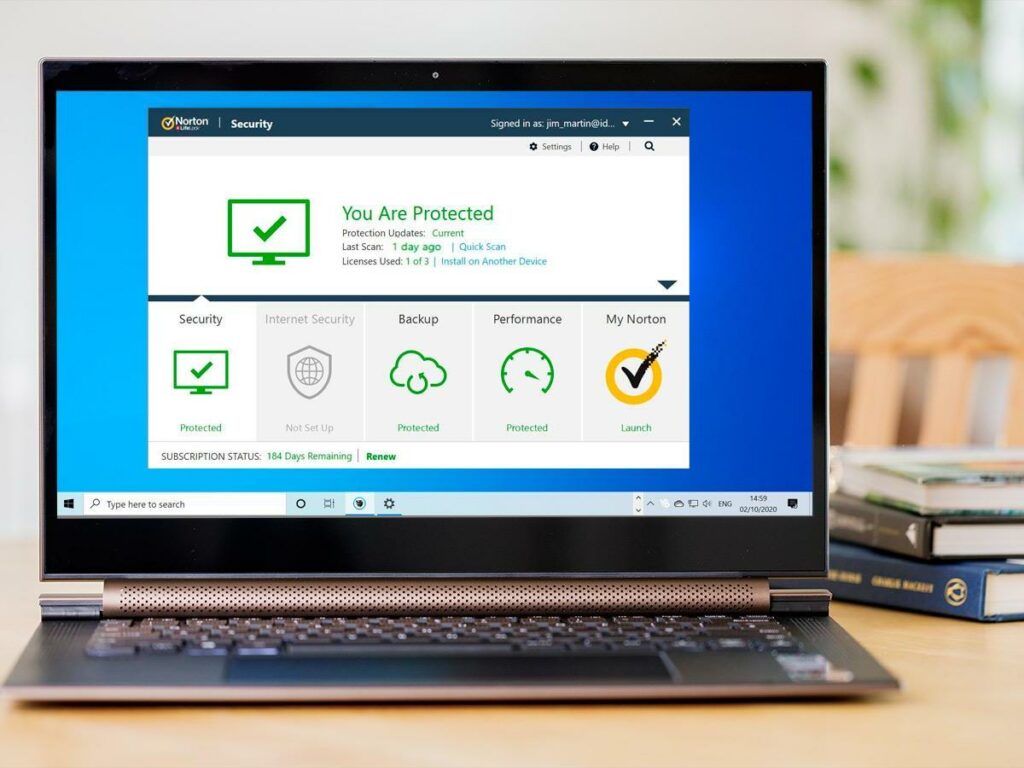
Norton Antivirus is becoming the best security program used by the majority of computer users around the world. Why is it so? Just because of one of the reasons that are the advanced features it equips. With every update, the Norton Team brings better versions of the Antivirus and builds up better security walls. We will be starting now with the features of Norton Antivirus and how these features assist in protecting your system. 

Basically, the Norton antivirus breaks down its features into 5 slabs: Fast Protection, Preemptive Protection, Malware Protection, Multiple Application Scans & Customer Service.

Learn more below in detail.   

Fast Protection

Fast Protection

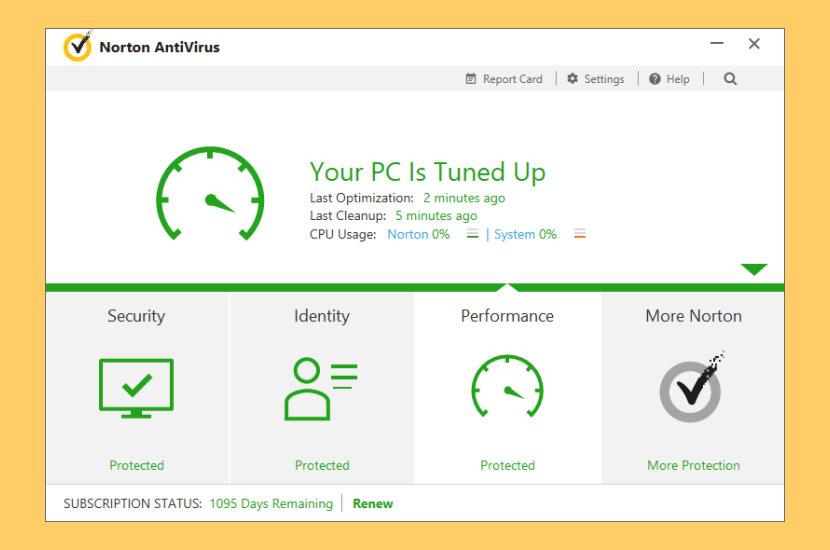
One of the complaints about running antivirus software is that it becomes a drain on a system’s resources & it makes everyday computing a hassle. This is quite true now as many people use their systems to download music, watch movies online, & play online games. However, Norton AntiVirus protection works so that this does not occur. Learn more below.

  • Norton Insight: Most antivirus programs scan every data file on a PC. But Norton AntiVirus scans only the data files that show red flags, making it easy for better scan speeds.
  • Silent Mode: Non-critical updates & alerts are delayed any time a PC is being operated during online gaming or to watch videos.
  • Smart Scheduler: At times when big updates and deep scans are mandatory, Norton AntiVirus waits till the system is not in use.
  • Proactive Performance Alerts: When programs start affecting the system’s performance, Norton AntiVirus gives an alert to the users so changes can be done accordingly.
  • Norton System Insight: This tool helps a computer user on how various applications affect the system’s performance.

Pre-Emptive Protection

Pre-Emptive Protection

Not every antivirus software is equal in its operations. Most Antivirus will protect the system against known threats. But Norton AntiVirus has the potential to detect threats against a system before it even comes on the watchlist.

  • SONAR Behavioral Protection: The SONAR (Symantec Online Network for Advanced Response) looks out for indicators to see whether a file is behaving suspiciously or not. With many antivirus programs, just the physical attributes of a data file scan determine its nature. But this is not the case with Norton Security as it performs a full scan on the data files.
  • Norton Reputation Service: Just not determining if a data file is good or bad by matching it against some known threats and scanning the physical attributes. The Norton Reputation Services will do a scan of the data file to look for its location & by what source to know its threat level. This service not only deals with preemptive protection but also scan speed.

Malware Protection

Malware

The majority of people use antivirus protection to block ransomware, malware, or temporary files that damage your system. Learn more on Malware Protection below. 

  • Viruses: System viruses are self-replicating in nature that can halt the system operations or even damage the system completely. These generally come with a file for the virus to work.
  • Worms: Worms are programs that go along networks to slow them down, but they can also have other forms of ransomware as a payload that damages systems.
  • Spyware: Any program used to collect data unknowingly from a target system is known as spyware.
  • Adware: Adware is a kind of malware that has unwanted advertising onto a system, whether it is a pop-up advertisement or it is replacing honest advertising on a website.
  • Rootkits: Rootkits permit cybercriminals to take over control of a system remotely by depositing this malware into the OS software of the target system.
  • Bots: Bots damage computers so they can be assembled into networks known as botnets. Different cybercriminals control such networks of systems all over the Internet. And done for illegal operations having financial gain as their sole aim.

Multiple Application Scans

Multiple Application Scans

One of the important ways Norton AntiVirus protects a system is through multiple application scan that brings in malware threats. This is quite important, as there are various ways that malware can prevail into a PC. Learn below to see how Norton AntiVirus plugs the holes:

  • Norton Download Insight: During downloading a file, be it from an e-mail or from a website, Norton Download Insight detects any irregularities and alerts the user if a problem persists in the system. Be cautious as there are other dangerous free software downloads available online.
  • Vulnerability Protection: Vulnerabilities refer to the weak points in a system via which cybercriminals enter and either deposit malware threats or take over the target system. Norton AntiVirus prevents these kinds of attacks via weak points in the operating system software.
  • Instant Message & E-mail Monitoring: The majority of people invite malware threats onto their system via emails and instant messages. Norton AntiVirus alerts subscribers when some kind of malware comes through these kinds of programs. Instant messaging security is the major part of overall protection & security.
Also Find, Choose Best Norton Security Software - Selection Guide

Customer Service

Customer Service: Norton

Norton AntiVirus also keeps their users safe through some of the following benefits given here:

  • Norton Ongoing Protection: This Norton Antivirus feature looks for & downloads essential software patches and updates.
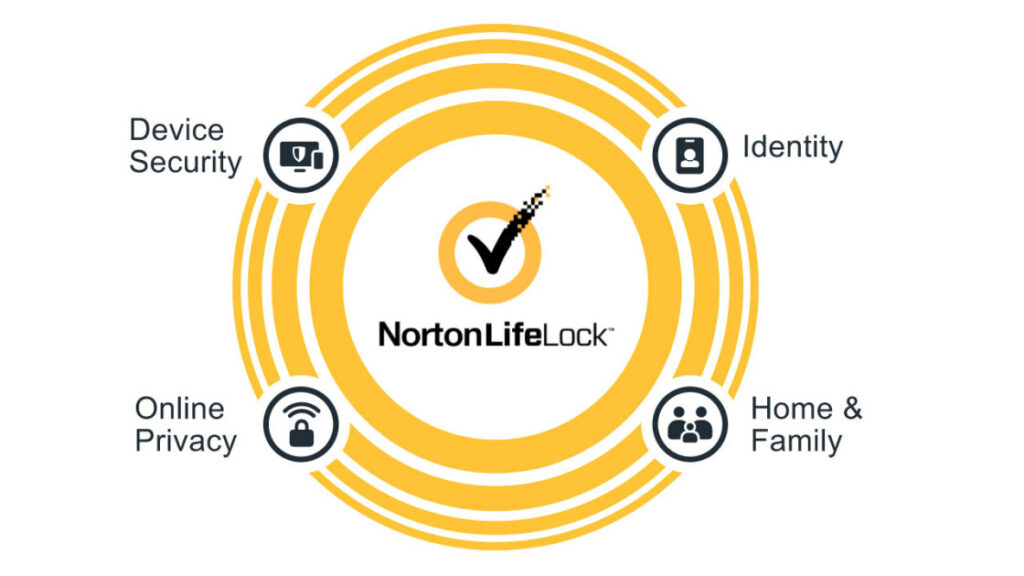
  • Free 24-Hour Support: NortonLifeLock provides 24×7 free customer assistance for all its users. You just need to keep your subscription valid.
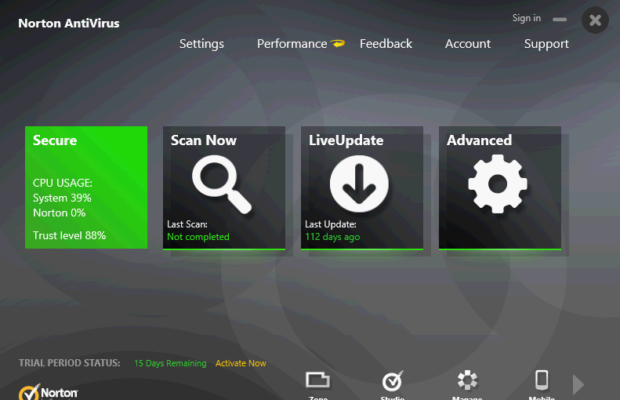
  • Norton Control Center: This Norton Control Center is a user-friendly control panel where a user can easily use their Norton AntiVirus features.
  • Norton Bootable Recovery Tool: Norton AntiVirus creates a personalized recovery tool on a storage disk that will permit even the worst-case systems to recover from cyber-attacks.

With all of these above protections put together, Norton AntiVirus provides the best security protection against all the major threats & cyber attacks.

Final Say!

This article focuses on one prime subject: How Norton Antivirus Protects Our System? Our team has put together all the important data in a nutshell. Our content is reliable enough as it has been put up after research from more than 20 sources. We have even self-applied all of its features before putting up the article. Norton Antivirus breaks down its security options in five slabs: Fast Protection, Preemptive Protection, Malware Protection, Multiple Application Scans & Customer Service.

We hope you got all the info. that you were looking for. It has always been a pleasure to be with you in times of need. Let us part our final goodbyes for now. Stuck in any query in the near future, you can always count on us. 

Norton software selection guide

Norton provides you with a wide range of high-security software to keep your system protected from any kind of malware, virus, or identity theft. There are different Norton software available in the market and choosing the one is difficult when you are not aware of the features that each software provides you. The company provides you Norton security standard to Norton security deluxe services depending upon your requirements. If you are not sure of how to select which Norton software to purchase, this Norton software selection guide will surely help you. We have tried to answer this question in detail so that by the end of the article, you can be sure of which Norton software you are going with.

let’s begin with the Norton software selection guide!

Norton antivirus plus

norton soft ware

So, we are starting with an entry-level product from Norton. This is one of the affordable options that you are going to get and it provides the basic level of security to your system. It will protect your system from Malware but besides begin a basic package, you are still going to get a lot of features in this plan. Here are some features that you will get in Norton Antivirus plus:

  • There is an intelligent firewall system, system performance speed-up tool.s
  • Also, you will get high-quality protection while browsing on the system.
  • You will also get a password manager.
  • Other than this, you will get an online backup facility for the browser.
  • One thing that you need to keep in mind is that this software applies only to 1 device. You can not use it on more than one device in a single plan. Also, if you need more features, you can switch to Norton 360.

Norton 360 standard

nortontm security standard

So, this plan can also be called a mid-range plan. You are going to get more features in this plan than the basic plan. This is a standard and yet premium plan that you can use. Here are some of the features that you can get in the Norton security standard:

  • There is an intelligent firewall system, system performance speed-up tool.s
  • Also, you will get high-quality protection while browsing on the system.
  • You will also get a password manager.
  • Other than this, you will get an online backup facility of about 10 GB.
  • In addition to this, you will get webcam protection.
  • One of the best features that you will get in Norton 360 is the VPN feature. You will get unlimited access to this service. It will help you to browse online safely and is worth the cost that you will pay for it.

Also, you need to keep in mind that you can use the service only on one device on a single plan but, you can use it for Android, iOS, Mac, or PCs which you could not in Antivirus plus. You may get more device support in the deluxe security suite.

Norton 360 deluxe

norton security deluxe

Well, this plan is great when you have to use the antivirus services on more than just one system. This will allow you to use the services on 5 systems simultaneously. You can use it for Mac, PC, android, iOS, or tablets. In this Norton security deluxe software, you are going to all the features that you got in the Norton security standard. Also, the VPN will be supported by all 5 devices on which you will activate the plan.

Other than this, you will get features like parental controls so that you can keep the system safe for your kids. You will also get the dark web monitoring feature which makes sure that your email is not compromised or sold. Also, you will get an online backup facility of up to 50 GB.

Norton 360 premium

norton premium

Now, this plan is above the Norton 360 deluxe and provides you with the system security to the next level. It may also called Norton 360 with Lifelock at some places. This plan can be used on 10 system at the same time and it is beneficial for people who uses a lot of hardware or want to secure the devices of the whole family. Other than this, the online backup facility is increased to 75GB in this plan and it emphasizes providing maximum capacity.

Norton small business

norton software security 10 devices

As the name suggests, this system is great for small businesses. To protect the hardware, you need an antivirus and this can be the best option. You can activate the plan in almost 20 systems at the same time. Also, you are going to get great some great features like other plans at a minimal cost. You must know that you can choose if you want to buy the plan for 5, 10, or 20 systems. You can use it on different platforms like desktops, tablets, laptops, and smartphones. The software can be set up on the cloud easily and the device can be managed.

You Might Also Like, How To Use Norton Removal Tool?

Norton software selection guide: Conclusion

So, we can say that you need to first know your expectations with the antivirus that you want and then choose the right one for you. In case you used to use the Norton security software, here is how you can choose the plan:

  • In case you were using Norton security standard, you can now use Norton 360 standard.
  • or, In case you were using Norton security deluxe, you can now use Norton 360 deluxe.
  • And, In case you were using Norton security premium, you can now use Norton 360 premium.

Other than this, if you are want to try Norton for the first time, you can go for the Norton antivirus plus. It is a basic plan but will offer you some great features at a very reasonable price. In case you own a small business and use different hardware, you can go for the Norton small business. It will protect tablets, desktops, smartphones.

Also, if you want high security for your device, you can go for the Norton 360 plans. You can decide the plan that you want to buy based on the number of devices on which you want to use the software. Also, keep in mind the amount that you are ready to pay for the antivirus. Norton 360 standard is one of the best plans if you need antivirus as well as the VPN on your system. If you want to use the antivirus on more than one system, you can go for the Norton 360 deluxe or Norton 360 premium.

You must go through all the features and pricing of the Norton software so that you can be sure which Norton software you need on your system. We have tried to provide you with all the information about different Norton software that you need to know. We hope that this Norton Software selection guide was helpful for you.

Confickr virus

Conficker worm is a type of computer virus that can spread itself from one system to another automatically over the network. This virus does not need any human interaction to spread. If you use security software like Norton 360, your system will not be affected by the virus. You can assume that your system is infected with the Conficker worm if you are not able to access the websites like Microsoft.com or Symantec.com.

If you think that your system is infected with the Conficker worm, here is all you need to know and do about it. We have provided you with a Norton Conficker removal tool so that you can easily remove the virus from the system. Read the article till the end to know how to remove the Conficker Worm virus.

confickr removal

How does the Conficter virus work

The conflickr virus can affect your system by installing software without any permissions on the system that is infected. It can be then used to make a botnet and send SPAM or steal ids. It can also be used to redirect users to phishing sites. The virus will affect your system when it is vulnerable to attacks. It will delete all the previous restore points that you have created or disable the option to create an automatic backup. The virus can also block access to the official security websites and disable the security services installed on the system. It can then easily spread to another system with the help of the same network that you are using. You may also see that you are redirected to the web pages to add additional programs from the virus creator sites.

Which systems are at risk from Conficker worm

The systems which are not configured to receive updates or patches from Microsoft can be affected by the Conficker worm. The worm looks for the systems having problem MSo0-067 where your system may fail to receive the updates from Microsoft and then the virus installs itself on your system without you noticing. Also, the systems that are not protected with the help of antivirus products can be affected by the conficter virus. So, it is highly recommended to use genuine Microsoft software and also, use a good antivirus to protect your system. Antivirus like Norton 360 will surely help you to protect your system from the conflickr virus.

Ways to remove the Conficker Worm Virus

In case you think that your system is infected with the Conflickr virus, there are different ways that you can follow to remove the error. Here are all the ways that you can use to remove the conficter virus.

Conficker worm removal tool

conficker removal symantec

Now, the very first method that you can use to remove the conficker worm virus is to use the Conficker worm removal tool. The Conficker worm removal tool will be available on the internet. You will then have to save the software on the system or you can burn it into a CD. Finally, you need to run the tool on the system.

Stop domain blocking

The next method that you can use for confliker removal is to stop the domain blocking on the system which is infected with the virus. Here are all the steps that you need to follow.

  • You need to first click on the start icon on the system and then open the Run window. It can be done easily by pressing the Windows button and then the R key.
  • Next, you will have to type cmd in the Run window.
  • You will have to click on the Ok option and then the command prompt will open on the system.
  • You will now have to type Cd and then press the enter key.
  • Once done, you will have to keep on repeating the same steps until you open the root directory. You will now have to make sure that you look for the root directory. It may be different for your system.
  • When done, you will have to type net stop dnscache and then press the enter key on the keyboard.
  • Now, you have successfully disabled the domain blocking feature that you can face because of the Conficter virus. You can now reach all the websites and then you can download the Conficker removal Symantec.
Also Find,  Protect Your Personal Information – Use Norton Secure VPN

Use the manual method to remove the Conficker worm

  • Now the next method that you can use to remove the conficter virus is to use the manual method. Read all the steps mentioned below properly and follow them in the same way as mentioned.
  • First, you will have to terminate all the processes running on the system. You will then have to open the control panel on the system.
  • Click on the option to add or remove programs.
  • You will then have to look for the Conficker worm option and then click on it to uninstall it. In case the Conficker worm is not visible, you will have to proceed with the further steps.
  • Now, reboot the device and then Close all the programs opened on the system.
  • You will then have to click on the start option and then open the Run window.
  • Next, you will have to type Regedit and then click on the Ok button.
  • You will now have to look for the following registry entry: HKEY_LOCAL_MACHINE\SYSTEM\CurrentControlSet\Services\Tcpip\Parameters
    “TcpNumConnections” = dword:0×00FFFFFEHKEY_LOCAL_MACHINE\SYSTEM\CurrentControlSet\Services\{random}\Parameters\”ServiceDll” = “Path to worm”
  • When found, you need to delete the registry entry.
  • Also, look for other entries related to the Conflicker worm and delete all of them. You may find some entries like:
  • {067ed41ba9a2bcea5192cfba5c5678b094ea6af66db36aaabba2135c9da953a2}System{067ed41ba9a2bcea5192cfba5c5678b094ea6af66db36aaabba2135c9da953a2}\[Random].dll
    {067ed41ba9a2bcea5192cfba5c5678b094ea6af66db36aaabba2135c9da953a2}Temp{067ed41ba9a2bcea5192cfba5c5678b094ea6af66db36aaabba2135c9da953a2}\[Random].dll
    {067ed41ba9a2bcea5192cfba5c5678b094ea6af66db36aaabba2135c9da953a2}ProgramFiles{067ed41ba9a2bcea5192cfba5c5678b094ea6af66db36aaabba2135c9da953a2}\InternetExplorer\[Random].dll
    {067ed41ba9a2bcea5192cfba5c5678b094ea6af66db36aaabba2135c9da953a2}ProgramFiles{067ed41ba9a2bcea5192cfba5c5678b094ea6af66db36aaabba2135c9da953a2}\MovieMaker\[Random].dll
    {067ed41ba9a2bcea5192cfba5c5678b094ea6af66db36aaabba2135c9da953a2}All Users Application Data{067ed41ba9a2bcea5192cfba5c5678b094ea6af66db36aaabba2135c9da953a2}\[Random].dll
  • If you can not delete the file, start your system in safe mode and try to delete it.
  • When done, you will have to start the system and check if you can face the error.

To conclude!

Conflickr virus can be dangerous for the system and it needs to be resolved as soon as possible. These were some of the techniques that you can use for Conficker removal. Following all the steps, in the same way, will surely help you to remove the Conficker virus from the system. We hope that the article helped.

Norton antivirus free trial

Norton provides you with the Norton free antivirus software that you can use for 30 days. When it comes to the security of your system, you will prefer to buy an antivirus that is worth the amount you pay for it. Also, some people would see no point in paying for the antivirus software just by looking at the advertisements. It is surely fair to some extent. With the use of the internet more in our lives, the threat to personal information is increasing and it needs to be protected. If you do not have a reliable antivirus installed on the system, you can become a victim of the virus. So, you need to install a reliable antivirus system.

Here is all you need to know about the Norton antivirus free trial. Let’s get you started with how you can get the Norton free trial for your system. Read the article till the end to know more about it.

norton anti virus trialware

Norton free antivirus software

You are going to get a 30-day Norton 360 free trial. This version of the tool will work the same as the paid software for the next 30 days of your purchase. You will have to enter your credit card to avail the Norton AntiVirus trialware. The amount will be deducted from the credit card if you choose to continue with the software. If you cancel the subscription before 30 days, you will not be charged. You can visit the Norton Account and make the purchase.

Before we get into how you can get the Norton Antivirus trial, here are some of the malware threats from which your system will be protected with this Free Norton antivirus.

  • Worms: Worms will not affect your system directly but they carry payloads in which they can have malware programs. Because of the worms, your system can be affected by malware.
  • Rootkits: It is a type of malware that cybercriminals use. It will allow the criminals to get into your system without your knowledge and it will act as the inner working of your system. Also, it may act as an open door for other criminal activities to enter your system.
  • SONAR behavioral pattern: It will monitor the incoming files on your system to make sure that no file behaves strangely.
  • Viruses: We all are aware of what Viruses are and they affect our system directly. They look for opportunities to replicate and affect other systems also.
  • Spyware: This can affect your system to a great extent. These are used to gather information from the system with the knowledge of the user of the system. It can also steal the information that a user enters into the webserver. It can be harmful to the personal information of the user.

Steps to get Antivirus Norton free

So, if you want to try using the Norton free antivirus software, here are all the steps that you need to follow.

  • To start with, you will have to open the Norton official website.
  • You will then have to enter your credentials to create an account.
  • When done, you will have to choose the application for which you need to get the free Norton. Also, choose the plan that you wish to opt for.
  • After this, you will have to enter all the details of your credit card and then proceed with the process.
  • Finally, click on the free trial option and you can start using the application.
  • In case you want to continue using it, the amount will be automatically deducted and if you do not want to use it, you can cancel the subscription anytime before the trial period ends.

Norton 360 features

Now, here is a list of all the features of Norton 360 that you will get in Norton’s free trial also.

Device security:

  • The Norton 360 will help you to keep your PCs, tablets, Mac, and smartphones safe.
  • Also, it will scan and block all the malware spams and other threats that your system may face.
  • It also provides you with a feature of parental control so that you can track online activities.
  • Other than this, every time you try to make a risky download, you will get a warning.
  • Lastly, it provides you Virus protection.

Identity theft protection:

  • With the help of proprietary technology, you can keep track of where you have used your personal information.
  • It will always alert you when there is identity theft.
  • The NortonLifeLock can also help you to fix the issue in case you have become a victim of identity theft.
  • Also, it is one of the best brands for identity theft protection.

Online privacy:

  • You can browse anonymously and it provides you safe browsing.
  • Also, you can block the ad tracking from the advertisers.
  • You can also access the public Wi-fi safely.
  • The tool also provides you with bank-grade encryption.

Important points to keep in mind

So, here are some of the important points that you need to keep in mind so that you can easily use the Norton free trial. Read all the points below.

  • To start with, you need to know that you need to enter your payment details if you want to avail of the Norton free trial. If you fail to cancel the subscription within 30 days, the amount for the next month will be deducted.
  • Other than this, you must know that as soon as you avail of the Norton antivirus free trial, your trial period will start. You can then download it on all the systems and then start using it. Also, if you have availed of the free trial version at a discounted price, it will be valid for the term of the plan. After that, you will have to pay the annual or monthly usual charges.
  • Also, when you avail of the free trial, the company has the full right to add, remove or modify the services provided. It will be provided in the license and services agreement.
  • Next, It is a must that you know that number of devices allowed to use the free Norton antivirus will be for personal uses only. It will not be applicable for commercial use.
  • Other than this, you will need to have an internet connection on your system to use the application.
  • You may have to download the mobile application for Norton separately.
  • Also, you need to know that protection from scams or phishing attacks will be provided to the systems in which you have installed the Norton device. You may not get the reimbursement when there is identity theft indirectly or directly from the phishing attack.
Also Find, SECURE YOUR PERSONAL INFORMATION WITH NORTON SECURE VPN 

System requirements to use Norton antivirus trialware

You must know that all the features provided by the Norton Antivirus will not be available for all the operating systems. Here are some of the system specifications that you need to check before you opt to use the Norton anti-virus trial.

norton anti virus trials

For windows operating system:

  • Microsoft Windows 7 all versions.
  • Microsoft Windows 8 all versions. There are chances that you may not get some features in the Windows 8 start screen.
  • Microsoft Windows 10 except the Windows 10 s.

For Mac operating system:

Norton free antivirus will be available for the current and last two versions of the operating system. Also, you will not get the parental control feature in the operating system

For the iOS operating system

When it comes to the iOS operating system, the Norton provides all the features for the iPads or iPhones running on the current and last two versions of the iOS.

For Android

Now, when it comes to Android, all the features can be accessed on mobile phones having Android version 6.0 or later.

This is it. This was all you need to know about the Norton antivirus free trial. It is definitely worth a try when you have to check which antivirus is best for your system. We have tried to provide you with all the relevant and required knowledge. Hopefully, the article has helped you.

Norton Secure VPN

Norton Secure VPN is a tool that protects your online activities. It provides you online security to perform every task sincerely. Millions of people use websites that can get their personal information. Everything they do online whether it be a bank or credit history can be accessed easily. Even providing your password can be a great risk for you. 

But, you don’t need to be worried as Norton Secure VPN is there to help you. Through Norton Secure VPN, we can easily get an advanced level of security against those websites that try to access and use the data. As everything is online so the tool in today’s time is much more valuable. You may want to know more about this tool. Well, keeping that in mind, we prepare this article to provide you a better view of what Norton Secure VPN can offer to you. 

It’s no secret that your online privacy and security have at risk. The growing threat is always there whether you switch from an unsecured to a private Internet connection. But, Norton Secure VPN secures your data, information, and connections whether being you at home or some other place. It also fights cybercriminals who try every possible way to infect your devices to access personal information. You may not aware of this, but current federal regulation allows activities like tracking, selling, and accessing our history to Internet service providers. Not only that but you can also get filtered content on your feed.  

A Small Brief of Norton Secure VPN

Norton Secure VPN

If you want to try out some extensive types of security tools, then you must bring Norton Secure VPN. Also, protects your sensitive information from instant advanced level security. Your password and credit card number will be secured and protected. Using a public hotspot can bring all of your sensitive information to the world. As a consequence, anyone having the access to that hotspot can also become quite able to fetch your information. But, Norton Secure VPN always secures you and your information from getting trapped by those nonsensical sites. 

You can have all the power in your hand with Norton Secure VPN. Just make a click and you are all ready to secure all your online privacy. Adding on, you can also get the freedom to receive only those contents you value the most. With this incredible software, you can continue your work and share bank information without worrying much about security.

As it runs effortlessly in the background so you don’t need to log in several times. Just install the software, log in once and leave the rest of the work on the software. What is more satisfying than securing our browsing history, bank-related information, and so on. After logging in, you will receive more privacy and security any time you are making your way online. 

As we have mentioned above, using a public WiFi location can prove risky for you. Using WiFi means sharing your data, your information, your browsing history, and everything on the Internet with all those people who are using that hotspot. You are neglecting it now but it can become a big risk that can cost you in the long run. If you want to keep yourself away from this kind of risk then you must put in some level of protection. 

You may also like: How to Make your computer faster?

Benefits of Norton Secure VPN

There are several benefits of using the Norton Secure VPN. You will find some of them listed below.

Norton Secure VPN

  • Without any fear and restriction, you will be able to browse your favorite apps and content. The best part is you can have it not only at your home but in other places as well. Whether you be at home or some public place, you can easily enjoy the working of this incredible software.
  • You will get the best bank-grade encryption services whenever you make your way towards the public WiFi hotspot. It indicates that you will be provided some of the highest levels of protection that too when you are on an open network. 
  • It regulates to encrypt your data on a no-log virtual private network. That means you can easily search for what you need online while just on a private network. Well, if you have still some doubts to use this tool then just throw all of your doubts as there is no such possibility that a third party will store or track your information.  
  • Norton Secure VPN also enables you to browse any websites you want anonymously. As the tool works to protect your privacy with no limitation of where you move online. 
  • Also, the software comes with a 60-day money-back guarantee. So, you can first try it and then make a further decision of still using the software or not. You need to use the service within that timeframe to encounter its benefits. Let us tell you that the support from Norton is too good. 
  • This amazing tool provides you enough power to gain control over everything you do online. As well as, your access is not bounded as you will receive a much higher level of protection from all of those illegitimate sites and cybercriminals. 

System Requirement to Install the software

The software is available for Windows PC, Macs, iOS, and Android Smartphones and tablets: 

It is also compatible with Macs, Android smartphones, PCs, iPads, tablets, and iPhones. If you subscribe to its services then you can use the tool on the specified number of devices with unlimited use. 

Windows Operating Systems

  • It will work on all versions of Microsoft Windows 8/8.1
  • Also, support all versions of Microsoft Windows 10
  • All versions of Microsoft Windows-7 with Service Pack 1 (SP 1) or later

Mac Operating System

  • Require current and last two versions of Mac OS X 

Android Operating Systems

  • Androids running 5.0 or later

iOS Operating Systems

  • iPhones or iPads having the current and last two versions of Apple versions. 

Ways to Download and Install this Software

To use the software, you have to first download and install this on the device. So, let’s learn the steps that will help you in doing so.

 If you have a Windows or Mac device

No matter what you are using a Windows or Mac as Norton Secure VPN can easily run on both of the devices through these steps:

1. First of all, you need to navigate to the official site of Norton and then tap on Sign in. 

2. Now, just do one of the following things on the page of Welcome to NortonLifelock page.

  • Try to enter the login credentials and tap Sign in to log in to your Norton Account if you have it.
  • Otherwise, you can select Create a new account and follow the onscreen guidelines to make a new account.

3. select Download under Secure VPN.

4. Now, just try to access the downloaded file and do one of the following:

  • For Windows: Complete the installation procedure by following the on-screen guidelines.
  • For Mac: You need to open the Application folder to place the Norton Secure VPN into it.

5. You need to now launch the Norton Secure VPN app. If you are a mac user then don’t forget to provide the administrator password during launching Norton Secure VPN.

6. Just sign in with your Norton account credentials.

7. Next, hit the button Turn On.

8. In the end, click on the VPN switch to turn it on.

Users of Android or iOS device

1. Start the procedure by performing these steps:

  • If you are an Android user, then navigate to Play Store and tap on Accept if you use the app for the first time.
  • If you are an iOS user, then select the App Store icon located on the home screen.

2. Now, search for VPN in the search menu and select this app.

3. Proceeding with one of the following:

  • On Android, tap on the install button and then click accept & download.
  • On iOS, click on Get and tap Install and just sign in with your Apple account password.

4. Now, just tap on allow if you get a message that states “Norton Secure VPN Would Like to Add VPN Configuration.”

5. After that, you need to access the Norton Secure VPN app, and choose I Already Have a Subscription. 

6. Answer Yes when asked with Do you have a Norton Account.

7. In the end, enable VPN to activate Secure VPN.

Wrapping Up!

So, this is the entire guide related to Norton Secure VPN. We hope that you find it informative. Although, if you have any queries then drop them in the comment section.

Norton Power Eraser

Norton Power Eraser uses the most aggressive scanning technology to eliminate deeply embedded crimeware and threats that traditional virus scanning is unable to detect. With this aggressive virus removal tool, you can get your PC or other devices back. Also, you can undo the results of a scan. It is one of the best applications to diagnose and remove Potentially Unwanted Programs. 

The most persistent computer viruses such as scareware and fake security suites can also be eradicated through this tool. However the tool does not require installation, you can easily set up the power eraser and scan your system in no time. It also clears USB memory sticks. You only need to be careful about your critical system files as after completing the scanning procedure it always asks you what to do with those files. 

Luckily, the power eraser allows you to get the file insight online database to learn more about the file that is going to be erased. Although, the tool has a restore point in case something goes wrong but make sure to double-check the information before deleting any of the files. 

Now let’s learn how you can use this incredible tool for Windows 10, 8, and 7. With this step-by-step guide, you will be guided to use this tool. Later on, we move to the steps to use this tool in Windows XP/Vista. So, read this entire guide and learn the procedure of using this tool. Before diving into the next part, you need to be aware that the tool is only compatible with computers running Microsoft Windows operating system. So, if there are Mac OS X, Android devices, OS X, and iOS devices then you cannot use this tool. 

Download Norton Power Eraser and Conduct a full system scan for Windows 10/8/7

  1. We need to first download the Norton Power Eraser. 
  2. Press Ctrl + J button together to open the Downloads window in your browser. 
  3. Now, just double-click the NPE.exe file. 
  4. Click on the Yes or continue button if the User Account Control window prompts.
  5. It’s time to read the license agreement and hit the Agree button. 
  6. Select Full System Scan in Norton Power Eraser window.
  7. After that, tap on the Run Now tab. 
  8. In case you want to include the Rootkit scan then move to settings and choose Include Rootkit scan under Scan and Log settings. 
  9. Restart the computer when you see a prompt. 
  10. Just wait for the scan to complete. 

Resolve the Risks

1. When the Norton eraser finishes the scan, it will show the scan results. You will see all the items that the tool considers as risks display the severity as High or Medium. 

2. You can do one of the following mentioned below according to your situation.

  • If the virus eraser antivirus did not detect any risks then just tap on the Done tap to exit. 
  • If you encounter any such files that are listed as High or Medium then the checkbox under Fix is automatically checked and it will recommend you to remove these files. 
  • At times, the user wants to know more about the threat. In that case, you can tap on the threat name under Primary target and view all the relevant details. 

Keynote: Norton Power Eraser will take a restore point as part of the remediation if your system is configured to use System Restore. 

3. Next, tap on the Fix now. 

4. If the window pop up it will restart the computer then select restart now. 

5. You can click on Done after the successful removal of the risk. 

Steps to Configure Settings

Well, Norton Power Eraser provides you the option to set up a network proxy, adjust log settings, multi-boot check, and add the Rootkit scan. 

1. To configure settings, you need to first start Norton Power Eraser. 

2. Select settings from the top right corner. 

3. You will see all the options on the screen such as Network Proxy settings, Rootkit scan, Scan and Log settings, and Language selection. 

4. In case your network uses proxy settings to connect to the Internet then select Configure to configure network proxy settings.

5. You can do one of the following mentioned below. 

  • Choose the Automatically detect settings if you are not sure of the proxy settings. 
  • Subsequently, If you have acquired an automatic configuration script then choose to use the automatic configuration script and type that script in the URL textbox.

virus eraser antivirus

  • Now, tap on Use a proxy server for your HTTP connections if you are aware of the proxy server settings. Then, enter the server address and the port number. 
  • In case your proxy server requires any authentication then choose Connecting to my firewall or proxy server requires authorization. After that, just type your user name and password. 

6. Hit the apply button when you finish updating network Proxy settings. 

7. Accordingly, enable Show only bad files to display only the bad files. 

8. Norton Power Eraser does not include the Rootkit scan so if you want to add it then just enable include Rootkit Scan. 

9. Now, try to configure the log settings by doing one of the following things. 

  • In case you want to modify the location of the log file then click on scan results, tap on change and select the new location. 
  • If you want to delete the log history located next to Log files and choose the Delete option. 
  • You can opt for the Use Default setting if you want to restore the default settings. 

10. Finally, just choose the preferred language and select Apply.

Steps to Restore a fix to undo a previous repair session

If you want to restore a file that has been incorrectly removed by the Norton Power eraser then try to undo the repair session.

Keynote: You need to know that undo sessions created with Norton Power Eraser version 5.3.x.x are not supported by Norton Power Eraser Version 6.0.x.x.

1. To initiate, start Norton Power Eraser. 

2. Choose Undo Previous fix in the Norton Power Eraser and hit the Run now tab. 

3. In the Previous Repair Sessions window, you need to select a repair session that you want to undo followed by clicking on the Next button. 

4. Adding on, select Undo in the previous Repair Session. 

5. Hit the Done tab. 

 So, these are the steps that you can consider to configure Norton Power Eraser Tutorials for Windows 10/8/7. Now, let’s learn how you can download, run and configure the tool in Windows XP/Vista. 

You May Also Like To Read: NORTON REMOVAL TOOL- WHAT IS AND HOW TO USE IT?

Download Norton Power Eraser and Conduct a full system scan for Windows XP/Vista

1. First of all, download the Norton Power Eraser. 

2. Subsequently, press the Ctrl + J button to access the downloads windows in your browser and double click the NPE.exe file. Hit the yes button if the User Account Control window prompts. 

3. Adding on, tap on the accept button when finished reading the license agreement. 

4. Again, tap on the Scan for Risks icon in the Norton Power Eraser window. 

5. Norton Power Eraser by default performs a Rootkit scan and also requires a system restart. If you see a prompt to restart the computer then just click on that. 

6. In case you don’t want to include the Rootkit scan then navigate to settings and deselect the option Include Rootkit scan.

7. At this moment, just wait for the scan to complete properly. 

Steps to Fix the risks 

After completing the entire process of scanning in Norton Power Eraser, it displays the scan results. You will see the risky items displayed as bad that need to be removed or repaired and the items that require further review display the status as unknown. 

1. According to your situation, just do one of the following things.

  • If you see No Risks Found, then Norton Power Eraser did not detect any risks on your computer. Just tap OK to exit.
  • In case, you see any files in the Bad names then the Remove checkbox under Action is checked automatically. You need to remove all of these files and if the Remove checkbox under Action is not checked. 
  • Now, if you see any files that are listed as unknown then click on the cloud icon. It will send the file to a Norton server and scan it using the traditional signature-based detection engines. 
  • If the cloud scan result shows Bad for any file then tap on the remove checkbox. 
  • If the cloud scan result shows unknown then do not select the remove checkbox as the file may need further analysis. 

2. Now, ensure that the Create System Restore point checkbox is properly selected.

3. Later on, hit the tab named fix now. 

4. After that, click on the Restart now tab to restart the computer to finish the removal. 

5. Once removing the risk, just tap on the Done option.

Run a Scan using Advanced scan options

Norton Power Eraser gives scan options for advanced users and technicians to conduct advanced troubleshooting. Some of the following advanced scan options are available in the tool. 

power eraser

1. Reputation Scan

You can easily scan specific files and folders using Norton NPE. With its Reputation scan, you can speed up the scan. Well, only these files with the following extensions are supported for scanning. 

  • .exe
  • .ocx
  • .sys
  • .msi
  • .scr
  • .drv
  • .loc
  • .dll

2. System Scan

This scan does not include a Rootkit scan and performs a standard Norton Power Eraser scan on your current Windows OS. 

3. Multi-Boot Scan

With this scan property, you can conduct a scan on a particular OS in a multi-boot Windows environment. You can select the Windows OS that you desire to scan. Although this option is not available if only the current OS is detected.

To conduct the advances scan, follow the lead of these steps:

1. To initiate, start Norton Power Eraser. 

2. Next, just read the license agreement and hit the Accept button. 

3. Select the Advanced scans icon. 

4. Click on the scan icon according to your requirement.

  • Reputation Scan
  • System Scan
  • Multi Boot Scan

5. In the end, follow the on-screen guidelines to complete the scan. 

Steps to Configure Settings

1. First of all, access the Norton Power Eraser. 

2. Now read the license agreement and hit the Accept button. 

3. Moreover, select Settings from the top right corner. 

4. You will see several options like Network Proxy settings, Log settings, Multi-Boot check, and Rootkit scan. 

5. If the network uses proxy settings to join the Internet then click on Configure to configure network proxy settings. 

6. Once done with these, do one of the following things:

  • When you are not sure of the proxy settings then select Automatically detect settings. 
  • If there is an automatic configuration script then choose Use automatic configuration script and then enter the script in the URL textbox. 
  • If you know the proxy server settings, then just select Use a proxy server for your HTTP connections and then enter the server address and the port number. ‘
  • Tap on Connecting to my firewall or proxy server requires authentication If the proxy server requires authentication then enter the username and password.

7. After updating Network Proxy Setting, select Apply and hit the OK button. 

8. If there is more than one operating system installed on the device, Norton Eraser lets you scan system files and registry files of other systems as well. You can include other operating systems by selecting Enable Multi-Boot check. Otherwise, the Multi-Boot check option is grayed out if you do not acquire any multiple operating systems installed on your computer. 

9. In case, you want to configure the Log settings then conduct one of the following. 

  • Browse and select the new location if you want to change the location of the log file. 
  • Tap on Delete Log History if you want to delete the log history. 
  • Select Default settings if you want to restore the default settings. Keep in mind that once you deleted the log history then you can undo any previous Norton Power Eraser fix sessions. 

10. You need to know that Norton Power Eraser includes Rootkit scan by default. If you do not want to include it then uncheck Include Rootkit Scan. 

11. In the end, you only need to click on the apply button and then tap OK.

Steps to Restore a fix to undo a previous repair session 

In case of Norton power erases a file or a registry file on your computer then you can undo the repair session to restore it by following the steps:

  1. You need to first start Norton Power Eraser. 
  2. Hit the Accept button after reading the license agreement. 
  3. Later on, select Undo Previous fix icon. 
  4. Now, you need to select a repair session that you want to undo in the Previous Repair Sessions. 
  5. After that, select the files that you want to restore in the Previous Repair Session and hit Undo. 
  6. Furthermore, select Restart Now to finish the restore. 
  7. Once you restarted the computer, Norton Power shows some files that were restored. You need to just tap on Done. 

Final Word!

So, this is all about the Norton Power Eraser. You can use this tool to enhance the working capacity of your system.

At times, the users of Norton Antivirus have encountered several hindrances while installing new software. It blocks some suspected activities like the download of a file and Internet connection. Also, the auto-sync of a mobile device with your desktop computer can get interrupted. As well as, the user receives instant notifications for restarting the computer. If you are aware that the activity or application that brings these notifications is safe to use then try to temporarily disable Norton Security.  

Repeated notifications and antivirus interference make you totally unable to install business software. But, you can disable its services to conduct those activities. Then, re-enable it to protect your PC on the web. Now, let’s learn how you can temporarily disable Norton Security or Norton 360.

Temporarily Disable Norton Security on Windows 

The user is required to log on to the computer with an administrator user account. That will help in temporarily turning off Norton protection. Some of the settings may appear disabled for standard user accounts. 

Steps to Turn off Norton Protection in Windows

  • Move towards the notification area on the taskbar and right-click on the Norton icon
  • Then select the following things. 
    1. Disable Auto-Protect
    2. Disable Firewall

Disable Norton Security

  • Now, navigate to the Security request window and select the duration drop-down list.
  • You need to choose the duration for which you want to disable Norton Protection. 
  • Once done with these steps, just tap on the OK button. 

You need to ensure that Norton will automatically enable the features after the duration you specify in the Security Request window. To enable Norton manually, you can move to the notification area on the taskbar. Subsequently, perform a right-click on the Norton icon. Then, choose Enable Auto-Protect/Enable Firewall. 

If you get irritated from the repeating sounds of notifications, then try out these steps to disable Norton tasks notifications on Windows.

Steps to Turn off Norton Tasks Notification on Windows

  • Try to access Norton. 
  • Now, if you can see the My Norton window located next to Device Security then hit the open button. 
  • Select Settings in the Norton main window.

Disable Norton protection

  • Moving on, select Administrative settings in the settings window. 
  • You need to now move the on/off switch to disable the Norton Task Notification row. 
  • In the final step, just click on the apply and close tab.

If you are a mac user and use the antivirus in that only, then move on to these steps and try to disable Norton Security.

Also Find, Complete Guide to Download and Install Norton Security

Temporarily Disable Norton Protection on Mac

  • The first and foremost thing for you to do is to start Norton. 
  • Now, navigate to the My Norton window, next to Device Security, and hit the Open button. 
  • Just select Advanced or Settings in the Norton product main window. 
  • Consequently, tap on Protect My Mac on the left pane. 

Turn off Norton Security

  • You will see a switch in the Automatic Scans row, just move it off. 
  • Select Firewall located on the left pane. 
  • Again, move the switch to off in the connection Blocking row.
  • Finally, disable the Vulnerability Protection row. 

Conclusion!

Now, you are quite eligible to conduct the installation procedure. Don’t forget to bookmark the site for more helpful articles. 

downloading Norton security

This is going to be a helping guide for all the users who want to learn the process of downloading Norton security on their PC and phone. 

If you want to install Nortons on multiple devices like computers, phones, and tablets then it will be preferable to use Norton 360 Deluxe. As with this version you can use five devices altogether. 

Well, the procedure remains the same no matter what version you are using. So, let’s stick to this guide and follow the steps to conduct these operations.  

The procedure of Downloading Norton Security on your PC

It will be a step-by-step process, so don’t forget to perform each step perfectly. 

Step 1: Download Norton Internet Security

  • The first and foremost thing for you to do is to purchase Norton from Norton’s range. 
  • Move towards the Norton product page and search for the one you want.
  • You can choose Norton 360 Deluxe if you need it otherwise go for other versions. 
  • Once done with that, tap on the Subscribe now button.
  • Followed by filling in all the important details like choosing a password and entering payment information. 
  • After you have done the payment on the order confirmation screen, you need to select the Get Started button to download the Norton installer. 
  • Consequently, follow the on-screen guidelines to tap on the EXE file at the bottom of your browser window once it downloaded properly. 
  • You will see that the downloader will automatically initialize and download the rest of the files needed for the application to be installed. 
  • Then, the program will request permission for Norton to apply changes to the system. 
  • To move ahead, just tap on the Yes button. 
  • Now, you can proceed to the next step that is installing Nortons.

Step 2: Install Norton

  • You need to hit the install tab to start the installation of your Norton. 
  • If you want to block new threats then join the Norton community watch. It will also keep all your data safe and protected. 
  • Now just hit on the Maybe Later tab if you don’t want to.
  • With these steps, you can install Norton easily. Yes, the process is a bit longer but it is the right time to feel yourself, to pamper yourself with your favorite cup of beverage so make one for yourself. 

Step 3: Activate Norton

After performing the installation process, Norton will activate safely. It will start communicating with the company’s servers and then the main menu pops up. This will indicate that one of five licenses has been used and the device in which you just installed the app is fully protected and safe. 

Step 4: Browsing Protection

  • Now, you need to minimize the Norton main menu window and move back to the browser. 
  • You will see an opened tab that offers Norton extensions for the browser.
  • It would be best if you opt for Chrome as it is widely used and highly recommendable by most users. 
  • To enable the safe mode, you can select Enable all Norton Extensions that will bring options like safe search and Norton’s Password manager. 
  • If you only want Safe Web then tap on the blue install option for whatever extensions you wish to grab. 
  • Then, click on the install button so that you can move to the Chrome Web Store or the source of extensions for whatever browser you have chosen.
  • Now, tap on Add to Chrome option for the appropriate extension. 
  • Once done with this, you will be able to see the permissions you are granting the Norton extension. 
  • After that, hit on the Add extension tab to confirm that you wish to use it. 

Step 5: Patch Up

  • Once selecting your extension, you can move back to Norton’s main menu.
  • Now, just navigate at the top of the main menu where the device security tab located and select LiveUpdate. 
  • You will see that Norton LiveUpdate will verify for updates. 
  • After that, just confirm that you want to apply the downloaded patch by clicking on the apply now tab. 
  • At this moment, just wait while Norton restarts itself and installs the patch. 

Step 6: Scan your System 

  • Just after completing all these processes, Norton will initiate a quick scan to examine the contents of your PC for malware or anything else suspicious. 
  • At times, the application missed it so you can start a scan yourself.
  • To do this, just navigate to the Device Security in the main menu and select the tab named Quick Scan. 
  • Substitutionally, you can also run an initial full scan on the system
  • You can do this by tapping on the Open button which is located next to Device Security. 
  • After that, tap on the arrow pointing down on the right that shows Scans options. 
  • Now you need to choose Full System Scan at the next dialog box and hit Go.
  • You will witness that a full scan will automatically run that verifies all your files with a fine-tooth comb.

Step 7: Ensure Signing-in

  • If you have purchased Norton 360 Deluxe and one of the higher tier packages then the message will pop up to sign in to the account.
  • After the activation, you may be provided features like parental controls or dark web monitoring.
  • Now tap on the sign-in box located at the bottom of the main menu and enter the password for your Norton account. 
  • Once done with the steps, you will see those extra features in the main menu that you can set and manage by yourself. 
  • Till now, you have set up the fundamentals of the Norton suite.
  • In the next step, you need to choose the features you want to run and also try to configure them by following the instructions given to you. 
You May Also Like: NORTON REMOVAL TOOL- DOWNLOAD TO UNINSTALL NORTON DEVICE SECURITY

The procedure of downloading Norton Security on Your Mobile Phone

download Norton internet security

If you want to safeguard your phone with Norton then move into this section. 

Step 1: Purchase and Download

The user needs to buy the suit online for downloading Norton Security on mobile phones just like we have told you in the above procedure. So, first of all, you need to buy the suit from your preferred third-party retailer or Norton site. 

  • Once done with that you need to move towards the Google Play Store on your Android phone. 
  • Now, just open the play store app and type Norton 360 at the top in the search bar. 
  • You will see the install button in green color with Norton 360 app. 

Step 2: Sign in 

  • Once the app is installed properly, you need to click on the Open button and choose Sign in. 
  • Then, fill in your email address (username) and password before tapping on the Sign-in tab. 
  • Now, just pick choose your plan and sign up for Norton 360 Deluxe right here.
  • You need to be aware of the fact that they offer a full-price subscription and on the Norton website you find a discount running. For instance 58{067ed41ba9a2bcea5192cfba5c5678b094ea6af66db36aaabba2135c9da953a2} at the time of writing. 
  • So, it will be recommended to always take out your subscription on the website, not in the mobile app. 

Step 3: Initialize

  • Now that you have signed in properly, the app will initialize for a bit and automatically intiate a quick scan before you come to the main menu.
  • So, once all of these activities are performed, you may encounter some security-related issues in the menu.
  • After viewing them, you need to click on the Security box to check out these.

Step 4: Try out flagged Security Issues  

  • You need to move towards the security category.
  • In that field, you will come across any app. 
  • Also, Internet, Wi-Fi, and device security issues listed there. 
  • You need to touch them to see Norton’s recommendations for fixing them. 
  • These are enabled by default to turn on Safe Web and real-time protections for policing apps. 
  • The main thing that you need to do here is to turn on Safe Web by hitting the Set Up. 
  • Now you will be taken to the Accessibility menu where you need to select Norton 360 Service from the list. 
  • Once done with that, just set your slider ON and you are good to go with your Norton on mobile.  

Wrapping Up!

So, this is the article related to downloading Norton security. Hopefully, you find this article relevant and complete the installation on your mobile and system. Don’t forget to check out the site if you want to read more about Norton and its incredible features. 

Norton removal tool is officially provided by Norton and you can easily install it on your system. The tool is helpful when you have to uninstall the Norton product completely. When you uninstall the Norton product from the system using the usual method, some traces can be left behind. This is because it needs to prepare your system to install the Norton product again. Because of this, you can face issues while you are trying to uninstall other products that are not manufactured by Norton. Norton is aware of the issues that you can face so, they have provided you with an official tool. If you are not aware of the removal tool, this article will surely be helpful for you. Read the article till the end to know how to use the Norton removal tool windows 10.

Norton removal tool

Uses of the Removal tool

  • You can use the removal tool for different reasons. The tool can be used to remove products like Norton 360 and Norton SystemWorks from your system that you may not be able to normally.
  • Other than this, you can use the Norton removal tool mac if there is any failed or damaged Norton product present on your system. You may have such files on your system if there is an older version of the Norton application is available on the system or if the installation is not completed because of the system errors.
  • The tool is suggested because the tool is going to work on almost all the systems and will remove all the Norton products. You may have to keep in mind to back up the database before you use the Norton removal tool macintosh.

Price of Norton removal tool Windows 10

Fortunately, the Norton tool is free to use. It can be used on any system and you will also not have to download the NortonLifeLock product. You can easily download the Norton removal tool from the official website.

Related Tool: Norton Power Eraser

Steps to use the Norton removal tool

So, now that you know what Norton removal tool Mac is, you can easily use it on your system. Here are all the steps that you need to follow to install the removal tool.

  • To start with, you will have to note down the Product key. It is a must to do because there are chances that the service provider will not have the product key. You need to keep it to uninstall the Norton product.
  • When done, you will have to visit the Norton official website and then look for the Norton removal tool. Also, you need to choose the Norton removal tool version according to the device that you are using.
  • If you need to prepare the system for the download, follow the steps appearing on the screen.
  • Now, you will have to navigate to the page and look for the option to download the Norton removal tool. Click on it and the process will begin.
  • Wait for the process to complete. When the process will complete, you need to follow all the on-screen instructions to install the product.
  • Run the product on your system and follow all the steps appearing on the screen to remove the Norton product that you want.
  • The process may take some time to complete. Wait for the process to complete. You may also see that your system has restarted while the process more than one time. Do not worry and let the process complete.

norton removal tool windows 10

  • When done, finally check if the application is still available on the system.

Preliminary preparations

  • While using the Norton Removal tool Mac, there are certain things that you need to keep in mind. These things will help you to avoid the problems that you can face while using the tool.
  • First, you need to make sure that you have terminated all the Norton processes running on the system. If any other anti-virus software is running on the system, you may have to terminate it too.
  • When done, you will have to end all the other files and programs opened on the system because it can lead to conflict with the removal tool.
  • In case you are using the tool on a laptop, you will have to keep it connected to the power source. This is because if the system shuts down while the process is taking place, the product can be more damaged than the removal tool will not be able to fix it.

Uninstall the tool

Now, if you have removed the Norton product from the system, you can remove the Norton tool also. You can easily remove the tool by opening the Control panel on the system and then click on the option to uninstall the application. You will then have to click on the Norton removal tool and choose to uninstall the same. Wait for the process to complete. It is recommended to uninstall the tool if you do not plan to uninstall the Norton removal tool Windows 10. The tool will be uninstalled without leaving any traces behind.

Conclude

The Norton removal tool can be helpful when you are facing difficulties in uninstalling Norton products. This was the full information about how you can use the removal tool. We hope that the article has helped.