Is WhatsApp Secure

We cannot deny the fact that WhatsApp has become a part of our lives. We use WhatsApp for sending and receiving pictures, document files, and videos, making voice calls, video calls, texting, and a lot more. Many features like sharing location, sending money, and WhatsApp business make it useful for everyone. While we are constantly sharing our private information on WhatsApp, in the back of our minds we are always thinking, is WhatsApp secure ? After all, it has all our private information and data.

If you are also worried about, is WhatsApp safe to use then you are at the right place. In this article, we will tell you how secure is WhatsApp and how you can make it safer for yourself. 

Is WhatsApp Secure ? 

Is WhatsApp Secure

Honestly, we cannot claim that WhatsApp is completely secure, there have been a few voids here and there. Many times the hackers have succeeded in invading WhatsApp’s security. Let’s look at some of these scenarios. 

Hackers Attacked WhatsApp Through Calls

This incident took place in 2019. Hackers attacked WhatsApp through video and voice calls. Hackers called WhatsApp users and they could hack their devices irrespective of the fact if the user answered the call or not. This hampered several users. Later WhatsApp fixed this but this attack was huge. Some 20 counties were attacked by hackers through this malware. 

Jeff Bezos’s Phone Got Hacked

Jeff Bezos, the Amazon founder, received an encrypted message on his WhatsApp from Saudi Arabia’s Crown Prince, Mohammed Bin Salman’s official account. It had a malicious file that hacked Bezos’s phone. Later the investigation revealed that this was done by Saudi Arabia’s hackers who wanted to attack the people who were close to Jamal Khashoggi, The Washington Post Journalist. 

There are many other instances where the hackers were able to invade WhatsApp’s security but WhatsApp came stronger every time. They fixed their voids to prevail over the security of their users. 

Whatsapp Safety Features

Whatsapp Safety Features

Is WhatsApp secure ? This is a constant question in our minds. And to resolve this, WhatsApp keeps adding security features as soon as they find a void. Some of its security features are: 

Privacy Settings: Whatsapp provides you with complete control over your display picture, contact information, status, and last seen. You can hide this information from everyone or show it only to your contacts. Not just this, you can also show your status to some specific contacts only. 

Block and Report Spam: If someone sends you some malicious information not only you can block that person but you can also report it as spam, doesn’t matter if that person was in your contact list or not.

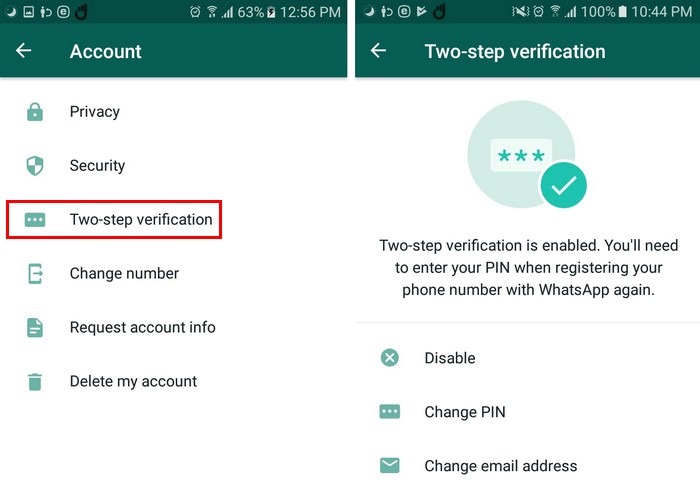
Two-Step Verification: If you login into your WhatsApp from a new device then WhatsApp sends you a six-digit code. Anyone cannot log into your account without that code. 

One-Time View Pictures and Videos: Whatsapp has recently introduced this feature where you can send one-time pictures and videos. This does not allow the sent media to get saved into the receiver’s device. WhatsApp is also about to introduce a feature where the sender will get a notification if the receiver clicks a screenshot of the one-time view picture or video. 

Request Account Information: If you receive a message from a new number then WhatsApp tells you about it and provides you with the options to block, save that contact, or report that number. 

Too Many Times Forwarded: If any message or media is forwarded too many times then WhatsApp tells you about it. You can then delete this message. 

Turn Off Read Receipts: If you do not want the sender to know if you have read their message then you can turn off your read receipts. 

How Can I Maintain Security While Using WhatsApp? 


How Can I Maintain Security While Using WhatsApp

There is no one-way answer to the question, is WhatsApp secure? But here we are providing you with some steps which will increase your WhatsApp security. 

  • Do Not Open Unknown Files

If you receive any unknown file from a new number then do not open it. It can contain some virus or malware that might hack your device and give your device access to the hacker. The hacker can use your account for some malicious activity. 

  • Use Two-Step Authentication

WhatsApp has a two-step verification feature which you should always use. You can add your mobile number or email address and if someone tries to login into your WhatsApp account then you will get a message and a six-digit code. Anyone would not be able to login into your account without this code. 

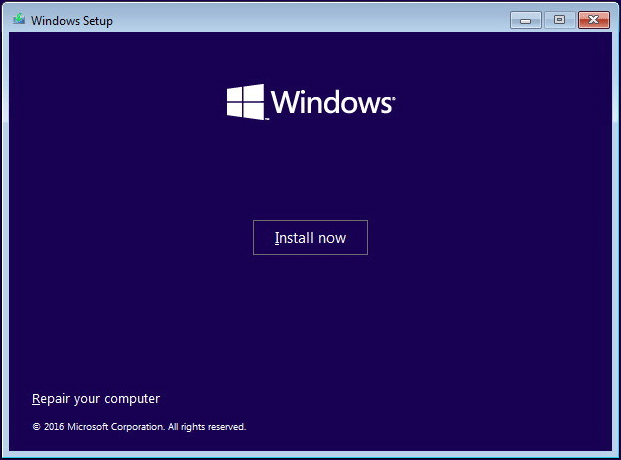
  • Install WhatsApp Only From Reliable Sources

Make sure that you download WhatsApp only from their official website or reliable sources like the Apple store, GooglePlay, or Microsoft store. 

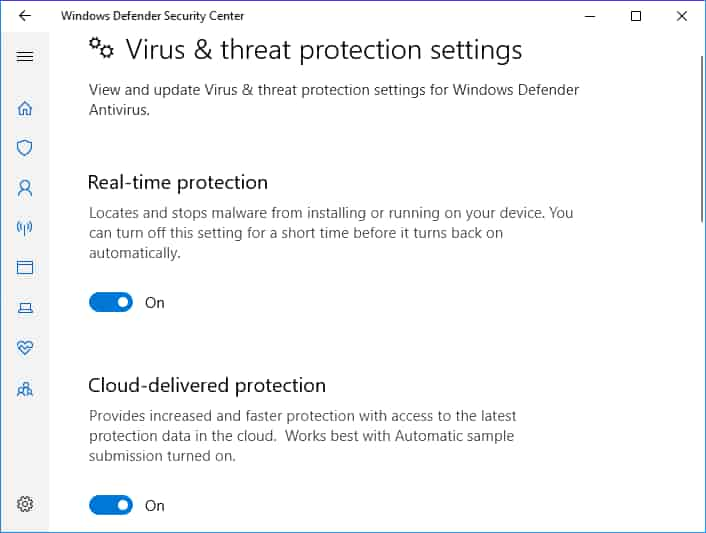
  • Secure Your Device With Antivirus

Install antivirus in your phone and computer. It protects your device from viruses and malware.
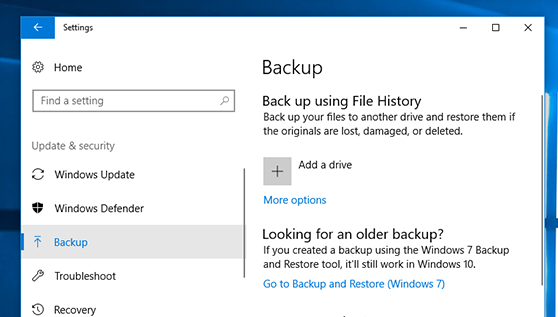
  • Backup Your Data

Make sure that you back up your data on your google account or some external data protection provider. 

  • Do Not Connect to Unknown Wi-Fi

When you are out or traveling, you might see some wi-fi that does not need a password. If you connect your device to it, it might hack your device. 

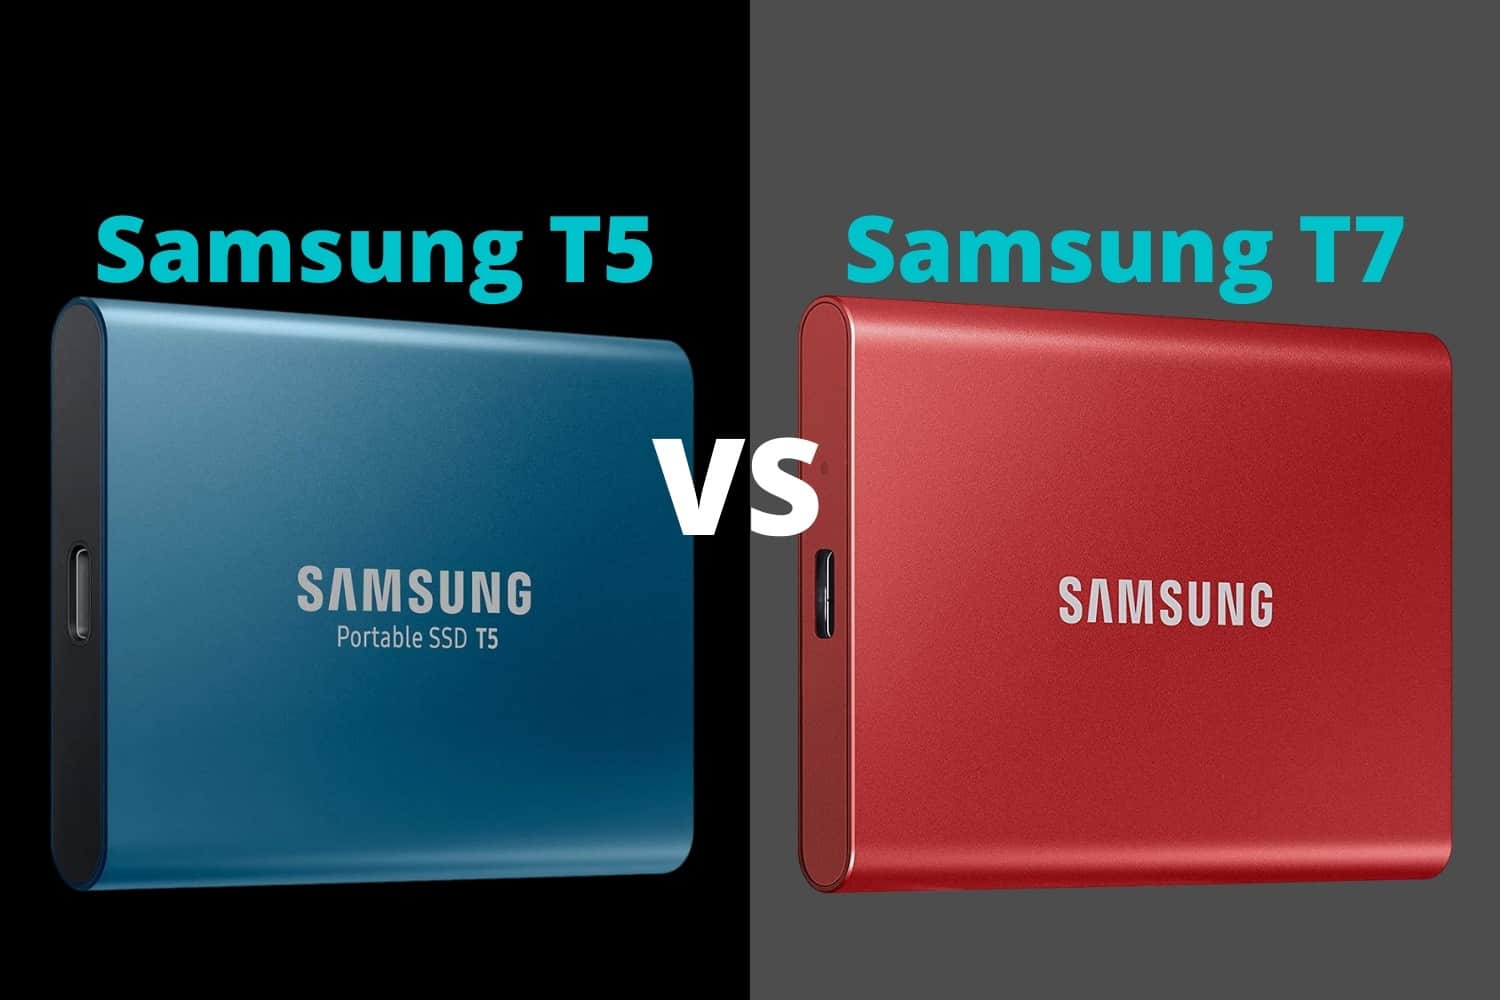
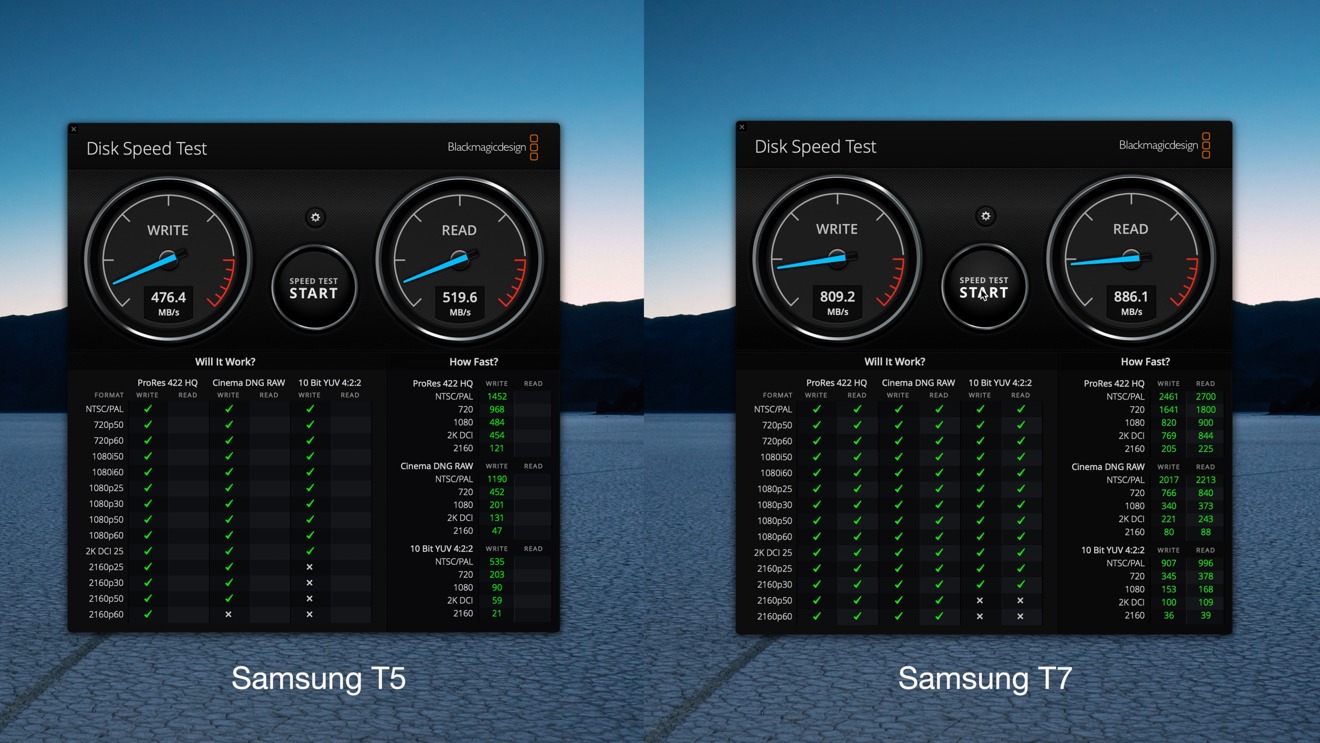
Read more: SAMSUNG T5 VS T7 | WHICH ONE IS BEST

All in All

So, is WhatsApp secure ? We are not claiming that WhatsApp is completely safe. There have been incidents where hackers have hacked it. But WhatsApp has come stronger every time and fixed the holes. You can take some precautions like using two-step verification and antivirus to protect your data and device.   

FAQs: Frequently Asked Questions

Q1- How safe is WhatsApp?

WhatsApp is not completely safe, it has its flaws. Whereas if you take certain steps like using two-step verification, installing it from reliable sources only, and not connecting your device to unknown WiFi then you can make it safer for yourself. 

Q2- Why is WhatsApp not safe?

Because the technology is at its peak. The hackers are very smart and they find new ways to invade the security veil of WhatsApp. Though you can use two-step verification & antivirus to safeguard your data & device.

Samsung T5 Vs T7

Samsung is one of the most prominent producers of technical resources and keeps on providing us with new and latest versions of its devices. This causes a lot of confusion in the minds of the users as they have to make a tough choice. Similar things happen while choosing between two of the most desired SSD which run in the market with the names Samsung T5 and Samsung T7. To make that confusion easy, here we have a detailed review of both of these SSDs. Let us start with our comparison guide for Samsung T5 Vs T7. 

Samsung T5 & T7

1
Top Picks
Dell S2721QS

Samsung T5

Brand: SAMSUNG
Digital Storage: 1 TB
Hard Disk Interface: USB 3.0
5/5
Trending
2
Dell S2721QS

Samsung T7

Brand: SAMSUNG
Digital Storage Capacity: 1TB
Hard Disk Interface: USB 3.2
4/5
Trending

What are Samsung T5 and T7? 

Samsung T5 and T7  are two types of portable SSD MU. SSD stands for solid-state drivers. These are a source of portable storage which is way better than the traditional drivers. As these drivers are something that aims at providing their service at the highest speed. Samsung also has an SSD which is one of the finest ones available in the market. But with the latest addition to its devices, there is also this confusion among the users about which among these is best for them. So, here we have a full comparison of two very popular SSD of Samsung named Samsung T5 and Samsung T7.

Comparison Between Samsung T5 Vs T7

In order to compare any technical device, we need to examine the features of that device in detail. So here we are going to do Samsung SSD T5 vs T7 with the help of the comparison made between the features of both of these Samsung SSD. Let us begin with the comparison and find which of these two stands out to be a better one.

Price

Price is something that affects a person’s choice altogether. The price point should be satisfactory for the buyer as well as according to the device. Here let’s compare these two devices on the basis of their price point.

  • Samsung T5: This Samsung T5 SSD has a price point ranging around $ 119.99 for the 1 TB variant.
  • Samsung T7: This SSD has a price of $139.99 for the 1TB variant.

In terms of pricing comparison of Samsung t5 Vs t7, the latter is a bit more costly than the former. But you can’t just judge on the basis of the price. So let’s have a look at other features and then conclude on the price point.Samsung T5 Vs T7

Capacity

Capacity refers to the amount of storage an SSD may provide the user. As the main feature of this device is to cater to storage needs. Samsung provides a bunch of different options for the size of these SSDs.

  • Samsung T5: This is available in around four different sizes which are 250 GB, 500 GB, 1TB, and 2 TB. All these sizes are available in this SSD.
  • Samsung T7: This SSD of Samsung provides you the options of these different sizes, 500 GB, 1TB, and 2TB.

This makes the Samsung T5 SSD available with a wider range of sizes available for storage options and there are many options from where you can choose your desired size for your SSD.

Color

Although the color is something just concerned with the appearance of the device, still it is a matter of concern for many people. So here is a comparison between the two variants on the basis of the color it provides.

  • Samsung T5: This device is available in colors, rose gold, metallic red, blue, and black.
  • Samsung T7: It is available in two major colors that are black and silver.

In the battle of Samsung t5 Vs t7, this very clearly states that Samsung T5 has a lot more options in terms of color variations.

Dimensions

Dimension is also among the physical features of the drive but it also counts as important when we compare the two SSDs.

  • Samsung T5: This comes with the dimensions of 2.9 inches in width, and 2.3 inches in height and the depth of the SSD is 0.4 inches.
  • Samsung T7: This has 0.3 inches of depth and a height of 2.2 along with 3.4 inches of width.

There is a slight difference in the dimension of these two disks and whatever sizes you prefer for your SSD can be your preference.

Performancesamsung t5 ssd

Here comes the deal maker and the deal breaker for any person. Performance is something that everyone looks out for whenever purchasing a device such as an SSD. Let us have a look at the performances of both of these devices.

  • Samsung T5: the speed provided by this SSD is around 540 MBps for the read and for the speed as per writing is around 520 MBps.
  • Samsung T7: as per speed goes for this, the read speed for this is 1050 MBps and the write speed is 1000 mbps.

There is a visible difference in Samsung t5 Vs t7 in terms of speed. The Samsung T7 speed is much higher than the Samsung SSD T5 speed.

Security

As per security, both run with the same hardware encryption but the version of Samsung T7 that goes with the name Samsung T7 Touch comes with some advanced security such as fingerprint protection. This gives Samsung T7 an upper hand in the field of security.

Read more: FULL REVIEW GUIDE ON DELL SUPPORT ASSIST OS RECOVERY

Conclusion

The above-mentioned difference clearly brings out everything you might need to make the right choice for you. Both of the devices have distinguished qualities of their own that make them stand out. Which one is better depends on what a person is looking out for in his SSD device? 

If you too were confused about which Samsung SSD to choose for yourself then this article is all you need to make things easy for you. Hope this comparison between the Samsung T5 and Samsung T7 clears all the doubts that might be running through your head while making a choice for yourself.

FAQs

Q1. Difference between T5 and T7 SSD? 

The major differences between the Samsung T5 and T7 are :

  • The price of T5 is less than the T7 
  • T5 comes in more color variants and size variants than T7.
  • Their dimensions are different in height, width and depth.

Q2. Is the Samsung T5 SSD fast? 

Yes, although the read and write speed provided by Samsung T5 SSD is less, there are other factors that make it faster than the others.

Q3. Is Samsung T5 good? 

Yes, Samsung T5 is a good SSD as it has good performance with a good price range and a lot of color options. It is a highly secure device and very compatible and user-friendly. It aims at making data transfer and storage an easy and hassle-free process.

What is Dell Support Assist OS Recovery?

In order to make the work of the user easy and convenient Dell came up with its recovery tool named Dell Support Assist OS Recovery. Are you still unaware of this multipurpose tool? Then this article brings you a full review of this recovery tool by Dell. From its basic introduction to its features and the ways to use this tool for your device, we will help you out with everything you need to know researched, analyzed, and put forward by our experts. So, Let’s Start.

What is Dell Support Assist OS Recovery?What is Dell Support Assist OS Recovery?

Support Assist OS Recovery is a system model developed by Dell. It brings the services of recovering and solutions for the issues in booting your operating system. Also, it allows you to check over the issues regarding hardware, files, or the state of your device. It is a tool that helps to make the fixing procedure easy for its users. Compiling all its features together makes it a really helpful tool for the user. However, This gives a brief introduction about how and what really is this tool by Dell. Now let’s have a look at some features of it.

Features Provided by Dell Assist OS Recovery 

  • Dell System Repair

This feature is made to turn back your computer to a previous point. This is done when your device has issues in performance or in booting itself.

  • Scan Hardware

It allows the user to detect any kind of hardware issues in your device. With the help of running a diagnostic test, this feature of dell support assists os recovery.

  • Startup Repair

This feature helps you to fix the common issues that occur in your device. It enables you to reset your device to solve all the minor issues in your device.

  • Backup Files

This feature of Dell SupportAssist OS Recovery assists the user to make a backup for their personal files on a local drive or any external drive.

  • Resetreset

This allows the user to reset the full setup by reinstalling everything and upgrading the operating system to the latest version.

Different Uses of Dell Support Assist OS Recovery

1. Dell SupportAssist OS Recovery Tool Reset 

One of the major roles that Dell Support assists OS Recovery plays is to recover and reset your device. Here are a few steps that might help you to figure out the steps that should be followed to use this feature:

  • Open your device and press the key F12 when your logo is still on the screen
  • From all of the available options click on the SupportAssist OS Recovery
  • Then you will be directed to the interface of the recovery tool.What is Dell Support Assist OS Recovery?
  • You can now see four options available. From all of those options, you need to select the “Reset” option.
  • Then click on the “Start Reset”
  • Now reset your device to your desired wish if it is to the factory settings or update.

2. Startup Repair through Dell Support Assist OS Recovery

Through this tool, you can run the process of startup repair in just a few simple steps. If you too are looking for a way to startup repair then follow the below-mentioned steps to use this tool by dell to carry out your setup repair:

  • First of all launch the Recovery tool on your device
  • Then go to the Startup Software and select the option “Repair”
  • Now select Startup Repair to begin the process 
  • After the completion of the process, you should click on Done to finish your process. You can restart the tool if your Support Assist OS Recovery stuck issue prevails.

3. Scanning Hardware with Dell Support Assis OS Recovery

This tool also provides you with the opportunity to run a scan for your hardware. Let us see the steps that would lead you to scan your hardware with this recovery tool by Dell:

  • Start by launching the Dell Support Assist OS Recovery tool
  • Next, reach for the option “Scan Hardware”
  • Now click on “Start Scan” and this will begin the whole scanning procedure Also, it will notify you.
  • At last, click “Done”

4. Use Dell Support Assist OS Recovery for Backup

Along with all other features this tool also allows you to have your files backed up in your local drive or any external storage device. This is one such task that requires a lot of effort but this tool makes it just a matter of a few simple steps. If you want to make a backup of your files too then these following steps are what you should be following:

  • Beginning with getting to the main interface of the tool
  • Then select the option with “Back up Files”backup
  • After that click on the option “Start Backup”
  • You have to select the files that you want to backup and click on “Next”
  • Now select the storage device.
  • Finally, click on “Next” and complete the process.
Read more: 4 SIMPLE METHODS TO FIX APTIO SETUP UTILITY STUCK ON ASUS LAPTOPS

The Bottomline

If you too were unaware of this tool of Dell then this article might be enlightening for you. This introduces you to the Dell Support Assist OS Recovery tool. A development that will bring its users many features from resetting, and recovering to backing up files in just a single application. You are provided with a full guide that explains everything about the tool, its features, and how to use all those different features. This may bring answers to any of your queries related to the recovery tool by Dell and act as a torchbearer while you try to figure out how to use it.

FAQs

Q1. How do I get out of Support Assist OS recovery?

In order to get out of the SupportAssist OS Recovery stuck, you can turn your device off by pressing the power button. Then try to press the key F2 and enter the system setup. Now change the setting of it from the automatic start and press F10 to exit with the changes saved.

Q2. Is Dell Support Assist OS recovery needed?

Yes, it can be said that Dell Support Assistance OS Recovery is needed as it makes the following tasks easy to access:

  • Restart and reset 
  • Backing up your files
  • Hardware check
  • Startup Repair

Q3. What does Support Assist OS Recovery do?

SupportAssist OS Recovery allows you to repair your device, back up your files, restore to factory reset and check the hardware of your device when your computer is unable to boot the operating system.

aptio setup utility

What is Aptio Setup Utility? Is your Asus laptop Stuck in Aptio Setup Utility? We have received several reports in recent months from owners of Asus-branded PCs from around the world stating that Aptio Setup Utility rather than Windows starts up whenever the computer/ laptop turns on. 

Therefore, in this specific article, you will be provided with an ultimate guide that will surely help you find your answers to the questions. Here, we will discuss some simple methods to resolve “aptio setup utility” on your device. Don’t wait anymore and continue reading the article.Causes of Aptio Setup Utility Asus

What do you Mean by Aptio Setup Utility?

The Aptio Setup Utility is a BIOS setup utility variant but exclusively includes along with Asus desktop laptops and desktops. There is a problem that many Asus PC customers have experienced and still experience where their computer keeps heading out with Aptio Setup Utility rather than the system software. A typical reason for an Asus to do this is because it is either unable to identify an operating system that it can boot into the hard drive or SSD.

Causes of Aptio Setup Utility Asus

Well, it does not matter all that much why it arose. The crucial element is that the difficulty can be associated with Aptio, which is the name they refer to their UEFI in the United States. As a consequence, it just never stops displaying after restarting. 

Additionally, the system did not include a corrupt file that had to be removed, which is an additional cause why the system was not able to boot. Alterations to your computer’s setup may possibly be to blame for this trouble. The startup does, though, sometimes not take effect. Hence, in this situation, you can verify to determine whether your Aptio configuration tool has any faults or hardware-related difficulties. 

Hence, you need to follow the steps listed below:

  • First, select the Start menu option from the Aptio. Secondly, in order to activate CSM, click on it.
  • Then choose the Security option, look for Secure Boot Control, and disable it.
  • Upon verifying that you clicked ” yes “, you have to save and exit.
  • Start up your computer. For at least ten seconds throughout the restart, hold the F9 key.
  • Select the “Advanced starting” option. select “Advanced options,” the window recovery option now will emerge.
  • Now tap on “System Restore” and a date that occurred before the situation happened.

Methods To Fix Aptio Setup Utility

Here, we will discuss the simple methods/techniques to fix aptio setup utility BIOS. 

Method 1: Restart the Asus Devicerestart device

A number of people noted that merely restarting their computer solved the Aptio Setup Utility issues for them. Quite often the simplest remedies are the finest. This seems like a simple remedy, but a number of people indicate that this workaround was successful for them, therefore you may want to test it out. 

Simply perform a few resets on your device and examine for modifications.

Method 2: Install Windows Again

install window again
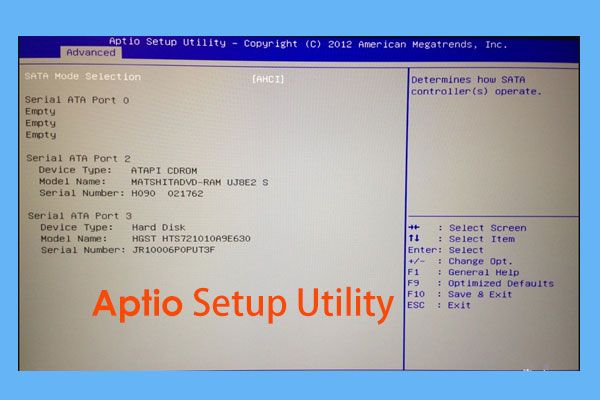
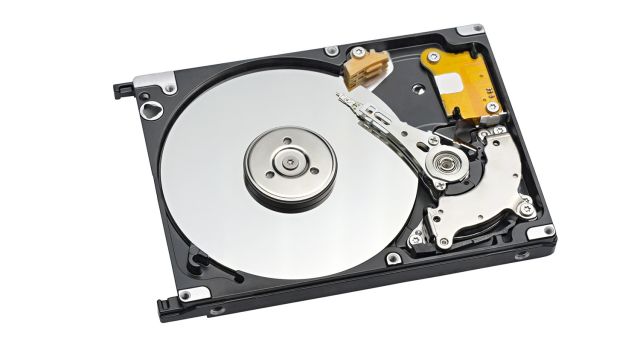
The system can be reinstalled once more if you are confident in the condition of your HDD and that it operates as it ought to. To be completely certain, you may use one of these programs to examine the integrity of your HDD.
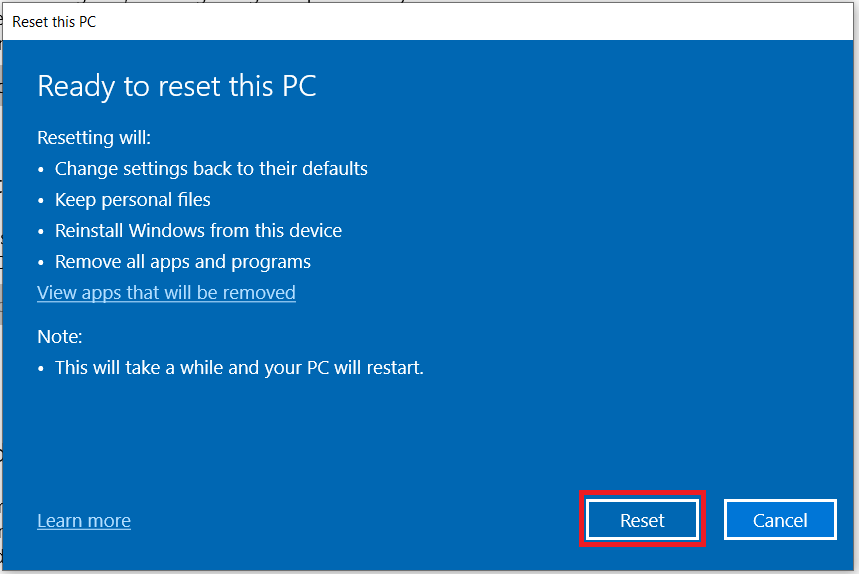
You’ll essentially have to employ a different PC to make a portable medium, USB or DVD then seek to boot from that. The majority of consumers don’t have a restoration USB, therefore if you’re amongst some of the minority that is more prudent and does have one, make sure that you test it first before proceeding with a reinstallation.

Hence, to resolve problems with the Aptio BIOS utility and reinstall your system, just use the necessary steps:

  • First, on a different PC, download the Media Creation tool. By clicking on this link, you may achieve that.
  • Connect a suitable USB flash drive or a blank DVD.
  • Launch the Media Creation Tool, then agree to the license terms.
  • Click Next after selecting your chosen architecture, language, and edition. Select the version for which you have the licensing key.
  • You have two options for moving further if the setup download is complete: burn the ISO file to a DVD or continue using a USB drive.
  • When everything is ready, restart your computer.
  • The Boot section may be found in the Aptio Utility BIOS settings. The principal boot device ought to be a DVD-ROM or USB flash disc. Restart your PC after saving modifications.

The Windows setup documents must now begin to load. Everything should work out if you just follow the directions.

Method 3: Make an HDD or SSD Accessible by the Asus PChdd sdd

Your system may be having trouble setting up the detection of SSD and HDD if the hard drive and system are connected properly however the system continually displays Aptio Setup rather than the actual OS. Perhaps this is the source of the problem if the hard disc was upgraded or modified instead of the one that came with the computer. Take the following actions to fix this error:

  • First, stop your Asus computer from starting up and wait for the Aptio Setup Utility window to emerge.
  • Now, click the Secure Boot Control menu under Security, then make sure that the Secure Boot option is switched off.
  • Now, save and quit after making any necessary changes, then restart your computer and wait for Aptio Utility settings to reload.
  • Turn off the Secure Boot and Fast Boot under the Boot tab. Be careful to turn on Compatible Support Module.
  • Last, save the adjustments, then restart your Asus laptop.

Method 4: Restore Default Settings in the BIOS

Despite being straightforward, the aforementioned methods may not be beneficial for you. Probably return the PC’s BIOS to its factory settings. Additionally, by correcting the BIOS configuration error, you may be able to resolve other problems. Hence, to reset the BIOS, perform these simple stages:reset BIOS (Fix aptio setup utility)

  • First, restart the Asus PC to bring up the Aptio Setup Utility window.
  • Then, open Settings and check the choices for Factory reset or Reset Configuration Data.
  • Now, factory reset the BIOS, then save the modification. Later, log off and restart the computer.
Read more: EASY AND QUICK STEPS TO TURNING A LAPTOP INTO A DESKTOP

Closing Lines

You now must have understood what the “Aptio Setup Utility” is and how you can fix the issue “aptio setup utility asus” if your computer gets stuck utilizing it all while running on windows 7, 8, 10, or 11. We hope it will be beneficial to you.

Also, let us know which method worked for you by leaving a comment below.

Frequently Asked Questions (FAQs)

Q1: How to fix the aptio setup utility problem?

Ans: To fix aptio setup utility problem, follow the steps below:

  • Restart the device.
  • Install Windows again.
  • Make an HDD or SSD accessible by the device.
  • Restore default settings in the BIOS.

Q2: How can I stop using the setup tool?

Ans: You can leave the BIOS setup tool by pressing the F10 key. By using the Enter key, you may save your choices and leave the Setup Confirmation dialogue box.

Q3: What do you mean by Apito Setup Utility?

Ans: American Megatrends created the BIOS configuration application known as the Aptio Setup Utility. Almost all ASUS PCs, including laptops and desktops, also include it as a standard component. A fantastic method to personalize communication across your devices is to use this software when your computer initially boots up.

How to Charge Laptop in Car

These days, everything is done online. From students, and shopkeepers to businessmen, everyone does their work on a laptop. Also, working while traveling has become very common. People attend their meetings in the car, students attend their classes in the car. You also have to make sure that the battery doesn’t run out. In such a scenario, it becomes necessary to have a good car laptop charger so that you can use it in your car. In this article, we’ll tell you how to charge a laptop in a car and the best car laptop chargers for 2024. 

Best Car Laptop Chargers 2024

Now that you know how to charge laptop in car, let’s look at some best car laptop chargers. 

1
Top Picks
Dell S2721QS

Foval 175 W Car Power Inverter

Brand: FOVAL
Total Power Outlets: 3
Input Voltage: 12Volts
5/5
Trending
2
Dell S2721QS

Bestek 300 W Power Inverter

Brand: BESTEK
Output Power: 300 Watts
Input Voltage: 12 Volts
4/5
Trending
3
Dell S2721QS

Focal 200 W Car Power Inverter

Brand: FOVAL
Total Power Outlets: 6
Wattage: 200watts
4/5
Trending
How to Charge Laptop in Car ?

How to Charge Laptop in Car

There are five easy and simple ways to charge laptop in car. Follow the given list

  1. You can use a car inverter and a regular laptop charger.
  2. You can use a Type C USB laptop charging cable. 
  3. An adapter can be used to charge a laptop in your car. 
  4. A power bank can be used to charge a laptop in a car.
  5. A car laptop charger is the easiest way out of all these. 
Read more: HOW LONG DO LAPTOPS LAST? IS THIS THE RIGHT TIME TO GET A NEW LAPTOP?

1. Foval 175 W Car Power Inverter

Car Laptop charger

Foval Inverter is one of the best car inverters. It can be used to charge mobile phones and laptops. It has a cooling fan which prevents it from getting heat. Its compact size makes it easy to carry. It can also be used while camping, traveling, or in any other emergency. It can also be used as a LED light. 

Pros
  • Multipurpose
  • Fast Charging
Cons
  • It has fewer ports

2. Bestek 300 W Power Inverter

Laptop charger

This car inverter can easily charge laptops, mobiles, and tablets. It is ultra-compact and lightweight. It has built-in 40 amps fuse to protect your device. This protects your device from overheating, under and over-voltage charging, and short-circuiting. It can be used while traveling, camping, etc. 

Pros
  • Compact size
  • Fast Charging 
Cons
  • Due to its compact size, can’t fit large adapters.

3. Focal 200 W Car Power Inverter

charger

It has 2 US standard Ac Sockets and 4 USB charging ports. it provides power up to 180 W which is best for charging cell phones, laptops, tablets, portable speakers, etc. It has multi-protection and a smart cooling fan system so it protects the device from short circuits and overheating. 

Pros
  • It has multiple sockets 
  • Multipurpose 
Cons
  • Slow charging on laptops

4. YSOLX 150 W Power Inverter

Car Laptop charger

It is lightweight and easily portable. The metal body prevents it from any damage against bumps and falls. It also has an 18-month warranty and 24 x 7 customer support. YSOLX is multipurpose and its integrated fans prevent overheating and short circuits so there are less chances of damage.  

Pros
  • 18 months warranty by brand
  • Multi-protection
Cons 
  • The cooling fan is noisy

Whether it is Safe to Charge a Laptop in a Car? 

Yes, it is completely safe to charge a laptop in a car, but only until you’re using the right cables, connectors, and inverters. If the cables, connectors, or inverters are not of good quality then it can affect your laptop and its battery. There are also chances of overheating and short-circuiting. Since you’re doing all this in the car, it can turn into a bigger danger if not used properly. 

Read more: HOW TO WIPE A HARD DRIVE FROM THE COMPUTER: SIMPLE STEPS

Final Say

In this article, we told you about how to charge a laptop in a car and the best car chargers available in the market. A car laptop charger is definitely going to make your life easy. Also, you can buy car laptop chargers from shops or e-commerce websites like Amazon. 

FAQs: Frequently Asked Questions

Q1- Can I charge my laptop through the USB?

Yes, you can charge your laptop through USB. But, for that, your laptop must have a built-in USB-C port and it allows charging through that cable. Some laptops use USB-C cables as their primary chargers.

Q2- How do I plug my laptop into my car?

If you want to charge your computer in the car, first you need to turn on the car’s engine. Plug the car charger into your car’s charging port. Plug the USB-C cable into your laptops USB-C port or charging port if compatible. 

Q3- Will charging laptop in car drain battery?

It is possible. If the car is on and is in motion then the laptop battery will charge only. But if the car is not moving then the laptop battery will drain. It is also important to use the original cables to make sure that the laptop’s battery doesn’t drain. 

Q4- How to charge laptop in car?

There are several ways to charge a laptop in a car. You can use a car inverter or a Type C USB laptop charging cable. A power bank or a car laptop charger can also be used to charge a laptop in the car. 

Q5- Can I charge my Macbook Pro in a car?

Yes, a Macbook pro can be charged in a car. The Macbook Pro original charger comes with a USB-C cable so if you’re using a car inverter then you won’t even have to buy the cable. If you’re using a car laptop charger, then also you can buy a charger with a USB-C type cable. 

Types of Hard Drives

Are you planning to buy a hard drive but you’re confused about which one you should get? We’ll help you solve this. In this article, we will discuss different types of hard drives and which one you should get for your device. 

Hard drives are one of the most important parts of a laptop or a computer. It helps in storing all the important data. If one hard drive is full, you can get another hard drive to store data. You can store data like images, documents, videos, software applications, etc. on a hard drive. 

What is a Hard Drive?

Hard Drive (Types of hard drives)

A hard drive is a primary data storage device. It is mainly used for storing data and retrieving data whenever the user wants to see it. The other computer hardware becomes outdated after some time but hard drives are not one of them. We can store or retrieve data from even old hard drives if they’re in working condition. 

There are 4 main hard drive types

  • Parallel ATA (PATA)
  • Serial ATA (SATA)
  • Small Computer System Interface (SCSI)
  • Solid State Drive (SSD)

Types of Hard Drives

Now that you have understood what hard drives are, let’s see the types of hard drives.

  • Parallel ATA (PATA)

Serial ATA

Parallel ATA is one of the most famous types of hard drives. PATA drives are called EIDE (Enhanced Integrated Drive Electronics) & Integrated Drive Electronics (IDE). It was the first hard drive that used the PATA interface and was developed by Western Digital in 1986.  

PATA hard drives provide a data transfer speed of up to 133 MB/second. PATAs are not in use now. It might be impossible now to find these hard drives in computer stores not. 

  • Serial ATA (SATA)

Serial ATA

Serial ATA is also one of the types of hard drives being used today. It is one of the best hard drives for PCs. SATA supports almost all kinds of motherboards and operating systems. It comes in two sizes- 3.5 inches and 2.7 inches. The bigger one is used for PCs while the smaller one is used for laptops. 

Though it is one of the best types of hard drives for laptops and PCs, the main problem is its mechanical failure. These drives provide the best speed and good storage but their mechanical failure is its biggest drawback. 

  • Small Computer System Interface (SCSI)

Small Computer System Interface

It is also one of the types of hard drives. You can connect 7-15 SCSI to a single motherboard. Small Computer System Interface HDDs are also considered outdated these days and can rarely be found in any new devices. 

  • Solid State Drives (SSD)

Solid State Drives (SSD)

Solid-state Drives are the most used type of hard drive these days. Rather than being a big box-like structure, these drives are in the form of small chips. These drives don’t have rotating parts or disks. SSDs store data in the semiconductor chip. It doesn’t face any such mechanical failures as SATA hard drives but is much more expensive. 

Which Hard Drive is Best for You?

Which Drive is Best

Now you know all about the types of hard drives, let’s find out, which can be the best hard drive for you. Before choosing any hard drives, consider the following factors and then make any final decision.

  • Storage Space

Storage space should be the most important thing when buying a hard disk. If you want to buy a large storage space hard drive with less money then you can buy SATA. But, if you’re ready to spend more money then you can buy an SSD which will have comparatively fewer chances of mechanical failure and will provide good speed as well. 

  • Hybrid Option

These days, most professionals and industries go for the hybrid option. This allows them to use the best features of HDDs and SSDs. Here, the HDD can store data like images, documents, and videos, meanwhile, SDD can store the operating system. 

  • Performance

If the slow operating speed of laptops and PCs frustrates you then SSDs would be the best option for you. The only problem with SDDs is their cost. Otherwise, these are best because it provides a good speed and is less prone to damage and failures. 

Read more: HOW TO CHARGE LAPTOP IN CAR: BEST CAR CHARGERS FOR LAPTOP

Final Say

In this article, you got to know all about hard drives and types of hard drives. Now before investing in a hard drive, note down the factors that are most important to you. Look for the hard drives that have all those features and then make the final purchase. 

FAQs- Frequently Asked Questions

Q1- What does a hard disk drive do?

A hard disk drive stores data. You can store your images, videos, and documents on hard drives. Also, you can use it to store software programs or operating system files required to run the laptop or computer. 

Q2- What does an internal hard drive do?

An internal hard drive is one that comes with a computer or laptop. The internal hard drive stores the computer and stores all the files and data. It is present inside the laptop or computer. It is the primary storage device of a computer. Moreover, it has all the pre-installed software applications, the operating system, and other files.

LONG DO LAPTOPS LAST

If you’re wondering, how long do laptops last? You’re at the right place. Here we’ll tell you all about the lives of laptops, and whether it’s the right time to change your laptop or not. We’ll also cover gaming laptops and the battery lives of laptops.

The advancement of technology is marvelous, how some years ago, people used to work on massive computers and now we’re using small foldable and easy-to-carry devices which perform better functions than a computer. Today we will resolve all your questions including “how long should a laptop last” and more. 

How Long Do Laptops Last?

How long do laptops last

The life of your laptop depends on two things

  • Hardware
  •  Use 

If your laptop has good quality hardware like motherboard, RAM, battery, CPU, etc then it will obviously last longer. But, good hardware comes with a good price. The more expensive your laptop is, the more it will last. The life of a laptop can be predicted according to its price in the following way-

  • If the price of the laptop is between $600-$700, it will last for some 2-4 years.
  • A laptop of a price between $700-$1000 will last for some 3-5 years.
  • If the laptop’s price is more than $1000, it will last for some 4-7 years.

Every day, some new hardware or software is launched in the market. The new software is made to make them compatible with new hardware. This is where the old laptops lose the battle. If you try to use new software on your old laptop then there are chances that it will decrease the life of your laptop. 

If you use the laptop for general purposes like watching videos, using it for official purposes, listening to music, etc then your laptop will last longer than usual. But, if you use the laptop for running big programs like editing videos, etc. then the life of a laptop will automatically decrease. 

Your laptop’s quality also depends on how often you properly clean it. You should get your laptop cleaned by professionals for its better working and longevity.

How Long Does a Gaming Laptop Last?

How long do gaming laptops last

Gaming laptops are known for their high-quality graphics, good processors, hardware, and speed. They can easily run big games which general laptops cannot. Though gaming laptops are more expensive than general laptops, you shouldn’t expect a longer life out of them. 

You can increase the life of a gaming laptop if you use slower FPS and resolutions. Playing complex games with high graphics on a mid-range laptop will obviously decrease the life of your gaming laptop. The life of a gaming laptop can be predicted according to its price in the following way-

  • If the price of the laptop is between $600-$700, it will last for some 2-3 years.
  • A laptop of a price between $700-$1500 will last for some 3-4 years.
  • If the laptop’s price is more than $1500, it will last for 4-6 years.

How Long Does a Laptop Battery Last?

How Long Does a Laptop Battery Last

If you’re wondering, how long should laptop battery last? Well, it depends on many factors, how often you use your laptop; if you’re using the original charger or not, and whether you’re removing the charger once your laptop is fully charged or not. 

Though a normal laptop might last for 3-4 years, the battery will last for only 2-3 years. In general, when the laptop is new, a quality battery lasts for some 7-8 hours but with time it decreases and becomes 2-3 hours by the end of 2 years. 

Signs That it’s Time to Change Your Laptop 

Signs That it’s Time to Change Your Laptop 

Now that you know how long do laptops last, let’s see if it’s time to change your laptop. If your laptop has any 2-3 of the following signs then you should change your laptop. 

  • Everything gets slow. 
  • Compatibility issues with the new software.
  • The laptop keeps crashing.
  • The battery is completely dead. You cannot use your laptop without a charger plug-in for constant charging.
  • The laptop fans have become noisy.
  • You cannot run multiple tasks anymore.
  • The display quality has decreased. 
  • You cannot install new programs. 

How to Make Your Laptop Last Longer?


How to Make Your Laptop Last Longer

After knowing ”how long does a laptop last”, it is time to make it last longer. If you recently got a new laptop or you’re planning to buy a new laptop then you got a chance. You can increase the life of your laptop by following the given tips.

  • Remove the charging cable when your laptop is completely charged.
  • Get your laptop cleaned by professionals.
  • Save your laptop from overheating. If your laptop is heated more than usual then make sure that you immediately shut down your laptop and don’t use it until it comes back to a normal temperature.
  • Upgrade your laptop whenever any new update comes to keep it optimized. 
  • Make sure that you have some good antivirus on your laptop to save it from viruses and malware. 
  • Keep it away from food.
Read more: HOW TO UNFREEZE A LAPTOP MOUSE: LATEST AND EASY GUIDE

Final Words

I am certain You now know how long do laptops last. These days, laptops play a very important life in a person’s life, be that a student, a shopkeeper, or an office-going person. It’s important to invest in a good laptop and take good care of it. Make sure that you follow all the given tips so that your laptop can work properly for a longer time than usual. 

FAQs- Frequently Asked Questions

Q1- How often should you get a new laptop?

It totally depends on the money you’re spending on the laptop and the functions you perform on it. If you take proper care of your laptop then your laptop will work properly for 4-5 years. You can get a new laptop every 4-5 years.

Q2- New laptop what to do?

If you got a new laptop then first things first, install a good antivirus in it so that it is safe from viruses and malware. Make sure that you don’t overburden it, it will degrade the functioning of your laptop. Clean your laptop from time to time and keep it updated. 

Q3- How long do laptops last generally?

The laptops usually last for 4-5 years. But, it also depends on how good your laptop is and what functions you perform on it. If you get a cheap laptop and perform high-end functions on it then it won’t even last for two years.

SIMPLE STEPS TO MAKE YOUR LAPTOP FASTER

The world we live in moves with the highest speed of modernization and along with the world, we need to catch up with this fast-forward speed. As all our work is mostly confined to our devices such as laptops. Now, these devices are a very large part of every activity we do, be it work, education, recreation, and many more. After a while devices such as laptops become a bit slow, that might be because of technical and maintenance issues. Many times when you might be stuck with the slow working of your laptop making your life full of hassle and you also get this question in your head, “How to make my laptop faster? “Get yourself relaxed because here we have all the best steps for making laptop faster.

Check for the following things whenever you are asking yourself ” How to make laptop faster? “

  • Remove Virus
  • Get rid of unwanted files
  • Increase storage by upgrading your hardware. 
  • Run an update
  • Remove temporary files and animation
  • Restrict on-going program startup 
  • Modify Power options

How to Make Laptop Faster? (Best Ways)

1. Remove Virus

How to Make Laptop Faster? - Fix 1: Remove Virus

Whenever thinking about how to make my laptop faster, the first thing that is a must is getting rid of all the viruses from your device. The virus is one of the leading reasons that might cause your laptop to run slower and cause other hurdles. Removing such harmful viruses should be the first step in making laptops faster. For this purpose, you can run the antivirus on your device or check for spam and junk and then clear them. 

2. Get Rid of Unwanted Files

There are many files, games, and applications that take up a lot of space in your device but are of no great use but they contribute to making your laptop slow in speed. If you are also into making a laptop faster then you should get rid of such unwanted and unused files from your device. For this you need to follow the given steps:

  • Go to the Control Panel on your laptop
  • Click on Uninstall program
  • Now select all the programs that are unnecessary. 
  • Hence delete them permanently for a faster running device. 

3. Increase Storage by Updating your Hardware 

One of the major reasons for your laptop not being able to function in a fast way could be the lack of space. This lack of space disables smooth running as well as makes it very hard for the laptop to run heavy applications. In order to make your laptop faster, you need to increase the storage and for that, you can update your hardware. For that you can use two ways:

  • Increase your RAM or Add an SSD

RAM is one of the components solely responsible for the functioning of the device. If your laptop is lacking space in its RAM then it may not function in a fast way. 

When talking about SSD, it can help you to manage heavier applications and it would enable you to access them with the best experience that too in the fastest way possible. 

4. Run an Update 

Updating is a very necessary part of the working of a device and you should always keep your device updated. Whether it be its applications, Windows, or the system, for a fast-running laptop you need to have it all updated. After answering your question of how to make laptop faster, another question arises which says, how to run an update then you have your answer here. Here are quick easy steps to run an update of your window :

  • Go to the “Start” button
  • Now click on “Settings”
  • Further, go on the” Updates and Security”
  • Reach out for the “Update Windows ” option. 

Update Windows

This will enable you to run an update of your windows and will hence improve the general performance of your laptop.  This is one of the best ways to improve laptop performance.

5. Remove Temporary Files and Animations

If you want your device to run in a smooth way and with a fast speed then you need to free your device from the temporary videos and other files that collect up making your storage low and causing you problems in having a fast experience. Check your storage and delete all those unwanted files, that might be images, videos etc. After deleting them make sure you go and clear your recycle bin. 

6. Restrict Ongoing Program Setup

There are a lot of programs running on your system in the background which will surely slow down the functioning of your laptop. Such programs go on and run automatically causing a lot of negative effects on the performance of your device. In order  to shut all of these programs follow the given steps:

  • Give a right-click on your “Taskbar”
  • Select “Task Manager”

taskbar

  • Now click on the start-up, this will enable you to see whatever programs are running in the background. 
  • Remove the ones you think are not essential to run in the background. 

After removing some of these you will notice the changes in the speed of your device.

7. Modify Power Options

Our devices come with a default power setting. These settings are set to balance by default, in order to run the device’s battery longer. However, this can be a cause of the slow running of the device. If you want to make your laptop run faster you need to change these settings from balanced to higher performance. But before enabling such a setting, you need to know that this will have effects on your battery. If you are fine with that issue you can use this way to make your laptop faster. 

Read more: HOW TO CHARGE LAPTOP IN CAR: BEST CAR CHARGERS FOR LAPTOP

Conclusion

We have very accurately made this article on the steps and methods to make your laptop faster. There’s always a time when your laptop needs a quick refreshment to work smoothly. And if you ever get stuck with the question, “how to make a laptop faster” then these methods mentioned above are all for your aid that are surely the best ways to make a laptop faster. These will let you solve all your hurdles in a fast-running device and make your experience hassle-free. 

Frequently Asked Questions 

1. How to make an older laptop run faster? 

Do you have an older laptop lying around your house? No one uses it as it runs very slowly. Now get your old laptop to run faster by following the given steps:

  • Get it all cleaned by removing everything from the laptop for a fresh start. 
  • Now give it a full update
  • Have a good antivirus installed
  • Make sure not to run heavy-duty applications
  • Keep your device cleaned as much as possible by frequent scans. 
  • Update your storage and hard drive. 
how to unfreeze a laptop mouse

How to unfreeze a laptop mouse? A frozen laptop mouse besides interfering with work can also cause the computer to hang. The built-in touchpad mouse included in the majority of laptops allows you to move the pointer all around the screen by stroking your finger across the surface. Hence, this may occur due to the following reasons written below:

  • The operating system on our laptop can be frozen.
  • There might be hardware issues with your laptop.
  • Your laptop’s touchpad settings may have been turned off.
  • Drivers on your laptop might be damaged or out of the current.
  • Corrupted software or data on your laptop.
  • Dust & dirt on your touchpad.

Therefore, before sending your laptop to a computer repair expert or any other computer service center, you just need to try our simple methods. Hence, in this article, we have provided you with the simplest solutions for unfreezing the mouse in your home itself.  So, without making any delay, let’s get started. 

unfreeze a laptop mouse

How to Unfreeze A Mouse On A Laptop?

As you are worried about “ my cursor is stuck” or “how to unfreeze a laptop mouse”, we are here ready with a few solutions, to help you out get rid of this frustrating issue on your laptop, which is leading to delays in your work. 

Method 1: Reboot the Laptop

Before jumping to any other method, rebooting your laptop is the first and easy method if you really want to know and fix “how to unfreeze a laptop”. You may fix any incorrect software or driver issues that were impacting your mouse by restarting your laptop. To apply this method to solve the issue, follow the steps below: 

Reboot the Laptop

  • Hold Alt + F4 to open the Shut Down Windows panel.
  • Select Restart and you are all set to fix your problem.

If your mouse still freezes after restarting your laptop, you can boot into safe mode because there could be a problem with the driver or the application. Also, uninstall any recently installed applications and restart the laptop.

Method 2: Disable the Touchpad Driver

Secondly, removing the touchpad driver is also considered as one of the effective methods to resolve freezing of a mouse on the laptop. Hence, to apply this effective method and get the problem resolved, you just need to follow the steps below:  

  • Firstly, to use Windows, hold down the key. Between the Function and Alt keys lies the Windows key.
  • Secondly, type “Mouse Setting” into the search box and then hit the “Enter” button on the keyboard. 
  • Now, if your mouse is not working, you can use the tab key to access a “Additional mouse option” on the right side.
  • Next, press ‘Ctrl + Shift + Tab’ to open the ‘Hardware’ tab.
  • Now, use the arrows key to highlight your touchpad and then press the enter button. After pressing enter, click on “Properties.”
  • Use “Ctrl+Shift+Tab” to open the “Drives” tab.
  • Next, use ‘Tab’ to scroll down to ‘Uninstall Device.’ Then hit ‘Enter,’ if it is a choice for you.
  • Lastly, use the shortcut keys to restart your laptop.

Method 3: Remove/ Disable the Touchpad Software

Removing the Touchpad Software is another effective method to resolve “how to unfreeze a laptop mouse”. Apply this method, and follow the below-mentioned steps properly:  

Disable the Touchpad Software

  • Firstly, to open Windows Task Manager, simultaneously press “Ctrl,” “Alt,” and “Delete.”
  • Secondly, once the touchpad software has been identified, use the down arrow on your keyboard. Make a note of the touchpad application’s name. To stop the action, use the “E” key.
  • Now, open the File menu by holding down the “Alt” key and pressing “F.” Tap “N” to continue.
  • Next, press the “Enter” key after typing the whole name of the touchpad program.
  • Lastly, check the mouse to check whether it is operating properly once again.

Method 4: Update the Touchpad Key

To update the “Touchpad Key” is another most effective method to resolve “how to unfreeze a laptop mouse”. The touchpad key might need to be updated, hence for not updating your touchpad key,  you might be facing the problem on your laptop. To try this method, just follow the steps mentioned below: 

  • Firstly, hold the Windows key while pressing it. The Windows key is located between the Function and Alt keys.
  • Secondly, type “Mouse Setting” into the search box and hit the “Enter” button.
  • After that, if your mouse isn’t working , you can just use the tab key to get the “Additional mouse option” on the right side.

Update TouchPad

  • Next, press “Ctrl + Shift + Tab” on the keyboard to open the “Hardware” tab.
  • Then, use the arrows key to draw attention to your touchpad.
  • Next, press “Enter” after clicking on the “Properties.”
  • Now, use the keyboard shortcut “Ctrl+Shift+Tab” to open the “Drivers” tab.

Hence, restarting your laptop completes the process.

Method 5: Analyze Your Settings

Here’s another effective method for you. You can be perspiring if the cursor/ mouse on your laptop continues to be frozen. But you’ll stick with it. Therefore, now it is time to analyze the settings on your laptop to determine whether the trackpad has been deactivated. To apply this formula, just dig into the steps mentioned below:

  • First, select “Start” from the menu and go to Mouse Settings.
  • Secondly, from the selection, just choose “Touchpad.” (Based on the maker of your laptop, it could say “Device settings,” “ELAN,” or “Synaptics.”). It generally is the last tab, regardless of what it says. Hence, to make certain that this tab is active on your laptop, click on it.
Read more: BEST WAYS TO INCREASE SPEED OF YOUR COMPUTER [TRICKS GUIDE]

Closing Lines 

In this article, we have covered all the information you need to know about “how to unfreeze a laptop mouse”. Hence, we hope you have got your answer for “how to unfreeze a laptop”. This specific article, with the simplest methods, will definitely help you to fix the particular issue you have been experiencing. 

If you are still experiencing issues on this, please reach out to our team for assistance. We are happy to help you troubleshoot & fix this error. Have you been able to resolve the problem on your own using one of our methods? Let us know in the comments below.

Frequently Asked Questions (FAQs)

Q1: Why is my cursor stuck in the corner? 

Ans: It may be really aggravating to have your mouse/cursor stuck in a corner, especially if it happens frequently. It can interfere with all of your computer-related tasks, despite the fact that it may not appear like a huge issue and is typically relatively simple to remedy. This issue on your device may be caused because of – the battery, surface, USB port problem, problematic wireless connection, Windows trackpad, and if the mouse is not enabled in the windows.

Q2: How to unfreeze a Microsoft Laptop?

Ans: Here are some things you may attempt to fix for your Microsoft laptop if it won’t turn on, keeps turning on and off, or starts but stays on a screen that is either black, has a logo, or has a different screen. Follow as mentioned below:

  • Use the keyboard shortcuts (Ctrl+Shift+Win+B) or tablet shortcuts to wake it up.
  • Next, by holding down the power button for 20 seconds, you may force a restart.
Easy and Quick Steps to Turn Laptop into Desktop

Are you in a situation where you need a desktop but all you got is your laptop? What to do when landed in such a situation? Just turn your laptop into a desktop and get your problem solved. Now the thing is, how can you turn a laptop into a desktop? With adding some elements, you can easily do this whole process of turning a laptop into a desktop all by yourself. Here we are providing you with a proper step-by-step guide for converting laptop to desktop.

Easy Steps For Turning a Laptop Into a Desktop

For this, you need to make changes with the following parts either by adding them or modifying them. Follow the given steps for turning a laptop into a desktop:

  1. Bring in the Monitor
  2. Change and modify Ports
  3. Adding Keyboard and Mouse 
  4. Peripheral and Setup

Now, let’s understand each step in detail below.

Bring in the Monitor

Bring in the Monitor

The first and foremost change that needs to be done while turning a laptop into a desktop is bringing the monitor into the picture. One of the major reasons to turn the laptop into a desktop might be the display. Having a monitor for the display is more convenient mostly. So to begin this process of converting a laptop into a desktop begins with the display itself which is a monitor. Thus, the monitor being one of the major elements that make both laptop and desktop different is necessary for this conversion.

The process is simple, you need to get a monitor with a decent display and it won’t even cost you much. After you have a monitor, connect it with your laptop and it will now access the external display. For enabling this access, just go through the following steps:

  • Go to Settings
  • Then click on display
  • Click on External display and allow for multiple displays. 

Change and Modify Ports

Change and Modify Ports - Guide for Turning A laptop Into A Desktop

The next step in the process of turning a laptop into a desktop would be identifying the types of ports in your laptop and monitor. You have to connect them so that ports need some changes. If you have similar ports then there is no big issue but if not then you might need an adaptor to connect and let your laptop convert to a desktop.

Although one might originally go for a monitor that might have similar ports as their laptop so that it is easy to connect. But if you find any different ports then you might get your hands on an adaptor and you will be all sorted with turning a laptop into a desktop

There are the following common ports that you would find :

  • HDMI
  • DVI-D
  • VGA
  • USB

The HDMI port is present in many laptops but some of them just have a USB type C port. In such a situation you need to get a USB type C port to HDMI converter. You can also go for a USB C hub that has multiple conversation ports like HDMI ports, USB type A ports, and audio ports. Now getting something multipurpose can help you to fix a lot of issues all at once so get these additions and finally turn laptop into desktop. 

Adding Keyboard and Mouse 

Adding Keyboard and Mouse 

What makes a desktop different from a laptop is these additional parts which are differently present in both devices. So for further turn a laptop into a desktop, you need to add a keyboard, a mouse, and speakers if you require. For this process, all you need is these external parts. You can easily get these in the market and even at the best prices that won’t be heavy on the pocket. Now once you have all these things, try to connect them through their attachments with the USB port present and if you don’t have enough ports then you might get an additional adaptive port for that purpose.

Peripheral and Setup

After you are done with all the above steps, you now have to check if you have connected all the wiring and ports to the correct place. After you are done setting up the external setup, you now need to go to the settings and allow your system to give access to the additional display that is to the monitor. Along with that, you need to also have access provided to the mouse and keyboard for a smooth experience. After doing all these things, you are all done with converting a laptop into a desktop just with a few easy steps. 

Read more: BEST WAYS TO INCREASE SPEED OF YOUR COMPUTER [TRICKS GUIDE]

Conclusion

Thinking about converting a laptop into a desktop to make your working experience a little healthy for your body or want to utilize your old laptop and desktop for your kids to work on then here is a guide for you. You will get everything you need to do in order to turn the laptop into a desktop. Go thoroughly with the article and find your map to reach a converted laptop into a desktop.

Frequently Asked Questions

1. How to turn your laptop into a desktop? 

Need to change your laptop into a desktop, follow up the given steps to do that in the easiest way around:

  • Firstly get yourself a monitor, a keyboard and a mouse. These are the main requirements you need to turn the laptop into a desktop. 
  • After you have these parts with you, attach them through the ports. If you do not see enough ports you can always go for an adapter that has access to multiple ports. 
  • Now go to the settings of your device and allow its external display and other permissions required for the keyboard and mouse operation. 

And here you are all done with the conversion of your laptop into a desktop. 

2. How to make a laptop into a desktop?

Turning your laptop into a desktop may sound like a very tricky job but it can be done with a few simple steps. You just need to add on a few additional parts the keyboard mouse and monitor. In order to install these devices, you need to modify the available ports either by adopters Or by adding additional ports. After doing all these steps just allow the settings from your device and you are all done with turning your laptop into a desktop. 

Computer Beeping

Every tech-savvy person can confirm that technology is not an easy task to handle by everyone. You may say you know how to operate the system, but can you guarantee that if somehow a minor issue occurs, let’s say you witness a computer beeping while Starting or Operating your system? Can you resolve the error? The answer is most probably no! Because it is a hardware error and only a technician can fix it. 

On that note, we are here to guide you with some points where you can repair the issue without any technician. But that doesn’t mean there is never a need for a professional. Let’s find the support. 

What is Computer Beeping?

Let’s understand it from the beginning. You have a computer and use it for personal and professional goals. There is no requirement for any system brand name and OS version here. The issues occur in every brand. Like your goals, the computer also marks its goal with a Power-on Self Test (POST) when you start your computer to check whether it is fine starting or not. 

If everything is OK, then you can see your desktop screen immediately, notwithstanding noticing the computer beeps on startup because of an error inside the system. What usually happens is! If any issue comes while booting, then you may find an error code on the screen. Contrary, you may hear the sound. (Beep Codes) The crux is when it can not display any clear screen error, it gives sound or beep or startup tones. 

Computer Beeping

Meanwhile, consider some common causes, like hardware or motherboard issues that gave this error before you or in your system. Although the technician is responsible for this repair; nonetheless you can do some of them. Like the keyboard is not stable or not connected, you can fix it on your own. 

BIOS/Basic Input-Output System– A program or inbuilt software used by the computer processor to start any computer after Powering On completes the POST & indicates the issue with the beep code in the sound mode. The data flow management among OS & attached devices, like video adapter, mouse, keyboard, printer, and hard disk, is possible via BIOS. To your knowledge, the Basic input output system “First-software,” the computer runs while it starts. 

Identification of Computer Beeping

The laptop is beeping, and the PC, a single time, indicates that it is getting started or the system boot function is there. On the other hand, repetitive sound demands priority repair of serious POST found errors. You don’t have to take it for granted. 

The seriousness depends on the volume or repetition. Maybe one beep is long & the other two are short/One is long, and the other-3 are short. A quick and slow succession of every beep considers an independent issue and another division of malfunctioning. 

Identification of beep sound in computer

Before troubleshooting the error, one must understand that beep codes are crucial to controlling these computer beeps, which are the outcomes of various BIOS. The most important note is that BIOS contains different beep codes, although they are from indistinguishable manufacturers. 

It happens because of the planned reflection of motherboard manufacturers’ independent customization via reprogramming codes. You may visit their official web address to get the updated codes with few exceptions. 

Computer Beeps Codes from Several BIOS Brands

As you have now understood that it is because of your motherboard and various other causes, then you should consider some error names that affect and program the sound codes. Find the names.

  • Award BIOS/AMI (American Megatrends)/AST BIOS/Compaq/Phoenix/IBM Desktop/IBM ThinkPad/Mylex/Quadtel BIOS

However, this article will only represent the Award BIOS and its fixes. 

What is Award BIOS?

What is Award BIOS?

It is among the types of BIOS of Award Software Inc in the ownership of Phoenix Technologies (1998). Award is popular and practically adopted by various celebrated motherboard manufacturers. Most of the time, it shows screen errors (in the ownership of Phoenix Technologies).

A certain highlight is that you may see one long and two short beeps when using an award BIOS is an indication of what the issue; is for video error. Furthermore, it can not trigger any video screen displaying “Additional Information.” Others are for RAM issues. 

Contrary, the Beep codes of other manufacturers are like:

  • One long and two short beeps mean there is a video adapter error/Bad-improperly “Seated Video Card.”
  • Repeating beeps mean there is improperly seated RAM or Memory Error. 
  • One long and three short indicate bad video RAM/Video card absence. 
  • High-frequency beeps monitor the overheated CPU or suggest checking the fans. 
  • Repetitive high or low beeps say improperly seated/defective CPU.

How to Fix Computer Beeps on Startup?

After considering all the facts & the causes, you can quickly switch to the fixes. Some fundamental points are here for your reference. 

How to Fix Computer Beeps on Startup

Solution 1. Restart the Computer

Restarting a computer is always a possible solution for any computer error. Here also! You can manage this task by turning it off and restarting it to resolve the laptop is beeping issue. 

Solution 2. Listen to it, Not Hear It

Award BIOS description indicates that you must figure out what beep code is there so that the particular manufacturer tutorial can resolve the issue. That is possible when you listen to note it, not hear to find the solution. If you face confusion, it is better to repeat the restarting solution to get the exact idea of the problem or code. 

Solution 3. Note the Volume and Frequency of the Beeps

For a further solution, try to understand the volume and frequency of the sound. The Beep’s speed, repetition, high or low volume, party low-partly high, and very high/very low are the points one must note. 

Solution 4. Find the Manufacturer Details

After gathering all the information related to the issue, you must look for the manufacturer’s name and other details. Because the motherboard runs all your computer applications and it should be of the brand of industry, this beep information can be so;ved by visiting the manufacturer or its official website to find the exact tutorial for the beep code and issue computer beeps on startup. 

More Resolutions for the Operators Before or After the Motherboard Manufacturers’ Tutorial (Computer Beeping)

Computer Beeping

Step 1. Examine the RAM

The beep code description also includes a RAM issue. At such a time, you must notice whether the RAM is fine or not. You can figure it out by following a tutorial.

Step 2. Video Card Replacement 

For instance, if the video screen error msg appears then it is due to a video card error, completely replace it and add a new one over there. 

Step 3. Personal Computer, Hard Disk Drive and its Replacement

Nowadays, most operators go out with their laptops and PCs using them on the go, and later complain that the laptop is beeping. This may disturb the wiring of the system or the device. To resolve the concern, you should examine PC to HDD connections. PC cleaning, RAM repairing or replacement, CPU fan check, GPU/PCI cards, and more. Moreover, replace the hard disk drive if there is a fault. 

The Final Note

Our article is a complete package solution for the question of why is my computer beeping continuously. If you have faced this issue in the past and forgot some steps or solutions, then this guide will be helpful in the speedy recovery of your system. On the other hand, if you are new to error or not Tech-savvy, then- it can be a bit tough task for you. Still, we are sure that the solutions are in the easiest way possible. You don’t have to drill your heads out to understand and apply them.

Read more: WHY DOES MY COMPUTER KEEP FREEZING?: ALL ROUND SOLUTIONS

Frequently Asked Questions

Q.1 Why is My Computer Making Noises?

Your computer makes noises when it faces any critical inside errors. When you start the PC, the POST indicates that either the RAM, Hard Disk, hard disk drivers, motherboard, or CPU fans are faulty and are not able to process the system. It is making noises because the video screen can not display the error message, and the motherboard programming uses sounds to pass the information to the operator.

Q.2 Why is My Computer Beeping Continuously?

The continuous beeping of the system is dangerous for the safe environment of the computer booting. BIOS indicates that any hard drive is faulty and not supporting running the computer. You must note the BIOS code and visit the motherboard manufacturer’s website to find the tutorial. Meanwhile, you should check the CPU fans and act accordingly. 

Q.3 Why is My PC Beeping?

If that’s the case, you should check the PC heating, remove the dust, let the PC cool down, check the keyboard connection, random access memory faultiness and its replacement, hard drive failure, motherboard problem, & other related things. 

Why Does My Computer Keep Freezing

Your computer is an inseparable part of your lifestyle. Not just you, nobody can deny its presence in personal or professional life. But what if someday you got a situation: Why does my computer keep freezing? We (Can) feel the frustration. Now, leaving this frustration behind should analyze the causes. Of course, you will reboot or restart the window as a general trend with the technical issues. But maybe, at some point, you are wrong. 

Now, Let us understand the cause of your trouble to resolve it better. read on to learn more. 

Causes: Why Does my Computer Keep Freezing? 

At that moment in time, when you are countering it, these causes may be present or not, depending on the condition of your Windows and usage system. However, random freezing doesn’t need firm consideration. Find the causes:

Why Does My Computer Keep Freezing

  • Overheating

It is because of the long-run usage of your system. Overheating can also come under the category of computer freezes randomly because that doesn’t possibly happen every day with some exceptions, especially for personal usage. Due to high temperatures, the PC performance will slow down automatically and finally complete freezing. Furthermore, it can damage your system components. 

  • Viruses or Malware

Viruses or malware are one of the various causes of any freezing issue of your operating system. They heavily corrupt your computer and result in screen freezing issues.

  • Faulty Software

The software makes your task successful, yet in most cases, they are the legitimate cause of creating issues in the computer. They sometimes run programs that are not compatible with the operating system. The running of a group of resources and bugs in the program follows the trouble. It is better to uninstall them or troubleshoot them to avoid any kind of future errors. 

  • Faulty Hardware

It seems a little bit unacceptable for hardware sometimes because of the complicated performance of the software in the system. Yes, that’s possible with some external devices, like mouse and USB drives. In this case, check the wired mouse or wireless mouse battery. 

  • Multiple Tasks

The trend is quite normal nowadays. Be it for personal or professional charges. We try to complete several tasks altogether. On that note, running multiple programs results in a frozen computer. If your system holds enough memory or power, chances are less for this cause. Any other reason certainly will affect your productivity and time with your PC. 

computer freezes randomly - Fix the Problem

  • Insufficient RAM

If the computer keeps freezing, chances are high with “Not Enough RAM.” As a consequence, the system will stop responding, and performance will be down. 

  • Outdated Drivers

Bad drivers don’t let you perform efficiently on your system, and the computer freezes randomly. The outdated and corrupted drivers will hinder required communication between hardware and computer applications. Update the driver immediately.

How to Unfreeze a Computer?

Like the causes, solutions are several. The classical and straightforward option is always “Restart or Rebooting.” Before using this method, understand the requirement properly.

  • Restart & Reboot

Automatic rebooting is possible in case of a blue error on the window screen. Furthermore, use the safest method if the computer freezes but leaves the option to pursue ‘Start Menu.” Come to the task manager screen by pressing “CTRL+ALT+DEL” to reboot. Choose a hard reboot by pressing the power button continuously if the condition still exists. In the third run, find another solution.

  • Use Canned Air to Avoid Overheating

Completely shut down your PC to clean the dust from the fan of the CPU or processor. You can use canned air to resolve the issue. 

Not enough RAM (Troubleshoot)

  • Troubleshoot the RAM

Failing your RAM can be an issue to be troubleshot by running some tests on it. 

Go to the “Start Menu” to search “Windows Memory Diagnostic” to find the tools to reboot and test the RAM. 

  • Reinstall the drivers with the latest versions of applications 

Better try a specific method to testify and recover your drives. If you ask why my computer keeps freezing, that’s the cause of outdated and corrupted drives. Install the current time version. It will resolve the issues that occurred in the last installations. 

Detect the Malware

  • Detect the Malware

Viruses and malware are detectable with several free-of-cost sources on the internet, like Malwarebytes. (in the frequent use of PC users) Use them to configure the status of your operating system. 

  • Scan Hardware faults

Hardware faults are resolvable, especially for USB. Scan the files saved in this hardware and remove them entirely to troubleshoot the freezing issue. 

The Final Verdict

No cause to ignore these issues while you have various methods to troubleshoot them, yet, sometimes, things become more critical than our thoughts. In that scenario, you must take individual help to improve your productivity on your computer. You may write to us in the comment section to figure out the right path for your personal computer. 

Read more: HOW TO CHARGE LAPTOP IN CAR: BEST CAR CHARGERS FOR LAPTOP

Frequently Asked Questions 

Q.1 Why Does My PC Keep Freezing?

You can discover various aspects as a result of the question. (Why does my PC keep freezing?) They are crucial to troubleshooting them timely. 

  • It is because of the overheating of your computer system. Check it from the processor side, especially. 
  • Multiple programs are running in your Windows or Computer System. 
  • RAM has not enough space to run multifold programs altogether. 
  • Viruses and malware are creating issues. 

Q.2 Why Does My Computer Keep Freezing When Playing Games?

  • The graphic card is not giving desired results or giving a low performance. 
  • Memory storage is not suitable for the game.
  • Your internet connection is not stable.
  • Disk space is not compatible with your game. 
  • Due to the outdated driver of the graphic card.
How To Wipe a Hard Drive From the Computer

It’s common for many users to sell or divulge computers or hard drives once they want to eliminate old devices or upgrade to new ones. You’ll have already formatted the disk drive or deleted files thereon so as to erase sensitive personal data and avoid becoming the victim of fraud. However, the very fact is that wiping out a tough drive isn’t as easy as deleting data or formatting a tough disk. Simply deleting files by Shift + Delete or emptying the Recycle Bin doesn’t permanently clear data, as deleted files can easily be recovered by recovery software. Formatting a tough drive doesn’t completely erase data either. Though the OS cannot see deleted or formatted data and therefore the drive looks empty, average users are ready to revisit lost data easily with the assistance of disk drive recovery software. This article will tell you how to wipe a hard drive from a computer in a detailed manner. so, that no one can use your deleted data for their own good.

Why deleting and formatting isn’t equivalent to erasing a tough drive?

Are you one among those that hold the view that deleting a file is analogous to erasing it? If yes, you ought to take a fresh look at this issue. We’ll explain the explanations in a detailed and clean manner.

What about disk formatting? Formatting works similarly because it doesn’t wipe data. Formatting a disk or partition seems like tearing the contents of a book without disturbing the actual chapters of the book. Recovery software is additionally ready to retrieve lost files from formatted disks.

How does Wipe hard Drive work?

How To Wipe a Hard Drive From the Computer

You may wonder how disk wiping works since deletion and formatting don’t work on a permanently clean disk drive. Aside from physical damage to the disk drive, we will completely remove data with disk wiping technology.

As we’ve mentioned above, to completely erase the disk, we should always remove those binary data, which suggests overwriting those zeros and ones with new data. Once binary data of a file is replaced and overwritten by new data, it can’t be recovered anymore. Some professional disk eraser software is in a position to refill the disk with zeros or random information sector by sector, ensuring no data is often recovered from a wiped disk.

What to do before Wiping Hard drives?

  • Download and install disk drive wipe software. If you propose to wash a tough disk on your own, a disk wipe tool is important. You ought to select one easy-to-use and effective tool for the task. If you would like to wipe the whole computer, you ought to confirm the software can work on a bootable drive.
  • Ensure the battery is full. If you would like to wipe a laptop, you ought to confirm the battery is well charged or connected to power. If the facility goes out during disk clearing, it’d spell disaster to the drive.
  • Back up your data to a special hard disc. Once you wipe your computer, everything thereon is going to be lost, thus you ought to copy any files you would like to stay on a different disk drive. you’ll clone a tough drive or simply copy & paste files thereto disk.
  • Prepare a bootable disk. If you’re wiping the computer’s main hard disc, you will have to hold out the task without booting the system, like under WinPE. Once everything gets ready, you’ll start erasing the pc hard drives or external disks. The simplest part of this instruction will show you ways to wipe a tough drive, external disk, SD card, or flash drive in several ways.

What Can Happen If Not Reformat Hard Drive?

As the line between the important world and the digital world blurs, it’s smart to know how cybercriminals work. A security product like Norton Security Premium helps protect your PC files, financial information, and your family’s devices. But once you discard your device without properly wiping the disk drive, you run the danger of losing your data.

Cybercriminals value your data — like your email address, passwords, Social Security number, driver’s license details, and MasterCard information. they might sell the knowledge on the dark web.

Cybercriminals can purchase the knowledge and launch cyberattacks to commit other forms of crimes like fraud and extortion. they might open bank accounts in your name, purchase items together with your MasterCard information, or remove loans and default them, leaving you with the results.

Thieves also search for private tips. This might include non-disclosure agreements, personal photographs, private chat conversations, and other details you’ll not want to show. 

How To Wipe A Hard Drive?

Follow these steps to make sure you’re truly wiping your disk drive clean. They’ll help keep you from passing on or losing your documents, photos, passwords, financial information, and private data once you say goodbye to your old device.

Step 1: Copy your hard-drive data

How To Wipe a Hard Drive From the Computer

Before you wipe your computer’s disk drive or do a factory reset, confirm to copy all of your information to your new computer, an external disk drive, or an internet service.

Backing up your data regularly may be smart work to keep your data safe. But sometimes the Hard drives can malfunction, get misplaced, robbed, or be encrypted by ransomware software and so the data you’re stored in it. The simplest defense is to make sure all the info is protected safely and regularly.

You can copy your data on thumb drives or USB flash drives. But confine in mind these are small storage devices and should not accommodate all the info from your PC. Larget external hard drives offer more storage. you’ll also transfer your data to a different laptop or PC.

“Cloud backs” are an alternative choice. They’re safe and one of the foremost convenient ways to store data. Here’s how it works.

The first thing you have to do is to create an account and complete the initial setup that required the site. Next, you enable the storage of your data to the cloud — a network of remote servers. There’s no visible place for the data you backed up. Therefore the risk of it getting stolen or destroyed by things like floods or fires is mitigated.

Step 2: Don’t just delete files from your computer

You might think moving your documents to the trash or recycle bin and emptying it’ll do the trick. Maybe not. In this post, we are going to explain the way to delete the files, but you often leave them where they were, and choose not to delete them because they are hidden from view. Most of the data recovery programs can easily recover these hidden files.

Data recovery software is capable of rebuilding the file header. This makes it possible for the pc to ascertain the file again.

Step 3: Use a program to wipe your drive

How To Wipe a Hard Drive From the Computer

Special software programs can permanently erase your disk drive. There’s little chance you’ll get any data back. Similarly, nobody else is going to be ready to use data recovery software to recover your files.

There are many programs that run a low-level setup that overwrites all the removed files with zeros and other obscure data. This makes it impossible for data recovery software to recover the files.

DBAN may be a free data destruction program that completely erases files on a tough drive that includes all personal files, operating systems, and installed programs.

It would be great to use third-party software to remove your device. Most products offer proof of erasure. This helps when wiping a corporation laptop or PC.

Step 4: Physically wipe your disk drive

As an example, you’ll physically wipe the drive. Just remove your disk drive and take a rare-earth element magnet thereto. Another option? Physically dismantle it with a screwdriver.

A rare-earth element magnet, just like the neodymium magnet, is often wont to deform the metal plates within the hard disc. This makes it unusable. 

One warning: The magnets are powerful and may cause physical harm if used incorrectly.

A safer method could be employing a screwdriver to dismantle the pieces of the disk drive to make it useless.

Step 5: Do a fresh installation of the OS

It’s different to completely rewrite the entire disk drive. That’s by completing a clean installation of the first OS that came with the pc. This will be especially important if you’re giving the device to someone sort of a friend or loved one.

Last Words!

Hopefully, the above information helped you well to understand how to wipe a hard drive to save yourself from identity theft. If you are the one who’s gonna sell your PC or laptop and do not want to be a victim of Identity theft then you have to wipe the hard drive of your PC or laptop. And this post will help you with this. Keep every point in mind before reformatting the hard drive.  

make your computer faster

We often see various hindrances while working on our system. One of the most common hindrances is slow performance. Encountering such a snail’s pace intensifies frustration inside us and we decide to buy a new system. But, sometimes we don’t need to spend so much on buying these machines as there are some strategies through which you can make your computer faster. So, just keep reading to discover twelve easy tips that will definitely bring you the desired result. 

12 Tips & Tricks to Make your Computer faster

1. Close Unused Tabs

The first and foremost tip that we would suggest you is to close all the tabs that are not in used. It would be really helpful for all the users who work on a large project with unclosed tabs. You can close these tabs and restart your browser. Don’t panic as most browsers come with an option to restore previous tabs once you have restarted. 

2. Restart your Computer

Make your computer faster

We all are very well aware of the fact that when the system is left on, background programs and apps consume memory. So, restarting is a way to refresh memory and proceed with proper installments to update. Rebooting also helps in saving the changes. So, try to shut down your PC once a week for smooth performance and work. 

3. Backup the Data

At times, the user ought to store their sweet memories on the PC that can become lost or damaged due to some virus. Therefore, make sure to always create a backup of your data. 

You can consider one of these methods to create the backup. 

  • The largest external hard drive use can be good for you
  • Try to back up online with Google Photos, Drive, Amazon, Dropbox, etc. 
  • Also, make a backup on a DVD or CD and store it in a safe location. 

Backing up is a great way to save your file and free up space on its OS and RAM. Therefore speeding up the performance of the computer.

4. Delete Internet Browsing History

make your computer faster

The fourth thing that you can do is to clear your Internet Browsing History. To do so, try to clear the history from all time and some date back time as well. Furthermore, you can select Home to see full history. 

5. Verify Your Hard Disk Space

speed up your computer

You need to keep your hard disk 15{067ed41ba9a2bcea5192cfba5c5678b094ea6af66db36aaabba2135c9da953a2} free. If somehow it becomes full then you will have to remove some programs and files to boost up speed. 

You can also take some aids from cleanup programs that are used in freeing up hard drive space. Through, deleting temporary files, cleaning up the Windows registry, deleting cookies, defragmenting the hard disk, and deleting browser history, these programs help to make your computer faster. You can check out one of the most used cleanup programs Panda Cleanup. 

6. Delete/Remove Unnecessary Files and folder

During the installation process, there comes several temporary files. They can consume a larger space of the hard disk. So, you need to remove those unwanted files by conducting further procedures. 

For Mac: You can download and use CCleaner to find and delete temporary files on the hard disk. 

make your computer faster

For PC: Tap Start > All programs > Accessories > System Tools > Disk Cleanup

7. Uninstall Unnecessary Programs

Remove all of the external programs that you no longer want to use. 

For Mac: You can uninstall those programs manually by putting some apps into the trash. Also, take help from some program to free up the spaces. 

For PC: Move towards the Control Panel > Then, Add or Remove Programs or uninstall a Program. Now, you will see a list of all programs installed. Now, just perform a right-click and select Last used for unfamiliar programs. 

make your computer faster

8. Organize Desktop Icon

You can categorize desktop icons into folders. By doing so, it cleans up the background as well as cuts down the device’s RAM usage. Whenever the system turns on, it loads individual icons as the desktop is not organized properly. That in turn consumes lots of RAM space. But, through organizing the desktop icon, the computer is only required to load a few folders that will enhance its performance. 

9. Modify Power Plan

Sometimes the computer runs slowly because of the saving battery mode option. So, you need to verify the mode in which you run your system and if it is a save battery mode then modify the power plan with these steps below:

For Mac: Move to the top left-hand corner and choose the Apple icon. Now, you need to tap on System Preferences > Energy Saver. Once done with that, you are required to check “Restart Automatically if the Computer Freezes” and “Put the hard disk to sleep when possible” to make your computer faster. 

make your computer fasterFor PC: To initiate, go to the Control Panel > Power Options. Now, choose your power to optimize performance. You can choose High performance as it is one of the best options for enhancing the speed and performance of a computer. You only need to aware that this may take more power to use. 

10. Use Activity/Resource Monitor to Verify Memory

This is the best way to learn which programs and files are consuming a large part of your Central Processing Unit aka CPU. 

For Mac: Navigate to Library > Application > Utilities. Now, try to launch the Activity Monitor and choose the  CPU column to examine all the programs placed at the top. If there is some file consuming over 50{50afa256e6562afb2cd7837d8db3fd71ce947f26b53ffff72a77bb9141ae121a} of the space then it might be the leading source behind the slow performance of the computer. So, you need to run your computer faster by clearing the application and using an alternative that performs better than this one. The thing that you need to keep in mind is closing all other programs during using the application. 

For PC: You need to access the Start Menu and navigate to All Programs > Accessories > System Tools > Resource Monitor. Now, just examine the CPU usage percentage, and tap on the application tab to see the program consuming the most place of memory. After performing all these steps, you need to remove and replace the application. Also, don’t forget to open the application when it is really necessary. 

11. Repair Disk Permissions

If still the proper permissions are not configured then you might face issues in the basic operations on the system. So, make sure to repair the disk permissions every few months to remove issues related to your disk. 

For Mac: Visit the following series Applications > Utilities > choose Run Disk Utility. Now, tap on startup disk and select Repair Disk Permissions from First Aid.

Make your computer faster

With this, you will be able to view the permissions settings on the hard drive. Therefore, it tells you that the user can only access these files because applications have all the rights to do so. Once done with that, just restart the computer. 

12. Remove Unused Language

It is yet another trick to make your computer faster. By removing unused languages, we can free up some computer operating space. Well, this can be done manually or through the use of an application. 

For Mac: Try to download MacFlyPro which helps in detecting and removing the localization files in OS and third-party apps as well. To make use of it, launch and navigate to the System Module. After that, you need to tap the Cleanup section followed by hitting the Scan button. Now, you can review the language files. You need to ensure that files that are checkmarked represent unused macOS localizations and unused app languages. And, in any case, you want to delete all detected junk data excluding localization data then select the Clean button.

PC: First, You need to access the settings app > Time & Language > Language > Windows Display Language > now, just opt for the language you wish and set it as the default language. You can now delete a language. This will free up some space on your Windows system. 

make your computer faster

Now that, you have understood every trick successfully, it’s time to learn together some signs given below to identify that the system is corrupted with any kind of virus. 

Read more: HOW TO MAKE YOUR LAPTOP FASTER | ALL IN ONE GUIDE

Signs to Identify that the Computer is Corrupting with Virus

make your computer faster

If your system brings any of these signs listed below then it might indicate that the computer may have a virus. So, let’s learn these pointers and acknowledge the vital cause that leads to the slow performance of the system. 

  • If you encounter an unexpected pop-up continuously in the system.
  • Sluggish performance of the web browser. 
  • If there is a lack of storage space. 
  • Even after wiping the excess files, the hard drive works extra hard. 
  • The computer is really slow to start up. 
  • When you are missing files. 
  • The system’s programs still get crashed. 

Final Word!

With this guide, you would surely make your computer faster but if you think that you cannot pinpoint the issue yourself then try to contact the operating system’s support team. They will diagnose the issue in a minimal time and resolve your queries as well. We hope that you find this article resourceful and you are now working smoothly on your computer.