Blog

how to activate Google Lens

Google has been working diligently to make human life easier and simpler with the latest technologies, and one of the best outcomes of its innovation is the incredible tool Google Lens. What if we say you can search images and get the location, similar products on the market, and much more? Especially in no time. Well, you can harness the power of this fantastic tool through a direct search of the image.

However, you must not miss out on one of the most helpful tools powered by Google. If you are new to Google Lens, and don’t know how to activate Google lens then this article is best for you. Read this article all the way through to its conclusion so that you may take away all the best pieces of information with you.

What is Google Lens?

Google Lens is an AI-powered tool presented by Google. It combines AI technology with deep machine learning.  It is one of the most profound announcements that Google made in 2017. However, it offers features like scanning, shopping, copying text from the image, translation, and much more.  It has already been used for so many years. And indeed become too helpful for a pool of people. Let’s check the section below to get its uses with deeper insight.

Why Use Google Lens?

Why Use Google Lens?

There are various features for why you should use Google Lens. Taking advantage of AI is nothing bad at all. You can unlock various new features and privileges with the new technology. And make this work your oyster!!

  • Simplify Your Shopping: You can simply search for the image of the item you want to purchase. Google Lens will show you all the related products to it on various shopping apps through which you can compare the price and quality at the same time.
  • Explore Locations: You can simply search the image with any landmark located near you, and you can get the exact location where the image was taken. Also, you can search the review rating section by searching a single image of the landmark.
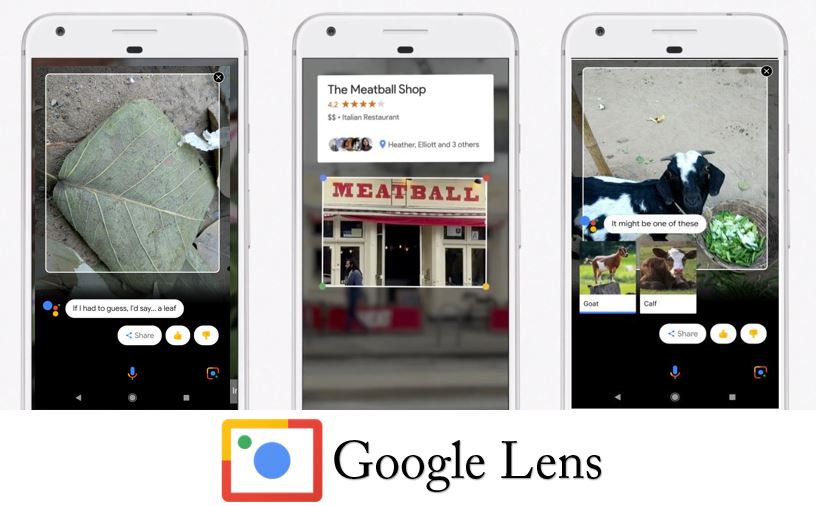
  • Identify Objects: Another feature of using Google Lens is easy identification. You can easily identify anything. For example, if any random plant has grown in your garden, you can simply search its image and get every piece of information about it.
  • Smart Text Translation: If you are a student, you can take the most out of this app. As you can simply scan the homework question and get all the related searches to it. Another thing is that you can copy the text of an image and even translate it in no time. 
  • Smart Scan of Barcodes: You can scan any barcode from this and get the related result for the same. Previously, you needed to download a third-party app for it, but with Google Lens, you can simply search for any barcode.

How To Activate Google Lens on Phone?

When it comes to actually using Google Lens, people are usually stuck on How To Activate Google Lens On Phone? Well, you won’t be facing this as we have given a simple step-wise guide below for both android and apple users.

How To Activate Google Lens on Phone?

One thing that you must keep in mind is if you have a new version of your phone, then you won’t need to download it. Otherwise, you can download it from the play store if you are using an older versioned mobile phone. Downloading it or not will completely depend on your phone’s model.

Here we are dividing the following into two sections, one for android users and the other for iPhone users. Read below and get the answer to how to activate Google Lens on your phone.

  • On Android Phones: if you are an android user, then you can simply find Google Lens on google search assistant and also in the google search app. If you have an old phone, then you will need to download the app from Google Lens.
  • On iPhone: if you are an iPhone user, then you can not use the Google Lens at google assistant. But it doesn’t mean that you can’t take advantage of Google Lens. Well, you can download the Google Lens app, where you can try every feature of Google Lens.

How To Use Google Lens?

If you don’t know how to use Google Lens, then don’t worry, as we have arrived to rescue you this time as well. Here are two ways through which you can use Google Lens. One is with the gallery photos, and the other is with the on-time photos. Let’s check the below section and find out how one can do so.

With The Saved Photos

Well, with the saved photos, you can simply access Google Lens with the google photos folder. Let’s check the detailed steps for better rationale.

  • Open the google photos app.
  • Here you can see all the images saved on your device. Navigate to the image that you want to search for with Google Lens.
  • Open the image; in the bottom coming options, you can locate the logo of Google Lens and click it.
  • Now, bubbles will start to appear on the image.
  • You can see all the visual matches to your image in the below area.

You can tap on the specific item for better results. If you are not able to find the exact result, then you must try focusing on the pacific item.
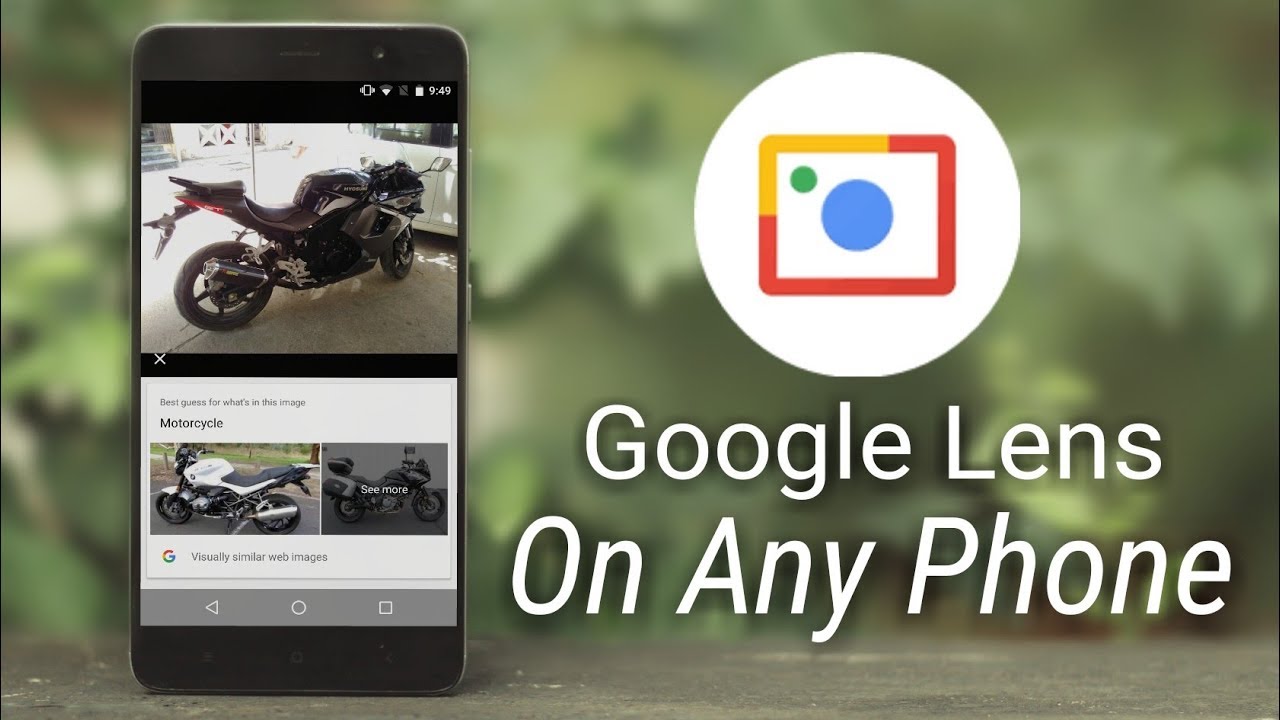
With The Camera

If you want to use Google Lens with the live camera option, then also it is quite easy. Look below for the easy steps.

  • Open google assistant.
  • You can see a microphone search logo. Besides that logo, there’s another logo of Google Lens.
  • Click that logo and focus on the item that you want to search for.
  • After clicking the photo, you will get all the related searches for your photo.  

How To Check Activity Status?

Do you want to check the activity status of your Google Lens? Not a big deal. If you have saved the history of all your google activity to your account, then the Google Lens history has also been saved in your account. You can easily access the history. Let’s check the easy steps to access history.

Check Activity Status

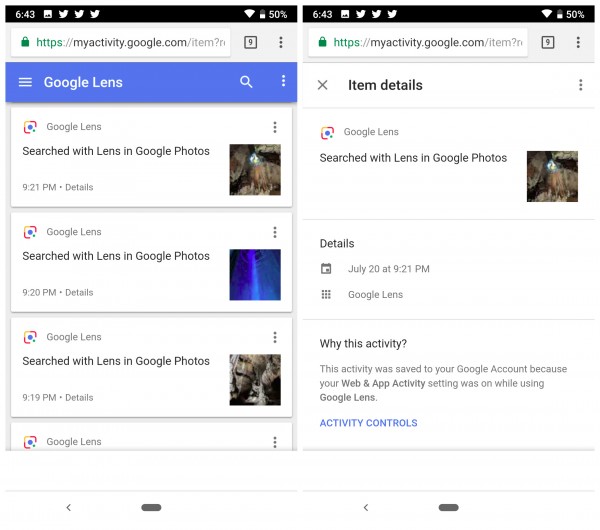
  • Open the settings on your phone and get into your google account.
  • Navigate to the data and privacy option and open it.
  • Scroll down; here, you can see the history settings option. Open it.
  • And manage your history here with full ease.

What To Do If Results Don’t Match?

There are two tricks that you can use when your result is not coming matchable to your image. Let’s check them out.

  1. You must try to tap on the target object for better results.
  2. If the above doesn’t work out, then you can follow the following steps.
  • Scroll down till the end and look for a message saying, Do you find these descriptions useful?
  • Click No, and a prompt message will come up saying, What could have been better?
  • Give your feedback here.

This way, you can let Google know what things it needs to optimize for better results in this newly launched AI tool.

Is Google Lens Worth a Shot?

As we have already told you, Google Lens is a combination of AI tech and deep machine technology. Thus, it can not be 100{50afa256e6562afb2cd7837d8db3fd71ce947f26b53ffff72a77bb9141ae121a} perfect all the time. Sometimes, you may focus on something else, and google targets something else. In this case, you can try to tap the target for matching results. Regardless, you can get better results after doing so. However, Google Lens has become one of the most used AI tools for images since its release. We would like to advise you; you should not miss out on this incredible tool.

Read More: HOW CAN YOU FIX “SD CARD ERROR GOPRO” ERROR QUICKLY? 5 EASY SOLUTIONS

Frequently Asked Question

Q1. How do I enable Google Lens in Chrome?

It comes pre-enabled on the latest devices. However, if you are struggling with the old version, then you can follow the below steps.

  •  Get into the list of search engines and select the one you want ot edit.
  • Get into the overview section and navigate to the search features.
  • Besides search settings, you can get the option to enable or disable image search.

Q2. How do I search with Google Lens on my phone?

If you are not getting the option in the google assistant tab, then you must get down in the google app and tap the option coming to discover more. Here type Google Lens and start doing your searches.

Q3. Is Google Lens free?

Yes, Google Lens is completely free, and you can use it with any device you have, either an android or an iPhone. You can use it free of cost.

Conclusion

In a nutshell, we have given a detailed comprehension of Google Lens. We have answered all the possible related questions about it. Such as how to activate Google Lens. And how to use Google Lens? We are hoping that this guide has made everything clear to you, and now you are able to use Google Lens to every extent possible. However, if you are still left with any queries, then you can connect with us in the comment section.

out of range

Are you struggling with the black screen showing “Input Signal Out of Range”? Setting a perfect graphic and visual setting can really be freaking sometimes. If you try anything, it will turn out to prompt errors. However, encountering signals out of range is one of the most common and significant errors in the list. Fortunately, the error can be resolved by tweaking some of the settings of your system. From changing the resolution of your screen to fixing the graphic card’s resolution, one can simply attain an error-free and smooth run of the PC. Thus, if you want to resolve the error input signal out of range Windows 10, this article is best for you. Read further to get your system back on the trail.

What Does “Out of Range Error” Means?

What Does “Out of Range Error” Means?

The error input signal out of range stands for the inefficiency of your monitor and the graphic card. Well, when your graphic card and the monitor are not appropriately stabilized to each other in order to send or receive the essential signals to function the everyday tasks.  In this condition, you will likely get the error saying, “input signal out of range.” In order to resolve this issue, you are required to maintain a refresh rate that will suit both the screen and your graphics card. But why is your system suddenly getting this now? Check the below section to know the causes.

Causes of “Input Signal Out of Range Windows 10”

When it comes to knowing the causes, one must be getting confused as there is indeed a variety of causes to it. However, understanding them will help you to resolve the issues with much more efficiency. Let’s check all the possible and responsible causes for the input signal being out of range.

  • Old Monitor: Old monitor is unable to make a stable connection with your upgraded graphic card. This unmatching will lead you to crashes and unwanted stutters. In this case, you must maintain a stabilized refresh rate between your monitor and your graphics card.
  • Faulty Resolution: If the resolution set by default is not compatible with the overall settings of your system. Then, you are most likely to get the error and crashes. 
  • Outdated Graphic Drivers: When you don’t upgrade your graphic drivers for an extended period of time, in this case, you are more prone to get the error as outdated graphic drivers lose the capability of sending signals to your system.
  • Corrupted Drivers: If you have corrupted drivers and files in your system, then your system can suffer a lot while functioning with day-to-day tasks. Hence, you must check the corruption in your device and try to remove it from any third-party apps. 
  • Loose Cabling: A loose cabling can cause the error as the graphics card won’t be able to work to its full potential if the cables connecting it to the system are not strong enough. Thus, you must check the cable connections for the betterment of the system. 

Ways To Troubleshoot “Out of Range Error”

Suppose you have got the reasons for why the error happened and what it actually means. Then it is time to dive into the resolving methods. Here, we are enlisting the top 3 methods for resolving “Out of Range Error” efficiently. Before you actually get into the following troubleshooters, you must check all the wirings and cabling of your device for better results. Might the issues be with your loose and inefficient cabling? Hence, you must tighten all the wirings.

1. Set the Refresh Rate to 60 Hz

A higher refresh rate of your system will lead your system to crash between the ongoing programs. The most common reason for this error crash is the unbalanced refresh rate of your card and the monitor. Thus, you must try to maintain a balance between the monitor resolution and the graphic card resolution. By minimizing the resolution, you can make the overall performance better and smooth. Let’s see how you can perform this.

Set the Refresh Rate to 60 Hz

  • In the system search menu, type system settings and open it.
  • From the right sidebar, click display.
  • Again from the right pane, select the advanced settings option for display settings.
  • Here, you can see the display adapter properties option coming to your screen; Click it.
  • Now, get into the monitor tab. And here, you can select the screen refresh rate from the drop-down menu. 
  • Press Okay to execute the changes.

Here, you must note that if your screen is showing a different refresh rate, then you must set the depicting screen refresh rate for better performance of your screen. However, our recommendation is 60 hertz as it is the standard refresh rate for most of the monitors. 

This method is only applicable to Windows 10 and 11. Thus, for Windows 7, you can follow the below-written steps.

  • Go to the control panel of your system.
  • Locate the “Appearance and personalization” option and click it.
  • Here, you can see the display setting option, open it, and get into the refresh rate.
  • Like the above steps, select an advanced setting and enter the monitor tab.
  • Now, you can locate the option for screen refresh rate.

2. Fix the Graphics Driver Resolution Settings

Fix the Graphics Driver Resolution Settings

If the above methods don’t work out well for you, then you must try fixing the resolution of your graphics drivers. This way, you can gradually trigger the problem and resolve the error within a few clicks. However, before you do so, you must check at what rate of resolution your monitor will work efficiently. If you don’t know about it, then you must go to the official website of your monitor’s brand and check the maximum resolution of the specific product you have and manage it as per the limit.

Let’s check how you can manage the graphics card resolution.

  • Open the settings app of your PC and click the display for further settings.
  • If you have multiple monitors, then select the monitor from where the issue is coming.
  • Navigate to the display resolution option.
  • From the drop-down menu, coming on the right side of the option. Select the limit as your brand has suggested.

When you are done with the above settings and still facing the issue of screen flickering & crashes, then you must lower the limit more. You must restart your computer for better execution of the changes you made.

3. Upgrade or Uninstall The Newly Installed Graphic Driver

Fix the Graphics Driver Resolution Settings

If you have recently installed new graphics drivers to your device, then you must uninstall them, as they must have come up with some bugs and malware on your device. This is why you are getting the error. Simply by uninstalling it, you can achieve the right functionality of your system. In addition to it, you must install a newer version of the driver after uninstalling the previous drivers. However, this time you must enable your firewall setting to have better results. Let’s see how you can upgrade your driver.

  • Open the device manager in your system. You can simply type device manager in the search windows of your device.
  • Here, you can see all the devices connected to your system and click display adapters.
  • From the drop-down menu, right-mouse the driver, and here you will get the option to update it.
  • Click update and wait for a few moments. 

After performing the above steps, you will feel some level of enhancement in the performance of your PC.

Read More: RESOLVE THE ERROR “THE SYSTEM CANNOT FIND ANY BOOTABLE DEVICES” WITH 5 QUICK METHODS

Frequently Asked Questions

Q1. Why does my monitor say Input signal Out of Range?

If your monitor is saying that the input signal is out of range, then it must be a problem with the connection between your graphics card and the monitor. The refresh rate and the screen resolution must match and be compatible with each other for better performance of your PC. 

Q2. How do I change the resolution of an input signal out of range?

You can simply change the resolution of your graphic card so that it will be compatible with the monitor’s refresh rate, and your system will ultimately start working well. Follow the steps below.

  • Open the settings and click display.
  • Navigate to advanced settings 
  • Manage the screen resolution here under the monitor tab.

Q3. How do I change my settings to 60Hz?

60 Hz is the standard limit of refresh rate for a normal PC. Thus, you must maintain this limit by tweaking some changes in your settings, you can attain the 60hz refresh rate. Here’s how to do so.

  • Open the settings of your PC and click the display settings.
  • Access the advanced settings, you can locate display adapter properties.
  • Open the monitor tab and click refresh rate.
  • Change it and fix it at 60 Hz.

Conclusion

In a nutshell, we have provided you with a guide that indeed has the capabilities to resolve the issue of “Input Signal Out of Range Windows 10”. You can try any of the above tweaks to retain the smoothness and excellent performance of your PC within a few clicks. However, if you are still facing any queries and have suggestions, you can contact us anytime.

Xbox Controller Not Connecting to PC

Stuck with a blinking Xbox Controller which doesn’t connect to your PC? If so, then you must be looking for some resolving methods. Right? And what if we say you have landed on the right page that is going to assist you in every way possible? Well, it’s true. In this article, we are going to tell you everything about the Xbox Controller connection problem. However, we have given 6 possible solutions through which you can establish a connection between your PC and the Xbox one controller. All you need to do is read the article all the way through its conclusion to get your Xbox one controller back to normal and to get it working as intended.

Are You On The Right Track For Establishing a Connection?

Xbox Controller Not Connecting to PC

You must check if the way you are establishing the connection is right or not. If not, then you must get the right way to get your connection established once again. However, the process of connecting the controller and the PC is very simple. You just need to turn on your Bluetooth and check the availability of your controller. 

Furthermore, you must check if you are facing Xbox Controller Not Connecting to PC problem and then where the problem is coming from. To test this, you can try these 2 below-written approaches.

Try Pairing It With Other Device

If your Xbox one controller is not connecting with your PC, then you must try to run tests with your controller to check if the issue is with your controller or with your system. You can try connecting your controller with another system and check if it gets connected. If not, then you must replace your controller as the problem is with your controller. If Xbox one controller not connecting to the other device, then the problem is with the controller.

Recognize Your Xbox Controller

Before everything, you must identify your controller; what type of connectivity it establishes with your PC? Or what kind of version your controller has? And if it needs any other accessory to work? 

However, it is very simple to identify your Xbox controller. There are mainly two models; let’s check what you have. 

  • If you have a newer model, then you don’t need anything, as it uses standard Bluetooth to establish a connection. You can simply figure it out by the guide button, surrounded by the same plastic as the whole body.
  • If you have an older model, then you will require a dongle to establish a connection. You can identify an older version easily if you are not able to connect it without the dongle, then simply you can come to the answer that is an older version.

6 Ways To Resolve “Xbox Controller Not Connecting to PC”

There are six easy ways that you can try to resolve the issue of the Xbox controller not connecting. After doing the above tests, you must know where the problem is located, whether the problem is with your controller or with your computer. You can try all these six methods irrespective of the issue. You can not only be able to connect Xbox connect to a PC, but also you can improve the overall gaming experience and also you can resolve the problems like “ps5 not turning on”. However, the following methods are based on the research done by pro gamers and technical experts. So without further ado, let’s get dive into the troubleshooters to remove the issue “Xbox one controller not connecting”.

1. Use a USB Cable

If you are looking for a wireless connection but are stuck in connecting to the PC, then you must try establishing a USB connection. And check if it works. However, most gamers sit near their system for better gameplay, and also it resolves the issue of the sudden battery falls and charing. Hence., you can try using a USB wire to have a good connection and gameplay.

Xbox controller not connecting

In addition, you can check the problem’s location/. Confused how? Well, use a sound USB wire and check whether the issue is at the controller’s end or your system’s end. However, if this way doesn’t work out for you, then you must get on the other method listed below.

2. Yank Batteries & Toggle Bluetooth 

If you have a wireless controller, then the issue you are encountering is the network’s errors. Thus in order to refresh the network, you must toggle with your Bluetooth. Try to turn it on and off a few times. This can help you to have access to Bluetooth connectivity on your PC. 

In addition, you can try to yank the batteries of your Xbox. It is also possible that the batteries connecting to your Xbox have loosened the connection. Thus fixing it back can help you to have a better battery connection. This method will help you to have a seamless connection with your PC.

3. Change Batteries

Another possible cause that you can encounter is an expired battery. Yes, maybe the batteries of your Xbox are not working properly. If you haven’t changed it for an extended period of time then it is time to change these batteries. This can definitely help you to be able to establish a perfect connection between your Xbox controller and your PC. And you can rectify the problem Xbox Controller Not Connecting to PC.

4. Update Windows and Controller Firmware

Outdated stuff is more prone to create errors and shutters. Thus, you are required to keep updating your Windows drivers and every other hardware. This way, you can improve the overall performance of your PC. Along with this, upgrading will help you to eliminate the issue of the Xbox Controller Not Connecting to PC. But how can you do so? Well, look below for the easy steps for upgrading windows and controller firmware.

For Upgrading Windows
  • Open your system settings.
  • Click the option “Update and Security.”
  • Choose the option to search for an update.
  • Update your Windows if needed.
For Xbox Controller
  • Install an app called Xbox Accessories.
  • Connect your controller with a USB wire.
  • Open the installed software.
  • A prompt will come up automatically; now, you must follow all the on-screen wizards.

Updating these can help you remove the issue. However, this issue also comes when your controller firmware is unable to establish the connection due to the unmatching versions of updated apps. Hence, you are really required to have the latest updated versions of every connected device to eliminate the issue Xbox Controller Not Connecting to PC.

5. Improve Signal Strength 

The signal strength issue is another prominent cause of why your Xbox controller not connecting. However, Bluetooth comes with one of the best connectivity in all other wireless means of establishing connections. Thus, you must ensure there is no error in the connectivity oath. If there are so many other Bluetooth devices, then it must be getting difficult for your controller to get connected to your PC.

6. Try USB Bluetooth Adapter

There are various kinds of controllers in the market, which creates a hassle for establishing a connection via Bluetooth. Thus, you must try using a Bluetooth adapter of any third-party brand. It will definitely help you to establish a proper connection between your PC and the Xbox controller.

Try USB Bluetooth Adapter

You can purchase any Bluetooth adapter of a reputable brand, but we would advise you to go for the Xbox wireless adapter for Windows 10. It consists of a lot of features. We have enlisted all the features of this adapter in the below pointers.

  • It can connect eight simultaneous controllers at a time.
  • Provides support for in-game chats.
  • Provides wireless stereo support.

Frequently Asked Questions

Q1. Why does my Xbox controller keep blinking and won’t connect to the PC?

There can be various responsible reasons why your Xbox one controller not connecting with PC. Common reasons are– outdated drivers, firmware, and Windows. If you have problems related to it, then you are most likely to face all these kinds of not connecting errors.

Q2. How do I connect my Xbox one controller to my PC Wireless?

You must connect your Xbox controller to your PC via Bluetooth, as it will be the most significant and efficient way to establish a wireless connection. Simply turn on your system’s Bluetooth and turn on the controller and look for the match on your system and connect with your controller.

Q3. Do all Xbox controllers connect to PC?

Yes, all Xbox controllers connect to PC. You just need to make a proper connection via Bluetooth so that you will be able to establish a connection. However, if you are unable to make the connection, then you must use a Bluetooth adapter from any third party. 

Conclusion

In a nutshell, we have provided you with the top resolving methods in the above article. Through this resolving troubleshooters, you can connect your Xbox to your PC. You can not only resolve the error of connection, but also you can improve your system’s gameplay. If you are still facing any hassle or have any queries in your head, then you can connect us anytime.

How to Charge Nintendo Switch Controllers

The running battery of the Nintendo Switch Controller is ruining your gaming sessions? Seeing the flashing prompt of low battery in the middle of the game is the worst thing you will ever experience while playing. Fortunately, there is a way out of these flashing warnings. Once you get to know about “How to Charge Nintendo Switch Controllers?”  You will be ready to unlock lengthy gaming sessions on your own. Well, in this article, we are coming up with so many options to charge  Nintendo Switch Controllers. Read this article all the way through its conclusion and get your lengthy gaming session back to life without low battery interruptions.

Charging Nintendo Switch Joy-Cons

charge nintendo switch controller

If you are a pro gamer, then you must know the pain of losing the game in the middle because of the low batteries in the Nintendo switch. To reduce these terrible instances, we are coming up with three ways through which you can charge Nintendo Switch Joy-Cons in accessible ways—charging Nintendo switch controller is not a tough task to do. It simply depends on where you are and what resources you have. Thus, let’s see various ways to charge Nintendo Switch controller.

How to Charge Joy-Cons while Playing? (Attach to the Switch)

The easiest way to give your Nintendo switch controller the juice of charge is by attaching it to the switch. However, this method is only useful when not playing with your controller. Let’s get a more deep dive into the charging procedure (attaching to the switch method) with easy steps. However, if your Xbox controller keeps disconnecting, then also you can use this method to charge it properly as one of the main reasons for it to disconnect is a low charge.

  • Simply attach your joy cons with a switch. You can do this by sliding the switch between the joy cons. Also, you must ensure the right side and the left side are placed well. Only this way you can charge it efficiently.
  • Now, you are just required to plug your switch into the dock. Here again, you are required to make sure that the switch is on and fitted correctly in the ports. After ensuring this, check if your controller is charging or not. 

Here, you are advised to charge it without playing it. Otherwise, it won’t charge efficiently and fully. For your information, if you charge it handheld or while playing, then it automatically stops charging after 50{50afa256e6562afb2cd7837d8db3fd71ce947f26b53ffff72a77bb9141ae121a} in order to save the life of the battery. 

How to Charge using the Charging Grip?

How to Charge using the Charging Grip?

Another option through which you can charge the Nintendo Switch controller easily is the grip. The charging grip is another tool that will help you to do the charging. The best thing about using it is that you can use it while playing games on TV without much hassle. This is different from other charging methods as it comes without the switch hence charging your joy cons more efficiently. Let’s look at easy steps to perform charging through the Charging grip.

  • This also is in a slider frame. Attach this grip with your joy cons by sliding joy cons in the sliding bars. Make sure you slide the right joy cons on the right and vice-versa. Otherwise, it won’t charge.
  • Now, you have to take up a USB cable and connect it to the grip and the switch; this way, you can establish the connection for charging Nintendo switch controller

How to Charge using the Charging Dock?

This is another best way to charge up your Nintendo controller. With this charging dock, you can charge up to 4 joy cons at a time.  So, you must use this charging way to charge up your joy cons. Furthermore, it comes with a USB cable, so that you won’t need to purchase it separately. The only con of charging it with docks is that you can not play with it while charging. However, this is an excellent way to save the overall battery life of joy cons. Let’s see how one can do so. 

  • First, connect the USB cable to the switch and the post.
  • Simply attach joy cons with the dock by sliding the cons into the correct bar.

You can check your joy cons if they are charging or not through the red lights coming on the top of it or not. When the lights turn green then, it means your joy cons are fully charged, and you can remove the charger. 

Charging Nintendo Switch Pro Controllers

Charging Nintendo Switch Pro Controllers using a USB cord

If you have Pro Controllers, then you must know about their amazing battery life. It works for 40 hours if charged once. Pro controllers take almost 6 hours to charge completely. There are two ways to charge it: one is using a cord, and the other is using the dock. 

Using a USB Cord

Pro controllers always come with a USB cord, no matter what brand you buy. The same is the case for Nintendo switch controller charger accessories. The Nintendo Pro controller comes with a USB cable. Let’s see how one can use it to charge the pro controller.

  • First, you are required to attach the cord with the Switch to the controller.
  • After establishing the connection, you will observe an orange light turns up on the controller, which means that it is charging. After it gets completely charged, the light will automatically turn off.

Here, the best thing that you must note is that you can use this way of charging while playing, as the switch is not required to be in the dock while charging the pro controller. Hence, you will not need to compromise your game because of less charge. However,  low charge is also one of the primary reasons why your Xbox party chat not working thus, you are required to charge it properly.

Using a Charging Dock

nintendo switch controller charger Using a Charging Dock

Another way through which you can charge your pro controller is a dock. There are various third-party docks present in the market. You can buy any dock of a reputable brand. Some docks give you the exceptional feature of charging joy cons and dock together. Let’s see how one can charge a pro controller with a charging dock.

  • Connect your pro controller with the dock.
  • You must use the USB cable for it. Must ensure that your controller is off or in sleep mode for an efficient charge.
  • You will notice the lights on the dock will get red which means that it is charging. After it gets charged completely, the lights will turn green which justifies that the charge is full.

Frequently Asked Questions

Q1. How long does Nintendo switch controller take to charge

A Nintendo switch controller pro takes almost 6 hours to charge completely. If you are not using it while charging and can give you up to 40 hours of seamless playing. On the other hand, the Nintendo Switch controller joy cons take 3.5 hours to charge completely and give a seamless play of about 15 to 20 hours.

Q2. How long does the switch controller battery last?

If you are using a pro switch controller and have charged it fully without interruptions of using it while playing, then this battery will last for about 40 hours, which is more than enough.

Q3. Which is the best way to Charge Nintendo Switch Controllers?

The best way to charge Nintendo Switch controller is using a USB cable with the dock. This way, you can charge it while playing. Also, you can charge up to 4 joy stocks at a time.

Conclusion

In a nutshell, we have provided you with easy ways through which you can charge Nintendo switch controller. In addition, we have provided you with the way through which you can charge it while playing. We hope this guide has resolved every possible question about “How to Charge Nintendo Switch Controllers.” If you have any other queries, then you can contact us anytime.

Xbox controller keeps disconnecting

Are you losing control over your high-end game? Does your Xbox controller keep disconnecting from the console? If you are too experiencing this terrible issue, then you must be scratching your head, as it can ruin the entire play at once. However, finding a perfect way to rectify it can be complicated and troublesome, but you don’t need to worry anymore as we have arrived to rescue you. Well, we are coming up with a guide that consists of the top 8 ideal ways to rectify  “Xbox controller keeps disconnecting.” You just need to read all through its way and get your Xbox controller working back as normal. 

Why Does My Xbox Controller Keep Disconnecting?

Xbox Controller Keeps Disconnecting

If you are also stuck with the question, “why does my Xbox controller keep disconnecting” then the time has come to get the answer to this question. There are five possible reasons for this problem. Let’s understand the causes first so that we can get the solutions better. 

  • Dead Batteries: If the battery of your controller is low, then you won’t be able to maintain a proper connection between your console and the controller, and it will start disconnecting frequently. Hence, you will need to replace the batteries.
  • Huge Distance: If you are playing with the help of a projector, then you are more likely to encounter the issue of disconnection as the distance between your console and controller increases, which tends to disconnect frequently. 
  • Outdated Controller Firmware: If your controller is not updated, then it will find a hassle to work with your updated operating system. Thus, you are required to update it on time. This way, you can avoid random issues as well.
  • Outdated Xbox Controller Driver: If the drivers of your controller are not updated, then you are more likely to encounter the issue of disconnection. Here, you are required to update your drivers so that you can resolve the issues like “Xbox one controller keeps disconnecting” and “Xbox Controller Not Connecting to PC.” 

8 Surefire Ways To Fix Xbox Controller keeps Disconnecting

After knowing the causes, it is time to get into resolving methods. Thus, we are coming up with the top 8 troubleshooters to fix the problem “Xbox one controller keeps disconnecting.” However, the following methods have been prepared with full-fledged research by our top experts. You can try the following methods one by one and get your controller back working usually.

1. Move Closer to the Console

This is a reason-based troubleshooter that comes first on our list. One of the primary reasons why my Xbox one controller keeps disconnecting is the distance between your console and you. Thus, the controller cannot establish a perfect connection with the console. Hence, you must move closer to the console. And check if you are able to establish the connection without random brakes.

Here, a lot of people think that it is possible to play a video game with a distant space between you and your console. Well, the answer is yes, one can play the game via projector to have better gameplay, but it results in the terrible issue of random disconnects. Thus, you must try reducing the space between your console and controller.

2. Check the Battery

Low battery is one of the most common reasons why your Xbox controller keeps disconnecting. A low battery won’t let you connect properly and play seamlessly. Thus, you must check for the battery if it is low, then you must charge it fully, then start playing again. This way, you can eliminate the issue easily. In addition, if your controller has batteries in it. Then you must try replacing them as it no longer provides your controller enough energy to let you play with more smoothness.

3. Power Cycle the Controller

Power cycling your controller can give it a refreshing start, and this way, you can improve the performance of the controller. This will promote a hardware reset in your controller. Let’s see how one can do so.

Power Cycle the Controller

Well, it’s not tough to do. You just need to press a jewel button present on the Xbox controller until the controller turns off completely, then wait a couple of minutes. After that, you must restart the Xbox controller and check whether the disconnecting issue has been resolved or not. 

4. Re-Pair the Controller

Another thing that you must try to eliminate the issue of “Xbox one controller keeps disconnecting” is repairing the controller with Xbox. This is not that difficult to do. You are just required to follow the below-written steps.

  • Press the pair button on your Xbox and hold it for a few seconds till the flashlight gets on.
  • Now, press until the jewel button starts to blink on both of the consoles. 

After doing the above steps, you must check if the issue has been resolved or not. If not, then you can jump on to the next method to rectify the issue.

5. Use a Wired Connection

Wired connections are always frequent and constant, either in the case of the internet or the case of the console. Thus, you are required to have a wired connection instead of connecting with Bluetooth. It may be annoying at first, as you will need to sit with a limit as you are connected to the wire. However, with the wired connection, you can unlock the experience of playing a 3D game with the ultimate gameplay. Hence, you must use a new and working USB cable. This way, you can check where the problem is actually located.

6. Update the Controller Firmware

If it’s been an extended period and you haven’t updated your firmware, then the time has come to do the task. Sometimes, outdated firmware of the controller is unable to work with the upgraded versions of the console. Then the issue of disconnection comes to light. Thus, the user will need to update the controller for better performance. If you want to know how to do so, then the below steps are for you. Check them out.

Update the Controller Firmware

  • Get into the Xbox settings. 
  • Click the Device and connection option coming in the left pane.
  • Now, select accessories on the screen.
  • Select the accessory controller and let the next screen open.
  • Click the three dots coming under the option “configure.”
  • Here, you can see an option to update the accessory.
  • Click it and continue with the on-screen wizards.

After doing the above steps, one must restart the console and the controller. This way, you can execute the update in a more efficient way.

7. Update the Xbox

If the above methods don’t work out for your controller, then you will need to update your Xbox. In most cases, your Xbox gives you a prompt to update it. But if you didn’t get one, then you must manually check for the updates and upgrade your Xbox if needed. Confused about how to do it? Well, we have provided you with the easy steps in the below section.

  • Launch your Xbox settings menu.
  • Click the system from the left pane.
  • And now, in the next lift on the right pane, select the updating console.
  • Click “Update now.”
  • Wait until the update is completed.

8. Replace the Controller

If your Xbox controller keeps disconnecting, it may be time to consider replacing the controller. This problem can usually be fixed by replacing the battery or using a different USB cable. However, if neither of these solutions works, it is likely due to an issue with the hardware itself and you should consider investing in a new controller. Replacing the controller is easy and inexpensive compared to having professional repairs done. It’s worth trying this solution before attempting more complex methods that may take significantly more time and money. This simple fix could save you a lot of hassle and get you gaming again in no time.

Frequently Asked Questions

Q1. Why does my Xbox controller keep disconnecting

If your Xbox controller keeps disconnecting, then it must be an issue with your signals. You must reduce the distance between yourself and the console. If your device is out of date, then you must update your device.

Q2. Why does my Xbox controller keep turning off even with new batteries?

If your Xbox controller keeps disconnecting even with the new batteries, then the problem is something else. But what can it be? Well, the problem can be virus attacks and other signal problems. You can resolve it with the troubleshooting guide that we have presented above. 

Q3. Why won’t my wireless Xbox controller stay connected?

There are various reasons why your Xbox controller won’t stay connected. The possible reasons are– bugs, low charging, and malware attacks.

Conclusion

In a nutshell, we have provided you with the top troubleshooting method to fix the problem of “Xbox controller keeps disconnecting.” You can try any of the above methods to fix the problem. If none of the methods works for you, then you can try replacing your controller, as taking it to the repair will cost you the same as the new one. However, if you are still having any problems, then you can connect us anytime.

In recent years, Chromebook has become one of the most popular OS around the globe. Besides this, it comes with a major hassle that every other user faces at least once in their life – the Chromebook Screen Black. Encountering a black screen can be a troublesome feeling. Fortunately, there are ways to fix it. Well, we have provided you with the top 8 troubleshooters based on technical experts’ recommendations. Try all these 100{50afa256e6562afb2cd7837d8db3fd71ce947f26b53ffff72a77bb9141ae121a} working methods with your Chromebook before sending it out for a costly repair. You just need to read all the way through its conclusion to bring your Chromebook screen back to life.

Why Does Chromebook Stuck on Black Screen?

chromebook screen black

Before getting into troubleshooting steps, you must be getting a constant question in your head “why is my Chromebook screen black?” Well, we are going to answer this question in this section itself. However, there are mainly two reasons for it. One is the problem with the software, and the other is the problem with your hardware. Thus, you will need to rectify them both. For your information, you can rectify all the networking problems on your own, but you can resolve hardware issues. For them, you will need to get help from a nearby technician. Let’s see what causes the problem in your software.

  • Charging: A problem with your changer and the port in your Chromebook can create hassles for your screen to run properly. Suppose the battery has been affected due to the bad charging schedule of your device. Then, you must go to a technician and let them check your problem as it is a problem related to your hardware. Rest you can try the following section before going to any technician.
  • Brightness: Another problem that can create the issue of Chromebook stuck on black screen is your problematic brightness. You must try increasing your brightness and adjusting it to the level where you feel compatible with it.
  • Bugs: Bugs are the most annoying cause for any technical woes happening on your device. Thus, you must keep running a malware check, or you can enable any firewall setting on your device. This way, you can secure your device from these common technical glitches. 

8 Troubleshooters For “Chromebook Screen Black”

Hoping that you have got all the rationale behind understanding the causes. So the time has come to troubleshoot the problem. However, we have provided you with the eight troubleshooting steps in the below section through which you can manage your Chromebook screen black problem. These methods are based on the advice of technical experts around the world. So without further ado, let’s get started with the troubleshooting steps.

1. Increase Screen Brightness

If your screen brightness is low, then you are likely to encounter the problem of Chromebook black screen. In this case, you will need to increase the brightness of your screen. Simply you can increase the brightness with the function key, which has a brightness sign. 

Increase Screen Brightness

Moreover, if this hasn’t happened the way it was intended, then you may require to take a long way. So, you must enter settings and look for the system display setting. Here, you will get the option to control the brightness of your system. Increase the brightness and check if the issue persists. If the issue didn’t get resolved with this most common trick, then you are required to hop on the next method.

2. Hard Reboot Your Chromebook

Rebooting and restarting can help you to achieve the ultimate smooth performance of your Chromebook. As you know, this resolving trick is quite common for various day-to-day troubles happening in your system. You can fix not only the black screen on Chromebook but also the windows 10 black screen. Hence, you must try rebooting your system as it will help you to remove the issue of a black screen.

A new start after the reboot will give your system a refreshed pace to work with. But how to do so? Well, it is easy; you are required to press the power button for 6 to 10 seconds or till the light of your screen, and the keyboard keys go off. Now, after a couple of moments, you must restart your Chromebook and check if the problem has gone or not.

3. Leave Your Chromebook to Cool

A heated-up system creates too much hassle for the user to work efficiently; the same is the case for Chromebooks. If you were using your Chromebook for an extended period of time, then it is more likely to create a hassle in running smoothly. Thus, you must give it some time to cool down. If you have over-consumed your Chromebook, then you must leave it for a couple of hours until it cools down completely. 

When its temperature comes back to normal, then, restart it and check if the Chromebook black screen problem persists.

4. Disconnect External USB Devices

Sometimes, the issue is coming from your device externally. Thus, you are required to eliminate this externally connected device. If you have so many connected devices to your Chromebook, then you must disconnect them all to have a smoother performance of your Chromebook. If any external device connected to your Chromebook consists of any bug, then you are likely to encounter a malfunction on your Chromebook. 

Disconnect External USB Devices

Furthermore, if your Chromebook is in developer mode, then you are required to be more careful with your connected devices. Thus, you must disconnect all the devices, i.e, keyboard, mouse, audio devices, and everything. Shut it down for a couple of minutes entirely. And then restart your device. This method can also resolve the problem of android auto not working.

5. Let the Battery Run Out

Another troubleshooter of the guide has received a lot of positive results from the people who were suffering from the issue of chromebook stuck on black screen. Thus, you are also advised to try this way out. However, it is quite an easy process to perform. If you are not able to do anything on your device, leave it until the whole battery is drained out and the system turns off automatically. Now, charge it for only 30 to 40 minutes and check if you get successful in eliminating the issue.

6. Charge Your Chromebook Correctly

If your Chromebook is incorrectly charged, you are required to charge it properly. If this doesn’t get done in an appropriate way, then you will definitely be going to face many more errors in the coming future. Hence, you must look into it timely. You just need to connect the charger properly. And charge your Chromebook until it is 100{50afa256e6562afb2cd7837d8db3fd71ce947f26b53ffff72a77bb9141ae121a} charged, and then remove the USB cable point from the Chromebooks ports. Restart your device for efficient execution of the troubleshooter. Now check whether the issue has been resolved or not. If not, then you can jump on the next lined-up method to get it resolved.

7. Try a Different Charger

Charging issues can create the problem of a black screen on your device. Thus, you must make your charging correctly and on time. Here, you must keep in mind two things– first, You must not always overcharge your device as it will affect the battery life, and second, you must charge your device completely and then use it. This way, you can manage your device’s battery life with more efficiency. 

 However, you must try charging your Chromebook with another working charger and check if the error has gone through, as there’s a possibility of having bugs on your previous charger. Thus, you will need to replace it if the issue gets resolved.

8. Reset Your Chromebook’s Hardware

Fortunately, there’s a way through which you can manage and refresh your hardware.  However, Google has given us a way through which we can refresh the malfunctioning hardware in our system. This is also known as a hard reset. Hence, in this method, we are going to perform a hard reset on our devices. Let’s see how one can do so.

 Reset Your Chromebook’s Hardware chromebook screen black

  • First, you need to power off your computer completely. Wait for a couple of minutes until it gets completely off.
  • Press the power key and the refresh key together to reset your Chromebook hard.
  • Keep pressing the buttons till your system comes back to light.

There are other methods, too, for hard resetting your operating system. However, these methods vary from brand to brand and version to version. In many new versions, in which the keyboard is removable, you will need to press the power button and volume up button together to perform a hard reset on your device.

Frequently Asked Questions

Q1. Why is my Chromebook screen black?

Your Chromebook must be going through some hassle, either related to the software or hardware issues. Most probably, the issue with the Chromebook is associated with the software problem. Thus, you can try common resolving troubleshooters such as resetting your device and restarting your Chromebook.

Q2. How do I restart my Chromebook without a screen?

It is very easy. You can simply turn off your Chromebook completely and wait a few minutes after it gets turned off completely. Now, press the power button along with the refresh button located on your keyboard until the light gets on.  

Q3. How do I manually start my Chromebook?

You can simply turn on your Chromebook by pressing Ctrl + Reload + power key altogether. This way, you can give your device a new and smoother start. Another thing that you can do to restart your device by just press the power key and reload the key together. This will boost your device efficiency as it will promote a hard reset on your device. Thus, your system will start to be refreshed.

Conclusion

In the above guide, we have provided you with the top solutions for the black Chromebook screen. You can try any of the above methods to rectify your issue. Must note, if the issue is with your software, then only these troubleshooters can help you. If your issue didn’t get resolved after doing all the above methods, then you must go to any nearby technician as the problem is with your hardware which you can not fix on your own. However, if you have any queries in your head, then you can connect us anytime. 

roblox fps unlocker

Are you looking to take your gaming experience to the next level? Do you want an edge on the competition and make sure that your skills don’t become stale? If so, then Roblox FPS Unlocker is definitely something you should consider. This powerful software allows gamers to unlock more frames per second (FPS), providing smoother, faster gameplay and a better overall experience. With this remarkable tool at your disposal, you’ll be able to out-play the toughest of opponents and strategies will be mastered much faster. Read on for an in-depth look into how FPS Unlocker can revolutionize your gaming skill set!

Roblox FPS Unlocker (What You Must Know)

fps unlocker roblox

If you thought the Roblox gaming experience was already awesome, think again! With the new FPS unlocker Roblox, gamers can enjoy a completely transformed, even better gaming experience. Unlocking FPS allows for bigger and bolder adventures with extra features like smoother game mechanics, higher-resolution graphics, and updated interface designs. 

This all adds up to an exciting opportunity to take gaming to the next level – more immersive, faster, and alive! If you are passionate about Roblox gaming, unlocking FPS with unlocker is a must-know for sure.

Why is FPS Unlocking Important?

The higher your frames per second when playing Roblox, the smoother and more enjoyable your gaming experience will be. Having more frames per second means that your game runs faster and more smoothly without lag or choppiness. It also ensures that you have better control over your character while playing so that you are able to make fast decisions in order to win the game. All of these elements come together to give you an overall better gaming experience and increase your chances of success.

Steps for Roblox FPS Unlocker Download

roblox fps unlocker download steps

This program helps users access higher frames per second (FPS) on their games so they can enjoy smoother, faster gameplay. Here’s how to get it up and to run in no time. 

Downloading the File 

First things first, you’ll need to download the .exe file from the below button. Make sure you get the latest version of this file so that your computer is compatible with it. Be sure to save it in a location where you can easily find it when it’s time to install. 

Download Now

Installing the File 

When you have downloaded the file, look for it in its saved location and open it up. You may see some security warnings but don’t worry—this is normal, as many programs require certain permissions before they can run properly. Just agree to any terms and conditions and click through these windows until the installation is complete. 

Running the Program 

Once your program is installed, launch it and press Shift+ F5 on your keyboard when prompted. This will activate the unlocker for all of your games, allowing them to run at higher FPS rates than before. The unlocker will take care of all of the technical stuff behind-the-scenes so that you can focus on playing and enjoying yourself.

System Requirements for the Unlocker

System Requirements for the roblox fps unlocker

To use this program, there are certain requirements that need to be met. Let’s take a look at what these requirements are. 

  • WinRAR Application: Before you can begin using the Roblox FPS Unlocker, you must first download and install WinRAR application on your system. This app will provide you with the tools necessary for extracting and streaming complex graphics files from your computer. 
  • Proper RAM: To ensure smooth performance while playing demanding titles, it is recommended that your system has 8 GB RAM or higher installed on it. 
  • Windows 7 64-bit OS: In order for Rbx FPS Unlocker to work optimally on your PC, Windows 7 64-bit must be installed as a minimum requirement. Without this OS, some of the features within the program might not function correctly. Having this OS ensures that all computing needs are met without any issues affecting performance. 
  • DirectX 11: This application requires DirectX 11 in order to unlock frames and improve gameplay visuals and performance by utilizing all of your computer’s hardware components in an optimal way.   
  • 2GB of Free Storage Space: Lastly, make sure there is at least 2GB of free storage space available on your device before installing this program – otherwise, it won’t run properly and could cause unexpected errors!   

Is Roblox FPS Unlocker Compatible with Other Games?

The FPS Unlocker Roblox is a game-specific add-on that was designed to improve frame rates and performance for the game Roblox. While it does its job well, it’s not capable of working with other games. This is because its features and settings are tailored to make the most of Roblox’s engine so that they wouldn’t be compatible with any other game. 

Additionally, it might create conflicts when attempted with other games, thus, making the two incapable of running smoothly together. Therefore, while this incredible tool certainly enhances gameplay on Roblox, there’s no reason to believe that its benefits can extend beyond this particular title.

Frequently Asked Questions

Q1. Do I Need To Be A Developer To Use Roblox FPS Unlocker? 

No! FPS Unlocker Roblox is designed for all skill levels and does not require any coding or programming knowledge. The program comes with an easy-to-follow interface that allows users of all levels to quickly get up and running with minimal effort. All you need to do is download the program onto your computer and follow the instructions. 

Q2. Is Roblox FPS Unlocker Safe To Use? 

Yes! The developers behind Rbx FPS Unlocker have gone to great lengths to ensure that all files associated with the program are safe and secure. The code is regularly updated with new features and security patches, so you can rest assured that any downloads from the official website are completely safe and virus-free. 

Q3. Does using this tool require me to install anything on my system? 

No! The installation process for the Now gg Roblox Frame Rate Unlocks is incredibly simple. All you need to do is download and run the application, which takes only a few seconds. Once downloaded, simply launch the program, select which game you want to unlock frames for, and wait for it to finish optimizing your settings. You’ll be ready to enjoy smooth, high-performance gaming.

Conclusion

Roblox FPS Unlocker is a valuable tool with many benefits for gamers. It encourages maximum control, creativity and speed for all players so that you can customize your gaming experience however you like. This software allows you to take full advantage of the advanced features in Roblox and gives you the edge when competing against other players. Not only that, it helps reduce input lags and frame dropping while ensuring smooth running game play. Experience the no-lag revolution today with this Unlocker – the ultimate solution to your gaming performance cravings.

no bootable devices found

At some point, we have all encountered a computer error that leaves us scratching our heads. The “The system cannot find any bootable devices” message is one of the most common errors that individuals encounter when attempting to start their laptop or desktop which can be incredibly frustrating. Fortunately, there is no need to panic as it’s often quite easy to resolve this issue quickly and get back online in no time. In this blog, we will provide you with a step-by-step guide on how to fix the “no bootable devices found” error by following five simple steps with easy instructions. Read on for more information and say goodbye to your tech woes!

What does “No Bootable Devices Found on Windows 10” mean?

no bootable devices found

If you are getting an error message “no bootable devices found” depicting that your system is unable to find a bootable device, then you must resolve it in time, as it can get worse if not fixed on time. But what does it mean? So, it simply implies that your device is having trouble while opening in order to get signals from the booting devices. Well, booting devices are the hardware required to start your computer. If you have just upgraded the hard drive or CD-ROM drive recently, you are more likely to face the error as your system would be unable to work with these drives and can’t find the essential files which help in starting up your PC. 

What Causes  “The System Cannot Find Any Bootable Devices”? 

Various things can be responsible for your system showing the ‘no boot device found’ error.  However, a better understanding of the cause will help you to resolve the error better. Hence, let’s see what the possible reasons for the error are.

  • The installed bootable device is not findable.
  • The boot order is not correct.
  • Having multiple hard drives
  • A disconnected bootable 
  • BIOS or CMOS settings may be incorrect.
  • Damage or corruption in your booting device

Now, you are fully aware of the cause. You can simply diagnose the cause and start with the fixing troubleshooters present in the further section. 

Troubleshooters To Fix  “No Bootable Devices Found” 

There are a total of 5 possible solutions that we have brought for you. This can fix the pesky error of “no bootable device windows 10” by setting back the boot drive and by repairing the bootloader. Let’s check the easy steps for doing all the fixes.

1. Setting The Hard Drive as The Boot Device

One of the significant causes of the error “no bootable devices found” is the hard drive issues. So you must look into fixing the hard drive issues if you have multiple hard drives injected into your computer. Then you must set a single hard drive for your PC to load. This way, you can make your PC’s overall performance smoother or can eliminate the error. Let’s check the steps that can help you to set the hard drive as the main booting device.

  • You need to restart your computer first. 
  • And while it is restarting, press the key “ESC” to get into BIOS settings.“ESC” to get into BIOS settings.
  • Here, you can see five tabs. Select the “boot” tab.
  • You can see a boot order list where you need to put the hard drive.
  • Press F10 to save the change. And let your computer start.

After doing the above steps, you must try opening your system and see if the error has been eliminated or not. If you are still facing the error, then you must try another method to fix it.

2. Fix The Corrupted Master Boot Record 

Maybe you have a corrupted master boot record. Thus, you will need to fix it within a few steps. It can simply cause an error and lead you to worse problems in the future if not fixed on time. Let’s get into the steps for fixing a corrupted MBR.

  • First, you will need to inject windows installation media into your computer.
  • Follow the on-screen wizards, asking for the language preference and the region.
  • Here you can see the option “repair your computer” click it. Click the install now option.
  • Click troubleshoot and open the command prompt in advanced settings.
  • Now, you can see the command prompt has shown up. Type out the following command in it. Make sure you press enter after every command.
bootrec /fixmbr
bootrec /fixboot
bootrec /scanos
bootrec /rebuildbcd

Here, you must note that if your computer is asking for a new installation, then you must press Y on it. If you are done with the above steps, you must be able to eliminate the error saying “windows 10 no bootable device”.

3. Use System File Checker

You can use the system file checker tool to know what file is exactly corrupted and causing errors. Before doing the test, you just check your hard drive is perfectly connected to your device. Then only you can do the test properly. Since your PC is not working thus, you will need to use the window installation media so that you can run your PC. Let’s check the steps to know what you can do to resolve the error “boot device not found”.
Use System File Checker

  • Insert your Window installation media into your device and start your computer.
  • Press ESC to open the BIOS setting, enter the boot tab, and put the hard drive first in the order list.
  • After changing the BIOS setting, you must save the changes and let your computer start again.
  • Press Shift + F10 to open a command prompt on your PC.
  •  Type DiskPart in the prompt & then type list volume.
  • Here you can see the whole list of the drivers connected to your PC. Know your dive letter from here.
  • Type exit DiskPart and enter the next command written below.
sfc /scannow /offbootdir=C:\ /offwindir=D:\Windows
  • You must replace the concern letter as per your PC. 
  • Now, SFC will start to repair the corrupted files themselves. You must close the tab when the process is done. 

After doing the above steps, you must check your system by opening it without windows installation media. See if the error “no boot device found” has been eliminated.

4. Check the Cabling of Your Device

If the above methods don’t perform a perfect fix for your problem of “no bootable devices found”, then there must be another problem that you need to investigate. The other possible and common cause for the problem is improper cabling and the presence of dust and debris in your CPU. Thus, you must perform a clean check of your system and also try to fix the cabling error, if any.

If you have loose cabling, then it may cause a hassle in transferring the signals to your PC; thus, you must reconnect it correctly. If this does not give a good result, you must replace the cable with the newer one.

While doing so, you must check if there is any dirt and debris in your CPU. You can open the front frame of your CPU and clean the dust with a soft brush and soft force. After doing so, restart your system and check if it has started working correctly. 

5. Maintaining a Windows 10 Installation

Maintenance has always been too essential for the smooth running of your device, from updated drivers to upgrade hard drives. You must maintain your system up to date. This way, you can manage unwanted opening errors and other things on your PC. 

Windows 10 Installation

In addition, if you have a corrupted or broken drive, then you must replace the drive. It will take some investment but can give you better results. However, you can go for resetting the window option too. Resetting Windows can cost your data. Thus, you must have a backup of your data first & then go for the reset option. 

Frequently Asked Questions

Q1. What does the boot device not found mean?

This is an error that comes when you open your PC and your PC is facing some hassles with the hard disk. The common reason for this error is when your hard drive doesn’t support the boot system of your device. 

Q2. How to fix the boot device not found?

There are various ways through which you can perform a fix for “no boot device found” error. You can try the above methods to rectify the errors. However, you can reset your windows, and also you can perform a cabling check for better results.

Q3. How do I activate my boot device?

Finding the bot device is quite easy. You can just restart your computer, & while the screen is blank, press key F10 on our keyboard to enter the BIOS setting, and here you can see the boot settings option. Follow the on=screen wizards and find your boot device.

Conclusion 

If you were too facing the “no bootable devices found” error while opening the device, then you must have panicked at first & then became frustrated in resolving it. However, we have brought you five ways to resolve the error in easy steps. You can choose any of the methods above and try next if one is not working for you. If you have any queries or suggestions in your head, then you can come back to us anytime.

faulty hardware corrupted page

Have you just experienced a crash on your smooth-running device? And the crash shows “faulty hardware corrupted page error” If so, then say goodbye to the error with our troubleshooting guide. However, this might have been a bit annoying for you. However, the time has arrived to resolve it. In this blog, We are coming up with the top 10 troubleshooters to rectify faulty_hardware_corrupted_page, from cleaning your computer to troubleshoot the error with tools like DISM and  Memory Diagnostic Tool. We have got it all covered. So, without wasting much time, let’s get started with the guide. Keep reading to enjoy the smooth running of your PC again.

What is Faulty Hardware Corrupted Page Blue Screen?

What is faulty_hardware_corrupted_page Blue Screen?

A faulty hardware corrupted page is a blue screen error that can interrupt your running program and also unstabilize the overall performance of the PC. This error will make the screen stuck or can cause a random crash. It comes up with a bug check value of 0x0000012B. You must try to rectify it timely. Otherwise, it can deliver further damage to your PC. Let’s have a better rationale for it by understanding its real causes.

Causes of Faulty Hardware Corrupted Page

There are various causes for faulty hardware corrupted page windows 10. Understanding the causes will give you a better rationale for resolving the issue. Let’s check them all in the below pointer. 

  • Problems in device drivers.
  • Corrupted files in your device.
  • Malicious attacks of viruses on your device.
  • Corrupted Registry.
  • Problematic hard drive. 

10 Ways To Troubleshoot The Issue “Faulty Hardware Corrupted Page”

After knowing all the essential pieces of information about Windows 10 faulty hardware corrupted pages, one must get into the troubleshooters. Thus, we are ready with the top 10 surefire ways that will be going to assist you in every way possible and eliminate the issue in no time. So without further ado, let’s get started with the solutions.

1. Disable Fast Startup

This issue has majorly been encountered in windows 10 because of its fast startup feature. Its core component sometimes corrupts the files of your device and leads the device to an error. Thus, disabling this fast startup can fix the issue of faulty_hardware_corrupted_page. Let’s see how one can do so.

  • Open the power user menu by pressing the Windows logo key and X together.
  • Now, choose additional power settings.
  • Click the ”Choose what power button does” option.Disable Fast Startup
  • Tap on the change settings option coming up on your screen.
  • Untick the box coming for the fast startup option.
  • Don’t forget to save the changes you made.

After getting done with the above settings, you must power off your computer entirely and turn it again after a few minutes. Now, check if the error has been resolved or not. 

2. Upgrade Drivers

Outdated drivers can be the cause of these random issues on your device. Thus, you must keep updating your device driver to have a seamless experience of using your device. Not only these drivers, but you must also keep updating all your network drivers and the Windows itself. Let’s check how you can update your device drivers in easy steps.

  • Open the settings of your device by pressing the Windows logo key, and I.
  • Now select the option coming ”updates and security”
  • Click check for updates.
  • Here, you get a blue-colored option of “checking additional updates”; click it.
  • Check the boxes of every other driver that requires an update.

3. Roll-Back Drivers

If you recently have a new driver injected into your system, it may be the issue with the new drivers. Thus, you are required to roll it back. You can simply get a satisfactory result by following the steps below.

  • The first step is to open the device manager on your PC.
  • Expand the list of devices from the drop-down menu.
  • Right-click on the device that you want to roll back.
  • Select Properties.
  • Now, a prompt will come up.
    Roll-Back Drivers
  • Select the Roll back drivers option. 
  • Don’t forget to save the changes. 

4. Eliminate External Peripherals

If you have multiple connected devices to your computer, then you may find this error bumping again and again on your screen. Thus, you are required to eliminate all these peripherals, such as scanners, printers, and other less necessary devices. After removing them, Check if the issue has been eliminated or not.  If following this has brought you results, then it is good. If not, then just hop onto the other method in the queue.

5. Run DISM Tool

Faulty files can disrupt the good performance of your computer and can cause trouble in overall performance. This way, the error faulty hardware corrupted page blue screen will be triggered. Hence, you must use the tool DISM stands for “Deployment Image Servicing and Management” you can simply follow the below steps to resolve the error.

  • Right-click on the power button, and you will get the menu opened.
  • Select the Windows PowerShell option coming in the list.
  • System file checkers can help you to repair system files. 
  • To do so, you can use below written three commands: 
DISM /Online /Cleanup-Image /CheckHealth
DISM /Online /Cleanup-Image /ScanHealth
DISM /Online /Cleanup-Image /RestoreHealth

6. Check Disk Utility

Might the issue you’re facing be with the disk? Thus, you can perform disk utility to ensure that it is corrupted and make hassles for your windows to run smoothly. To resolve the error, you may inculcate the following steps.

  • Press the Windows button on your laptop and type PowerShell under the search bar.
  • Right mouse click on it and choose the option ‘Run as admin’
  • Here, you can use it to its full potential. 
  • Now, type chkdsk C: /R, and one must not forget to replace the letter C with the drive letter of your windows partition.
  • Press Enter.
  • A prompt will come up asking permission.
  • Type ‘Y’ and click Enter.

You must restart your computer for better implication results. After doing so, you can see the changes that have been brought after doing the Disk utility check.

7. Windows Memory Diagnostic Tool


Windows Memory Diagnostic Tool

The Windows memory diagnostic tool helps a lot in resolving windows errors. Thus, you must try this method out to eliminate Windows 10 faulty hardware corrupted pages. Let’s see how one can do so.

  • Press the Windows log key and write Memory diagnostic. Launch it.
  • Click Restart. This way, your computer will restart by itself. 
  • Now, the diagnostic tool will load as the computer starts. Wait for a while.
  • Here, you can see a test running on your computer waiting for it, too, until it finishes itself.
  • Go to the power user list and choose the event viewer.
  • Select Windows and click System Logs.

Here, if you can see any errors, then you must try to resolve them by changing your RAM. If you see no error, then hurrah, it has been resolved. 

8. Clean the Computer

Frequent cleaning of your computer is essential. You can not only save your investment through it, but you are saving your internal data as well. Over time, unwanted dust and debris in the computer’s internal parts lead to some errors. Also, it can affect the overall smooth running of your computer. Thus, you must clean the screen and dust in the keyboard keys every few days. Hence, you must try performing this cleaning first and then check if the issue has been reduced or not. 

9. Resetting Windows 10

Resetting your windows can improve the overall performance of the PC and enhance the smoothness pace as well. If you perform a reset on your Windows, then your computer will get a fresh start with a completely new reinstallation. However, a reset can not only resolve windows 10 faulty hardware corrupted pages, but also it can improve the performance, battery life, security, and browsing experience as well. So let’s check how one can do so.

  •  Open the settings of your PC.
  • Choose the option for the update.
  • Click the recovery tab and select the option coming ‘get started.’
  • Here, a prompt will come up to keep the files or remove them.
  • You must choose to keep my file if you don’t have a proper backup. 
  • Click Enter to get started with the Resetting procedure.

10. Upgrade BIOS

Upgrade BIOS for windows 10 faulty hardware corrupted page

Outdated hardware is the most common reason for the error: Faulty hardware corrupted the page windows 10. Hence, you must always keep an eye on upgrading your software. However, Outdated BIOS always results in various hardware-related issues and errors. However, it can be untouched for many years, but if it remains like that, then it may cause some issues. Thus, it would be better to update it.

Frequently Asked Questions

Q1. What causes faulty hardware to be corrupt?

A malware attack can cause your hardware to go corrupt. Thus, you must do a malware check on your system. And one should always keep their firewall settings unable to protect their PC. 

Q2. How do I check for faulty hardware on Windows 11?

To check faulty hardware on your device, one must do troubleshooting on your PC. You can simply do this troubleshooting with the following steps.

  • Open system settings.
  • Click the system option coming on the next screen.
  • Click troubleshoot.
  • Now, target devices one by one.
  • You will get your query resolved.

Q3. How do I know if my Windows hardware is failing?

You can simply check it by performing a test on your PC. For this test, you just need to follow the below-written steps.

  • Press the window logo key and R together to trigger run windows.
  • Type mdsched.exe and enter to run the test.
  • Now, your system will take a few minutes to get back to you.

Your system will restart itself. After a few minutes, try using your system again and check whether your system has started performing well or not. 

Conclusion

In a nutshell, we have provided you with the top 10 methods for fixing the faulty hardware corrupted page error. Along with these resolving tricks, we have provided you with a detailed comprehension of it, which consists of its meaning, causes, and resolvers. However, you can try any resolving techniques mentioned above. If you have any queries or suggestions, then you can get back to us anytime.

GoPro SD Card Error

Who is not familiar with GoPro! Most youngsters, along with adults, use GoPro regularly nowadays as it is among the most sophisticated action cameras on the market at the moment. It is exactly renowned for its incredible capacity for producing high-quality recordings or footage. However, many among them are complaining that they are encountering a “GoPro SD Card Error” issue that pops up on the screen while they try to use it. Are you also the one who is experiencing the same trouble?

Well, despite the development of digital memory devices, they are nevertheless susceptible to malfunction. This specific error specifically appears on the screen if the user has inserted or fixed the card not properly. But, also, this can occur for some other serious reasons at times. So, how to get rid of it? 

In this article, we have researched and brought out to you some specific solutions which are easy and simple to apply for all (even for a non-technical person) to get away from “sd card error GoPro” instantly. Don’t wait anymore, start reading.

GoPro SD Card Error

What Do You Mean By SD Card Error On GoPro?

Whenever your GoPro camera’s LCD screen flashes with pop-up messages such as – SD ERR, SD Card error, or NO SD, it literally implies that perhaps the SD card is just not functioning with the video camera or that you are experiencing a “GoPro SD Card Error.”

What Are The Major Causes of The Error “GoPro SD Card Error”?

Well, the “GoPro sd error” is currently occurring on your go pro. However, sometimes it occurs suddenly might be due to various reasons. Well, for some of you reading the article, knowing about the reasons might not feel necessary. But, in actuality, giving some time to read the reasons of why “sd error GoPro” is occurring. It will not make you feel regret instead will make you know more about it. Thus, spend some of your valuable time in this section to know the causes –

1. Insufficient Read and Write Speeds of the GoPro SD Card

The “GoPro SD Card Error” issue commonly happens following high-resolution or high-frame-rate recording. The only viable solution for fixing the underlying “sd card error GoPro” issue is to eventually replace the old and outdated SD card that you are currently using. Also, at times, security policy prevents use of camera and can result in such an error.

2. Dirty GoPro SD Card

It is indeed possible that the dust and debris of the outside world is to blame if your SD card has been being used with GoPro for several months or years and suddenly and unexpectedly stopped working, causing you to encounter the Error.

3. The Nand Cells Might be Currently Running Out of Time

The Nand cells, employed in SD cards to store the data, have just a built-in endurance of many write cycles before they degrade. Hence, your SD card might start to behave abnormally, and the error message “GoPro SD Card Error” might appear if these cells start becoming severely depleted.

4. Check The SD Card

The pop-up warning message “GoPro sd error” will certainly appear on the LCD screen of your GoPro camera; nevertheless, if the SD card has been inserted incorrectly or is not completed properly connected.

How To Recover Data From An SD Card Displaying An Error On A GoPro?

Recover Data From An SD Card Displaying An Error On A GoPro

However, before you jump away to the solution part to get rid of the “sd error GoPro” error appearing on your GoPro camera screen, it is extremely necessary that you restore the relevant data from your SD card in order to safeguard yourself from loss of data. 

Therefore, to do data recovery, we will be using Disk Drill, which is considered to be one of the best among the most popular programs. Disk Drill is compatible with the primary file formats used by GoPros and can effectively repair SD card errors on GoPros. The user interface is simple to use, and it has extra capabilities like a byte-to-byte backup that make data recovery simple. 

Instructions for Recovering the Data

Well, to recover data from an SD card displaying an error on a GoPro by the use of Disk Drill, you need to follow the instructions very carefully as we have mentioned below for you –

  • First of all, download the Disk Drill installer from the authorized Cleverfiles website to just get started.
  • Open the Disk Drill installer by selecting the Start button, and then start the installation procedure. By selecting the Options option, you can voluntarily choose where Disk Drill will be installed. Now just watch for the installation to successfully complete.
  • The SD card should now appear on the list of devices and discs you may scan for data recovery after the software has been properly installed. Make sure to insert it at this stage.
  • Choose your SD card and press the “Search for lost data” button. The scanning procedure will begin as a result. By clicking the Review detected objects option while the scan is still running, you can immediately see what Disk Drill has discovered thus far. The results may also be seen by clicking the button when the scan is complete.
  • Following the scan, you may browse all of the files on the results screen to decide which ones you wish to recover. If you are able to recall the filenames of deleted files, you may also utilize Disk Drill’s search feature. After identifying the media you wish to recover, check the boxes next to each of their file names. Press the Recover button.
  • When the files are retrieved, a popup will appear asking where they should go.
  • Click OK after choosing the place for the files in your selection. It is advised that you save your data in a distinct sector than the one that you scanned.
  • The media recovery process will then begin with Disk Drill.

“GoPro SD Card Error” (FIXED with Easy Methods)

Following these easy and simple solutions, you will surely get rid of the “sd card error GoPro” trouble you are currently experiencing. So, without wasting a single, let’s dig into the solutions.

Solution 1: Clean the Memory Card in your GoPro

This is the first and the easiest solution to apply on the list of our solutions for removing the “GoPro SD Card Error” pop-up error appearing on the GoPro camera screen. The word “cleanup” refers to both internal and external cleaning of a computer’s memory card. Cleaning is important because the card may become covered in dust and debris, rendering it impossible for the computer to identify it properly. Therefore, you need to use isopropyl alcohol to clean your memory card. You can fix a card malfunction like the “sd error GoPro” error with the assistance of cleaning with this alcohol. How to do it? To know, you will need to follow as we have instructed below –

  • First of all, clean the metal or contacts on the SD card. Grab your toothbrush and dampen the bristles with isopropyl alcohol. 
  • The contacts should then be cleaned with a damp brush.
  • Use a cloth to pat your card dry. In the event that you still see dust on the metal contacts, repeat the operation.
  • The memory card should be inserted into your GoPro camera once it has dried completely.

However, after completing the following process, examine whether the error “sd card error GoPro” has now been removed and the camera is operating properly. If it still appears, there might be some other issue, so you need to proceed to the next solution.

Solution 2: Use CHKDSK to Inspect for SD Card Errors.

The second most effective solution in the list is to resolve the “sd card error GoPro” error that you are currently experiencing by the use of CHKDSK. A built-in utility in Windows termed CHKDSK basically monitors file systems to detect faulty SD card errors like “GoPro sd error” and fixes them if required. So, to run the CHKDSK, you need to follow the instructions we have mentioned for you below –

Use CHKDSK to Inspect for SD Card Errors.

  • Check to see if your PC has the SD card installed. 
  • Open File Explorer after that. After doing that, right-click your SD card on this PC and choose Properties.
  • Go to the Tools tab in the Properties box. Select Check from the Error checking menu. This checks your drive to see if there are any fixable issues.
  • Now, you will receive information stating that CHKDSK was unable to find any errors, but you can still opt to scan even in those cases. Choose Scan and repair drive from the menu to finally begin the scan.

Solution 3: Format GoPro’s SD Card

The “GoPro SD card error” can be a frustrating issue, as it means that you won’t be able to take any photos or videos. Thankfully, there is an easy fix: formatting your GoPro SD card. Read on for step-by-step instructions on how to do this. 

Step 1: Start by powering off your camera and removing the memory card from its slot. You should also make sure that the camera is not connected to any other device or power source. After that, insert the memory card into your computer’s built-in card reader or an external one if necessary. 

Step 2: Once the memory card is inserted into your computer, open up File Explorer (or Finder on Mac). From here, select the memory card and click on Format in order to start formatting it. Make sure you choose either FAT32 or exFAT as the file system type before clicking Start. 

Step 3: After a few minutes, your memory card will be successfully formatted, and any errors should now be gone! Now insert the memory card back into your GoPro and turn it back on again. Try taking some photos/videos with it to see if everything is working correctly now. 

Solution 4: Re-install Disc Drive

The “GoPro error.” is common among its users, and there is an easy fix that doesn’t require too much technical know-how. All you need to do is re-install a disc drive to resolve the problem. Read on for step-by-step instructions on how to do it. 

Step 1: Access the Device Manager 

The first step in fixing this issue is accessing the Device Manager. To do this, go to your Control Panel and select ‘Device Manager’ from the list of options. Once you have opened the Device Manager, look for ‘Disc Drives’ and expand that option by clicking on it. You should see an entry listed as ‘SD Card Reader’ or something similar; if not, move on to Step 2. 

Re-install Disc Drive

Step 2: Reinstall Disc Drive 

If you don’t see an entry listed as ‘SD Card Reader,’ then you will need to reinstall the disc drive in order to fix the issue. Right-click on ‘Disc Drives’ and select ‘Uninstall Device’ from the drop-down menu that appears. A confirmation window will pop up asking if you are sure about uninstalling. Select Yes and wait for it to finish. Once it has finished uninstalling, restart your system and then install it again using Windows Update (you can find this by going back into your Control Panel). This should resolve any issues related to your GoPro SD card error message.

Step 3: Troubleshoot

If, after following these steps, you are still having trouble with your GoPro SD card error message. here may be some other issue causing it that needs to be addressed before being able to use your device again. It may be worthwhile checking out some online forums or contacting customer service directly for help troubleshooting this issue further. 

Solution 5: Install the Latest Version of Firmware

The main reason why you need to install the latest version of firmware is that it contains important bug fixes and performance improvements that have been released by GoPro. By having these updates installed on your camera, you will ensure that any potential problems are resolved quickly and effectively. Moreover, installing the latest firmware can also help improve your camera’s overall performance. Which means you’ll be able to capture better-quality videos and photos. 

Install the Latest Version of Firmware

Installing the latest version of firmware on your GoPro camera is easy. First, make sure that your camera is completely off before proceeding. Then, download the relevant software from GoPro’s website onto your computer and follow the instructions provided on-screen in order to complete the installation process. Once completed, power on your camera to see if this has resolved the “SD card error” issue. If not, then it may be worth trying a different SD card in case there is an issue with compatibility or corruption with the current one in use.   

Frequently Asked Questions 

Q1: Why does the SD card on my GoPro always report an error?

Ans: Any time your GoPro camera displays the messages “SD ERR,” “SD Card error,” or “NO SD,” the SD card isn’t communicating properly with the device. This error can be caused by a number of reasons, including improper storage memory card formatting or using a damaged SD card in the camera.

Q2: Why are just 10 minutes of video being recorded by my GoPro?

Ans: A GoPro wouldn’t be able to record more than 9 to 10 minutes of video at a time at its maximum quality if it didn’t segment the video into volumes. 

Q3: Is 128GB sufficient for the GoPro 9?

Ans: Even though the GoPro Hero9 can better accommodate memory cards with a storage capacity of 256GB. or regular use, 128GB cards perform well. You don’t technically require an ultra-fast micro SD memory card.nstead, you merely need one that has a minimum U3 spec rating since the bandwidth, even in the Hero 9’s 5k shooting mode, is just up to 100Mbps, or 12.5MB/s.

Q4: Can videos that have been damaged be fixed?

Ans: Use Ontrack EasyRecovery or another video file recovery program to actually accomplish this. Ontrack EasyRecovery provides a number of advantages. All user profiles, including individuals who have little computer knowledge and expertise, may easily utilize it because it is so simple to use. Your damaged file may very well be recovered with only a few clicks due to this robust and reliable utility value.

Q5: What should I do if the SD memory in my GoPro is full?

You must follow the instructions that we have listed below when your SD card is full –

  • From the SD card in your camera, copy any desired files to Quik or your computer.
  • Swipe downward on the touch screen.
  • Click Preferences.
  • Now, select Format SD Card from the Preferences menu by scrolling to the bottom of the page.
  • Tap the Delete button.

Conclusion

All the solutions mentioned above are working perfectly fine. You can pick any one of them that suits you the best. Remember, these techniques are only for “GoPro SD Card Error”. So don’t try it on another type of error because it might damage your camera permanently. Also, if nothing seems to be working, then there is a possibility that your GoPro camera is facing some other problem. So in that case, the best thing would be to take it to the nearest service center.

Windows Shift S not working

Do you use Windows for all your computing needs? There’s no doubt that the operating system offers plenty of handy features and shortcuts, but unfortunately, it can come with some frustration. If you find yourself facing an issue when attempting to print screen using the Windows + Shift + S shortcut, rest assured that there are a few possible solutions. In this blog, we will detail six methods to fix Windows Shift S not working issues & help get your screenshots back on track and make life easier in the process. Whether you need to take a screenshot immediately or just want peace of mind for future reference, we’ve got everything covered right here.

Windows Shift S not working

Why Windows + Shift + S Not Working?

It is very important to know the root cause of Window Shift S not working before we actually get into troubleshooting ways. However, there can be various reasons responsible for this mishap in your device. Let’s check them out in the below pointers.

  • Double buttoning: The reason is very simple: when the load of the two functions is on the one key, then maybe the key won’t work efficiently. Similarly, when these three won’t get the perfect order to work.
  • Malicious activity within the app: Maybe your app is having some issues with viruses or other kinds of stuff. In this case, you just need to reinstall the app and get on with it. Check if the issue has been resolved or not.
  • Interference of another malware-containing app: If some apps in our system have malware or virus in it then it may cause disruption. Thus, you will need to boost up your computer by cleanup apps.

6 Resolving Troubleshooters for Windows Shift S Not Working Issue

After knowing all the possible causes, we can resolve the matter with a few clicks with a better understanding of troubleshooters. We have given the top 6 resolving methods that you can use to eradicate the issue of windows key shift s not working. Let’s get dive into the troubleshooters.

1. PrntScrn Button 

PrntScrn Button 

This is the most common and well-known method to try for taking a screenshot. If you are in urgent need of taking the screenshot, then you can press the “prtSc”  key to capture the screen and save the screenshot to your clipboard. After that, you can use any editing app like MS Paint and other editing apps from your device to edit the screenshot. But a number of systems lack this key. However, if you have this key on your keyboard, then you must try capturing your screen with this.

2. Allowing Snip & Sketch’s Notifications 

When you press the windows key shift s but no result comes up, then it can be the issue with your notification settings. If the notification for taking the screenshot is off, then you are most likely to face the issue of  ‘windows key shift s not working’. In this case, you just need to disable this setting from your PC. Here we are enlisting some steps to rectify the settings.

  • Press the Window log key and I together to trigger the setting app of your PC.
  • Select the system option coming very first on your screen.
  • Now, click on “Notification & actions” coming at the left bar.
  • Locate the ‘snip-n-sketch’ option and enable it.
  • Try taking a screenshot by pressing ‘windows + shift + s’. You must see a notification.

In case it is already enabled, then the cause of the problem is something else. Thus, you must jump to the next method. If it is not enabled prior, then you must see the screenshot notification when you try to take the screenshot.  

3. Turning Clipboard History ON

Window clipboard history is another feature that can help you to take screenshots even if your win shift s not working. If the history of your clipboard is off, then you must try to enable it. After enabling it, you can simply save whatever screenshot you may want to save by just pressing ctrl+v at the location. However, let’s check how one can turn on the clipboard history. Another important thing is that these steps have the potential to work on every version of Windows.

  • Open your settings window by pressing the Windows logo key and I together.
  • Select the system setting and come to the next screen.
  • Now, you can see an option for a clipboard in the left sidebar.
  • Click and enable the history option coming there.
    Turning Clipboard History ON

After doing the above steps, you must check to take a screenshot by pressing all three keys. Windows+Shift+S. If you are able to take the screenshot, then you must follow the below-written steps to save it.

  • Take a screenshot.
  • Launch MS paint and try to make a blank image.
  • Now you can paste your clipboard image here by pasting through ctrl+v here.
  • If you want to edit it, go ahead to do so.
  • And save the result simply by pressing ctrl+s.

Hence, you can save the screenshot at wherever location you may want it to be. One thing that you must keep in mind is to save the file at an easily accessible location such as the desktop or wherever you want it to be.

4. Reset Snip & Sketch App

Resetting the device has been a troubleshooter for every other little technical glitch that happens in your device. You must try resetting this tool to get the issue of “win shift s not working” resolved. Thus, let’s check what steps you will need to follow to get it working again.

  • Open the settings tab in your system.
  • Select apps option
  • Locate the “snip and sketch” app. Right-click on it.
  • Select advanced options.
  • Scroll down and choose the reset option.
  • Now, a prompt will come up, and select reset to continue the process.

This way, you have reset the app “snip and sketch”; thus, it may have started working well. To test, you must check by pressing all the concerned keys and see if it started working or not.

5. Reinstall Snip & Sketch 

Reinstalling Snip and sketch apps on your PC can resolve your problem in an easier way. This way, if any error or malware is disrupting the action, then you must reinstall the app so that you can have better results in a few seconds. If confused, how to do so? Then don’t worry because we have written the below steps for you to have a satisfactory result. 

Reinstall Snip & Sketch 

  • Open the settings of your system. You can open it by pressing the Windows logo key and “I” together.
  • Choose the “apps” option in the settings.
  • Locate the app Snip and sketch on the coming app list. 
  • Right-click and select uninstall.
  • A prompt will come up; select uninstall in it.
  • Now, open the Microsoft Store and search for the app snip and sketch.
  • Install it again from here.

After doing the above steps, you must launch it and do the needful things as per the coming on-screen wizards. Once again, test your system and the newly installed app. Press the Windows logo key + shift+S to take the screenshot. See if it has started working or not.

6. Perform a Clean Boot

Performing a clean boot on your computer can help you to make your keys work again & may tune up computer with maximum efficiency. Thus, you can download any trustworthy third-party app for it. Sometimes, a few malicious apps from your device try to interfere with the snip and sketch app and may create hassles for you to take the screenshot. Hence, you are advised to perform a clean boot on your device. This way, you can simply figure out what app is creating a mess on your PC.   

Frequently Asked Question 

Q1. Why is Windows Shift S not working?

There can be various reasons responsible for why the keys Windows Shift S not working on your PC. One of the most likely causes for it is the malicious app or some virus in the snip and sketch app. Another likely cause is the damaged or corrupted files of your system.

Q2. How do I enable Windows Shift S screenshot?

There are various tricks that you can use to enable Windows Shift S screenshots. You can try the above fixes for it. Simply get into the snipping tools’ advanced option and click on the repair option. Now, wait a few moments and see if the keys have started working again or not.

Q3. Why won’t my Windows let me a screenshot?

In a few devices, you can see the PrtSc key as the function’s key. It can do both tasks together, which is why it leads you to the problem of Windows Shift S not working for the screenshot. However,  you can simply resolve this by pressing it twice.

Conclusion

In a nutshell, we have provided you with the top 6 ways through which you can take a screen print in your pc if the keys on your pc Windows Shift S not working. Thus, you can try any one of the above tricks from the above article. Hope this guide has helped you in every way possible. If you have any suggestions or queries in your head, then you can come back to us anytime. 

You may be wondering why you can’t get out of the bottleneck caused by HBO Max not working. Many users have complained that they cannot access content on HBO Max or that the service is malfunctioning. If you’ve been looking forward to this as a chance to catch up on your favorite series, it might be really disappointing. Fortunately, there are certain things you can do to get this streaming platform working again.

Therefore, this article will go through the reasons why HBO Max can be malfunctioning and provide some fast fixes. In addition, we will discuss some broad tips and tricks for making the most of HBO Max programs. If you follow these guidelines, you may fix and get out of the issue of HBO Max app not working and prevent any future complications from arising; read this article all the way through to its conclusion so that you may take away its best practices as a troubleshooting guide.

What are the Issues and Troubles Causing the Streaming Service Malfunctioning?

causes for HBO Max not Working

Sign-in difficulties, no video issues, sound issues, HDCP failures, password issues, service errors, and “not in service area” problems are just some of the troubles that users may encounter while attempting to use the app. There are several potential causes for such difficulties of HBO app not working, such as faulty hardware, interrupted service, or incompatibility between devices and servers. Some users may encounter problems if they have an older version of the app loaded on their devices.

Here are some of the most crucial factors that may be causing problems with your streaming experience:

  • Network connectivity issues: HBO Max in UK, US, or any other nation requires a stable internet connection to stream content. If your connection is slow or unreliable, the HBO Max won’t play.
  • Server outages: Sometimes the HBO Max servers may experience a temporary outage, causing the app to not work.
  • Compatibility issues: HBO Max may not be compatible with certain devices, especially older models. This can certainly cause the app to not work properly.
  • Outdated app version: If you have an older version of the app installed on your device, it won’t play.
  • Device or app settings: Certain device or app settings such as proxy or VPN settings, can cause the HBO Max app to not work properly.
  • Overload of a number of devices: At times, increasing the number of devices used to stream may cause issues and HBO Max won’t load.
  • Credential issues: There might be other issues arising out of login issues or password issues.

As a result, these are some of the most crucial concerns and factors that are impacting your streaming experience. We’ll be addressing these HBO Max app issues in the following manner.

The Best Troubleshooting Steps to Fix the HBO Max App Malfunctioning

It’s preferable to implement some fundamental troubleshooting measures before diving into more in-depth troubleshooting. If you’re having trouble with the app, try the following steps.

  • Run a speed test: You should run a speed test to check the bandwidth and connection speed to make sure it meets the requirements for streaming HBO Max.
  • Restart your router: Restarting your router can help to reset any network issues and improve streaming quality to fix issues of HBO Max not working.
  • Update the HBO Max app: Make sure that you got the latest updated version of the HBO Max app.
  • Check your internet connection: Verify that your internet connection is working properly and that there are no other devices using the same connection.
  • Clear the browser cache: Clear the browser cache and delete any incompatible extensions.
  • Reinstall the app: If the issues persist, try uninstalling and reinstalling the HBO Max app.
  • Upgrade your router: If the issue is still not resolved, you may need to upgrade your router for better performance.
  • Check your subscription: If your subscription plan is not active, you will not be able to access the content.

If these basic steps didn’t work, try the following more advanced steps and some of these steps include error-specific troubleshooting:

Fixing the App Crash

Here are some steps you can take to fix issues with the HBO Max app crashing:

  • Restart the app: Restart the app and try streaming again.
  • Check for updates: Make sure that you have the latest version of the HBO Max app installed on your device.
  • Clear the cache: Go to Settings > Apps & Games > Manage All Applications and clear the cache of the HBO Max app.
  • Reboot your device: Reboot your device and try streaming again which might resolve the issues.
  • Disable VPN or Proxy: If you’re using a VPN or proxy, try disabling it and see if that resolves the issue. Some VPNs or proxies can block access to certain streaming services like HBO Max.
  • Uninstall and reinstall the app: Try uninstalling and reinstalling the HBO Max app.
  • Check your internet connection: Verify that your internet connection is working properly and that there are no other devices using the same connection.
  • Check for any network issues: Check for any network issues and try connecting to a different wireless network.
  • Upgrade your router: If the issue of HBO Max not working is still not resolved, you may need to upgrade your router for better performance.

Fixing the Error Code 321

Fixing the Error Code 321

To fix HBO Max Streaming Issues: Error Code 321, you should try the following steps:

  • Check if HBO Max is down: Check if HBO Max is down by visiting the official website or checking for any service announcements.
  • Disable VPN: Any VPN or web proxy may be responsible for the HBO Max Error code 321, so you should disable the VPN or web proxy from your device.
  • Check for an unstable internet connection: Check for an unstable internet connection that may be causing the error that says HBO Max won’t load.
  • Check internet speed: Make sure that your internet speed meets the requirements for streaming HBO Max.
  • Clear HBO Max cache: Clear the cache of the HBO Max app by going to Settings > Apps & Games > Manage All Applications.
  • Update HBO Max: Make sure that you have the latest version of the HBO Max app installed on your device.
  • Reinstall the HBO Max app: Uninstall and reinstall the HBO Max app if the issue persists.
  • Restart your router: Resetting your router can help to eliminate the HBO error code 321.

Fixing the Error Code 100 and 420

To fix HBO Max Error Code 100 and 420, you should try the following steps:

  • Check the HBO Max servers: Check if the HBO Max servers are down in your area.
  • Update or reinstall HBO Max: Make sure that you have the latest version of the HBO Max app installed on your device and reinstall it if necessary.
  • Disable VPN: Disable any VPN or web proxy from your device, as this may be responsible for the error that says HBO Max won’t play.
  • Check your location: Check if you are accessing HBO Max from the United States or a U.S. territory.
  • Clear HBO Max cache: Clear the cache of the HBO Max app by going to Settings > Apps & Games > Manage All Applications.
  • Wait for HBO Max to resolve the server error: Wait for a few minutes and try streaming again after the server error is resolved.
  • Force close HBO Max: Force close the HBO Max app and reopen it again.

Fixing the Sound System

Fixing the Sound System

There’s also the possibility that the audio system may just stop operating. Here’s how to fix the HBO Max app’s faulty sound:

  • Check the app’s audio level: Check if the audio level of the app is low and adjust it accordingly.
  • Check the sound format:  Try changing the sound format and see if that resolves the HBO Max app issues.
  • Check the audio setting on the media player: Make sure the audio levels are properly set on the media player and device.
  • Power cycle the streaming device: Turn off the streaming device and then turn it back on again.
  • Reconnect the HDMI cable to the Smart TV: If the HDMI cable is loose, try reconnecting it and see if the issue is resolved.
  • Logout and log back in: Try logging out of the HBO Max app and then logging back in.
  • Disable Bluetooth and Do Not Disturb (iOS): Try disabling Bluetooth and Do Not Disturb (iOS) to see if it resolves the issue of HBO app not working.
  • Try the audio stream on a different HBO Max title: Try playing a different HBO Max title to see if the problem is resolved.
  • Check the audio stream on a different streaming device: Try streaming the title on a different streaming device to see if the problem is resolved.
  • Update the HBO Max app: Check for updates for the HBO Max app and install any available updates.

Fixing the Internet Connection

If your internet connection drops often, you’re better off with a wired (broadband) connection than a wireless one. However, regardless of your internet connection, you may use the instructions below to address the issues.

  • Unplug the power connection from the network devices (modem, router, etc.).
  • Wait 30 seconds.
  • Reconnect the power to your modem and wait for it to connect.
  • Open a new browser window and search for ‘Internet speed test.’
  • Run a speed test to check your internet connection.
  • You need a minimum download speed of 5 Mbps or HBO Max won’t load.
  • If videos are buffering, check your internet connection.
  • Download an Internet speed test app from the Google Play Store or Apple App Store.
  • Check for any network outages in your area.
  • Contact your ISP if you still experience issues.

Not just your Max app, if you have a connection problem, you may notice that you are having trouble with Snapchat won’t open.

Frequently Asked Questions

Why is the app for HBO Max streaming not working?

The app may not be working due to a variety of reasons. Some common causes include Internet connection issues, Router or modem problems, Device software issues, Subscription issues, Server outages, Location restrictions, App bugs or glitches, Incorrect login credentials, etc.

Are there any temporary fixes to fix HBO Max streaming not working?

There are a few things you can try if the app is not working:

  1. Check your internet connection,
  2. Restart the app,
  3. Clear the app’s cache and data,
  4. Update the app,
  5. Check device compatibility,
  6. Restart your device
  7. Check your subscription.

Do I need to uninstall and reinstall HBO Max?

In most cases, you do not need to uninstall and reinstall HBO Max in order to fix issues with the app. However, clearing the app’s cache and data or restarting the device can often resolve the issue. If you’re still experiencing problems with the app after trying these solutions, you may want to try uninstalling and reinstalling HBO Max.

What are the possible causes of the HBO Max app not working?

There are several possible causes of HBO Max streaming app not working, including Internet connection, App updates, Device compatibility, Server issues, Subscription issues, Geo-Restriction, Device issues, and Device Configuration.

Conclusion

If you complete these steps in order, you should be able to resolve the problem that is preventing you from viewing the content. As we saw above, there is a wide range of potential origins for these problems. If the issues causing HBO Max not working, try following the standard troubleshooting steps first. If the basic troubleshooting methods don’t work, try the ones we’ve outlined for each error-specific problem.

To summarize, there are several steps you may take to diagnose and repair the problem. First, ensure that the service is operational and that there is no network interruption. Then, if required, try closing and restarting the program, as well as restarting the device or browser. Check the speed of your internet connection and the strength of your WiFi signal.

Furthermore, you may also attempt to clean the app cache or delete and reinstall the program. If all else fails to resolve the HBO MAX app not working issue, contact your internet service provider as well as HBO Max support team to see if they can assist and also see if there is any subscription issue. With these troubleshooting techniques, you should be able to resume streaming your favorite HBO Max episodes in no time!

AMD Driver Timeout

Are you having a problem with AMD drivers? Does your screen also get stuck for a few seconds and then go black? If so, then you are encountering the AMD driver timeout error. If you are using AMD graphic cards, then you must be much familiar with these frustrating problems. The only way one can go is to restart the PC and compromise the ongoing task. However, you are going to say goodbye to these technical woes with our top 9 effective ways to perform AMD driver timeout fixes. From upgrading outdated drivers and windows to repairing corrupted files, we got you covered all. Thus, you must keep reading to get your AMD drivers back on track. 

What is AMD Driver Timeout Error?

What is AMD Driver Timeout Error?

AMD driver timeout error is just a new and decorative way, which implies a condition when your Windows are unable to receive and send signals to the AMD graphics card. This issue is very frequent nowadays. This error comes suddenly and crashes your ongoing program no matter what important work you are in the middle of. Most of the users are stuck with a blank screen which may lead them to restart their device. A lot of AMD graphic card users have a complaint about it already. Thus, we have come up with a guide to resolve this. So let’s check further sections to know more about it.

Why Does My System Show AMD Driver Timeout Error?

Suppose your system is showing AMD driver issues or timeout errors frequently. Then, you must fix it. You must know the causes first so that you can fix the issue with more rationality. Let’s check the reasons below.

  • Outdated BIOS settings: BIOS setting is the primary cause for the error to occur. One must keep updating their BIOS setting in order to have a smooth run of their PCs. But still, if the error occurs, then there must be other reasons too.
  • Bugs and malware: Sometimes unwanted bugs and malware present on your PC try to interrupt the performance of your overall system. However, if bugs specifically affect the graphic card, then you are likely to encounter the AMD timeout error. After all, computer maintenance is also important. 
  • Outdated Windows: Outdated Windows are the most common cause of every error that occurs on your PC. Same in this case as well. if your windows are not updated to the latest version and have not been upgraded for an extended period of time, then you are definitely going to confront errors. This is not only limited to this timeout error but also extended to other errors such as ‘no bootable device found.’ 
  • Corrupted system files: Corrupted and damaged system files disturb the overall performance of your computer & make your system more prone to crashes and errors. If the files that are required to open the startup windows are corrupted, then you are more prone to encounter the error. 
  • Improper hardware configuration: Your system must be lacking some hardware configurations. For which, your graphics and visuals are suffering, and you are getting AMD driver issues. Thus, you must manage the proper settings of our hardware.

Top 9 Ways to Perform for AMD Driver Timeout Fix

Here, the time has arrived when you can actually play with some settings and perform some to fix the issues of driver timeout. However, we are coming up with the top 9 ways through which you can optimize the performance of your PC. Without further ado, let’s check them out.

1. Update the Graphic Drivers

Updating the graphics driver can give you amazing results. To update your graphic card, you must go to the official site of your graphic card manufacturer or your laptop brand’s manufacturing site. One of the most common causes for the error is the incompatible graphic card. So, let’s get into the steps for upgrading AMD graphic card.

  • Go to AMD’s official site first here; you can download the latest driver for your graphic card.
  • To download the latest version, you must enter your PC model name and the GPU’s model number.
  • The website will show you all the possible driver lists that you can use.
  • You must choose the best for yourself; we would advise you to choose a VGA driver.Update the Graphic Drivers
  • Download and run the driver. Also, it will automatically recognize your system.
  • If everything goes well and is good, then your system will show an install option to proceed with the process.
  • Click on the install. 

One of the most important things that you must keep in your mind is– when you are installing the driver, you may get the screen flickering and a black screen at some point. Don’t panic or don’t even turn off the installation. It happens. Your system will notify you once the process is done. 

2: Update Windows

One must keep their system upgraded and always update the Windows timely. Otherwise, you will face errors like a black screen and many more. Updating Windows will give your system a new start. This way, your system will improve its performance automatically. Thus, you must upgrade your windows timely. Here, we are enlisting easy steps through which you can update your windows.

  • Open the settings of your system. You can simply press the windows key with I to trigger settings.
  • Click the Windows update tab coming in the option.
  • Now, select check for updates.
  • This way, you will show all the available updates. Complete all the required updates.

After doing so, restart your computer. Now, you can experience a way more smooth performance. Also, see if the error has been eliminated or not.

3: Uninstall Windows Update

The most significant reason for AMD driver issues is the bugs and the malware on your system. Thus, you will need to perform a fixation for these bugs. If you have updated your Windows recently and then you faced this error. Then it means the updates window has come up with some bugs on your device. Thus, you will need to uninstall the new update that you have done priorly. Here’s how you uninstall the newer updates of Windows.

Uninstall Windows Update

  • On Windows 11

Simply search for uninstall updates in the windows search bar. Click the result that comes up. Launch it and delete all the latest updates.

  • On Windows 10

In Windows 10, you will need to consume less than in Windows 11. Here, you need to get into the control panel first and locate the option programs. Here you will see the option ‘programs and features’ now; click it and view the installed update. You can see all the recently installed updates.

After deleting the recently installed programs on your PC, you will see that your system has started performing well. If not, then you can hop on the next method. Also, you must install a newer update again for your device. 

4: Repair Corrupted System Files

Another troubleshooter that you can perform to fix the error driver timeout AMD. You won’t need any technical experience to do so. You also are not required to perform a reinstall of the OS. However, you just need to perform the following steps to fix the issue.

  • To run the SFC command, Type cmd in the Windows search bar.
  • Select run as administrator to use with full potential.
  • First, you need to run the DISM command first. To do so, type the following command.
Dism /Online /Cleanup-Image /RestoreHealth
  • Now, Microsoft will download an image version of your system.
  • When you are done with the above steps, write sfc /scannow to run another scan.

Scanning may take a bit longer if it may find a corrupted file, then it will take a little more time to make it fine. Thus, you must not worry if your scan takes too much time.

5: Update BIOS

If you are experiencing AMD driver timeout, then the most likely reason for this is the outdated BIOS. If you have an old system, then the reason is more likely to be the outdated driver. However, if your system is new, it may not be the cause; thus, you can skip this method. Updating the settings can fix all the significant glitches you are having in your system related to the BIOS. 

6: Disable Overclocking

An overheated computer always invites glitches and errors. Thus, you must try to cool down your PC accordingly. However, disabling overclock can help you to cool down your PC. A cooled-out temperature will help your PC to run with more smoothness. If you haven’t done it for an extended period of time, then you must do it right away for better performance. 

You can use any third-party app, such as MSI Afterburner. Through this software, you can simply do a scan to cool down your computer and disable all the overclocking. Run the check and do all the needful as coming up on the screen.

7: Increase Virtual Memory.

If you are still unable to eliminate the error and encounter freaking errors again and again, then you will need to increase the virtual memory, as this will help you in reducing the burden on your GPU. Thus, let’s see how one can actually increase virtual memory.

  • Get into the system settings of your system.
  • Click the advanced options tab.
  • Locate the virtual memory tab and choose the custom size option.
  • Now, you can adjust the virtual memory as per your system’s requirement.

Increase Virtual Memory.

After doing the above steps, you must restart your computer for better and more efficient applications of the changes you just made.

8: Tweak Settings for Performance

For better performance of graphics and visuals, one will need to tweak many settings for enhanced performance of your overall PC. Sometimes, your PC gives a lot of burn to the graphic card and the GPU for giving optimized outcomes, but when your GPU is unable to handle so, then this brunt will become the cause of the error.  Let’s see what tweaks in settings you can perform to optimize the overall performance.

Power Settings

Tweaking the power settings can give you a better result in the performance of your PC. You can achieve not only the smooth performance of your PC but also improved gameplay of any video game’s FPS. Let’s check the easy ste[ps through which one can do so.

  • Open the control panel on your device and go to power options.
  • Here, you can see the default setting is set to the balanced power option. Also, many of the systems recommend running the system over this option. But you can change this with a high-performance setting. 
  • Click the option ‘change power settings in front of the balanced power. And tweak the changes, don’t forget to save the changes you made.
Visual settings

Another setting that we are going to tweak is the system’s visual settings. You can simply get into it with the following steps. Changing these visual settings will help you in every possible way to perform an AMD driver timeout fix. 

  • Open your system settings. You can locate this in the search menu of your PC.
  • Go to the advanced tab. Here you can unlock many advanced settings for your PC.
  • Choose performance settings.
  • Click adjust for best performance. 

This way, you can manage the visual settings as well. Simply adjusting these features will help you to have an excellent performance on your PC as it will reduce all the additional burden on your PC. And you can have a smooth running system without any errors and interruptions.

9: Change the Hardware Configuration

If you have recently made a change in your hardware settings, then you are likely to get this timeout error as your system is unable to adjust to the new settings. Hence, you are required to undo the settings or update your system with new settings. This can only help you to make a balance between your system and AMD graphic card. 

Another thing that you can do is reinstall the graphic card or switch the slot of PCI-E. This can also help you to adjust the hardware configuration as your system is demanding. Hence, you can have an outstanding performance of the overall function of the PC. 

Frequently Asked Questions

Q1. What is a driver timeout?

Driver timeout happens when your Windows is not able to give and receive the signals from your Graphics card. Then your system shows this error. This generally happens when you have an outdated graphics card on your device. Thus, you are required to update it timely.  

Q2. Why does AMD driver timeout occur?

There are various reasons responsible for this error. One of the most significant reasons for this is the outdated drivers of your PC and the malware attacks.

Q3. How to fix AMD driver timeout?

There are various ways to fix AMD driver timeout errors. You can tweak some of the settings of your PC, such as visual and power settings. Another thing is the hardware configuration; adjusting it accordingly will help you to maximize the result of the outcomes. In addition, repairing system files and updating Windows can also help to eliminate the driver timeout AMD error. 

Conclusion

Having an AMD graphics card means facing frequent errors. Thus, you will need to resolve it on time so that the issue won’t create a bigger problem, Hence, we have provided you with the top 9 troubleshooting ways that will definitely fix the error “AMD driver timeout” within a few clicks. You can perform any of the above methods. If you have any queries or suggestions left in your head, then you can get back to us anytime.

Server IP Address Could Not Be Found

Are you stuck with a google server IP address that could not be found? In order to resolve it, you ended up scratching your head. If so, then you no longer need to worry, as we are here to rescue you from this frustrating error. However, we are coming up with a guide that has 9 resolving tactics to rectify and eliminate the error in a few clicks. Fortunately, we have got all covered, from its meaning to the causes and to the top resolvers. Well, if you want to resolve the error server IP address cannot be found, then you must read our guide and get your chrome working again. 

What Does  “Server IP Address Could Not Be Found Error” Mean?

Server IP Address Could Not Be Found

If you search for something and your system shows  “Server IP Address Could Not Be Found Error,” you must get freaked out first, and you will start to look for the resolving methods. But before that, you must know what it actually means. Well, it means that the server of your system and the server of the site that you want to reach are unable to connect. Thus, it showed the error “couldn’t find the IP address.”

Causes of “Google Server IP Address Could Not Be Found”?

When it comes to finding the cause of the error, then you can find it on your end and the site’s end as well. However, the solutions are reason based. Thus, you must understand all the possible reasons to resolve your error with our reason-based solutions coming in the further section.

  • Bad Internet Connection: If the internet connection through which you are connected is weak, then you are more prone to see this error. You must check your internet connection. You can try accessing another site to check where the problem is located.
  • Problematic Cache: If the random and unnecessary cache in your computer takes up important space, then you are likely to get the error. In order to resolve this, you can try deleting unwanted cache from your system. This will not only result in eliminating the error, but also it will help you to improve the smooth running of your overall system.
  • Down DNS server: If the DNS server is down at your end, then again, you will encounter this error. You can simply detect the cause of the error coming on your screen If it writes, “the DNS IP address could not be found.” 
  • Site is Down: Another possible cause for the error coming on your screen is the server of the site that you want to access is down. You must wait for a while to get your chrome back on track for this cause, as the problem is not at your end.  

Top 9 Troubleshooters For “Server Could Not Be Found”?

After getting a proper rationale for its meaning and the causes, one must look for reason-based troubleshooters for the error. Thus, we have prepared detailed stepwise troubleshooters for you. Try the following method one by one and rectify your error within a few clicks.

1. Restart Google Chrome

The best troubleshooter for any kind of problem in chrome is restarting it entirely. Restarting chrome will help you to re-establish the connection with all the sites and the pages you want to browse. Hence, re-establishing it will help you to surf limitlessly.

Simply exit the chrome with the coming red cross option in the top right corner. And relaunch it. Check if you have eliminated the error or not. If not, then you must try the other following methods enlisted below.

2. Make Sure Your Internet Works

The most common and significant reason for the error is that the google server IP address could not be found in the lousy internet connection. Thus, you must check if the error is from your side. Also, try fixing your internet connection. You can try restarting your wifi if your internet is not working. In addition, you must try connecting with a wired connection as it is meant to be more stable and frequent than the wifi connections.  Furthermore, you can check if your connection is lacking by connecting to any other site. 

3. Verify Your Proxy Settings

Verify Your Proxy Settings

Another possible cause for the error coming on google chrome is your proxy server. Might your proxy server be creating a problem with your internet connection. This is why your google chrome is not able to run efficiently. Hence, you will need to tweak some settings on your pc with a proxy. This way, you can manage to eliminate the server error. Let’s see what tweaks you can perform to eliminate the error.

  • Go to the start menu and look for proxy settings.
  • Here, you can see two options coming on the screen. One Automatically detects settings, and the other uses a proxy server.
  • You need to turn on the automatic detect setting option and,
  • Turn off using a proxy server option.

After doing this, you must check to open your google chrome and connect to any site. See if the error has gone or not. If not, then simply get on the next method written below.

4. Turn Off Your VPN

If you are connected with a Vypr VPN or any other, then only this step is relevant for you. Either way, you can skip it. A VPN server is most likely to have less connectivity, which ultimately results in showing server IP address cannot be found. In this case, you must turn off your VPN connection to eliminate the error. Furthermore, sometimes the site you want to reach is not approachable to the proxy location, thus resulting in an error. Hence, you must turn off your VPN and try establishing the connection with a standard wifi connection.

5. Use the Internet Connections Troubleshooter

If the above-presented methods fail for you, then you must try using an in-build internet troubleshooter in your system. But what does it do? Well, it simply detects the problem and gives you a way to resolve it. Thus, trying it can give you a productive outcome. Let’s check how one can do so.

  • Launch your settings app on your computer.
  • Open Update and security option 
  • Select troubleshooter and see in the right pane, and select additional troubleshooters.
  • Navigate to internet troubleshoot
  • Click “run the troubleshooter.”

5. Use the Internet Connections Troubleshooter

After a few minutes, your system will detect the problem and will show you the solution too. You just need to follow the on-screen wizards to remove the error. 

6. Clear the DNS Cache

If your DNS cache is creating problems, then clearing it can bring you productive results. Clearing unnecessary cache can help you to improve the overall performance of your PC. you can optimize the smoothness of running programs. Also, it will help you to remove the random errors coming on your device, such as Server IP Address Could Not Be Found and AMD driver timeout. Let’s check the following steps through which you can perform the cleaning. 

  • Open your command prompt. You can simply search the command prompt in the search windows.
  • Type “IPconfig /flushdns” in the command prompt and press enter.
  • Here’s how you can delete all the DNS cache from your system 

The above steps are valid for every other Windows computer, but if you have macOS, then you must try out the following steps.

  • Open terminal Utility.
  • Type “sudo killall -HUP mDNSResponder” command in the terminal. 
  • Put your password and click enter to delete the cache.

7. Clear Chrome Host Cache

Another thing that you can perform for the seamless and errorless performance of your pc is clearing the host cache from your google chrome. It is quite simple. What you need to do is listed below. Follow the easy steps. 

  • Launch your chrome and type chrome://net-internals/#dns
  • Click enter.
  • When you get to the next screen, you must select the DNS option coming on the left pane.
  • Now, you will get the option “clear host cache.”
  • Click it and check if your error has been reduced or if you can access your favorite sites.

8. Enable Dynamic IP Address on Your Windows PC

Enabling a dynamic IP address is one of the significant methods that you can try to remove the error server IP address could not be found. It happens when you manually set the IP address for your system, and your system is unable to show you the result with this inappropriate IP address. Let’s check how one can do so.

  • Launch the settings app on your PC.
  • Navigate to the network and internet options.
  • Click the “change adapter” option.
  • Now, you will get the network adapter option; right-click it.
  • Select properties.
  • Here, you will get a list where you can set the ‘protocol version 4’, click it, and then open its properties.
  • In the next screen, you must choose the obtain an automatic server address. 

You must press okay to save the changes. Also, you must not forget to restart your system for better execution of the changes you made. Try opening your google chrome and check if the error is eliminated or not.

9. Update Your Network Adapter Driver

Another possible cause for the error is your outdated network driver. Thus, you must keep updating your network drivers timely. If you are confused about how to do so? Don’t worry. We have covered it as well in the below pointers.

  • Open the device manager; you can simply enter the search bar and type device manager.
  • Now, you can see the list of all the connected devices to your system.
  • Navigate to the network drivers.Update Your Network Adapter Driver
  • Click the drop-down menu and right-mouse on the network device. 
  • Click to update the driver option.

After doing the above steps,  you will encounter a prompt that will ask you whether you want to search automatically for the driver or not. Then you must choose the automatic search option; this way, you can make your upgrading process easier.

Frequently Asked Questions

Q1. Why does it keep saying the server Cannot be found?

There can be various reasons responsible for the error you are getting on your google chrome. One of the most common reasons for it is a weak internet connection. You must check your internet connection to see if it is working well. Another possible reason is the unnecessary cache in your computer.

Q2. How do I fix being unable to connect to the server issue?

There are various ways to fix the server error you are getting in chrome. You can re-establish the connection, and you can try clearing the unwanted cache from your system. Another thing that you can try is to upgrade your network drivers.

Q3. What is the meaning of couldn’t connect to the server?

When your system and phone show that it is unable to connect to the server, then it means your network adapters are not able to connect with the local network servers.  

Conclusion

If you are struggling with the chrome error “Server IP Address Could Not Be Found,” then you must be freaked out at first, but you can resolve it with our top 9 methods that we have listed above. You can use any of the above methods to resolve the error. However, you must check to reach other sites if the issue is at your end or the site’s end to which you want to navigate. If you are still left with any query unanswered, then you can connect us anytime.

how to set up a teams meeting

The lessons we’ve learned from the Covid 19 pandemic and the need to quickly adjust to new circumstances have prompted some of us to acquire technical knowledge on our own time. Due to the ever-changing environment, not only in terms of technological background and context but also in terms of social and cultural issues, it is necessary for any of us to discover on our own how to fulfill our needs. Since MS Teams are so ubiquitous these days, it’s clear that knowing how to set up a teams meeting is essential in this day and age.

There is no such thing as wasted knowledge since every learning eventually pays out in some way. Understanding how to manage MS teams is also crucial and has got the same importance as any other knowledge you would pursue. This idea is for individuals who are here to learn the fundamentals, but for those whose work, education, or other pursuits depend entirely on online meetings, mastering MS Teams is an absolute must.

Therefore, you’ll find a wealth of information here regarding what a Microsoft teams meeting is and how to create a Microsoft Teams meeting link on a desktop computer or other device, whether you’re using a calendar or a scheduling channel to organize your meetings.

What is the Microsoft Teams Meeting, and Why Do You Need it?

how to create a microsoft teams meeting link

Whether you want to host or attend a virtual meeting, conference, or webinar, Microsoft Teams Meeting is the perfect tool for you. With features like screen sharing, video conferencing, and file sharing, Teams Meeting makes it possible for users to communicate and collaborate in real-time. Users of Teams Meeting can take advantage of the app’s recording and saving features to keep track of important discussions, and the app’s note, task, and action item creation capabilities can help improve teamwork.

Therefore, Teams Meeting is an excellent method for teams to remain connected and productive, regardless of where they are in the globe. As a result, understanding how to set up a meeting in Teams is always a valuable skill to add to what you already know.

As for its various uses, you may apply it to coordinate briefings among your team members who are spread across various geographical areas, creating a virtual setting that resembles your office atmosphere. You can use Teams to provide educational training, resources, or courses. You may also plan a general questions and answers session with your friends. So, you may have a variety of meetings using Teams meetings.

A Detailed Tutorial on How to Create Meetings on Microsoft Teams

As we have discussed above, you can schedule meetings using MS teams for a variety of purposes ranging from formal, business-related meetings to educational and social gatherings. You may control the meeting calendar so that both persons from outside the organization and those from inside the organization can attend. In other words, this is the way how to set up a Teams meeting for both internal and external contacts. You may also establish meetings on a channel that everyone on the team can access and join. Furthermore, you may specifically tailor the meeting such that only the team members that you have invited will be allowed to join.

As a result, we will go through a variety of methods of setting up Teams meeting on several platforms, generally, desktop and mobile, starting with the desktop version of Meetings.

Teams Meeting Link on Calendar (Desktop version)

To schedule a Teams meeting on a desktop PC, go to the Teams app and select Calendar. Select + New Meeting and give your meeting a title. Decide on a date and time, then enter the names of individual attendees or add a channel to select a class team channel to meet in. Finally, review your meeting details and select Send. This adds the meeting to your calendar and your attendees’ calendars.

how to set up a meeting in teams, Link on Calendar


As for a detailed oriented procedure, please follow the below-mentioned steps to create Microsoft Teams meeting:

  • Open the Teams app on your computer
  • Click on the “Calendar” icon on the bottom navigation bar.
  • Hit the “New Meeting” button in the top right corner view.
  • In the “New meeting” window, enter the meeting title, date, and time.
  • Choose your desired video and audio options.
  • Click the “Add online meeting” button to generate a link for the meeting.
  • Click the “Send” button to share the link with your desired attendees via chat, email, or another method.

This is how to set up a meeting in teams using the Teams calendar platform.

Optionally, you can also schedule the meeting from Outlook or Outlook on the web by clicking the “New Meeting” button in the top left corner of the calendar view and then following the steps from step 4 onwards.

Schedule a Meeting and Create its Link on a Teams Channel  (Desktop Version)

Teams channel meetings make it simple to arrange appointments though you cannot make private channel meetings. You can easily create teams meeting by following the procedures outlined below.

  • Launch the Teams app and go to the channel where you want to arrange and start a meeting.
  • Click on the team and channel where you want to schedule the meeting.
  • Click on the “Meetings” tab in the channel.
  • Click on the “Schedule a meeting” button.
  • Fill in the details for the meeting, including the title/name, date, and time.
  • Click on the “Add online meeting” button to generate a link for the meeting.
  • Click “Save” to schedule the meeting.
  • You can also click on “Send” to share the link with the members of the channel.

The meeting link will also be visible in the channel’s meeting tab for anyone to join the meeting on time. This is how to set up a Teams meeting through the Teams channel platform.

Create Meeting on Teams and Link for People Outside of the Organization  (Desktop version)

create teams meeting in desktop version

To schedule and create a Microsoft Teams meeting for people outside of a particular organization, follow these steps:

  • Open MS Teams and click on the “Calendar” icon on the bottom left corner of the screen.
  • Click on the “New Meeting” button to create teams meeting.
  • Enter the required information for the meeting, such as the subject, date and time, and duration.
  • In the “To” field, enter the email addresses of the attendees who are outside of your organization.
  • Click on the “Add Teams” button to add attendees from inside your organization.
  • In the “Meeting Options” section, choose the audio and video options that work best for your meeting.
  • Click on the “Send” button to send the invitation to the attendees.

These are the steps of how to setup a teams meeting requesting people from outside the organization join the appointments.

Once the attendees have accepted the invitation, the meeting will appear in their calendar and they will receive a reminder before the meeting. During the meeting, use MS Teams to share your screen, collaborate on documents, and communicate via audio and video.

After the meeting, use the chat feature to follow up on any action items or next steps, and to share any relevant documents or recordings. You can customize the procedures of creating the appointment or you can follow the same steps on how to set up a meeting in teams in the future.

Schedule an Appointment on Microsoft Teams Chat  (Desktop version)

To schedule and create an appointment  on Microsoft Teams chat, follow these steps, though this feature is only available for users who are using Teams on the desktop app or web version:

  • Open the Microsoft Teams chat with the person or group you want to schedule a meeting with.
  • In the Teams chat, click on the Schedule a meeting icon (under the box for the new message).
  • Fill in the meeting details, such as date, time, and duration, in the schedule card that pops up.
  • Add an optional meeting agenda and location if needed.
  • Press the “Send” button, to send the meeting invite to the attendees.

Attendees will receive a notification in their chat and in their calendars, and they can join the meeting. Hence, following these steps you will be able to schedule an appointment through this MS team appointment using the chat platform does not let you set up how to create a Microsoft teams meeting link because you directly approached the invitees or team. So, In this circumstance, there is no such thing as a link.

During the meeting, use the Teams’ meeting feature to share your screen, collaborate on documents, and communicate via audio and video. After the meeting, use the chat feature to follow up on any action items or next steps and to share any relevant documents or recordings.

As a result, this is an effective and quick approach to meeting individuals for briefings, particularly in an office or commercial setting. Finally, understanding how to setup a Teams meeting  on the Microsoft Teams Chat platform is simple, fast, and useful for business

Schedule the Appointment and its Link using Microsoft Outlook  (Desktop version)

Remember that this feature requires that you have a Teams account and that your Outlook account is already connected to Teams; in order to create an appointment and link, follow the below-mentioned steps:

  • Open Outlook and click on the “New Meeting” button to create a new calendar event.
  • Fill in the meeting details, such as date, time, and duration, as well as any other relevant information such as the location and agenda.
  • Click on the “Teams Meeting” option under “Meeting options” at the bottom of the page.
  • Click on the “Add Online Meeting” button to create Microsoft teams meeting link.
  • Add the attendees to the “To” field and click on the “Send” button to send the invitation.
  • Attendees will receive an email invitation with a link to join the Teams meeting.

During the meeting, use the Teams’ meeting feature to share your screen, collaborate on documents, and communicate via audio and video. Additionally, after the meeting is over, you can use Outlook to follow up on any action items or next steps and to share any relevant documents or recordings.

Something might be lacking in your work life if you are a professional and do not know how to utilize Outlook and MS Teams integration. Because Outlook is the professional backbone of the workplace environment. Furthermore, MS Teams have developed as the same counterpart through time. As a result, if you are still unsure about how to set up a Teams meeting, these methods will undoubtedly be of great assistance to you.

Schedule Appointments on Mobile Devices

You should stay logged in to your Microsoft account to schedule an MS Teams meeting and also that you need to have a subscription plan to access the full version of Teams. Provided that you meet all the requirements, you can follow the below-mentioned steps to set up appointments and meetings; this is a general step on how to set up a meeting in Teams applicable to both Android and Apple devices (however, based on device-specific, there might be slight changes which need to be mindful while setting up the appointments).

how to schedule a meeting in teams

  • Open the Microsoft Teams app on your mobile device.
  • Tap on the “Meetings” tab located at the bottom of the screen.
  • Tap the Schedule meeting button at the bottom of the screen.
  • Select “Schedule a Meeting” from the options that appear.
  • Enter the necessary information for the meeting, such as the meeting title, start and end time, and attendees.
  • Tap on “Schedule” to create the meeting and send out the invitation.
  • Optionally, you can also join the meeting by tapping on the “Join now” button from the meeting invite, or from the calendar view.
Read More: TOP 10 YOUTUBE TO MP3 CONVERTER AND EVERYTHING YOU NEED TO KNOW (UPDATED 2023)

Frequently Asked Questions

how to schedule a meeting in teams?

  • Go to the Teams tab on the left-side panel.
  • Select which team you want to schedule a meeting in.
  • Inside your team, go to the Calendar tab and select New Meeting.
  • Enter the meeting details, such as the subject, start and end times, and desired participants.
  • Select Save at the bottom of your screen.
  • Invitees will receive an email notification with a link to the meeting.

How can I prevent my team from leaking information during an MS Teams meeting?

To prevent your appointments and sittings from leaking information during an MS Teams meeting, you can use Data Loss Prevention (DLP) policies. DLP policies allow you to define rules that prevent people from sharing sensitive information in the Microsoft Teams channel or the chat session. Also, you can follow Microsoft’s ethical as well as compliance rules and regulations.

What’s the difference between an MS Teams meeting and an Office 365?

The main difference between a Microsoft Teams meeting and an Office 365 meeting is that Microsoft Teams is a unified communication and collaboration platform, while Office 365 is a suite of productivity tools that includes Microsoft Teams, emails, online offices, etc.

Conclusion

Microsoft is, needless to say, a vibrant and ever-evolving technology brand. How could anybody refuse to use anything from such a brand? Learning how to set up a Teams meeting will assist you in remaining informed of all the developments occurring in the technology world, whether it be MS Office, Outlook, Azure, or MS Teams, as well as being productive.

Overall, Microsoft Teams offers an easy-to-use platform for setting up and conducting meetings, whether one-time or recurring, with a plethora of tools to improve your meeting experience.